
Drill blocks can be made from a variety of materials and take on many different shapes.

Fig. 1
Watch carefully next time one of the old pros makes a hole with a hand drill. Chances are you’ll see him position the drill point on the mark, then crane his neck all around to judge if the drill is being held perpendicular to the work. Craftsmen don’t drill crooked holes. It’s a point of pride…an unwritten Law of The Shop.
As a practical matter, perfectly perpendicular holes are not required when drilling thin stock. When you drill a hole for a rivet in 0.025-inch aluminum skin, no one will ever be able to tell if you held the drill a few degrees off-angle. The situation changes as material thickness is increased. A bit of geometry tells us that for each inch of material, a single degree off perpendicular causes the drill center to exit the opposite side 0.01746 inch out of place. It may not seem like much, but it adds up quickly.
The Math of the Matter
For example, consider a 4-inch tall by 1-inch thick spruce spar for a small biplane. It is common to drill a 1/4-inch hole through the 4-inch dimension at the attach points of the interplane struts. Drilling crooked by tilting the drill chord-wise could be a serious problem. If the hole is perfectly centered in the 1-inch thickness, only 0.375 inch (3/8 inch) of material will remain on each side of the hole. Hold the drill just 3 degrees off perpendicular and the hole will exit the opposite face 0.2095 inch (0.01746 x 4 x 2) out of place, more than half the available 0.375 inch. Just a little more than 5 degrees and the hole will exit though the edge of the spar!

Fig. 2
Drill Blocks to the Rescue
The best way to assure perpendicular alignment with a hand drill is to build a drill block. It can be any size and shape desired. In general you’ll want it to be as large as possible and provide lots of contact with the reference plane of the material to be drilled. It doesn’t actually have to be in the shape of a block. It merely needs to provide rigid support and be wear resistant.
Let’s start with a very basic drill block, a small chunk of scrap steel or aluminum plate about 1 inch thick. Ensure one face is clean and free of burrs. Clamp it to a drill press or milling machine table known to be perpendicular to the spindle and drill a hole all the way through with the same bit size you intend to use for the actual hole in your project (Fig. 1).
Now hold the block against the reference surface of the project part (Fig. 2) and bore the desired hole with your hand drill. The perfect alignment of the machine-drilled hole is transferred to the hand drill operation; simply allow the block to guide the bit and the hole will be perpendicular to the reference surface.
In the Thick of Things
There is no rule stating how thick a drill block should be. I like to have a drill support length at least equal to the thickness of the part to be drilled. If the project material is several inches thick, the corresponding metal block would be heavy and awkward to clamp, so the best drill blocks for thicker parts are made with a base and a steel tube to guide the drill bit (Fig. 3).

Fig. 3
The base can be wood or metal; almost anything 1 to 3 inches thick will do. The guide tube for fractional size holes is made from a length of standard 0.065-inch wall 4130 tube. The nominal tube OD will be the drill size plus 1/8 inch, which means the ID will be the drill size less 0.005 inch. You’ll use a reamer to enlarge the ID to the drill size after assembly.
As before, clamp the base to the drill or mill table, but this time drill a hole slightly smaller than the nominal OD of the guide tube, then ream to the nominal OD. The actual OD of small 4130 tubing is often as much as 0.002 inch larger than nominal, more than enough for a nice tight fit in a base. If the base is hardwood simply press the tube into the hole. Warm an aluminum base in an oven, drop the tube into the hole, and it will be locked into place when it cools. Determining the necessary oven temperature is easy. Jot this equation in your shop notes:
desired hole expansion / (coefficient of thermal expansion x original hole diameter) = necessary temperature increase
You can look up thermal expansion coefficients in reference books or on the net. The coefficient of thermal expansion for 6061 aluminum is 0.000013 inches per inch per degree F. To slip a ½-inch tube which is .002 inch larger than nominal into an aluminum base you might like an additional 0.001-inch clearance, so:
0.003 / (0.000013 x 0.5) = 461F

Fig. 5
Variations on a Theme
Drill blocks can have many variations to fit the task at hand. The block in Fig. 3 was fabricated to drill center and bolt holes in the hub of a large maple propeller. It served as a jig for hole position, as well as ensuring the holes were perfectly perpendicular to the propeller’s flange face (Fig. 4).
The drill block’s reference plane need not be perpendicular to the drill axis. Let’s return to our spruce spar example. The stable reference is the 4-inch deep side of the spar, not the narrow 1-inch width. The drill block is fabricated as previous, with a base plane perpendicular to the drill guide, but then a second plane is cut at 90 degrees on the side of the block, with the surface being 0.5 inch from the guide tube center (Fig. 5).

Fig. 4
Clamp a chunk of heavy plywood or metal to the 4-inch spar face, add a spacer equal to the spar reinforcement plate thickness (if there is one), clamp the drill block into place, insert a long bit, and pull the trigger (Fig. 6). The hole will be perfect.
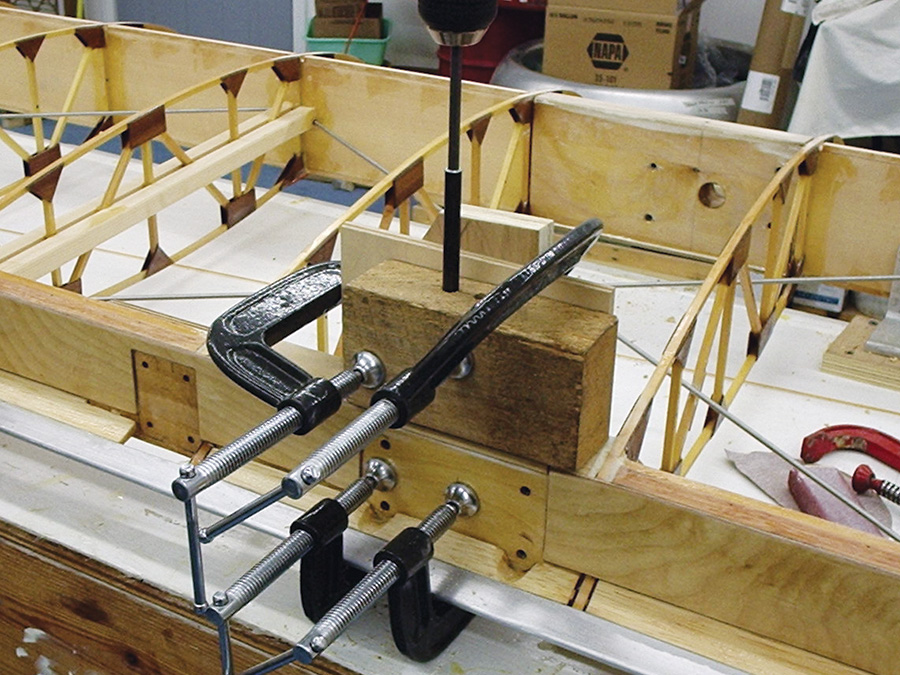
Fig. 6
Keep building, and have fun!


