Installing small screws into the tight confines of a deep avionics tray is a challenge that can be both annoying and frustrating. Certain trays require a screwdriver 12 to 14 inches long. Since you can’t get your hand in there to start the screws, you need to stick them to the driver. Since the screws are almost always stainless steel, a magnetized bit won’t work. The people I’ve talked to (all RV builders with Garmin stuff) resorted to a variety of solutions: multiple extensions and then masking tape, hot glue, super glue or sticky clay to hold the screw to the driver.
Tape seemed to be the most common method. Glue and clay, unless you wax the screw (yet another step), can leave behind flecks of dried adhesive or clay residue, which can be hard to clean off. And don’t forget to tape the extensions together. They might uncouple easier than the bit to the screw!
All of which is not too inconvenient for three or four screws. But it’s not unusual to do numerous refits before the panel is installed for keeps. That, or if you have more than one panel to maintain, might be reason enough to consider this month’s home shop project: a long screwdriver with a screw gripper.
The screwdriver featured here was the result of a conversation I had with Garmin tech Matt Burch at the Reno Air Races. Matt is regularly up to his elbows in panel work and wanted a long-reach Phillips screwdriver with a screw holder. The discussion included commercially available screwdrivers that feature screw-holding. Could these be adapted or extended? One type features a telescoping slide with a slotted cup at the driver end to capture the screw against the driver. Another type features a split, spring-loaded tip that expands to grip the screw. The split-grip driver—Klein Tools model K19 Phillips Screw Holding Screwdriver (9-Inch version)—does not have a handle, which is a hint that the Phillips end might be fragile. In fact, the Klein website says the tool “holds and starts Phillips screws.” In other words, it’s not for tightening. Neither type is available with a 14-inch-long shank. Modifying them by extending their shanks was considered, with the split gripper being the best candidate. However, not being able to tighten the screw necessitates having a second suitably long screwdriver anyway. Matt mentioned that a short length of flexible silicone hose works pretty well, but maybe there was some better idea. Since I like to experiment, I agreed to play around a bit (no pun intended) and see what I could come up with.
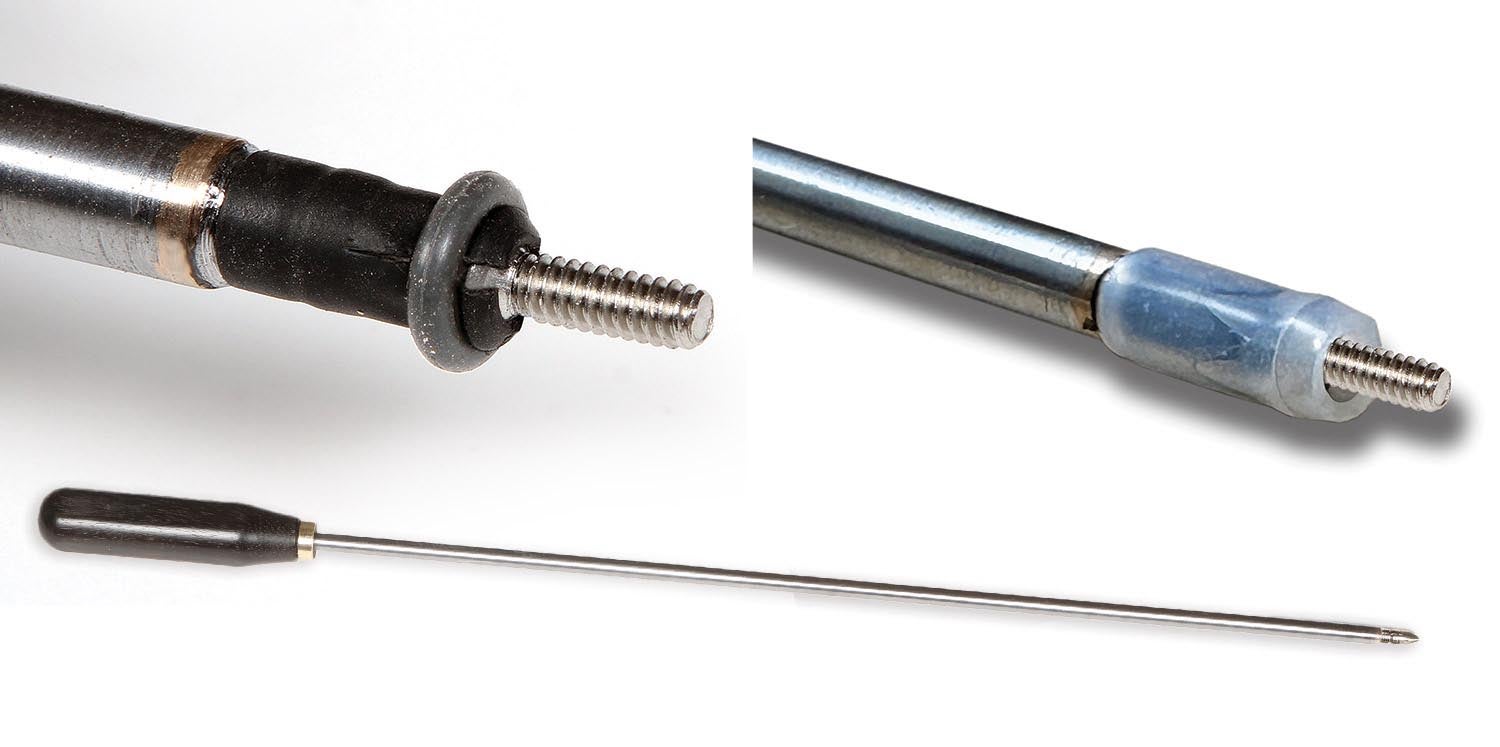
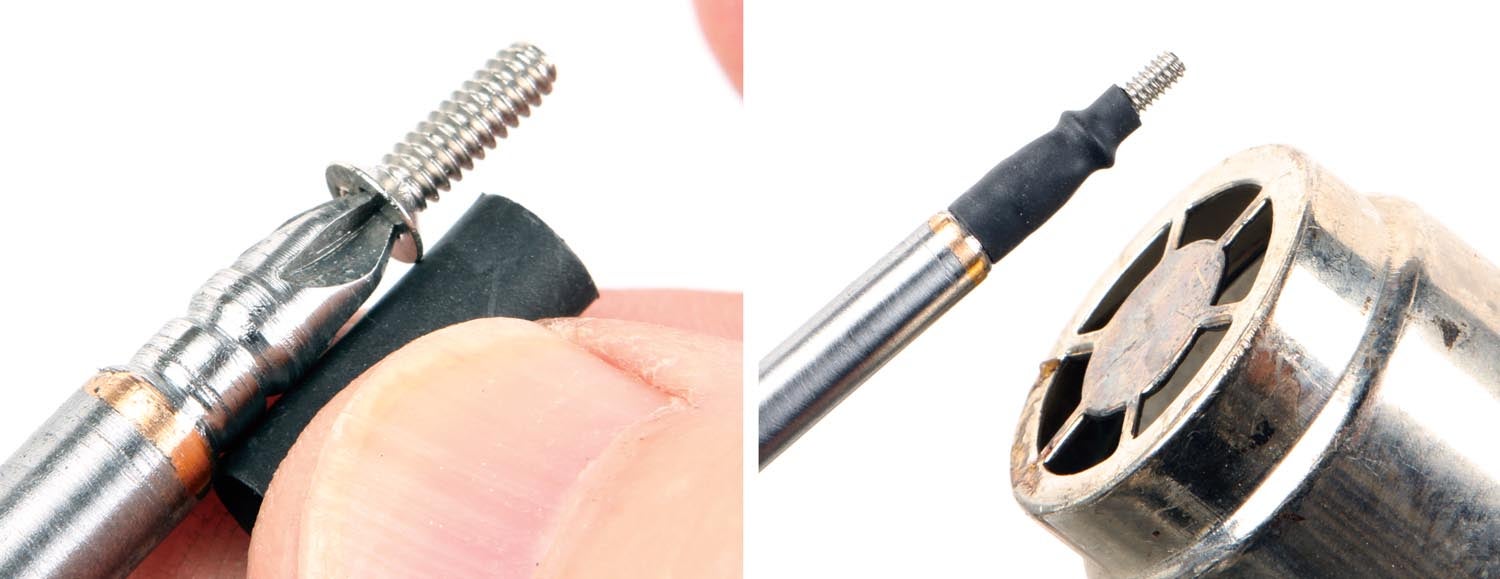
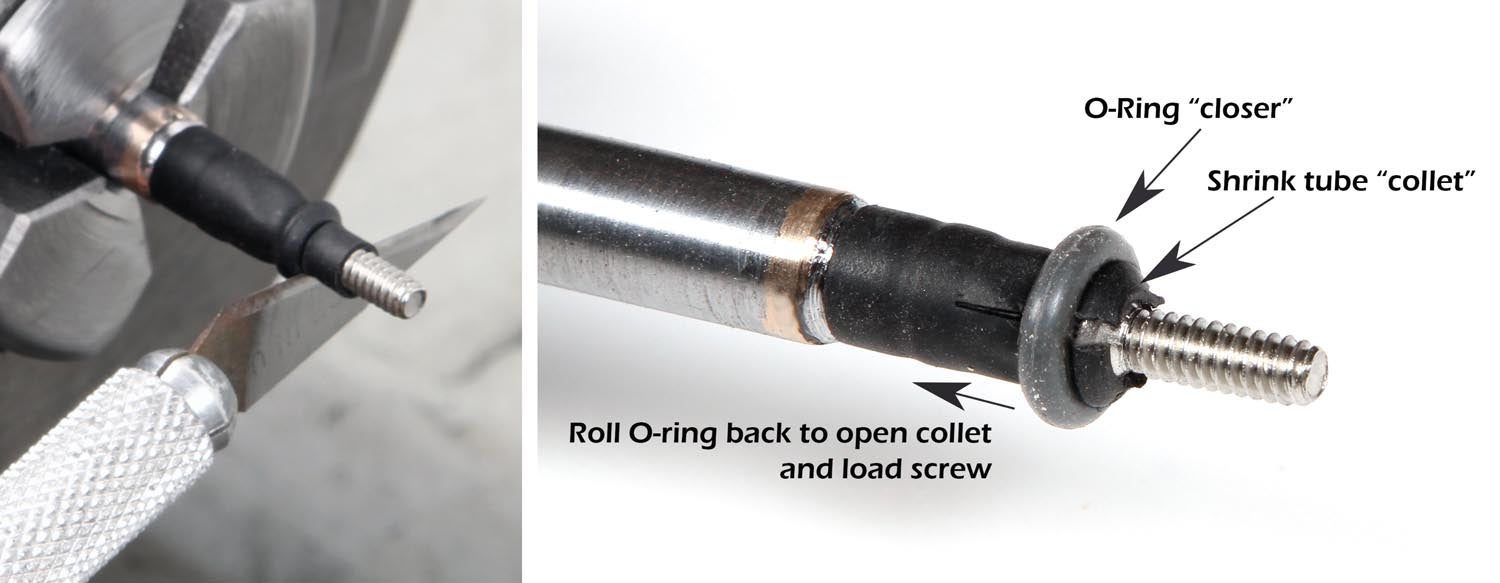
When it was all said and done, I did come up with a variation on Matt’s rubber hose: a flexible collet made from shrink tubing with an O-ring tensioner. Alas, it was not an improvement. It works, but shrink tubing isn’t durable enough for more than a few uses. While easy to replace, it’s inconvenient. That said, the fun part of this project was figuring it all out and then making an extra-long screwdriver for diminutive 6-32 flathead screws.
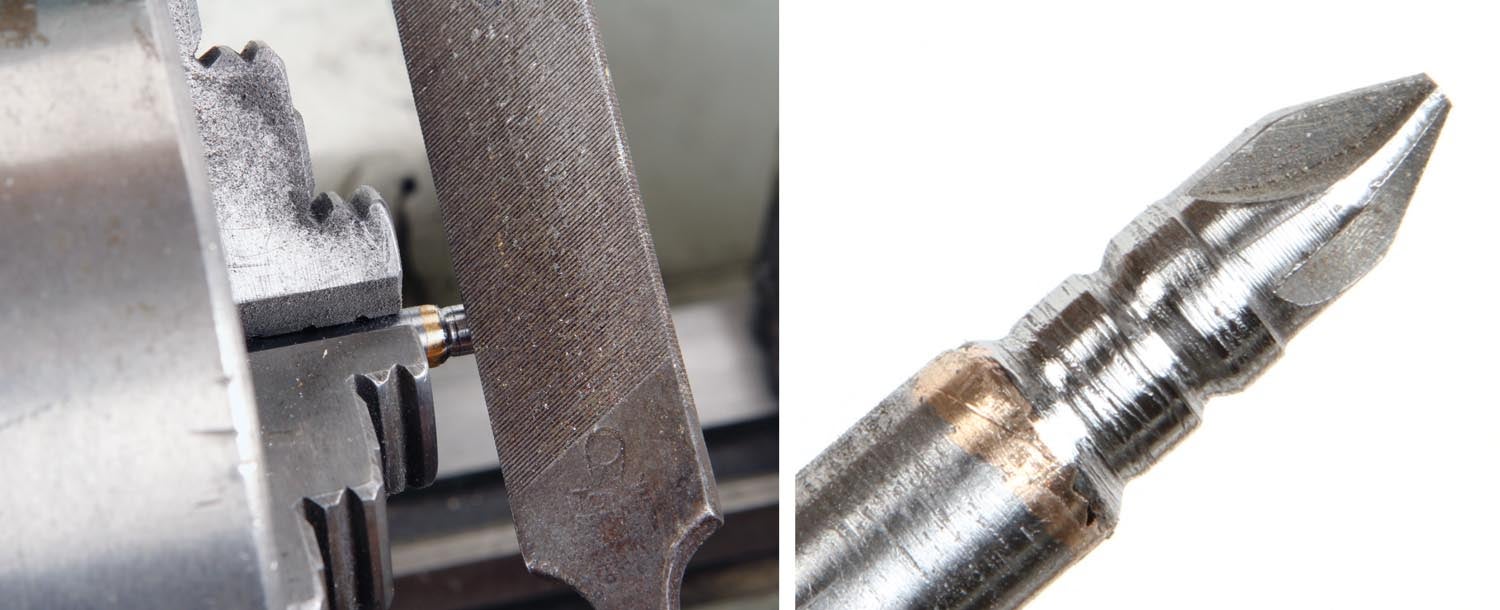
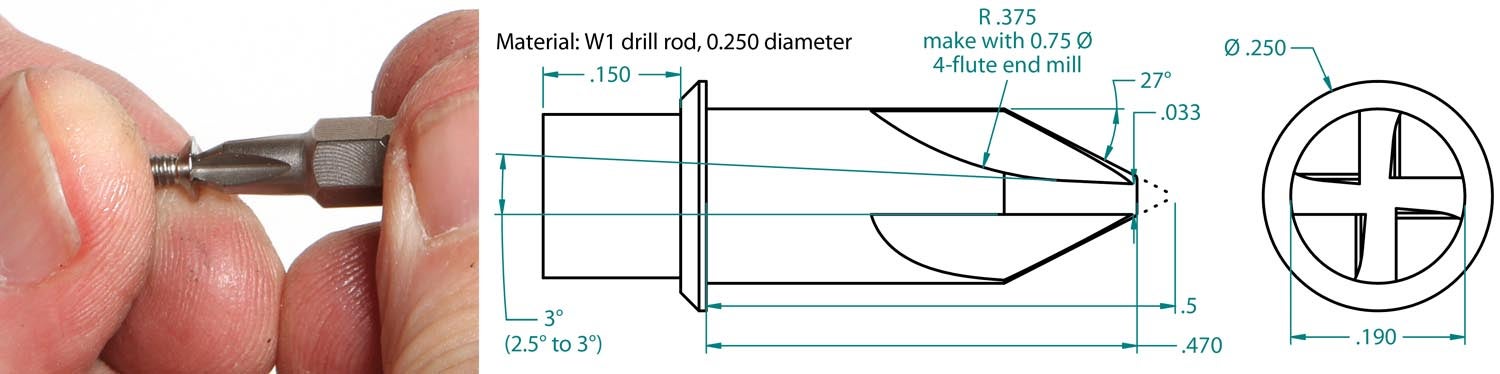
My initial plan was to use the lathe to turn down a store-bought #2 Phillips driver and weld it to an extension. Driver bits are hardened steel, but I had no idea just how hard. The bits I had were too hard to machine. I did some research and found that most are 58 to 63 on the Rockwell hardness C scale (58–63 HRC, for short). No wonder I couldn’t machine them with my small lathe! I figured I could anneal (soften) the bit by heating it up and letting it cool slowly. No such luck! Some more research revealed that driver bits are made from S2 tool steel, a super-tough alloy of vanadium and molybdenum. Heat-treating S2 consists of soaking at 1800° F for up to 40 minutes. To fully anneal the material would require heating it to the same degree—something way beyond the capabilities of my propane torch!
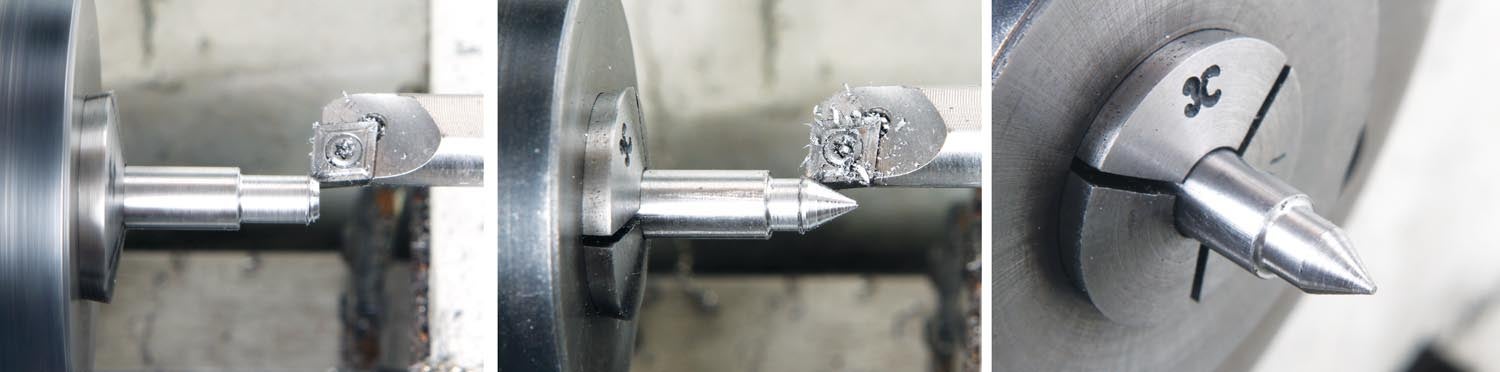
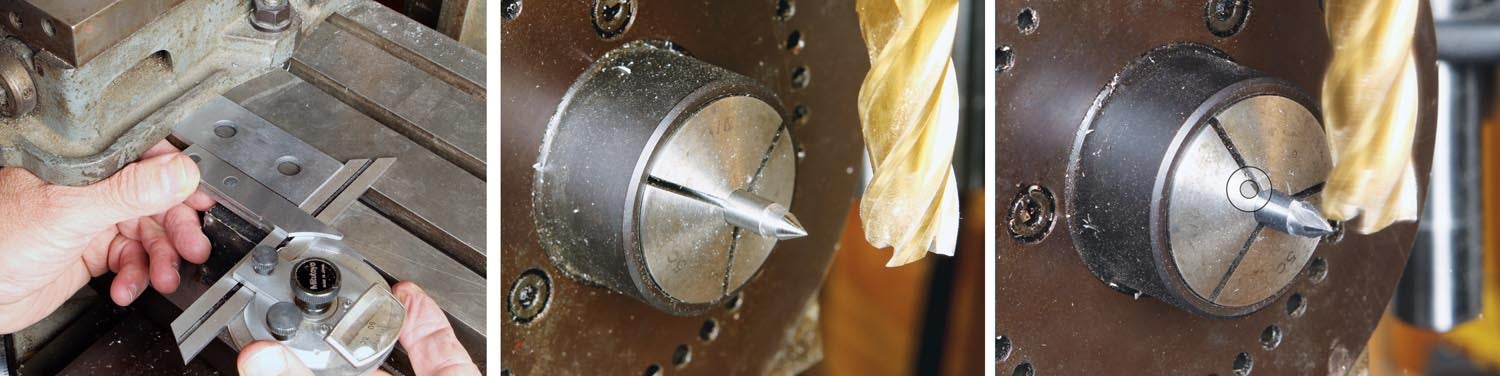
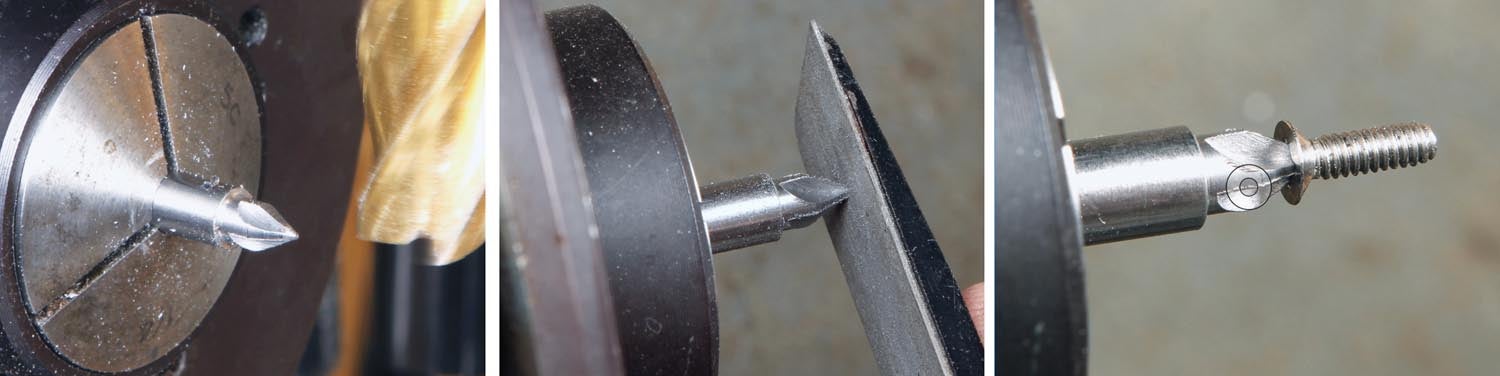
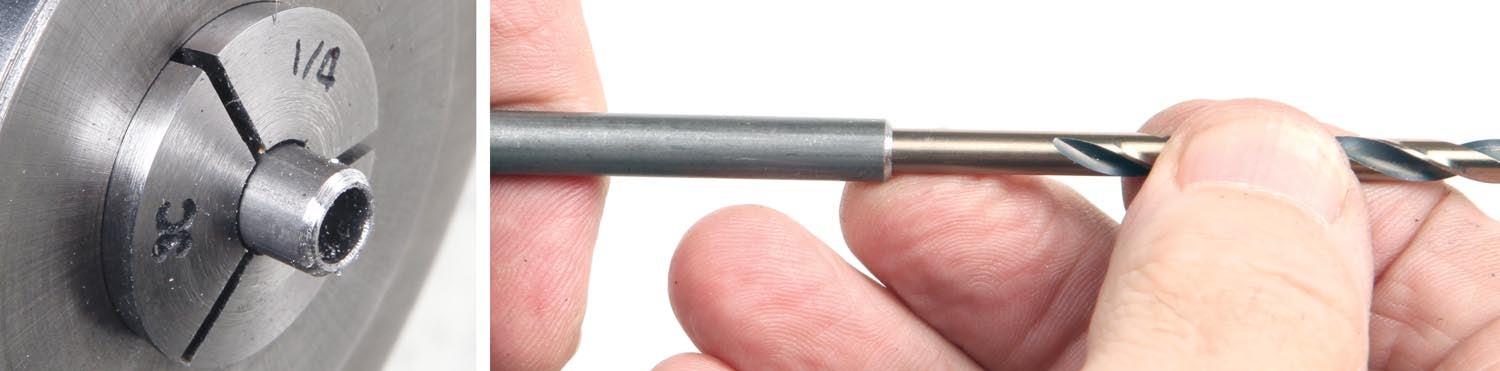
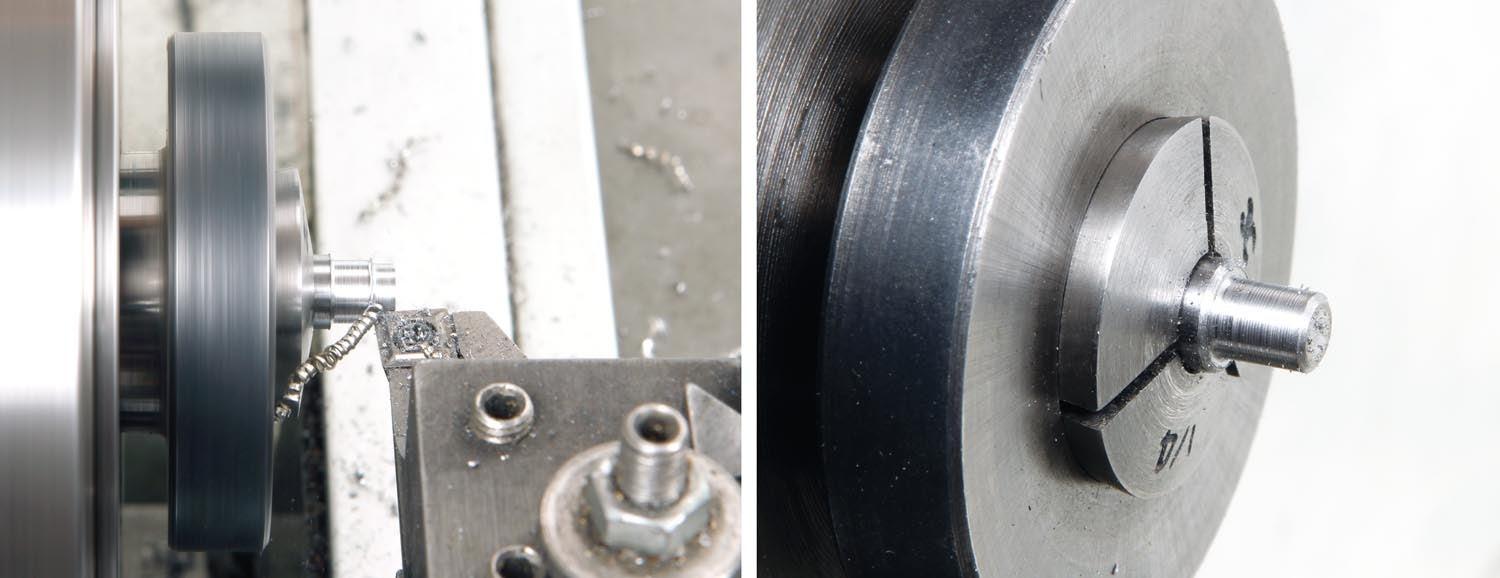
Armed with my protractor, micrometer and some magnification, I was able to come up with a project screwdriver. Making the bit turned out to be easy. I used TIG brazing to “weld” it to the shank, which was a length of 1/4-inch steel tubing. The handle was turned from wood and fitted to the shank with a ferrule from a piece of copper plumbing pipe.
That’s it for now. Time to get back in the shop and make some chips!


