As you unpack your metal aircraft kit, you will most likely find a bundle of long lengths of aluminum piano hinge. This miracle material is used for lots of things in modern kits—sometimes it’s even used as a hinge! The truth is, lots of kits do use piano hinge for control surfaces, but it is also often used as an attachment method for cowlings. It makes for a smooth, sleek hidden attachment that you will either love (for its looks) or hate (for a variety of reasons).
![]() No matter what the application, one of the things you’ll find is that you’re going to have to drill attachment holes in the hinge material—lots and lots of attachment holes. The standard piano hinge used in most kits consists of alternating loops and blanks that add up to one inch. As a general rule, for most of our airplanes you end up putting a rivet every inch, usually lined up with the hinge loop. You’ll also have a minimum edge distance for the rivets, usually 1/4 inch. So you’re going to need to drill lots and lot of holes, evenly spaced and at a specific distance from the outside edge of the hinge.
No matter what the application, one of the things you’ll find is that you’re going to have to drill attachment holes in the hinge material—lots and lots of attachment holes. The standard piano hinge used in most kits consists of alternating loops and blanks that add up to one inch. As a general rule, for most of our airplanes you end up putting a rivet every inch, usually lined up with the hinge loop. You’ll also have a minimum edge distance for the rivets, usually 1/4 inch. So you’re going to need to drill lots and lot of holes, evenly spaced and at a specific distance from the outside edge of the hinge.
One obvious way to do this is to get out your ruler and draw a line ¼ inch from the edge of the hinge, all the way from one end to the other. Then lay down the ruler and measure the spacing for the rivets, making a tick mark on your line every inch. Next, get out a center punch and make a divot in each spot. Then get your #40 drill bit and a drill motor, and start drilling pilot holes—precisely in each center punched spot. The first length of piano hinge isn’t bad. The second one starts to feel a bit repetitive. By the time you have started the third, it has become a tedious task, and when you have finished the third, you’re ready to turn out the lights and quit for the day—or maybe the week.
But there is an easier way—one that might still seem a little tedious, but believe me—it will save you lots and lots of time, and you’ll get far superior results over hand locating every hole. You’ll spend a little time up front getting set up, but then you’ll race through the process, allowing you to quickly move on to more interesting parts of your build. All you have to do is make a simple drill guide.

Building the Guide
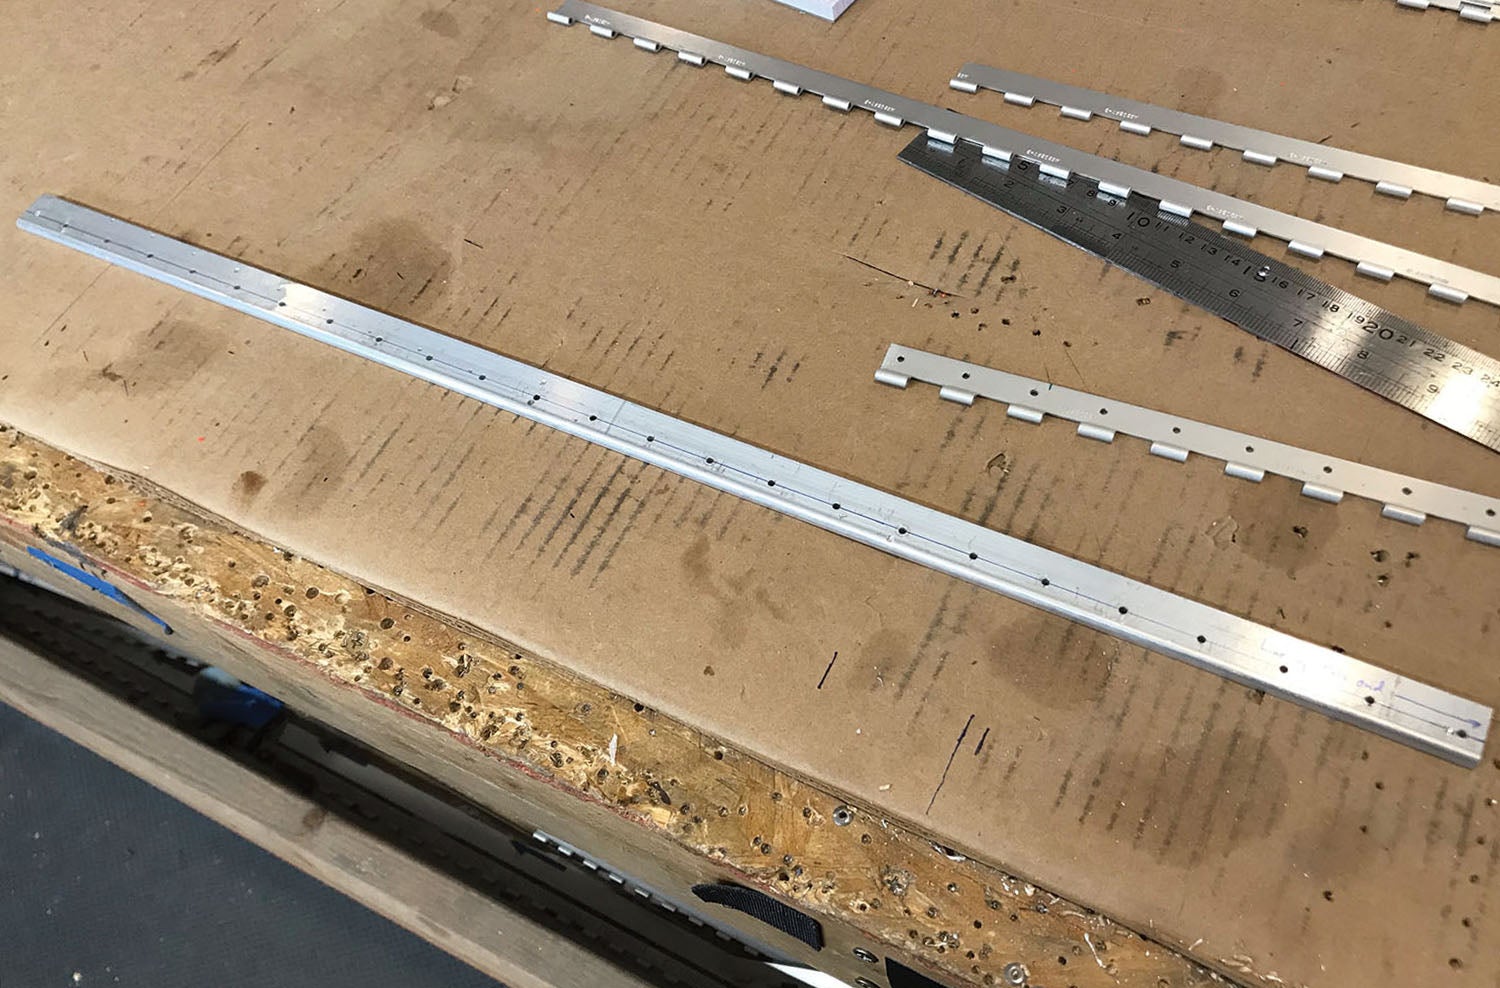
The drill guide can easily be made from scrap. For this example, I used the cutoff edge of a 3/16-inch thick piece of aluminum angle about two feet long. You want to use something fairly thick as this will quickly and naturally align your drill bit for every hole you are going to drill in the hinge. The rounded “foot” of the edge of the angle sits tight into the hinge loops, making the resulting line of holes nice and straight.
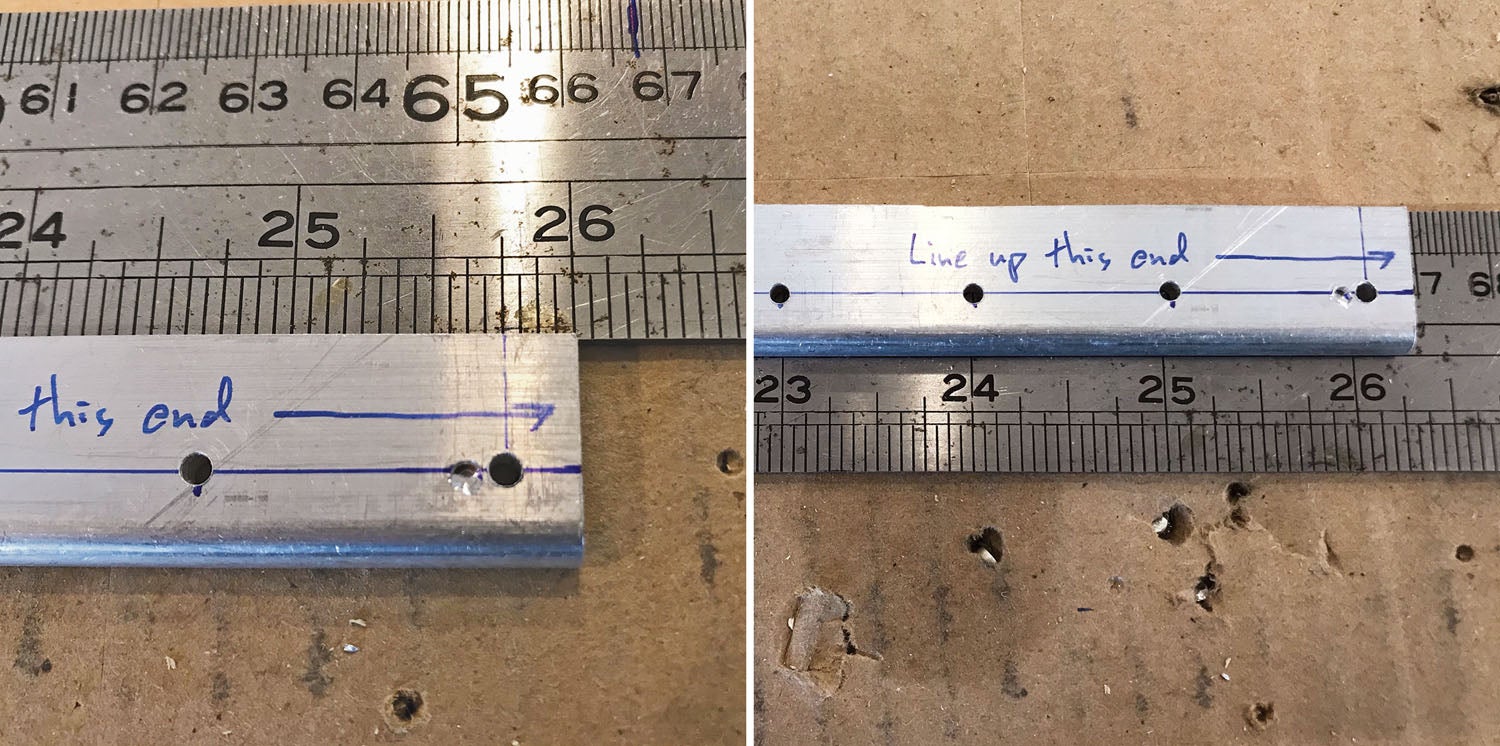
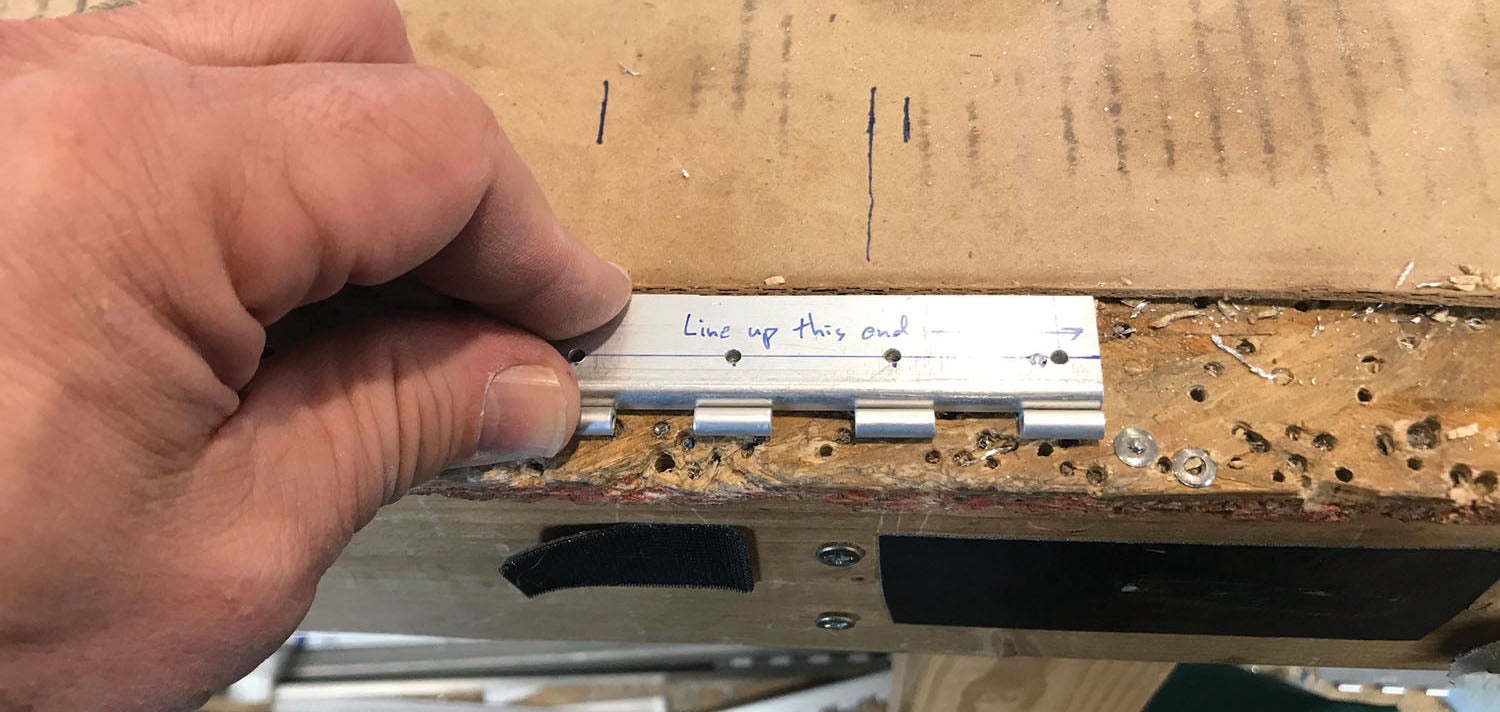
All you have to do to make the guide is to grab a chunk of the hinge you are going to use, and measure/mark the distance from the back edge to where you want the line of holes—in this case, 1/4 inch from the edge. Now lay your blank (undrilled) piece of drill guide material on the hinge and transfer the mark to the end of it. Do this on both ends, then draw the line nice and straight the length of the drill guide. Now measure ¼ inch from the end and make a tick mark for the first hole—then add a tick mark at one-inch intervals all the way down. Next, grab that center punch (you’re only going to have to use it to make the guide) and center punch each hole.
To make the holes nice and perpendicular to the surface, set up a #40 drill bit in a drill press, and proceed to drill a hole on each center-punched spot. The divot will center the bit, and you’ll get nice, precisely placed holes. Debur the holes top and bottom and the tool is finished!
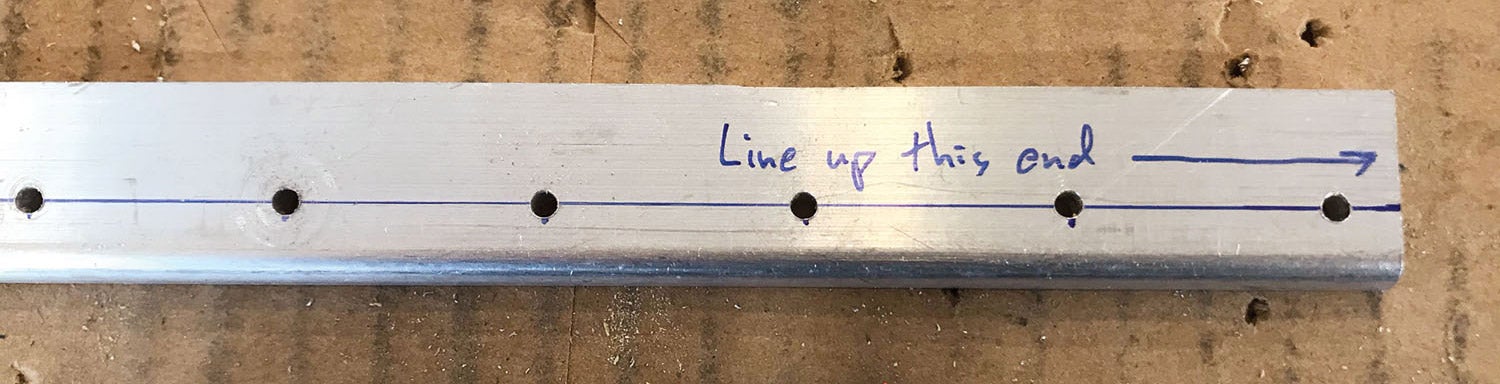
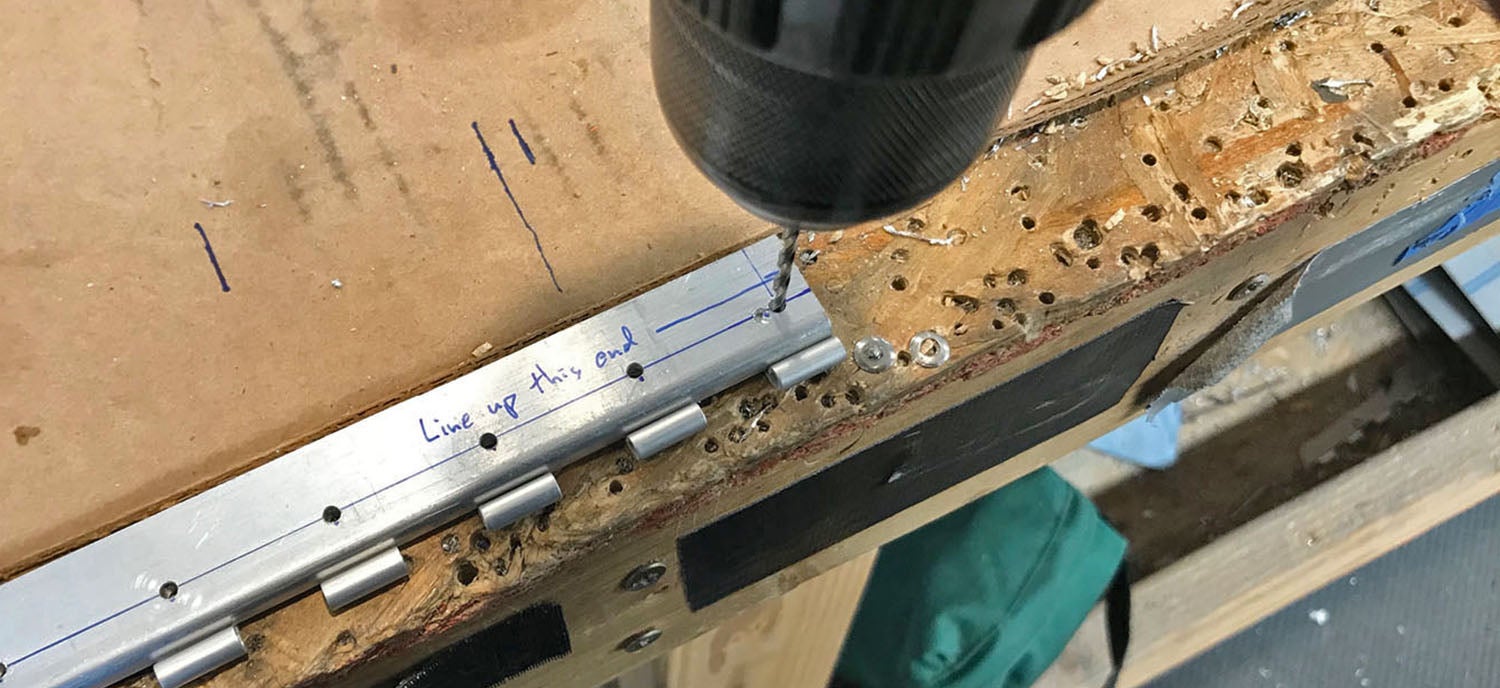
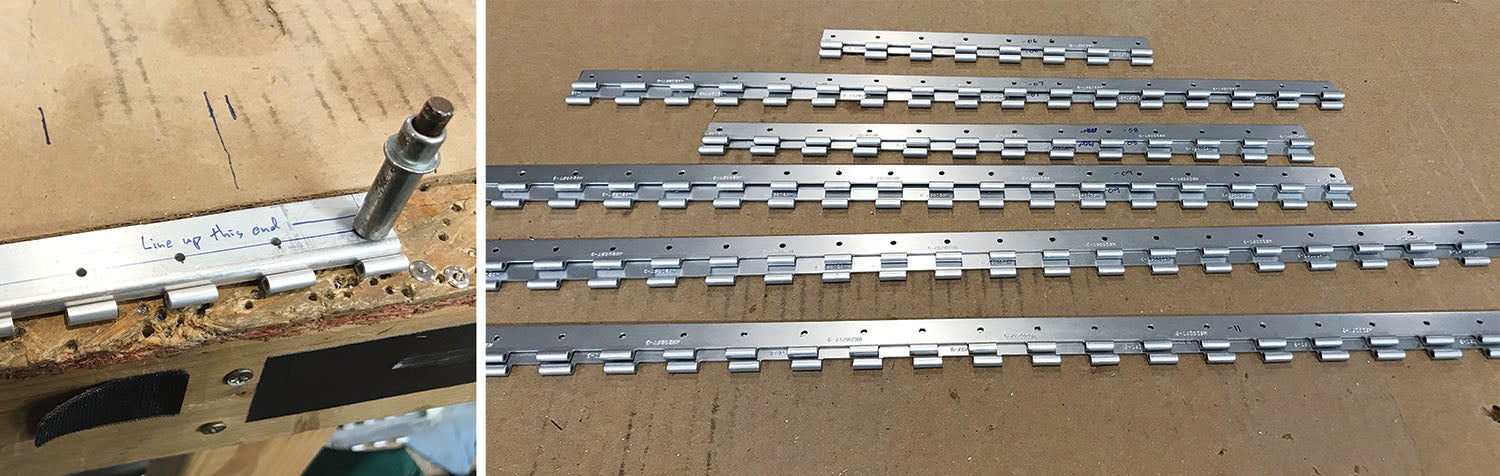
Using the drill guide is simple: Line up the end of the guide to the end of the undrilled hinge, hold it tight and drill the first hole using a #40 bit, right through the drill guide and hinge, into the workbench. Insert a silver Cleco to hold the guide and hinge to the table. Then squeeze the drill guide tight against the hinge loops and drill away, all the way down the length. If you run out of drill guide and still have hinge left that has to be drilled, just move the drill guide and Cleco down the length and keep going.
Most kits will use the exact same spacing and hole layout for all of the hinge rivet holes, and they’ll probably be centered on the hinge loops—in which case you can spend a day mass-producing drilled hinge for later use. Definitely look ahead on your plans, however, to make sure this is going to be true! Some hinges will be cut to specific lengths and have a modified spacing for the last hole, so plan ahead.
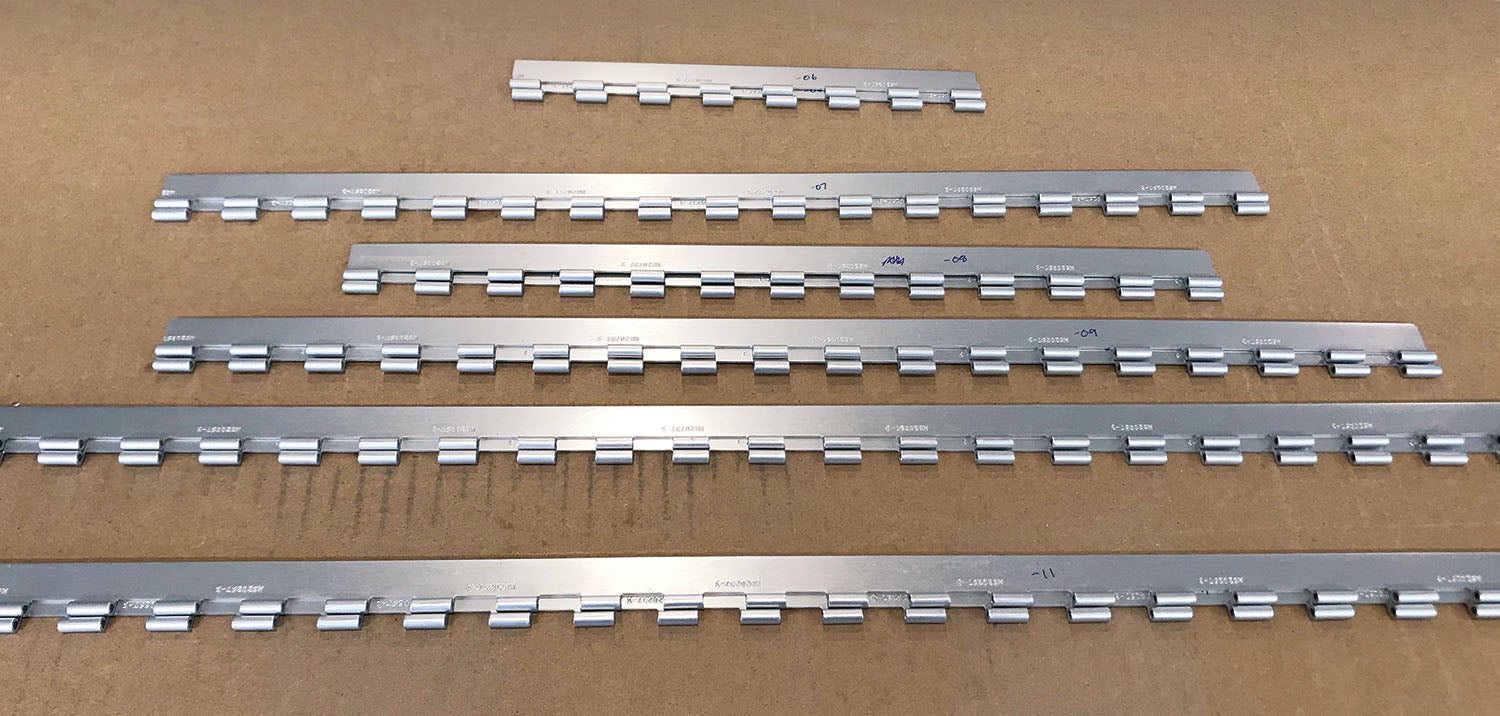
In our example here, we were drilling hinge material to hold the cowling on a Xenos motorglider from Sonex. The plans called for six different lengths of hinge, two pieces of each length, for a total of 12 pieces. All of them had identical hole spacing and end points, so the job was repetitive—but simple. Measuring and marking holes for every piece would have taken hours—but using the drill guide, it took about 45 minutes—plus about 10 more to make the guide itself.
Finding shortcuts like this drill guide will not only take the tedium out of your project, it will make parts more uniform and professional—so whenever you’re faced with this kind of problem, look for a way to make life simpler!


Sad that kit plans don’t call out a cut list early in the process. This way mistakes when cutting long stock can be reduced. Good woodworking project plans will have a cut list and go as far as providing a diagram for how sheet stock should be cut to get all needed parts.
Actually, some kits DO include a cut list of some sort – but many (including plans-built) do not.
This is what we, in Aircraft Production Factories call, a “Shop Aid”, but – be careful, as those holes in that piece of Scrap Aluminum, will quickly Wear, and move around, losing your Precision, and Risking your “ED” ( Edge Distance) over time, if using a “Normal” Drill with them!
Good Enough for use with a Typical Drill, with Lands on both Flutes, for a few uses, but – Get a Special Drill, called a “No Land” Drill, which means it does not cut on the sides, only at the Tip, if you want to use it more than that!
Or – Make the Drill Guides, from Steel Stock, or get Proper Hardened Steel Bushings installed in the Aluminum Piece!
Standard Production Worker Drill Bushings – Like these – https://www.browntool.com/Listview/tabid/344/ProductID/1305/Default.aspx can Help, too, but It is better to get these Insert Types – https://www.mcmaster.com/drill-bushings/drill-bushings-for-soft-metal-and-wood/
If you like using #40 Drills for all Pilot Holes – These Are Sized to suit that idea, better:
https://www.mcmaster.com/drill-bushings/id~0-098/id~0-0995/
If you have a decent drill press a fence to set edge distance and a flip over stop to engage the gaps between the hinge loops works well. Capture hinge with stop, drill first hole. Flip up stop move one space, rinse and repeat. Rig an air jet or brush swarf away between operations to maintain accuracy.
Comments are closed.