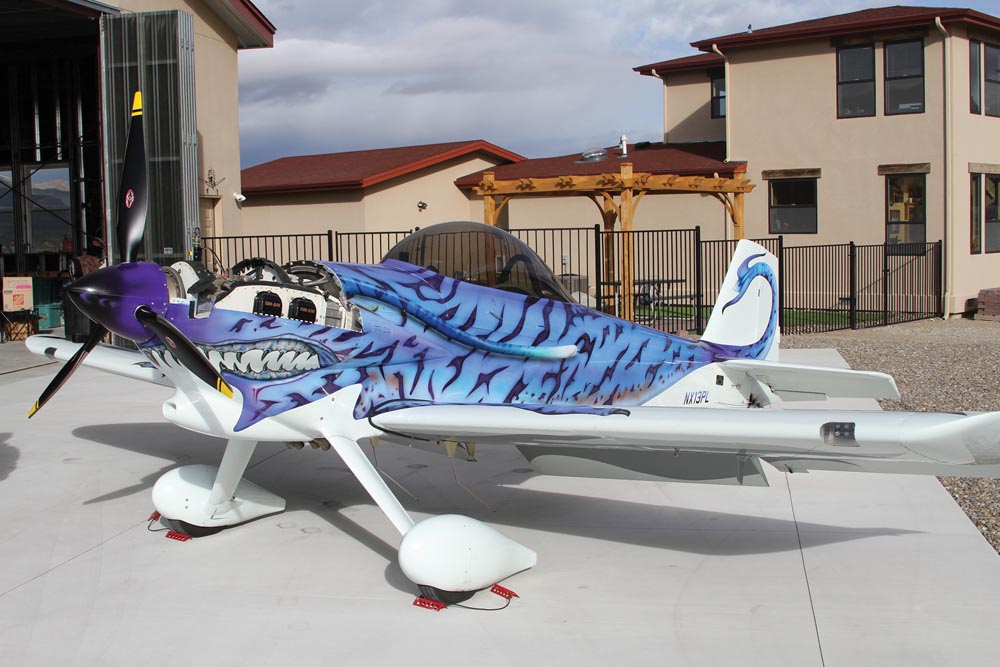
For our RV-3 test, we placed the Dynavibe operator off to the side and behind the prop arc. One person can do the testing by routing the cables into the cockpit.
Airplanes vibrate. They shake, they rattle, they roll—and in the process they wear out instruments, fasteners, and passengers’ patience. It’s been that way since the very beginning, and many of the mechanical methods and techniques we use for construction and maintenance are designed to address the vibration that seems to be inherent in light aircraft. It seems we’re more interested in hardening the airplane from the result of the shakes than preventing the vibration itself.
The two sensors mounted on a piece of aluminum angle, then attached to a case bolt. The yellow sensor is optical, the black cylinder is the accelerometer.
Stemming from the fact that the fewer the cylinders in an engine, the more it will pulse the airplane to which it is mounted, we have long suffered with the thrumming of a four-cylinder horizontally opposed engine, or the throbbing of a radial. But, it turns out, we don’t really have to put up with it at all!
Dynamic balancing is a process where we can balance the entire rotating system in our propulsion package—engine, accessories, and prop—at one time, after everything is finished and running. Using the principle that all of the various contributors to vibration can be treated as a summation to a single value, we can measure the vibration using an accelerometer to tell us where to put a single balance weight that will bring the system into dynamic balance.
Dynamic balancing is offered by many mechanics who have invested in the specialized equipment to do the job properly. But often the nearest facility or individual set up to offer the service isn’t all that close. Since it often costs a few hundred dollars to have it done—and the results are usually well worth the cost—it is not unreasonable for builders and pilots to buy their own equipment and do the job themselves.
Or better yet, an EAA chapter can invest in the machine to allow their members easy and inexpensive access to the service. Dynavibe offers an economical unit for a little less than $1500, a figure in line with calibrated aircraft scales and other test equipment often purchased by local groups and chapters. So do-it-yourself is definitely an option when it comes to smoothing out your ride.
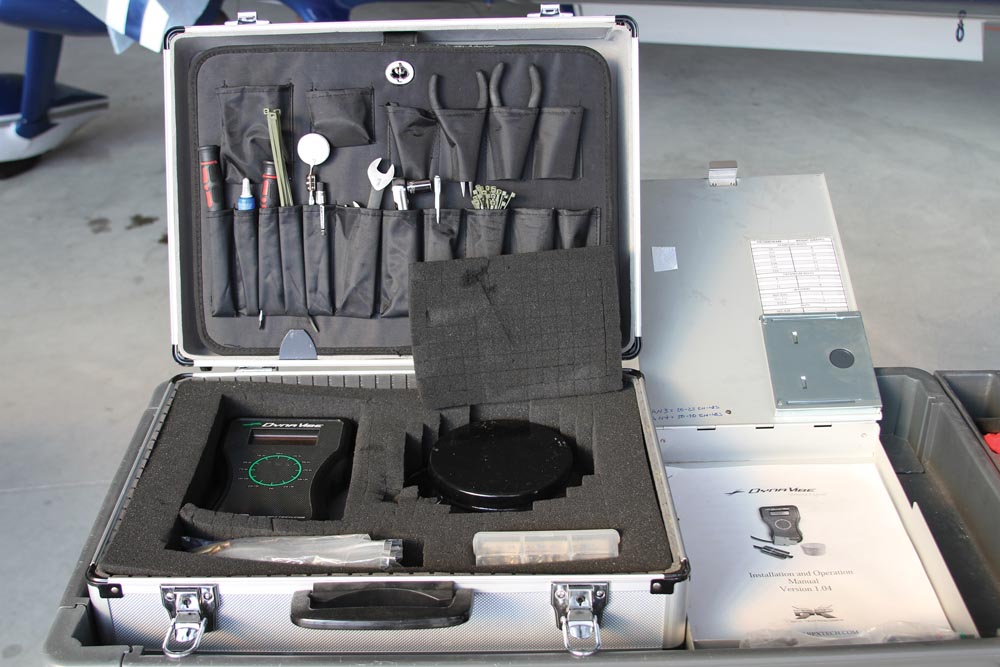
The Dynavibe Classic comes with the unit, cables, sensors, and retro-reflective tape. The owner of this setup added a gram scale, an assortment of bolts and washers for balancing, and the necessary tools to his kit to make an easily portable dynamic balancing shop.
The Dynavibe
The Dynavibe Classic, manufactured and sold by RPX Technologies, is a field-ready unit that comes in its own case with all necessary accessories. The sensors are simple—an accelerometer to measure vibration and an optical sensor to tell the unit when the #1 prop blade passes the “straight up” position. A supply of reflective tape that affixes to the prop blade is included, along with the necessary cables. The unit we used belongs to a local homebuilder who had fabricated a bracket that mounts both the accelerometer and the optical sensor to a Lycoming case bolt, and makes installation a breeze—a worthwhile investment of time and a 6-inch piece of aluminum angle.
There are, of course, much more expensive and sophisticated balancing systems that will measure multi-mode frequencies and vibration in the airframe. These are usually owned by shops that offer a complete service package and require significant experience to use properly. But for club, chapter or personal use, the Dynavibe Classic will get your engine and prop running smooth for a much smaller investment.
Balancing Made Easy
Balancing the typical prop/engine combination is conceptually quite simple. The machine knows where the prop is in its rotational cycle, and it measures accelerations with a sensor in the backbone of the engine. By averaging the accelerations it gets in a rotation, it can tell where the “heavy” part of the rotation is and give a magnitude. The person doing the balancing then attaches weights to the flywheel 180 degrees from the heavy point.
Although many balancers attach weights to the spinner backplate by drilling holes and mounting washers with bolts, the Lycoming flywheel conveniently has 12 holes around the rim that will accept AN4 bolts with washers. These of course limit you to 12 discrete locations, but it is a quick and simple way to get the balance within acceptable range. For those wanting to fully minimize vibration, drilling holes at exact location on the spinner will be the way to go—but it will take quite a bit longer due to removal and replacement of the spinner for each test.
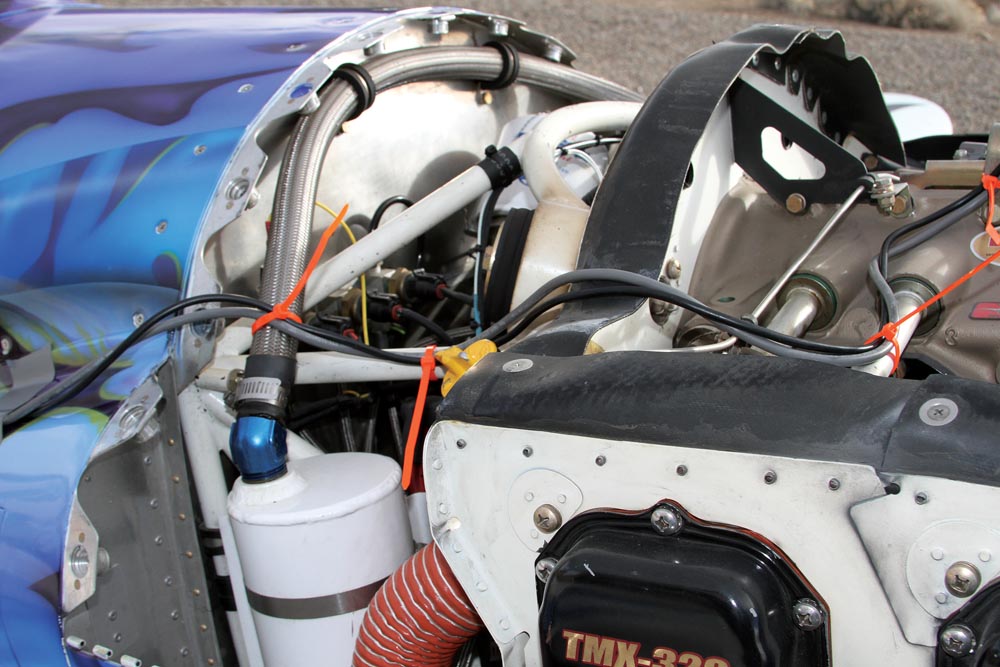
Be sure to secure the cables to the engine and engine mount using cable ties. There is quite a wind blast at cruise rpm, and things will fly around!
Setting Up
To conduct the dynamic balancing operation, you’ll want a convenient spot where you can tie the aircraft down and run up the engine to cruise rpm without blowing anything away or annoying the neighbors. It is nice to also have access to your tools and shop, but with a little planning, it is easy to bring a small kit of screwdrivers and wrenches into the field and do the entire process on a run-up pad. One thing you need is a way to tie the aircraft down securely—a solid tie-down ring or a car bumper will work. (Hint: Take the car keys out of the vehicle and secure them so that no one can accidentally drive away.) We used the run-up pad with sunken anchors in front of our airpark hangar for these pictures—airpark neighbors generally not being annoyed by airplane noise!
Chock the airplane securely, and make sure there is nothing behind that will be damaged by the prop wash.
Start by removing the cowl and checking that everything in the engine compared is well secured. You’ll be running the engine for a couple of minutes at cruise power, and you’ll be amazed at how much things can blow around. Mounting the sensor package is simple: remove one of the top case bolts, replace it with a slightly longer bolt and secure the sensors vertically behind the flywheel, with the optical sensor facing the prop.
Secure the cables to the engine with cable ties, routing them back and away from the prop. We ran ours over the wing on the RV-3 we were testing, then had the operator stand out of the prop arc beyond the wing tip. Three or four cable ties secured things to the engine and engine mount, then we used duct tape to secure the cables to the fuselage and top of the wing so they wouldn’t flop around in the breeze. I always use red cable ties from an inexpensive store for temporary jobs like this, just to make sure they don’t get left behind.
Secure the tail carefully to a solid anchor so that it cannot move forward, or rise (if it is a taildragger).
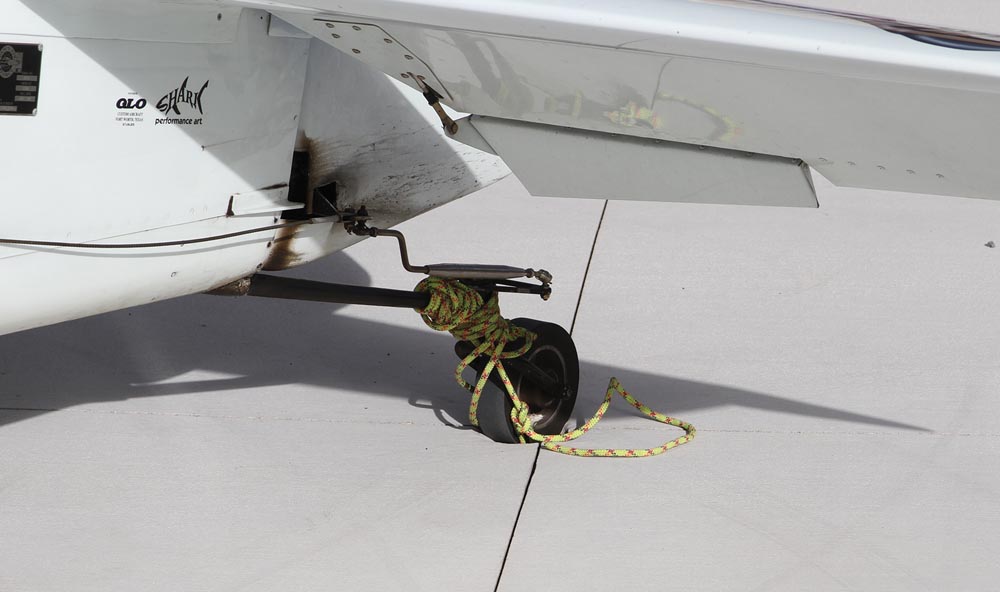
We tied the airplane down using the tailwheel, a strong climbing rope, and the in-ground tie-downs. Because the RV-3 will not only crow-hop at anything more than half power but also lift the tail, we made sure to secure it so that the tail couldn’t rise as well as keeping the airplane from moving forward. Chocks on the main gear added security and, of course, we held the brakes and the stick fully back during the tests. While it would be possible to do the test alone by running the cables into the cockpit through a vent, we felt that having one person operate the Dynavibe and another operate the airplane was safer and created fewer chances for error.
Running the Test
Once everything is secure, the engine is started and warmed up—if you are doing this in the winter, it might be best to warm up the oil before removing the cowl, since running the engine sans top cowl means you’ll have ineffective cylinder cooling. CHTs will rise quickly when doing the tests, but you may still be battling below-the-green oil temps. Getting a good amount of heat into the oil beforehand will make things easier.
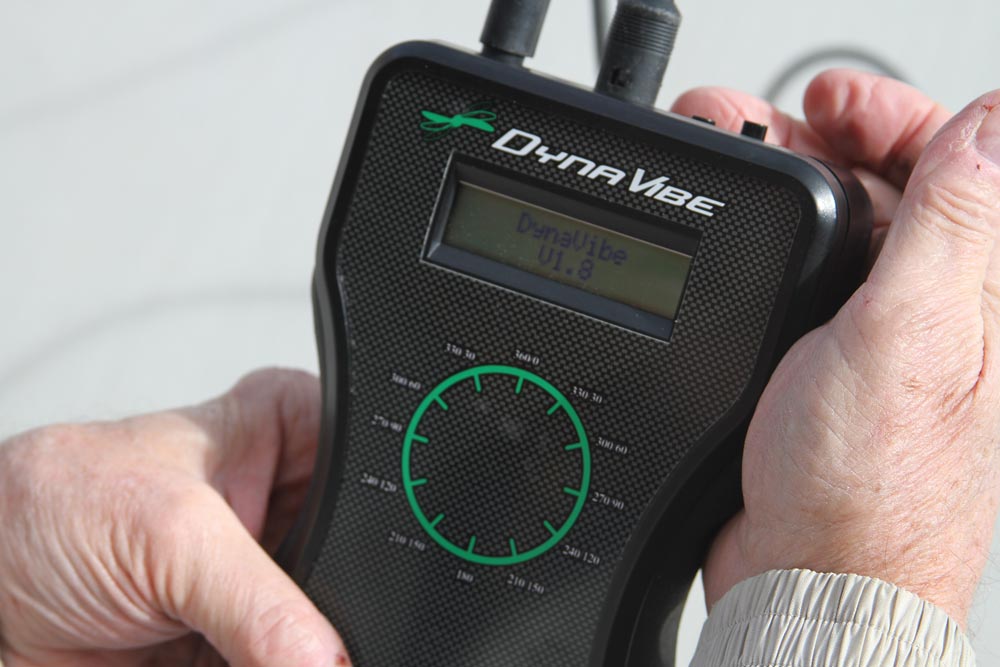
The Dynavibe Classic has just two buttons—one to turn it on, and one to take a sample. The software computes the imbalance in IPS and an angle.
It’s a good idea to arrange some hand signals between the pilot and the person outside doing the measuring—signals for emergency cut-off, spooling up to cruise rpm, and when the measurement is complete. Once the engine is up and running, the pilot takes it to cruise rpm, carefully holding the brakes and back stick to prevent things from getting really exciting. The person with the Dynavibe presses the sample button and the unit does its thing. When it shows a solution, the Dynavibe operator signals the pilot to reduce rpm. If multiple measurements are desired to ensure consistency, repeat the process.
Only once the measurements are complete, shut down the engine. We found that if we shut the engine down while the Dynavibe was averaging the results, it went blank, and didn’t finish—so make sure to write things down before pulling the mixture to idle cutoff.
The Dynavibe will now present a result, such as 0.38 IPS (inches per second) at 138 degrees. This tells you that the heavy spot is 138 degrees of rotation past the “zero” mark—when the blade with the reflective tape is straight up. Find this spot on the flywheel, then go 180 degrees around from it and apply some weight using a bolt, nut and washer.
Balance can be changed by using AN4 bolts, washers, and nuts in the flywheel holes. Different combinations of bolts, washers and nuts can be used to obtain the desired weight.
The Dynavibe instructions state that there is no way for them to give any meaningful guidance on how many grams of weight need to be added for each increment of IPS, because all props and engine sizes are different. Fair enough. We found that 16 grams of weight reduced the out-of-balance condition by about 0.20 IPS, so when we were out of balance by that amount, one bolt, nut and washer weighing 16 grams brought us very close. Having a gram scale on hand is essential to reduce simple trial and error guessing.
It is easy to get fooled by the angular measurement—no matter how much you are warned in advance. Clockwise and counterclockwise are confusing terms, because they depend on whether you are looking forward, or aft. If the out of balance condition is close to zero or 180 degrees, it is easy to simply go opposite from the “zero” blade—but once you get off to one side, it is easy to get yourself reversed. Fortunately, we found that when we went the wrong way (this was with two experienced engineers and a PhD working on the project), we immediately got a significant out of balance condition on the next test, and it was obvious we had screwed up.
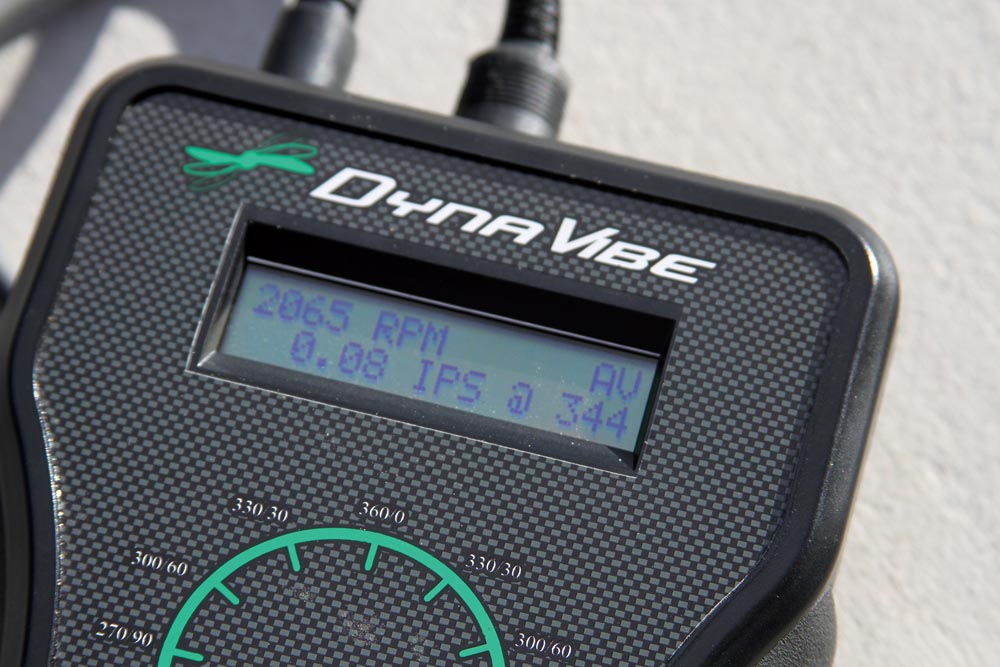
A typical reading after the units take an average—0.08 IPS at 344 degrees. To get a better balance, we could add a few grams near the 180-degree point (opposite 344).
From this point, it is simply an iterative process until you get within a limit that you like. Most people using this equipment consider 0.10 IPS or less to be an acceptable balance state. If you have plenty of time and patience, you can take it down to whatever you like—but you might be adding weights to multiple bolt holes—or drilling a hole in the spinner back plate. Fortunately, we found the Dynavibe solutions to be extremely repeatable, so we didn’t go wandering in search of a fix that was finer than we could measure. It pays to write down the solution numbers after each test, and keep careful track of the changes you make each time.
We started with several balance weights in place from a previous balancing, and after a couple of rounds, decided that continually adding things here and there was going to lead to a lot of weights. So we removed everything, did one measurement, added the necessary weight at one spot, tested again, and were within limits. Lesson learned—start from scratch each time—or you’ll use a lot more hardware than you need!
A Good Education
Having watched this done before by professionals, I had a good background in the process of balancing, but had never actually done it myself—so I was wondering how quickly we’d come to a good solution. Surprisingly, with the Dynavibe equipment we finished balancing the prop on the RV-3 in about 45 minutes. Of course, about 30 minutes was spent going down a blind path caused by going getting our rotations mixed up and having too many weights, but that’s just part of the learning curve. No damage was done, and we were buttoned up and ready to start another airplane in no time. This is definitely a task that mechanically inclined builders can do themselves, given that they have the equipment available, and it is amazing just how noticeable a good balance job is, once you get in the cockpit and go fly.








It’s good to see this subject covered and the excellent equipment (Dynavibe) featured. In 2007 I had bought a new Prince prop and, wanting to get a dynamic balance, was having a lot of trouble getting the local “prop balance” fundis to make or stick to an appointment. After some weeks of this I thought to see just what it would cost to buy my own “prop balancer” and it just so happened that RPX Technologies had just modified their helicopter blade alignment/balance equipment and were selling a balancer for fixed wing aircraft called the Dynavibe – now referred to as “The Classic” – since later on they introduced an advanced model called the GX3 and the original needed it’s own identity. I just call it “The Dynavibe”. I also have the GX3 but have found the “Classic” easiest and most convenient to use. Steve Sennett at RPX assures me I could use the GX3 just as quickly and accurately as I use the Classic, but I’m an old dog to whom new tricks don’t come as easily as they once did. I’m sure he’s correct however. However, I normally don’t need to do spectrum analysis or use the multi-input sensors on the GX3 for vibration/mechanical analysis plus have it all stored on an SD card to upload to the computer at which time any number of aerodyamically esoteric maneuvers can be pursued. Buy why? It also will send to a printer a record everything that’s done and even print out a receipt. It’s for a shop owner, really. The Classic is still only $1500 and is the one shown in the article and works beautifully. Incidentally, Paul mentions .10 IPS (Inches per second, the increment with which vibration is measured) being acceptable. Maybe back in the days of Chadwick-Helmuth a number of .10 was acceptable since that analog equipment used for so many years prior to the coming of the microchip was pretty clunky. Dynavibe in their documentation uses .07 IPS as the level of vibration lower than which only the sensors can detect vibration, so .07 IPS is the least acceptable number I would consider successful. However, everyone wants to see that 0.00 on the display and that’s what I always aim for. The more one uses the unit the more likely one can succeed in attaining that zero point. Run-ups need to be done with no breezes flitting around. Certainly no wind . . . . Doing a fine job requires calm.
Propbalancers back in 2007 were in the 4-5 thousand dollar range for the least expensive so $1500 sounded pretty inexpensive to me. It’s taken its place as an essential shop/hangar tool in my hangar. Yes, you can use it for free for the rest of your life anytime you change a prop or do an annual, change a belt, (any change at all can throw off a fine balance) but it’s also just a good tool to have in case you want to balance someone elses’ prop for them. The more practice one gets the better. The idea of an EAA Chapter investing in one is an excellent idea. One or two people would then be checked out on it. It’s not a tool you’d want to treat as if it was just another common hangar tool, like a jack or scales. It’s not tricky or difficult, but just as with using a wing jack or scales, it’s a device that needs to be used with understanding and care.
The Dynavibe device along with its cables, accelerometer and optical sensor has served well for thirteen years without repair or defect. I’ve done dozens and dozens of planes, singles and twins, two-blade and multi-blade. I’ve done radial engines on the Japanese warbirds that periodically come through and it works just fine on everything.
Mike and Matt, the engineers who created this company were extremely patient in answering my newbie questions following my purchase. These days there are instructional videos at their website and other places but I’d bet these busy guys are still accessable if a person has a question not covered clearly in the instructional video.
For those owners who have shown any interest in how the balancing process works, I’ve given them ACE’s really clear and explanatory document they created covering the subject. Link to that follows. It’s a great overview of the balancing process.
https://tinyurl.com/yxhtoj8f
As Paul points out, Lycoming’s come with a starter ring that is perfect for mounting weight. Holes in the Lycoming starter ring are my first preference but in the event it’s not a Lycoming there are many ways to approach an existing vibration. I’ve never needed to drill a hole in anyone’s spinner, although that is the FAA approved way of doing things. What about a change down the road – new prop, or just natural changes that occur over time? It’s not just the prop involved – it’s the entire rotational mass of the engine and drivetrain. A new alternator belt can change things slightly. Nothing lasts. Nothing stays the same. What to do about that hole? Drill another one? Buy a new spinner? Holes also can initiate cracks over time, so although it’s a fine, approved solution, I would rather modify weight by using a longer/heavier spinner screw(s), washers under a spinner screw, lead tape applied inside the immaculately-cleaned lip (if it has one) of the back plate (lead tape is sold for balancing golf clubs), etc. There sometimes arises unique situations that require unique solutions, such as a longer prop bolt or washers under existing prop bolts, etc. I of course would never tamper with weights installed by the prop manufacturer. They are delivered statically balanced and need to be left alone – my attitude anyway.
Anyway, Thanks for covering this excellent instrument Mr. Dye. I can’t say enough good about it – especially when you’re cruising along on a long cross country flight. Everything has settled into a perfectly efficient cruise, everything in balance. Your humming. You’re way up high with plenty of oxygen. Using hardly any fuel, yet sailing along at some ridiculous speed. Putting two fingers on the glareshield you smile because you honestly cannot tell if it’s cylinders or a turbine up front. True appreciation for having the Dynavibe sinks in after a few experiences like this.