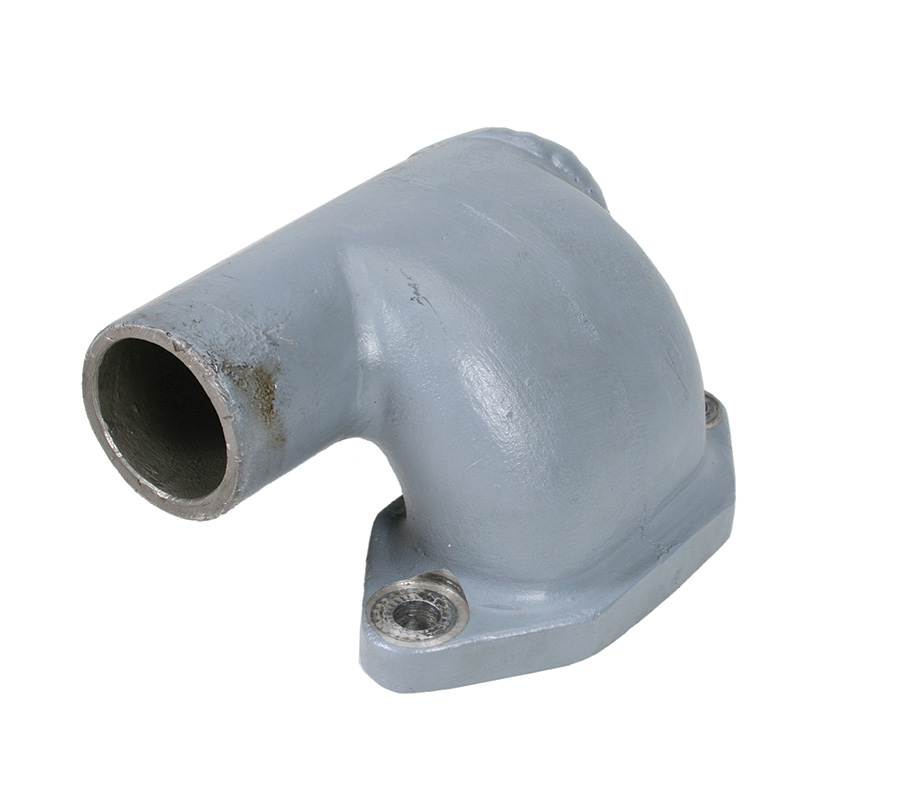
Last time, I discussed the basic types of 3D manufacturing and decided a VW intake manifold—with sweeping curves and deep cavities that would be a challenge for CNC machining—would be a good demonstration project. One could justify a one-off manifold design for a number of reasons: a better fit under the cowl, or as in my case, to resolve the tight fit between the spark plug cap and manifold. As I mentioned, Great Plains Aircraft has a manifold that solves the problem (I have a set on my plane); the “problem” manifolds are old hand-me-down Mosler manifolds on my test stand engine.
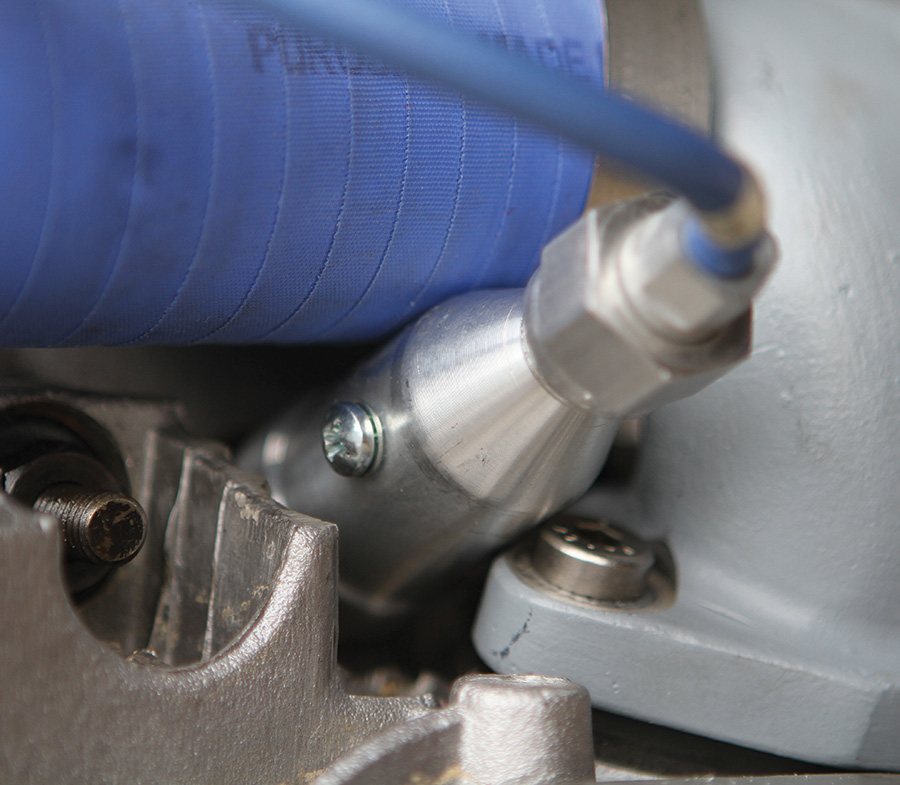
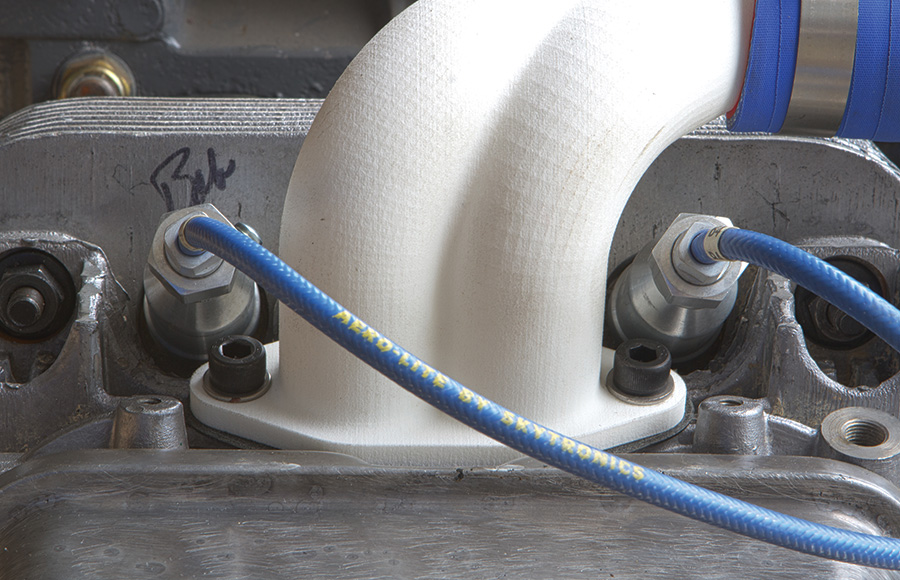
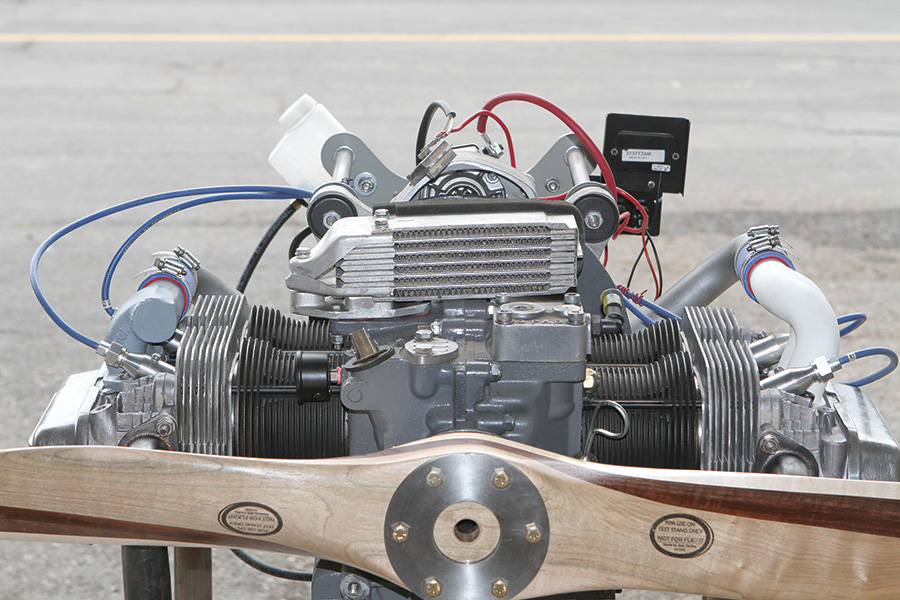
“Your problem,” as they say, “is obvious!” Notice the tight squeeze between the spark plug cap and the manifold on the author’s test stand engine.
One of the allures of 3D printing is the idea that highly accurate and detailed mock-ups can be constructed quickly for conceptual and/or functional vetting. Mock-ups are standard operational procedure for design work at all levels of aviation. Builders use anything and everything for mock-ups, from cardboard cutouts for panels, to PVC pipe for exhaust routing. For more complicated engineering problems, 3D printing is a boon for designers.
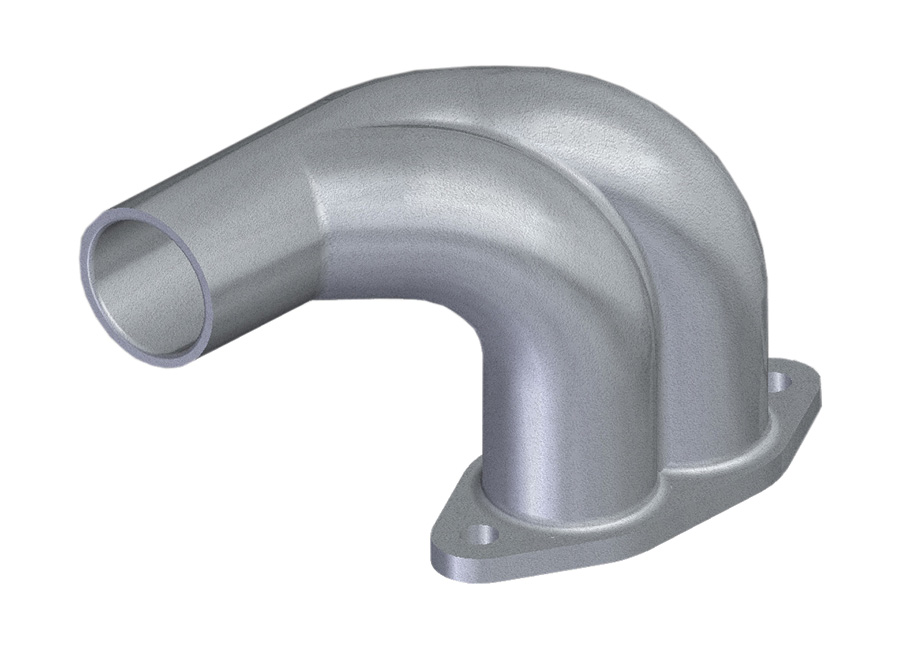
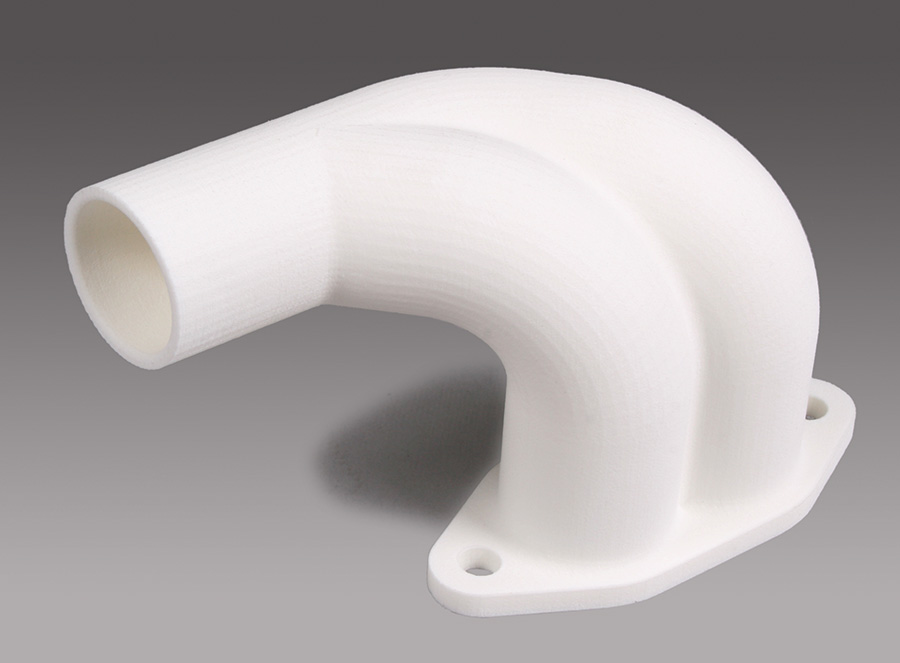
A computer rendering of the “improved” design. A low-cost plastic prototype was used to “proof” the fit and compatibility with the engine and spark plug wires.
Step one to printing any 3D part is to create a design file. To get some clues on manifold design, I paid a visit to VW engine guru Donny Karraker. He showed me a variety of VW intakes, including the classic Weber dual-carb setup popular with racers. Both the Mosler and the more modern Great Plains intake sit relatively low, and the split from one to two ports happens about .78 to 1.2 inches (20mm to 30mm) from the mounting flange. On the racing intakes I looked over, this split happens much farther upstream. The other distinction Karraker pointed out is a small breather port at the flange face that allows cross-flow between the ports. The theory, according to Karraker, is that the small cross-flow vent helps smooth out the idle on high-rpm engines with aggressive cams. Since VW conversions tend to cruise at relatively low rpm (compared to auto VW engines), the long velocity stack and the cross-breather features are not critical. One improvement he suggested was to add some rise to the inlet stack to eliminate the manifold spacer. He did not feel adding extra length, making the curves tighter, or moving the location where the ports split from one to two would affect performance that much either way.
With that information in hand, I sketched out the design with a CAD program called Solid Edge. With a few clicks of the mouse, I had an on-screen model that satisfied my goals. I exported the file in the STEP format (Standard for the Exchange of Product). Again, this was a preliminary design for a test fit. Once the fit is confirmed, final parts can be made using any number of processes that take advantage of 3D printing (more on that later).
Getting price quotes (and eventually parts) is usually a matter of uploading or e-mailing your file. 3D printing services are popping up all over the place, so it shouldn’t be a problem to find any number of companies willing to quote a project. Solid Concepts happens to be one of the major players in the Los Angeles area, so that’s where I went. They recommended printing the sample using selective laser sintering (SLS) with nylon-12 plastic. Nylon-12 is strong enough to be bolted and clamped onto the engine and dimensionally accurate to within ±0.002 inch. I have to admit the cost, at $295, was a bit of a head turner—about the cost of a used VW engine! In all fairness, that is reasonable for a one-off sample. The cost to produce the same thing on a multi-axis CNC machine would be many times that amount. So I put it on my credit card and waited for it to arrive in the mail.
In the meantime, I asked Solid Concepts to quote the final pair (one each left and right) of functional manifolds, assuming the same or at least very similar design. They offered two options, a lost wax casting method called “Quick-Cast” in aluminum and a set of 3D-printed manifolds using a carbon-fiber reinforced nylon. Unfortunately, both were way more expensive than I hoped (more than $1,000 for the pair), so I decided to wait and see if I could find other options.
A couple of days after placing the order, my sample manifold showed up as promised. A quick trip to the hangar and I had it installed. What a difference. In fact, there was way too much difference! The clearance was perfect near the flange and intake stack, but there was more vertical clearance than needed. The engine installation on my single-seat airplane has exposed heads, so clearance under the cowling is not a concern. But that’s no reason to make the manifold higher than necessary.
So for now, I’ve tweaked the design to lower the inlet to a more ideal height and archived the file. It is hard to justify a $1,000 manifold set on a $5,000 engine! The Great Plains aluminum manifold set is not too different from my design and costs only $130.00 (which is what I have installed on my “flying” engine).
3D printing is still a relatively new and emerging technology. Many people expect costs will come down. The only questions are how much and when. In the meantime, whether or not 3D printing is practical for your needs depends on your project. For low-cost prototypes and small decorative parts, entry-level machines might be a good solution. For structural parts or large-scale samples, you have to make a value judgment. For me, investing $1,000 for a set of manifolds for a $5,000 engine makes no sense. But if this was a $100,000 project, $1,000 or more could easily be justified.
This view shows how much taller the “high-rise” intake manifold on the right is compared to the original on the left.
Another key thing to consider if you are thinking of buying a 3D printer is the device only gets you a way to print a file. Also necessary are some sort of CAD program and the design proficiency to render your ideas into three-dimensional parts. Just because your computer can draw an M.C. Escher design doesn’t mean it can be printed (it can’t). There are some rules, such as the normal face rule and the manifold rule (a non-manifold part is a part that has edges that are shared between more than two faces) that, if you are not aware of, can produce unexpected results.
Some futurists are predicting that—in the not too distant future—when you need a part, instead of going down to the store or ordering it online, you will just download the file and print one on your home 3D printer. That’ll be the day!
Special thanks to Chuck Alexander, Product Manager Additive Manufacturing, Solid Concepts Inc.
Photos and illustrations: Bob Hadley

![]()
Bob Hadley is the R&D manager for a California-based consumer products company. He holds a Sport Pilot certificate and owns the VW-powered Victory Stanley Fun-Kist.

