Tube notching is a skill that, with the right tools, is easy to master and is useful for a variety of airplane projects. Although this article will focus on notching with basic machine tools, there are a number of dedicated machines, jigs, and fixtures for tube notching (also called mitering or fish-mouthing) that can produce, with some limitations, similar results.
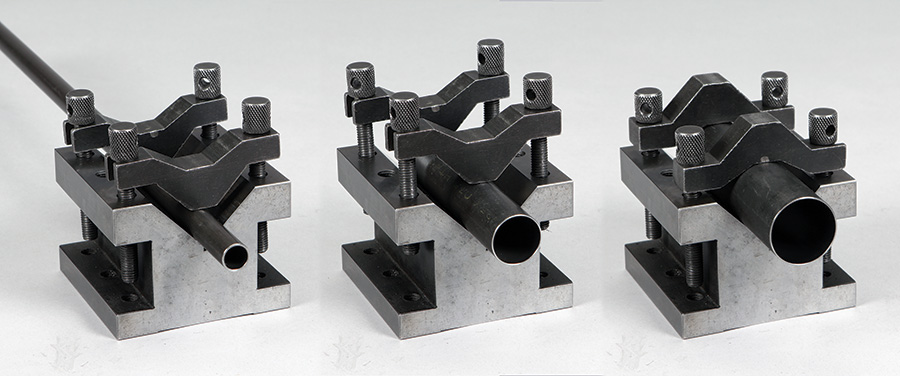
Fig. 1: The V-block clamp is a versatile and secure way to fix round tubes and bars for machining operations. It can be fastened to the table with T-slot components or bound in a mill vise. The mill-vise option allows you to tilt the V-block for angled cuts.
Many tube fabricators use bi-metal hole saws for notching. They are relatively cheap, work great for almost any angle or offset, and they stay sharp for a reasonable number of uses. They are available in 1/8-inch increments starting with 1/2-inch diameter. Metric sizes are also available.
For most tube fitting operations, standard off-the-shelf bi-metal hole saws with 6- to 8-teeth-per-inch (TPI) work fine. If you are working with thin-wall tubes (.028 or .035) and find that standard saws are too grabby or otherwise not working, fine-tooth (10 TPI or finer) saws might be more forgiving.
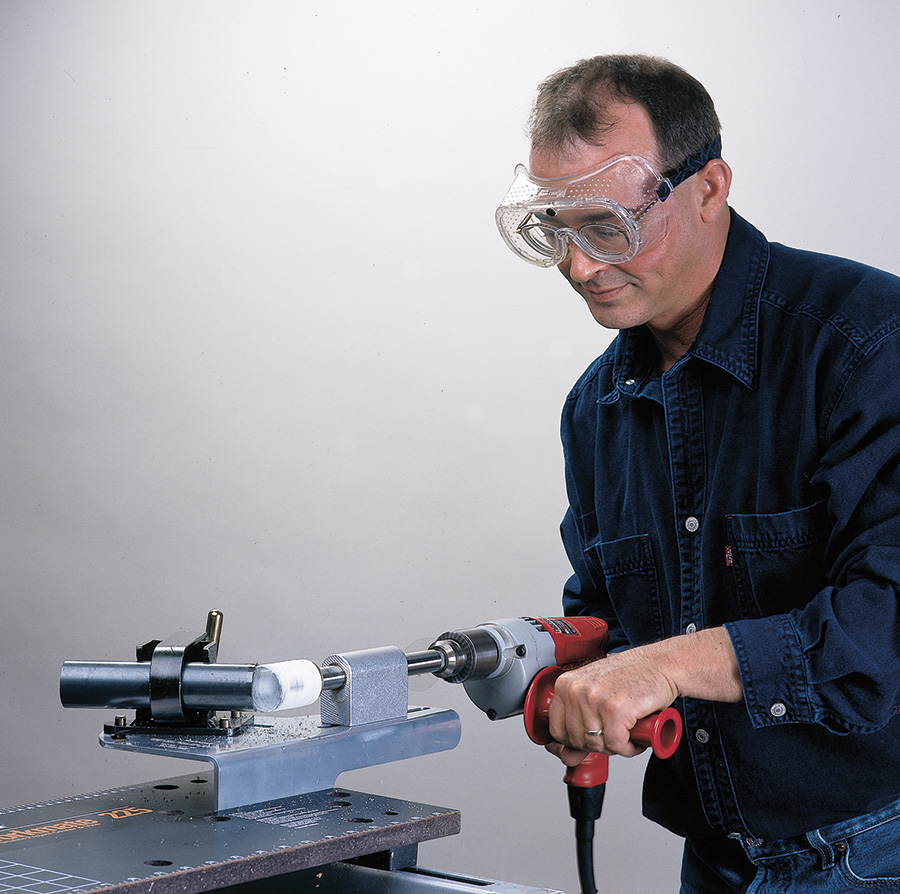
Not all hole saws are created equal. Cheap bi-metal saws from the local hardware store or home center do not work for precision notching. Too often they wobble (run-out) and/or have erratic tooth-set. When used in a milling machine, the wobble makes the resulting notch size too big. If you’re using an accessory fixture with a hand drill (see sidebar), wobble translates into vibration. If you’re lucky, you only get some nasty chatter marks. If not, the saw might snag the part and twist it loose from the clamp. Either way, the better option is to use a premium-quality hole saw.
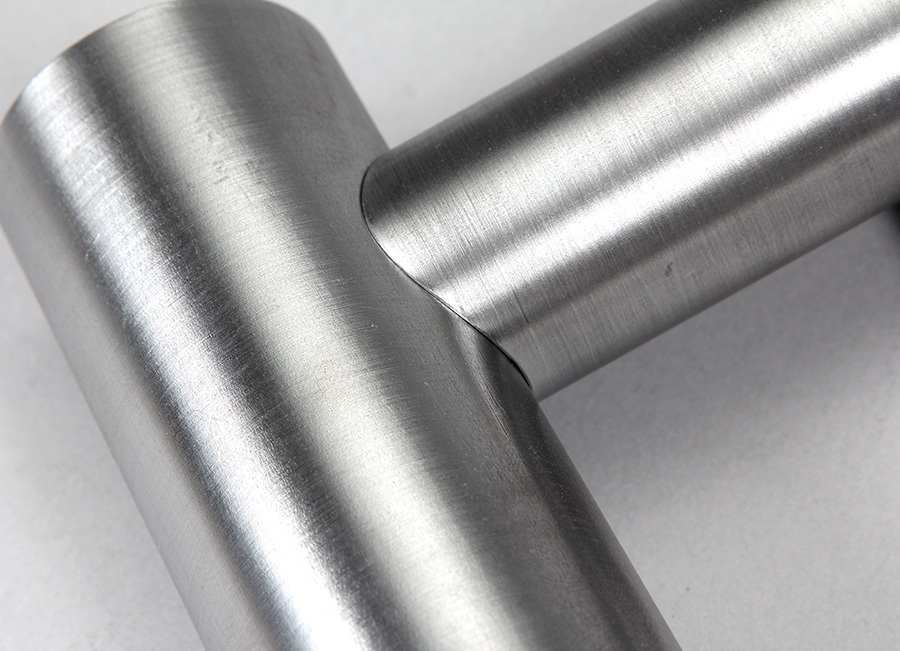
My preferred hole saws are made by Bahco. Bahco hole saws are premium-grade tools that go through 4130 chromoly tubing like butter. They have very little run-out and are consistently sized to very close tolerances. The best examples of this fact are in the photos of the fitted joints that accompany this article.
You’ll also notice the arbor is not the standard hardware-store type with a pilot drill. For precision tube notching you need a better arbor. You can make your own from 5/8- or ¾-inch precision-ground shaft (any free-machining steel is fine), or buy one from a supplier like Paragon Machine Works (www.paragonmachineworks.com). Paragon sells a 7-inch-long hole saw arbor with either 1/2-20 thread for saws under 11/4-inch diameter, or 5/8-18 thread for saws 11/4-inch diameter or larger.
Another important accessory is a V-block clamp with heavy-duty clamping bars (Fig. 1). The V-block clamp shown in the photos is a low-cost import model; the size is 4 inches x 4 inches x 90 degrees. This particular clamp sells for about $130. It can hold any size tube from ¼-inch to 2-inch diameter. Clamping V-blocks should not be confused with inspection V-blocks. In addition to costing a lot more, inspection V-blocks usually have only one clamp because they are designed to snug parts in place for measuring, not machining.
Building a Triamajig
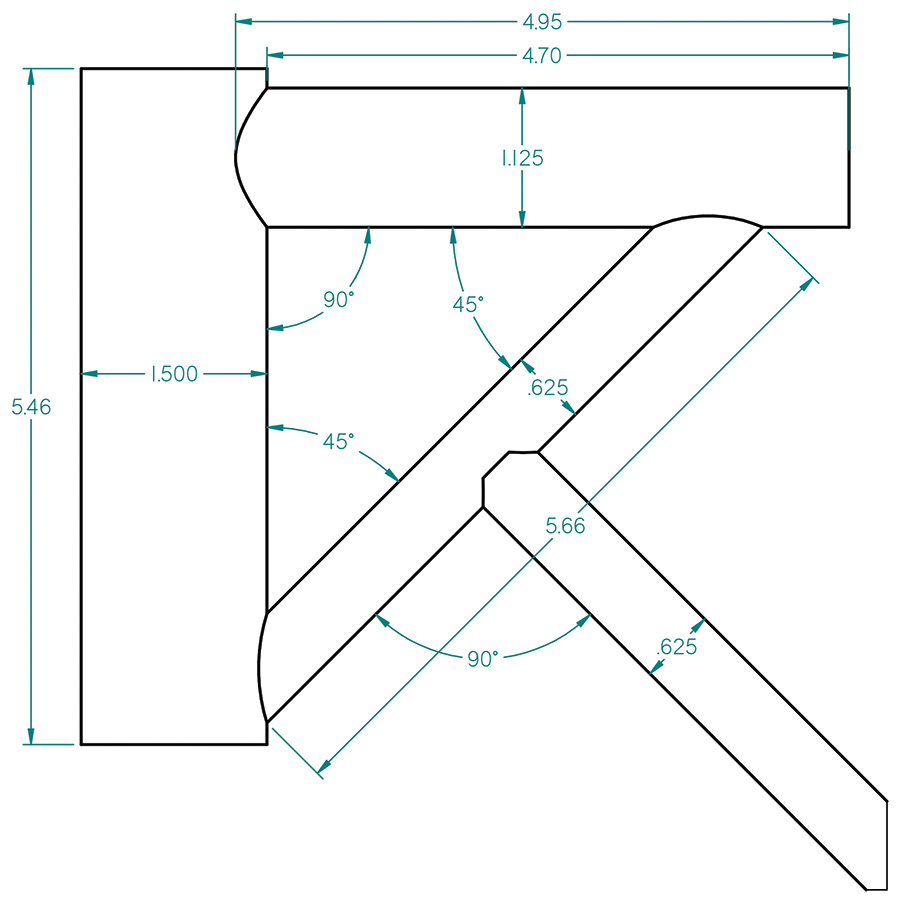
This project is an imaginary part we’ll call a triamajig (as in “thingamajig”). It consists of three different diameter tubes. The steps detail how to notch the joints so they mate together perfectly for welding. Good welds start with good joints!
First determine the length of each tube to be notched and the hole saw needed for each notch (Fig. 2). On the triamajig, we need three sizes: 11/2-inch, 11/8-inch, and 5/8-inch.
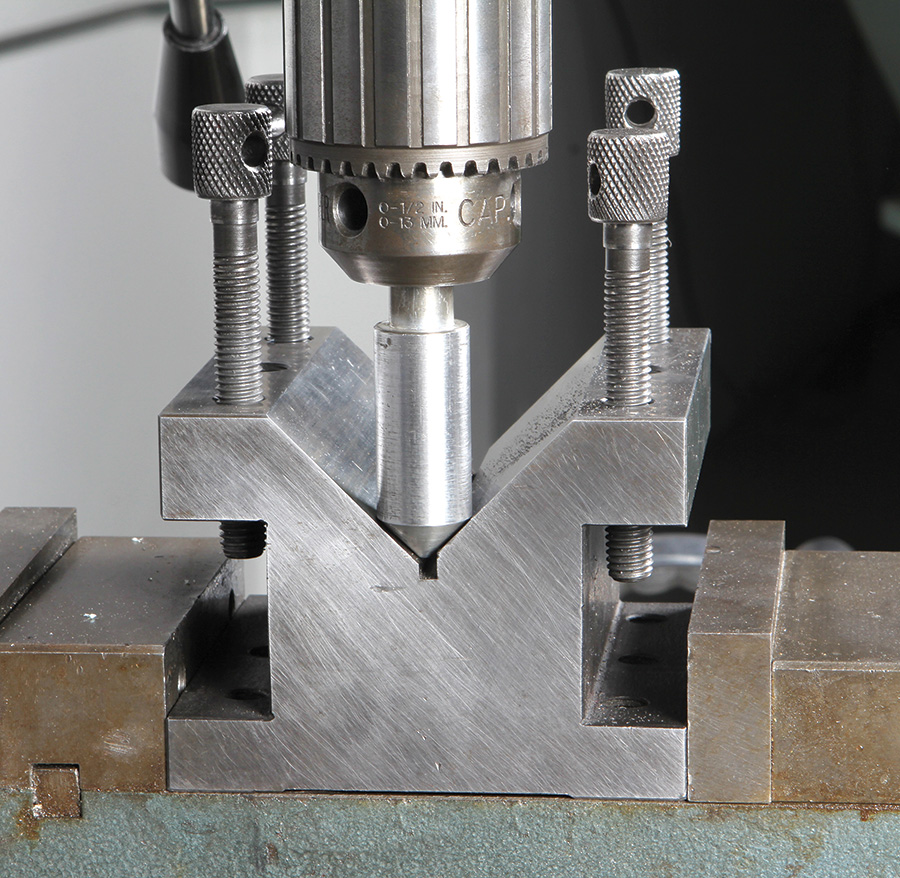
Next, fix the V-Block clamp in the mill vise and center the V-block clamp (Fig. 3). The centering tool in the drill chuck was shop-made on the lathe for this purpose. It makes set-up fast and accurate. Once the V-block is centered, you can reliably notch any diameter tube at any angle without re-centering. If the design calls for an offset notch, the centering tool provides a reference “zero.”
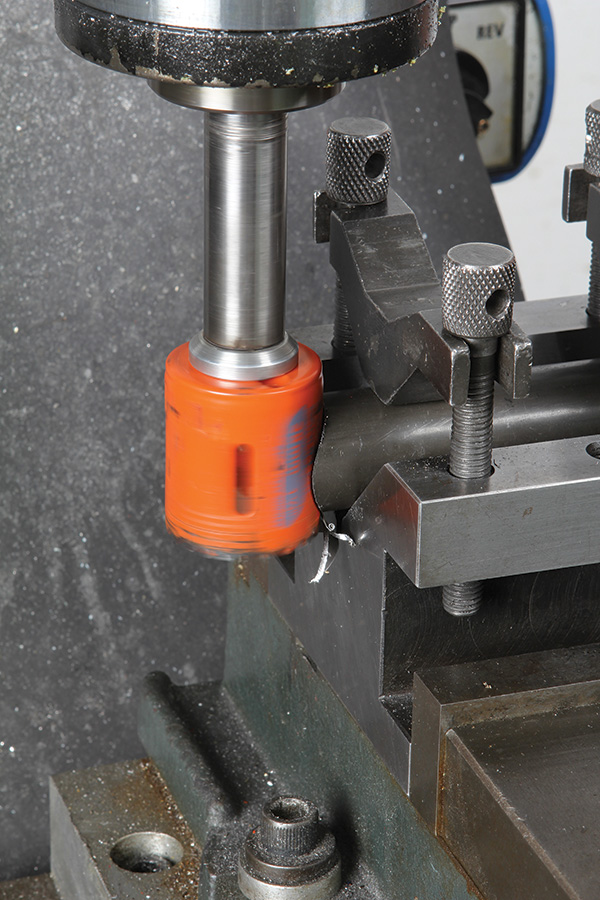
Using a 11/2-inch hole saw and the V-block at 90 degrees, notch the 1 1/8-inch tube (Fig. 4). Note how the end of the tube projects with minimal overhang from the V-block. Reducing overhang to the minimum eliminates the potential for chatter. Using the same setup, miter the 90-degree notch in the 5/8-inch tube. Tighten the travel locks on the mill to prevent the table from creeping. All the notches are cut with the mill set to 900 rpm.
Now test the fit. If you are using a good quality saw and the set-up is securely clamped, you should easily get a joint with minimal gaps (Fig. 5).
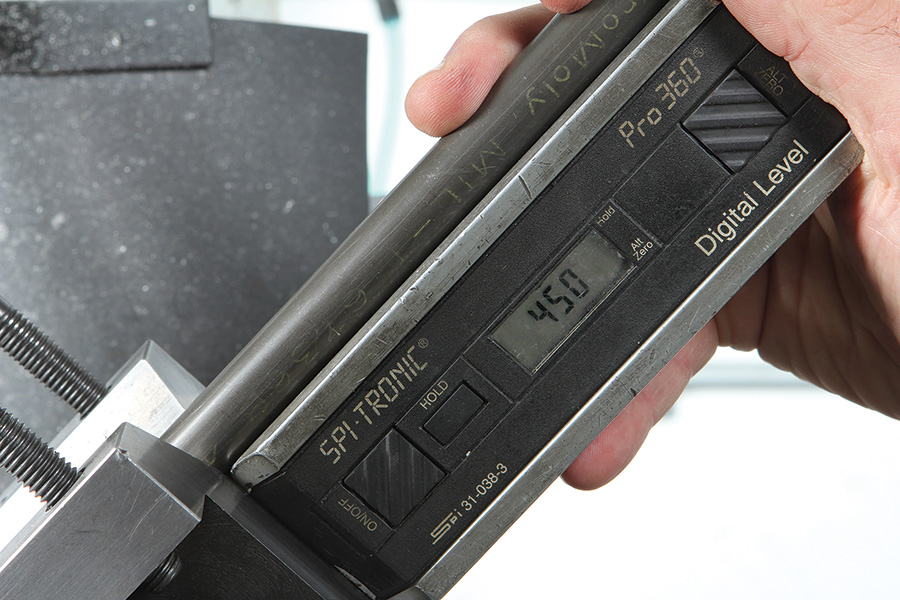
Using an angle finder or protractor, set the V-block in the mill vise to 45 degrees (Fig. 6).
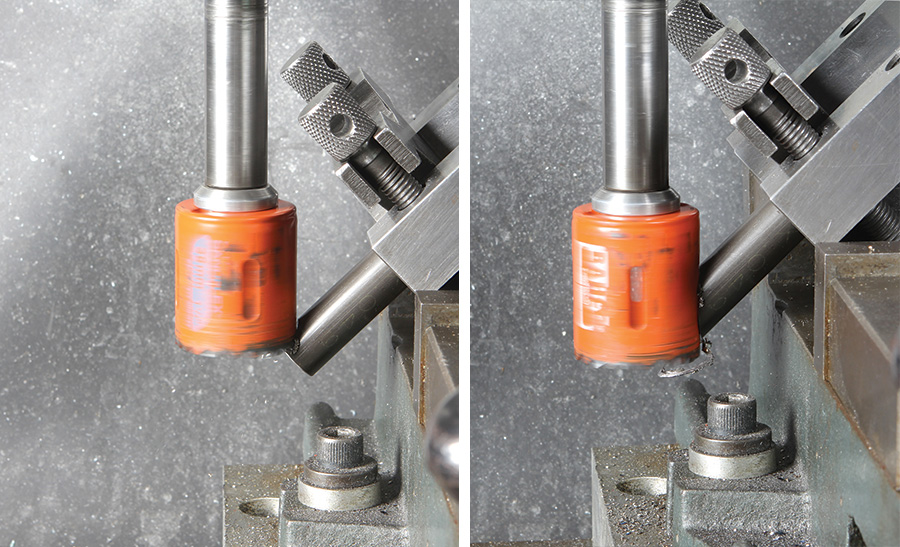
Using the 11/2-inch diameter hole saw, miter the first end of the hypotenuse leg of our triangle. Note that in order to make the 45-degree cut, the tube overhang must be increased. Therefore, take a roughing cut, about halfway (Fig. 7), then a finishing cut (Fig. 8).
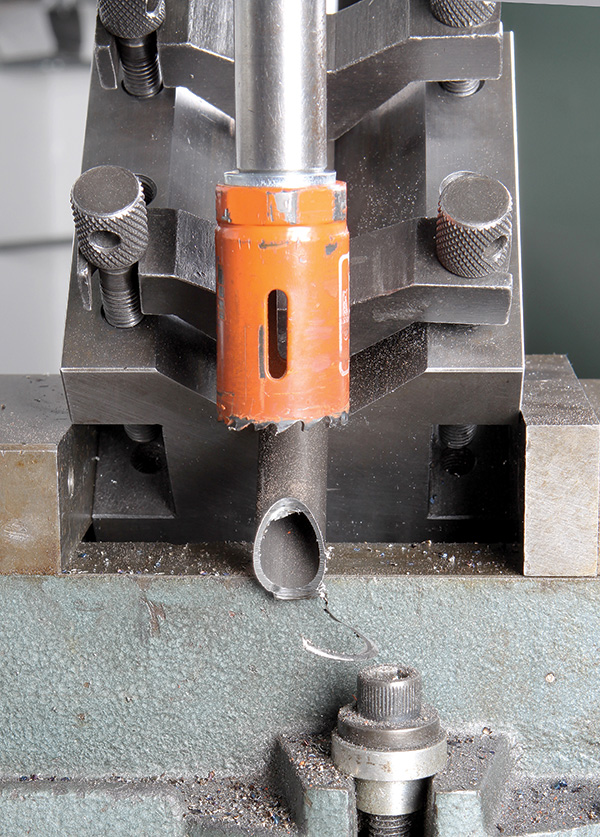
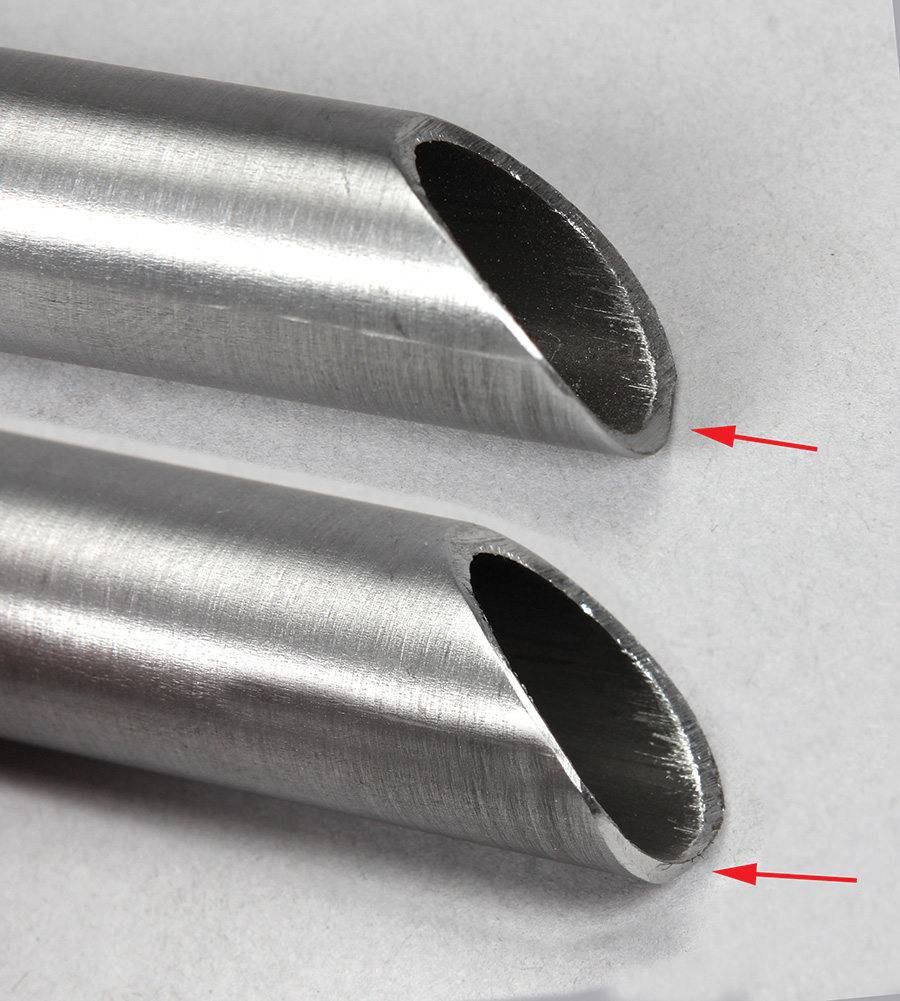
Switch to the 11/8-inch hole saw and notch the opposite end of the hypotenuse leg to the target length. Double-check the orientation! Take note of the flashing (burrs) left by the saw (Fig. 9). The flashing can make it appear the notch is not perfectly centered. Before you make any adjustments, grind or file it off to get a better view.
Notching long angles (30 to 60 degrees) will result in a sharp point at the long end. Before welding, file or grind back the pointy edge so it’s perpendicular to the mating face (Fig. 10). This helps the weld penetrate the full thickness of the tube. Do this just before welding, because grinding this edge changes the reference dimension of the tube.
Fig. 10: Before welding, file or grind back the pointy edge so it’s perpendicular to the mating face.
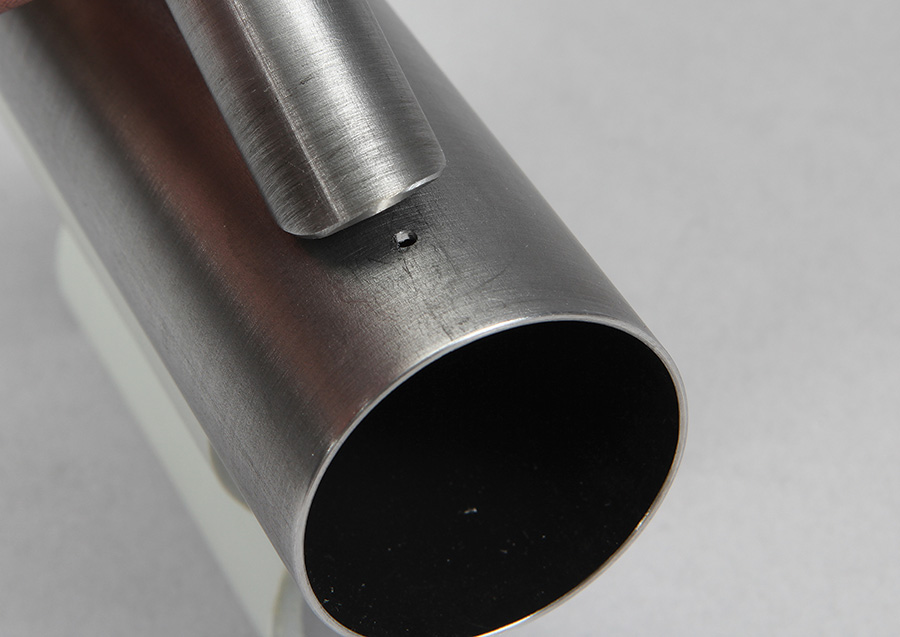
Here’s another important detail before welding: Anywhere a tube is closed off by welding, drill a vent hole for hot gases to escape (Fig. 11).
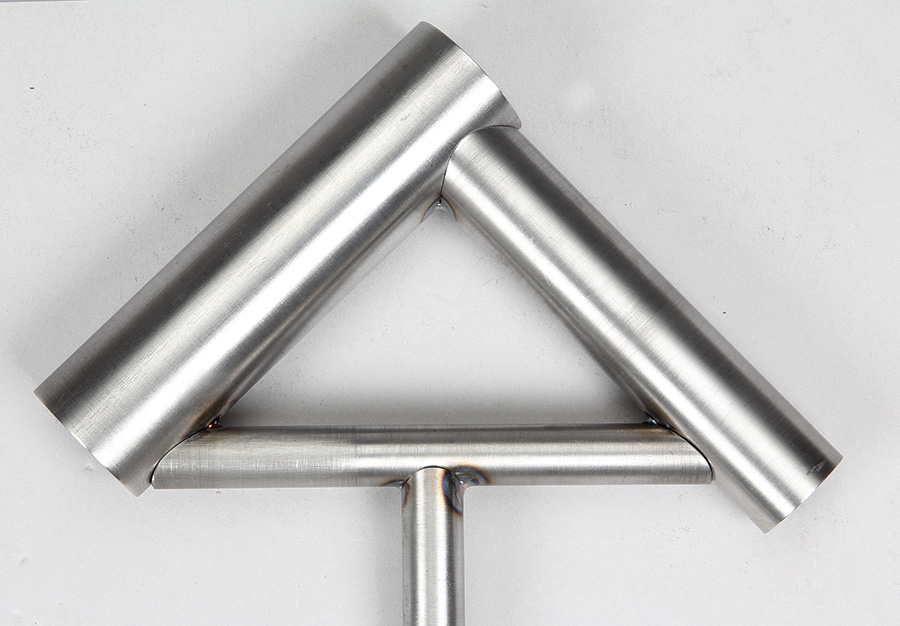
Now it’s time to fit the triamajig together and tack weld (Fig. 12). All the joints should look good. This is the last chance to check the angles and fits. If something is amiss, grind off the tack welds and remake or rework the offending part.
The last step is welding. Once that’s complete (Fig. 13), the finished triamajig is ready to be mounted for posterity!
Special thanks to Billy Griggs for TIG welding the triamajig project.




Bob, great article. Note, if $$$ is tight, and you only have a few joints to do, paper templates and hand files can produce high quality cuts as well. I wrote a program with some nice features, including alignment marks, and length reference for highly engineered products. I’ve also included a tab for air frame cluster joints. Free, no ads. https://dogfeatherdesign.com/ttn_js/
This works well too: https://www.blocklayer.com/pipe-notcheng
Clicking on the (www.jointjigger.com) acquaints you with a hemp website. Does the tool have another website?
The company appears to be out of business. Eastwood makes and alternative/identical product. Search for “Eastwood Tubing Notcher” and you’ll find it.