Casting is an ancient technique that can come in handy a number of interesting ways. Using simple techniques to make aluminum or wood molds, one can cast a variety of custom parts into shapes, or use materials, that can’t be machined.
Traditional gravity casting involves pressing a negative impression into sand and then pouring molten metal into the impression. After the metal solidifies, you break away the sand and, voil, you’ve replicated the pattern in metal. Sand casting is an inexpensive way to make a small run of production parts for a low cost. Among the obvious issues, at least for the home shop, is you need an accurate casting form to make an impression and a furnace to melt metal. All in all, it’s a bit complicated for a first-time casting project.
For this project, we’ll trade hot metal for RTV (room temperature vulcanization) silicone rubber, which makes first-time casting both fun and safe. Instead of using a sand impression for the mold we will use regular metalworking tools to machine a reusable mold out of a tight-grained maple hardwood.
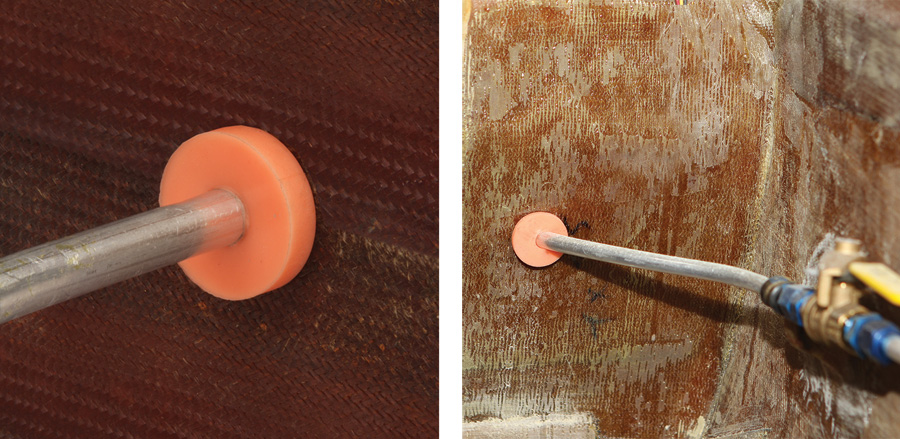
The part is a custom rubber grommet for neighbor Phil Hooper’s Velocity RG. He needs two of them, plus a few spares for down the road while we’re at it. The grommets go on 3/8-inch fuel lines (one from each wing tank) where they pass through the bulkhead to the header tank. The grommets prevent the aluminum lines from chafing against the fiberglass bulkhead.
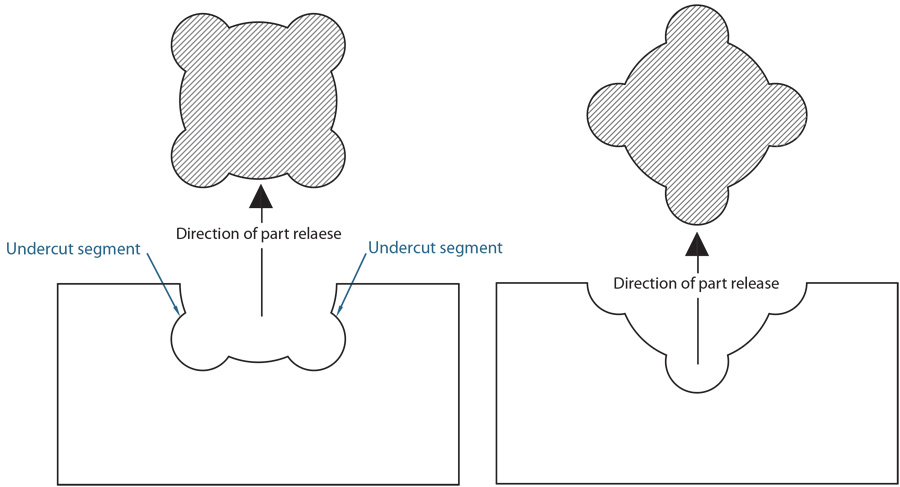
The example on the left shows an undercut segment of the mold cavity. The same part on the right, but oriented to eliminate the undercut and allow for a clean release from the mold.
Any molded part starts with an idea of how the finished piece should look. A simple part generally makes for a simple mold, but sometimes not. There are a few basic rules to mold-making that have to do with being sure the molded part will come out of the mold (“release” in mold-maker speak). A good example is “draft angle,” or simply “draft,” which is adding a slight taper to the sides of the mold to help prevent the part from binding in place. Another tip is to avoid undercuts or protuberances in the part that might cause the molded part to get locked into the mold. Most of the time you can work around these problems by paying attention to how the part is designed or adjusting the orientation of the part in the mold.
Small undercuts are usually not a problem when molding rubber. The material is flexible enough to be peeled out of the mold without harming the part. But if you’re using a hard plastic or epoxy resin, any undercut will cause the part to break trying to get it out of the mold.
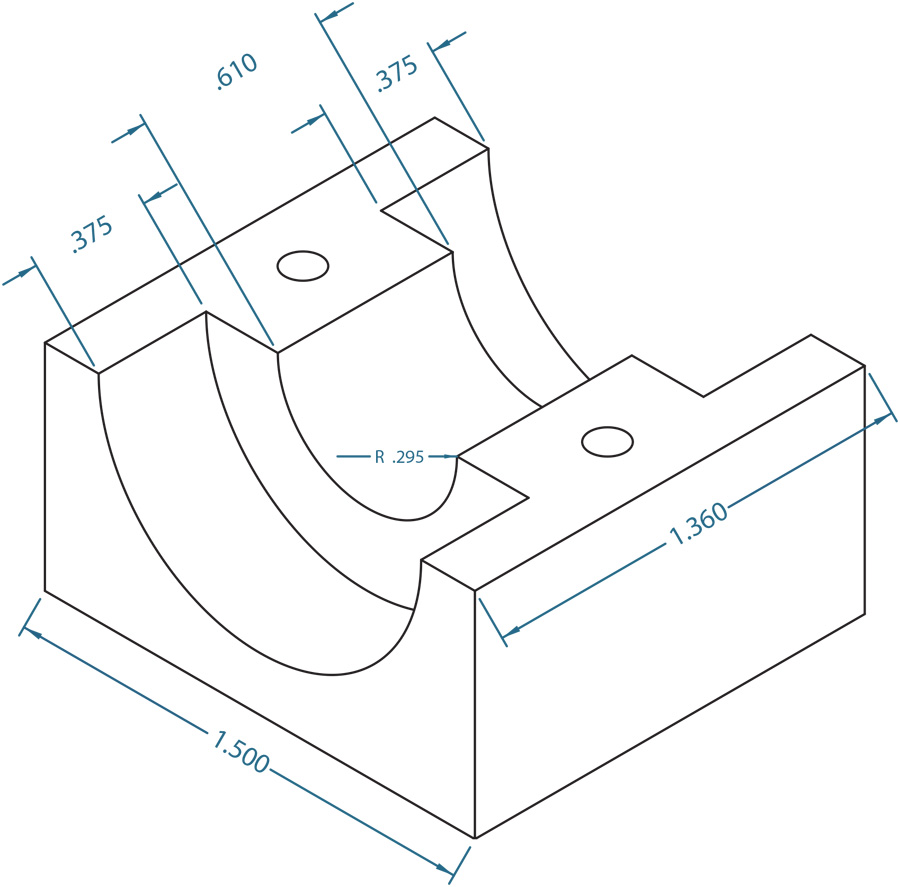
The dimensions were determined by the hole in the bulkhead (5/8-inch diameter x 0.61-inch width). The flange diameter (11/8 inch) and thickness (1/4 inch) can be whatever you want, but if it’s too bulky, you won’t be able to squeeze it into place.
The grommet mold consists of a two-piece base, two end caps, and a center core. All the parts can be made using basic drilling, boring, and facing techniques. You can make the mold base on a lathe, a milling machine, or even a drill press using Forstner-style bits. The end caps are made on the lathe. The center core is a simple 3/8-inch bar or tube cut to length.
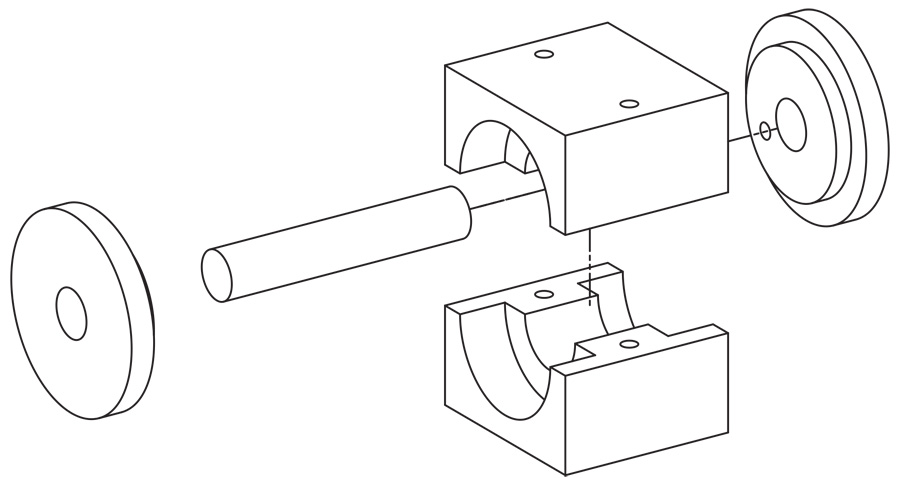
The top and bottom halves are identical. The cavities are machined with the two parts screwed together. The 3/8-inch rod forms the hollow center of the grommet. The 1/8-inch lip on each end cap centers the rod and seals the mold. The small hole in the cap on the right allows excess rubber to escape when sealing off the mold.
The rubber I selected to cast the grommets was a 1:1 two-part silicone called Rebound 25. It cures in six hours. The number 25 refers to the Shore hardness scale of the cured rubber. If you prefer somewhat stiffer material, the same company offers two-part silicone kits with a hardness of 40 (also a 1:1 mix) and 60 (a 10:1 mix). Mixing the 10:1 in small batches requires a scale with at least a 1-gram resolution.
The mold uses less than an ounce of material to fill so, using a postal scale, I metered out about -ounce each of part A and part B. The mixed-up goop is pretty viscous. The manufacturer suggests to be careful not to over-stir, which can create air bubbles. By doing the minimal amount of mixing and then tapping the mixture on the bench vigorously for two minutes, most of the air will rise up and escape. The rest of the air should escape when you pour it into the mold.
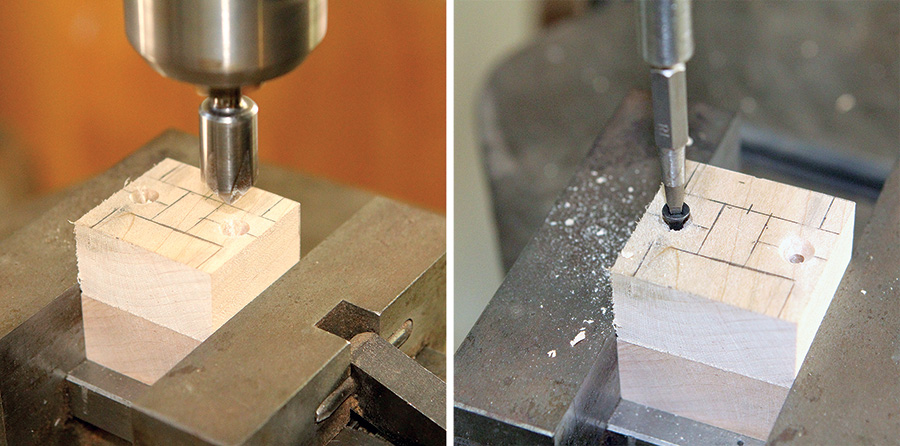
With the mold halves clamped together and the clamping holes marked, drill, countersink, and screw the two parts together as a matched pair.
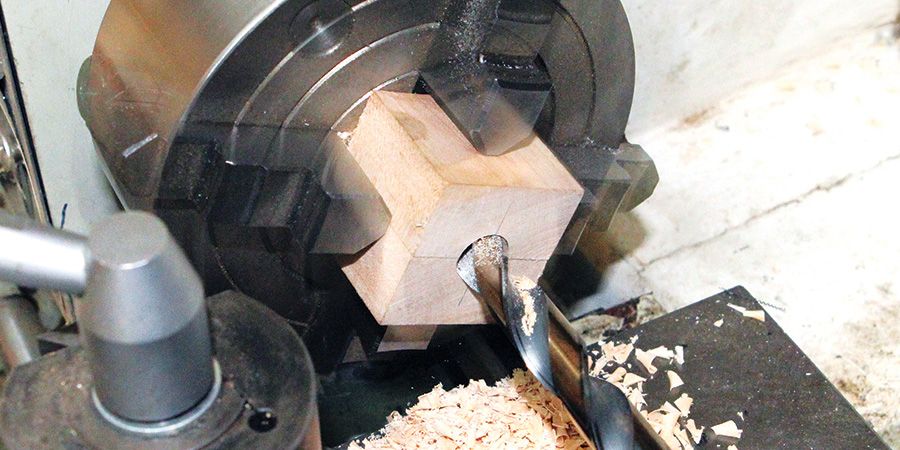
Using the four-jaw chuck, clamp the screwed-together block in the lathe, center it, and drill or bore the 5/8-inch center hole.
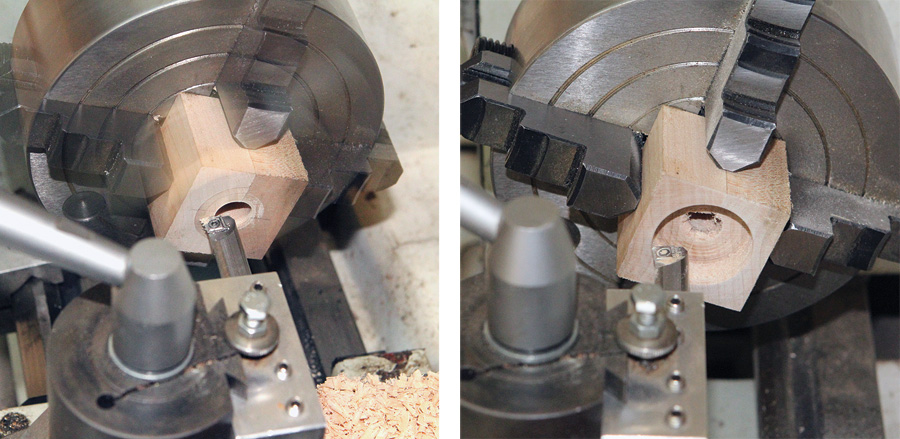
Using the boring tool, face the block flat and counterbore the flange cavity. Flip the block and repeat the facing and counterbore operations on the opposite side. When done, remove any stray wood fibers with 180-grit sandpaper. A coat of acrylic clear coat and some mold release wax will seal the wood and prevent the rubber from sticking.
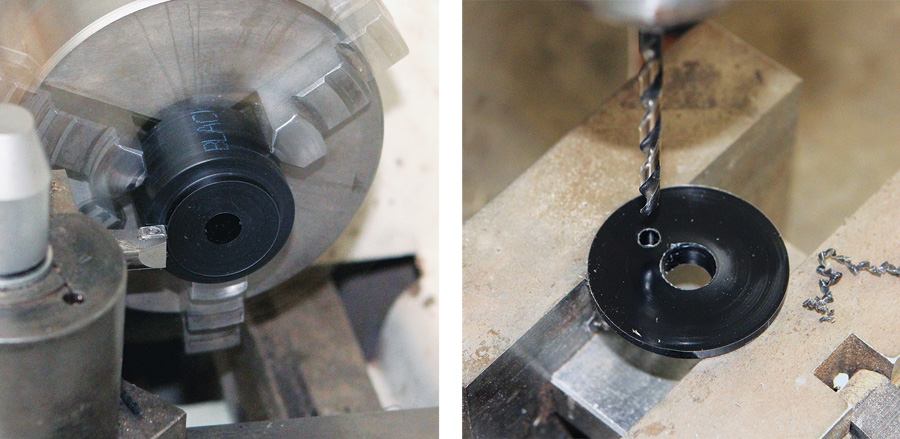
The end caps are lathe-turned from Delrin-type nylon, but any machinable plastic or aluminum will work. Drill an overflow hole into the top cap.
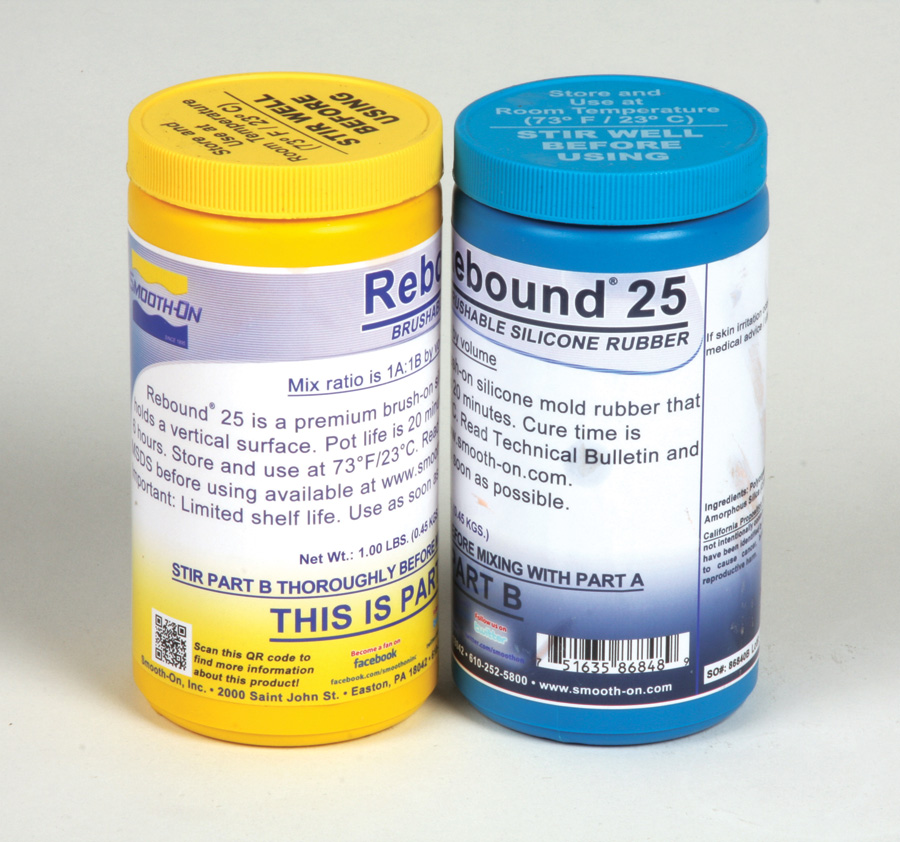
Rebound 25 two-part silicone. According to the manufacturer, it’s non-flammable. That’s a good thing on an airplane!
The manufacturer suggests pouring from “high up” and filling the mold as slowly as possible to reduce air bubbles. Our mold is pretty small, so it can be messy to hit the bull’s-eye—spread out a newspaper and wear gloves.
I found that it was a little easier to fill the bottom part of the mold cavity with the center post retracted (see photo). Once the mold was about 85 to 90% full, I pushed the center post up and capped the top. Overfilling the mold was not a problem because the excess came out the overflow hole.
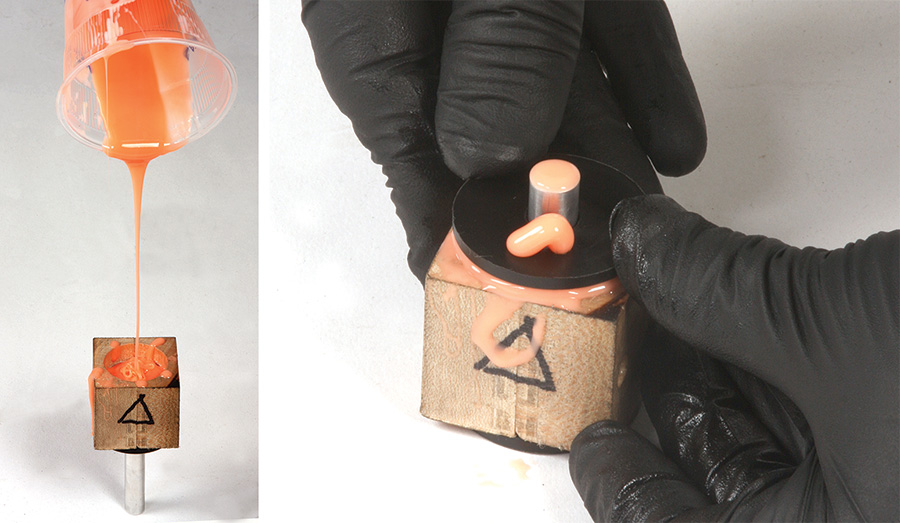
(Left) Using the manufacturer’s recommended “high pour” method, fill the mold as slowly as possible. (Right) Push the cap into position and the excess will ooze out the overflow.
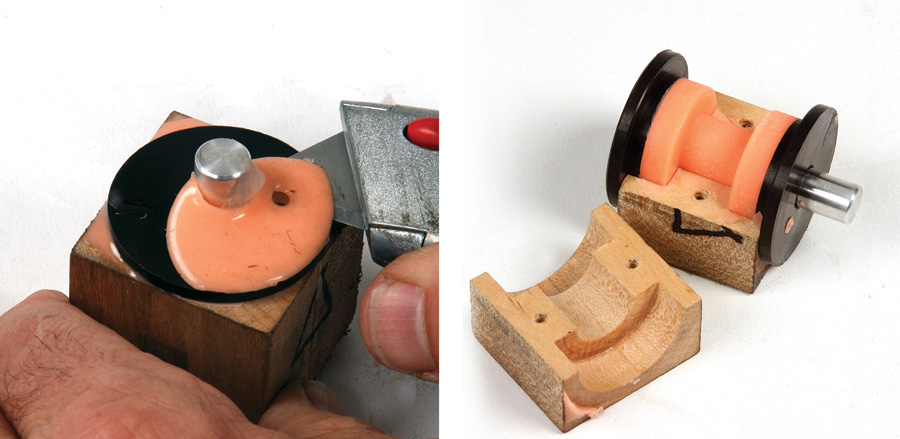
After curing at least six hours, slice off the cured rubber from the overflow and de-mold the part. As long as the mold is handled carefully, you can reuse it to make dozens of identical parts.
Of the dozen or so parts I cast for this project, most of them had a few pinhead size air bubbles cured into the top surface. A few ended up with larger air pockets. Tapping the mixture for at least two minutes to help the air escape is important. If you have access to a vacuum pump and chamber, you can de-air the mixture 100 percent in about 2 minutes. The pot life is only 10 minutes, so you don’t want to wait much longer than 5 minutes to start pouring.
Final thoughts: Tear strength, UV resistance, heat, and flammability attributes are factors to consider for any material not specifically recommended by the designer of your kit or plans. These particular grommets are installed in the fuselage/cabin area of the Velocity and therefore not subject to direct UV degradation. Even so, they probably won’t last forever. We molded a supply of extras and labeled and bagged them for future use. A check of the fuel system is part of the annual inspection, so their durability will be under continual scrutiny throughout the life of the aircraft.
Molded parts are something you most definitely should point out to your friends when showing off your airplane. It’s way up on the “that’s cool” scale.

![]()
Bob Hadley is the R&D manager for a California-based consumer products company. He holds a Sport Pilot certificate and a Light-Sport Repairman certificate with inspection authorization for his Jabiru J250-SP.

