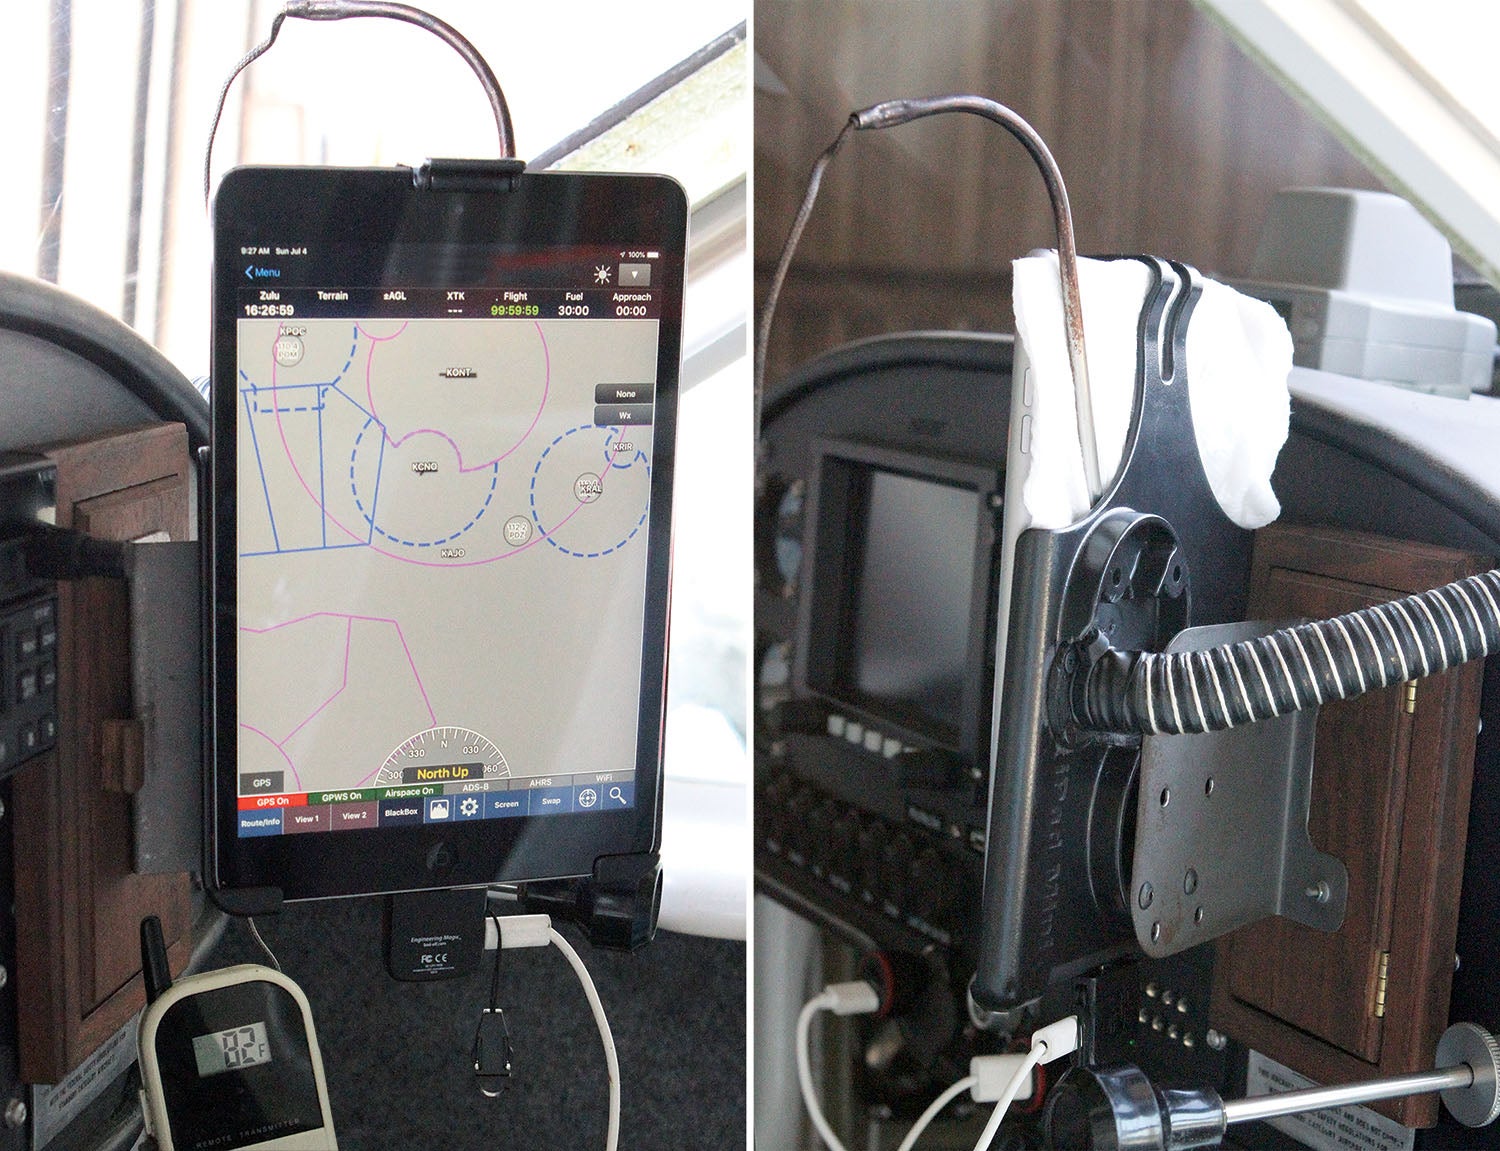
Just about every pilot I know uses an iPad or Android tablet with ForeFlight, Garmin Pilot or WingX software. In most cases it’s their primary tool for both flight planning and navigation. I’m no different. Even though my GRT Avionics flight display has flight planning and GPS navigation, the convenience of having an iPad mini (an older version 2 model) running WingX is tough to beat. A RAM holder attached to the right side of the panel, next to the radio and transponder, keeps my iPad within easy reach.
The iPad mini 2 may not be the latest and greatest, but with the addition of a plug-in Bad Elf GPS receiver and a Stratux dual-band ADS-B receiver—which talks to the iPad via Wi-Fi—it fulfills the needs of basic VFR flying and then some.
If there’s a downside, it’s that the iPad runs hot. That’s not surprising considering how hard the processor must be working with WingX, Bad Elf and Stratux all going at once. I searched and found that Apple recommends operating at temperatures between 32° and 95° F. Additional searches found information that suggests iPads automatically shut down if they get above 116° F. While mine has never shut down, many pilots and boat operators have reported shutdowns due to overheating. So it is definitely a cause for concern and worth trying to get it to run a bit cooler.
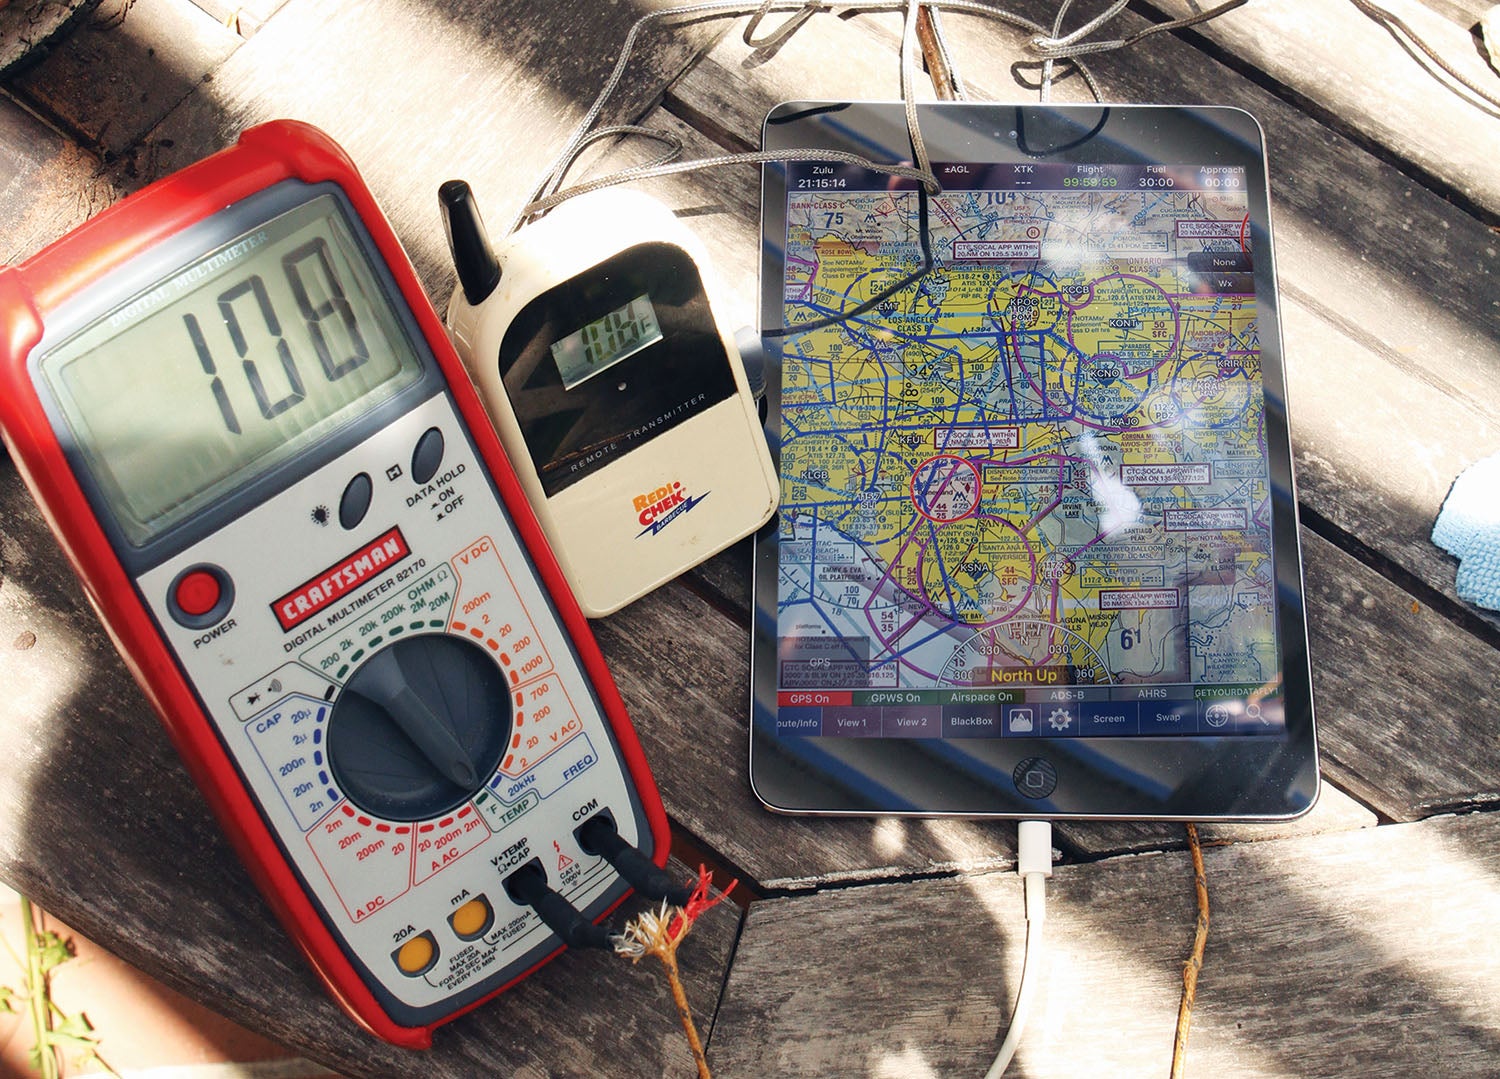
To find out exactly how hot my iPad was getting, I set it in the shade on the back porch and let it run with Wi-Fi and GPS connected (as well as being charged via the GPS pass-through port). I taped a couple of probes to the back and waited for the temperature to peak. After about 30 minutes it hit 108° F and stayed there.
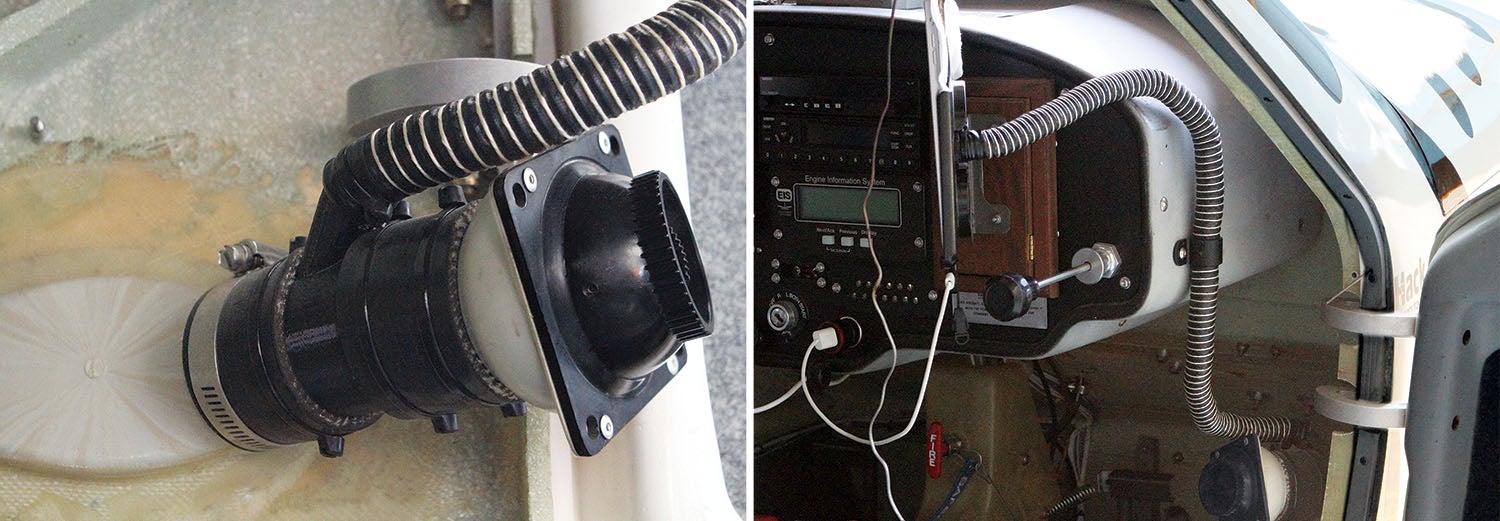
The obvious choice for cooling a tablet is an aftermarket chiller that clips on the back. These typically consist of a plastic case with one or more miniature fans to dissipate heat. The ones I looked at were either too expensive, too bulky or both. With nothing jumping out as being particularly suitable, it occurred to me that I might divert some airflow from a cabin vent. My theory was that, at 115 knots, both the volume and velocity of air available for chilling the iPad would be way more than a couple of piddly fans clipped to the back of the tablet.
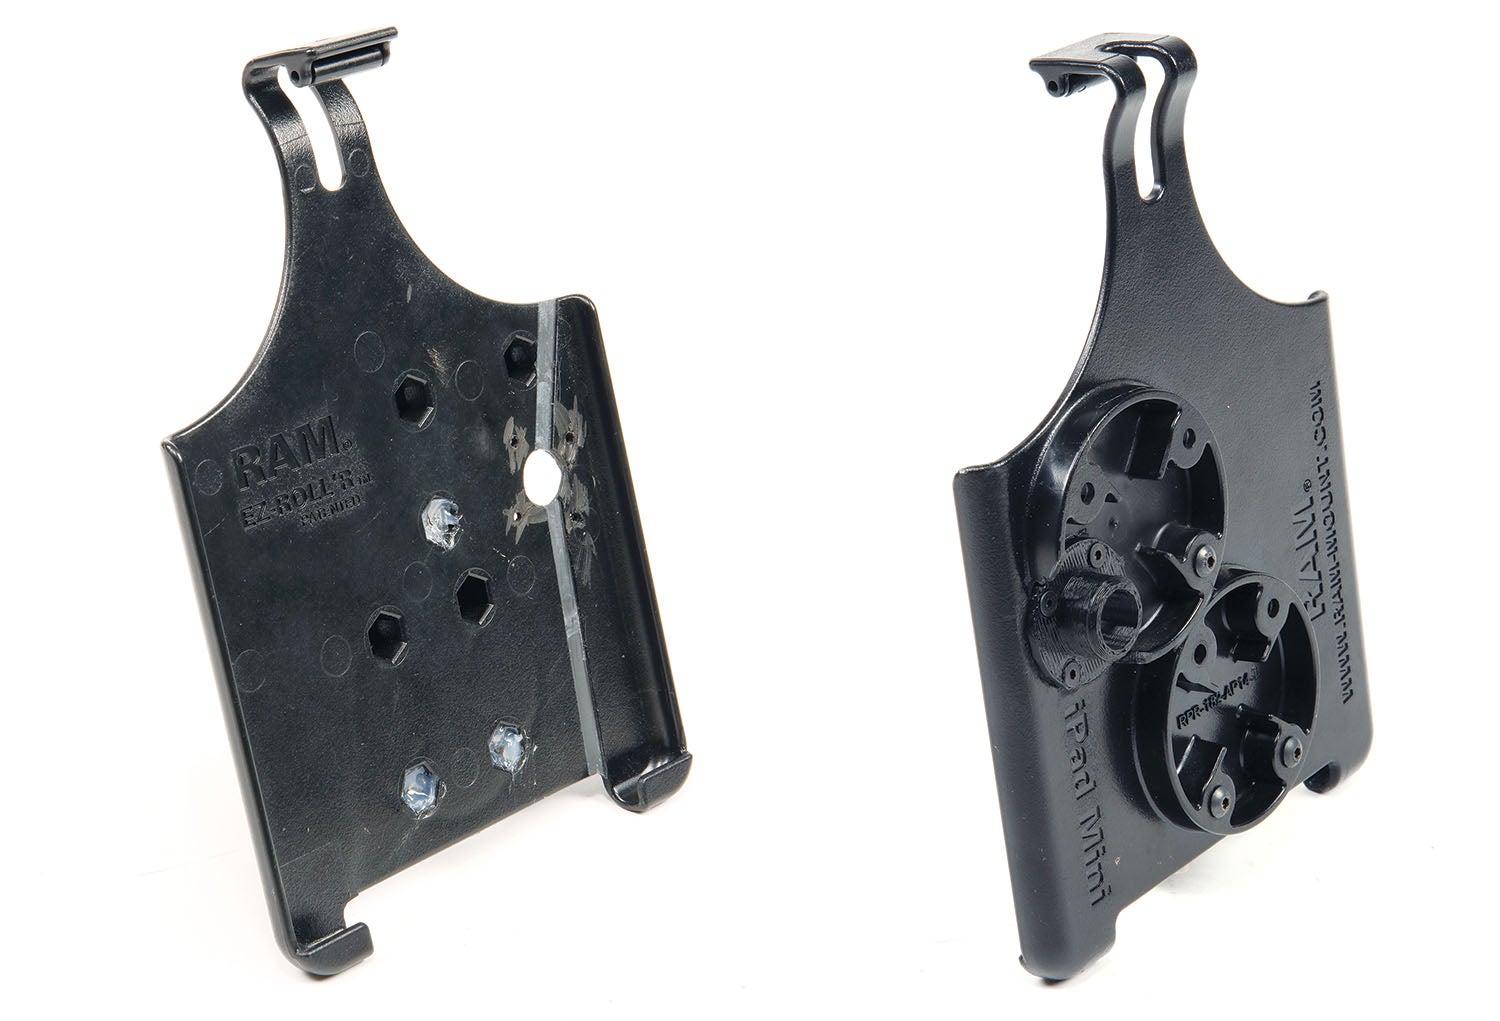

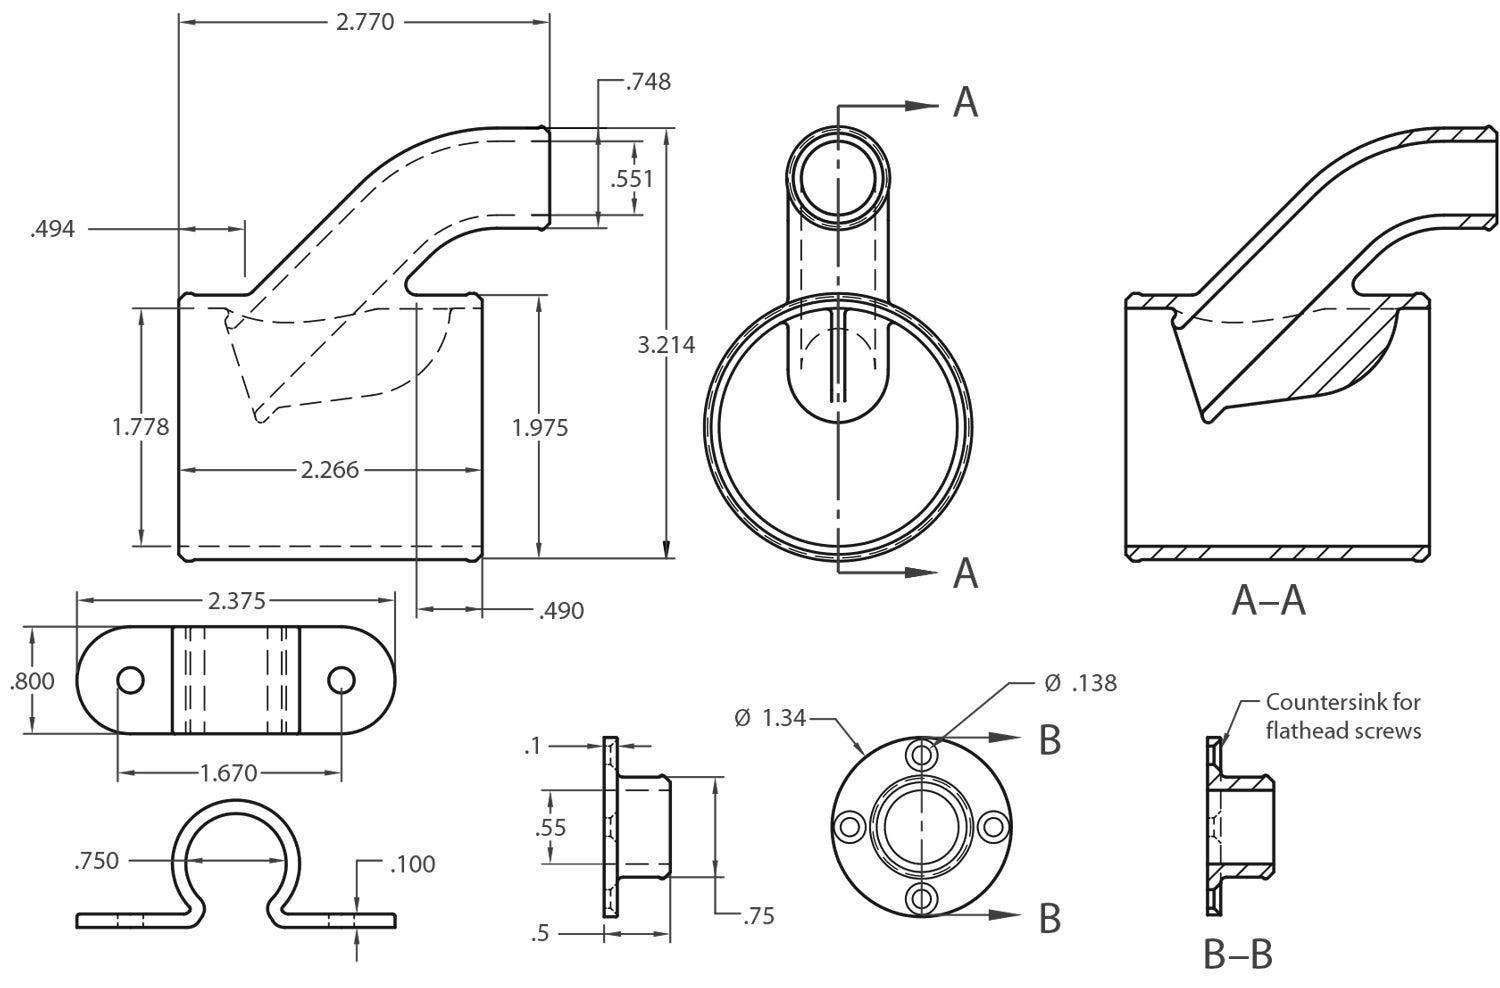
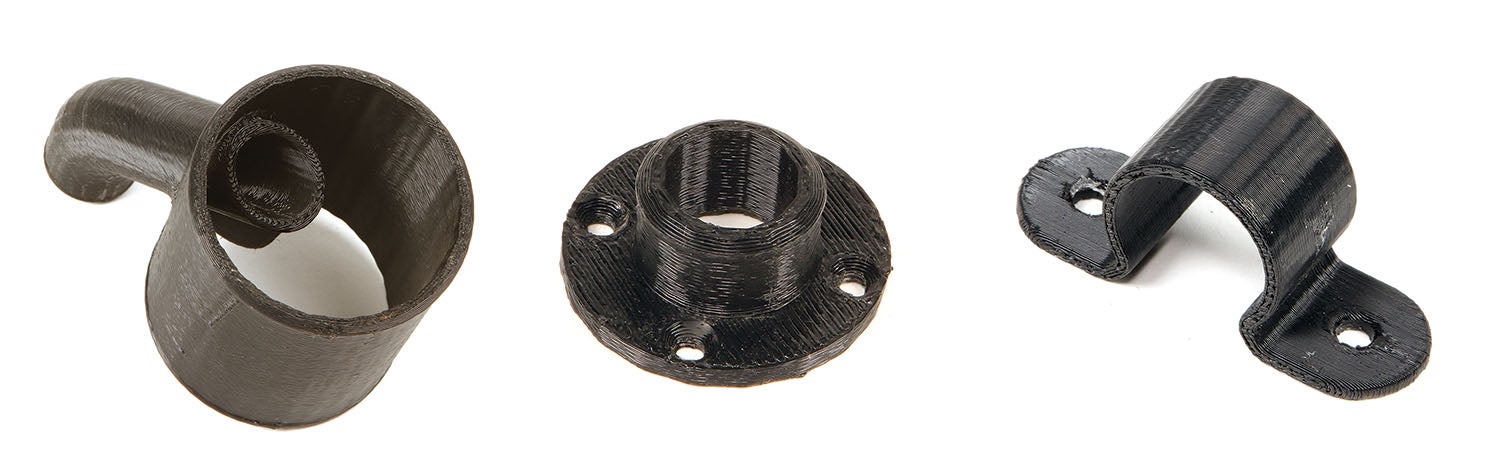
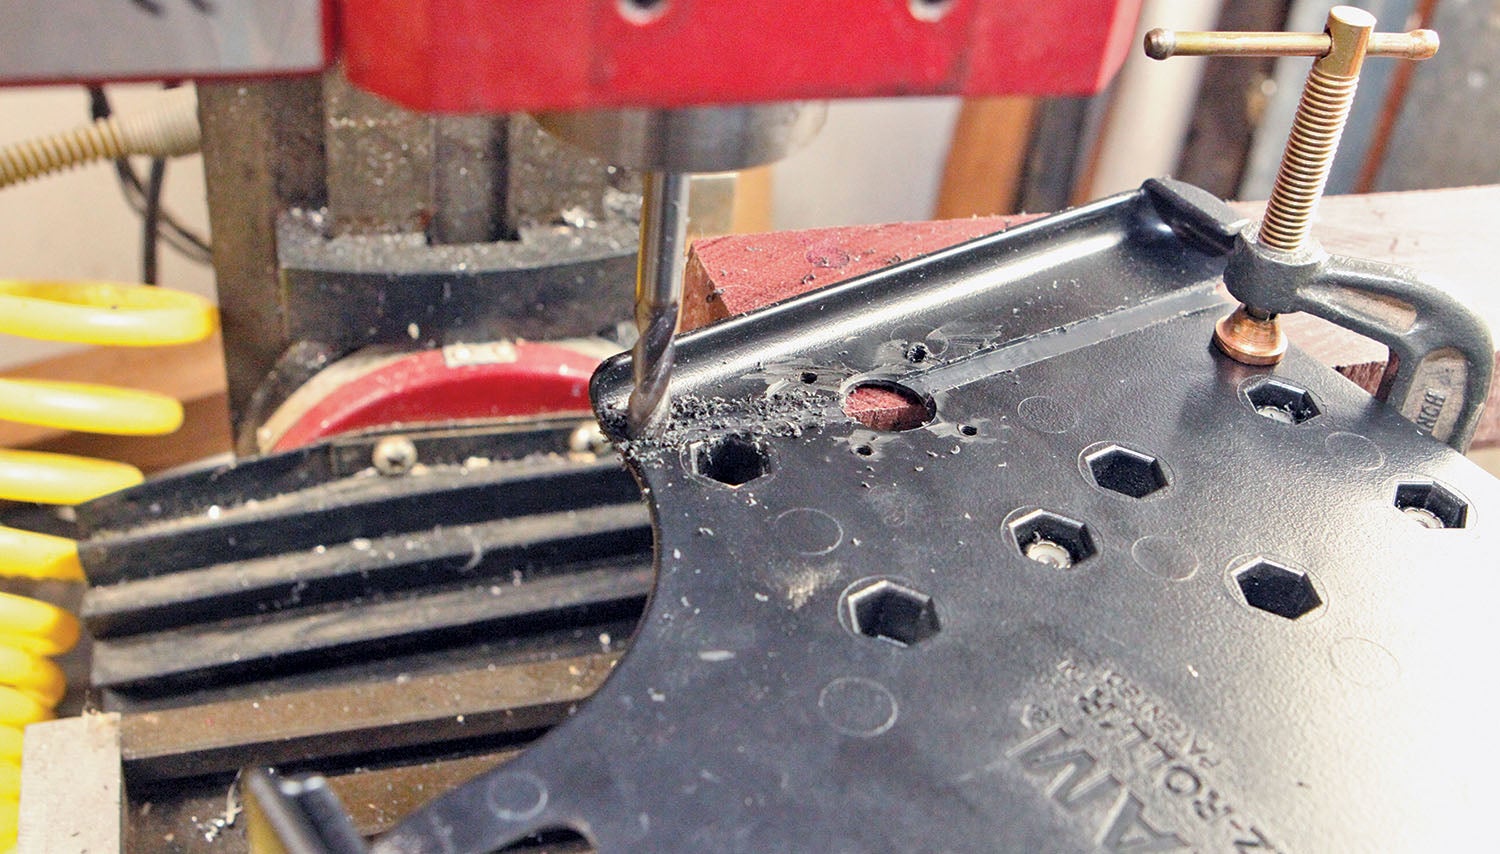
With that in mind, I came up with a simple system that consists of a diverter coupling, a flange connector and about four feet of 3/4-inch CEET/SCAT-type hose. I modeled both the diverter and flange using Solid Edge design software and printed the parts out of nylon on a 3D printer. I drilled a 3/4-inch hole in the RAM holder and tapped screw holes for the flange coupler. I then milled two grooves in the RAM holder so the incoming air could escape across the back of the iPad.
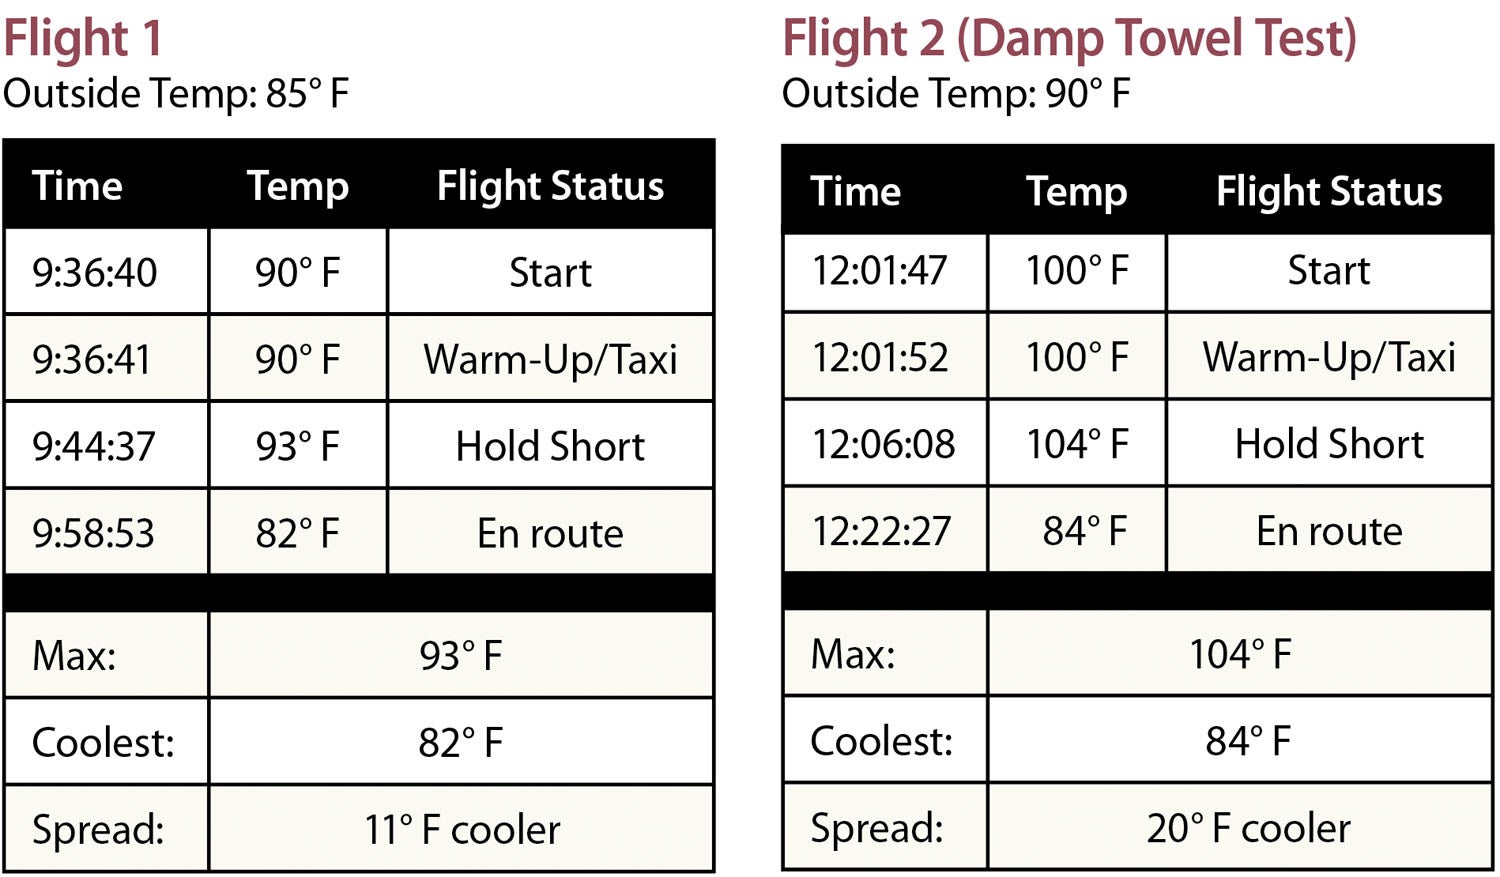
I did two test flights to measure how much cooling effect the system had on the iPad. On both flights, during warm-up and taxi, not much cooling occurred, but once in the air and cruising, the temperature dropped significantly. On the second flight, I tested the effect of adding a damp paper towel between the iPad and RAM holder. The idea was to see how much the swamp-cooler effect would improve the cooling. It seemed to work, but given the effectiveness of the system without it, it’s not something I would do except maybe in a heat-wave circumstance.
That’s it for now. Time to get back in the shop and make some chips!


Bob,
I use a simpler cooling solution in my Cessna. Since it has the ‘juice can’ vents in the wing root, I position it to blow air on my android tablet. But I improve the cooling by putting a thin aluminum sheet under the tablet, full width, but extend it about 2 inches past the top. I bend the extended part downward at about a 45-90 degrees. I then cut slits from the top, about 1 inch wide, to get 6 ‘tabs’. I twist these tabs about 45 degrees to have the air past between the tabs.
My tablet stays nicely cool.
There might be a problem with the STL that the article links to. I downloaded them and when I went into Cura to slice them for printing. Two of the objects showed up so small I thought there was nothing there. The other part (I Pad Scat hose to mount flange 3D print) loaded several sizes too large. I have done lots of printing from downloaded stl files and have never experienced an issue such as this.
The download now includes Bob’s files with SI dimensions so that CURA can import them properly.
Sorry to hear you had a problem with the files.
I was able to import them into Solid Edge and they scaled correctly.
It could be the CURA software is defaulting to metric, which would make the parts appear to be miniature.
I should have noted the files need to be opened with English units.
If that is not the problem you’re having, let me know and I will see about having to have the website post some alternative formats that should work.
Sincerely,
Bob
Comments are closed.