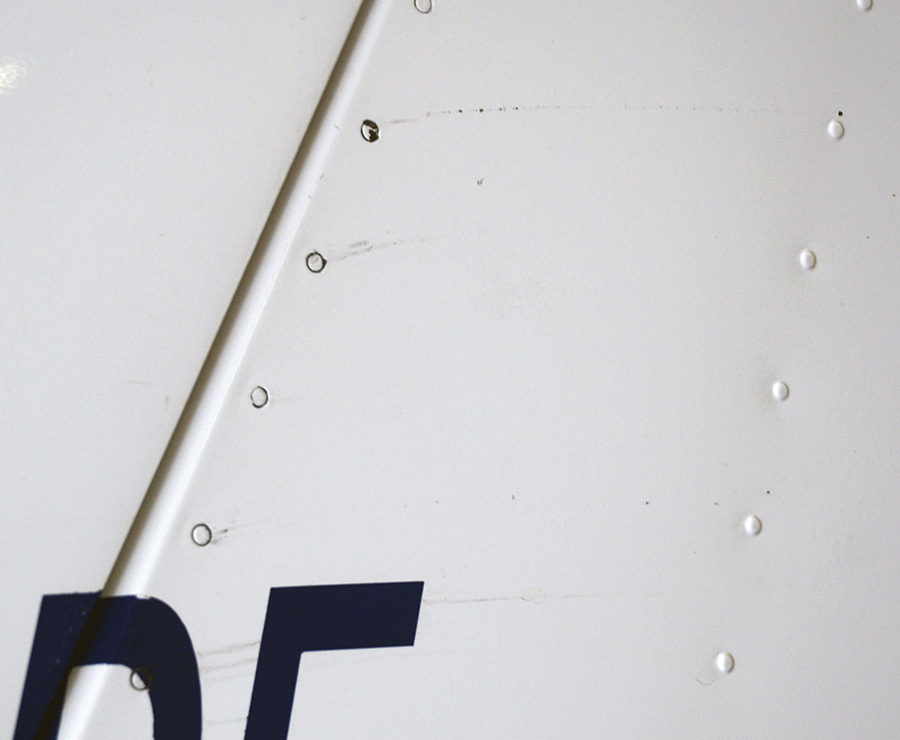
Black rings around the rivet heads and trails of black aluminum oxide indicate smoking rivets. These need to be replaced as soon as possible.
Smoking is bad for your airplane, especially when it is the rivets that are smoking. Other kinds of smoking have their own problems, but we’ll leave that for another day. Loose rivets tend to smoke—in other words leave telltale black rings around their heads and faint trails of black dust (aluminum oxide) streaming behind them. Look for these signs when you wash your plane. They can be easy to miss during a quick preflight walk around.
When rivets smoke, it means that they are loose in their holes. Sometimes not very loose, but enough to allow a little moisture and a little movement to take place around the rivets in question. The resultant corrosion produces the black “smoke” we are talking about. This problem can occur anywhere aluminum skins are riveted together.
Stop Your Rivets from Smoking
Loose rivets need to be removed and replaced. If you let them go you are compromising the structural integrity of the airplane and inviting other more destructive forms of corrosion to occur. If you catch them early and the rivet holes are not very worn, it may be possible to simply clean the holes and surrounding area and replace them. If the holes are too big for a good fit on a straight replacement, then you will need to drill the holes out and replace the old rivets with oversized rivets.
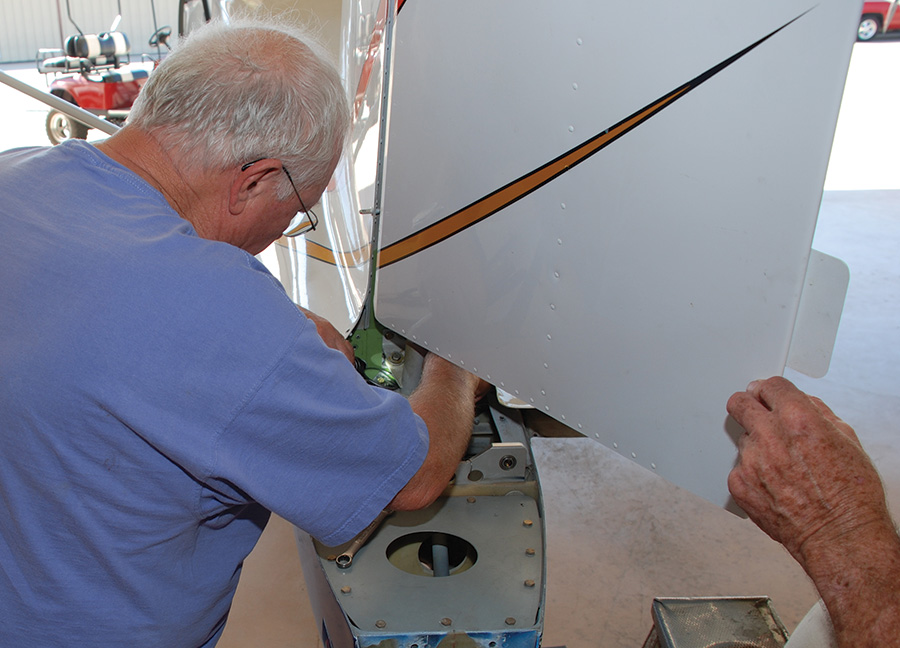
Removing the rudder, which required removing the horizontal stabilizer and elevator, too, proved to be quite a chore.
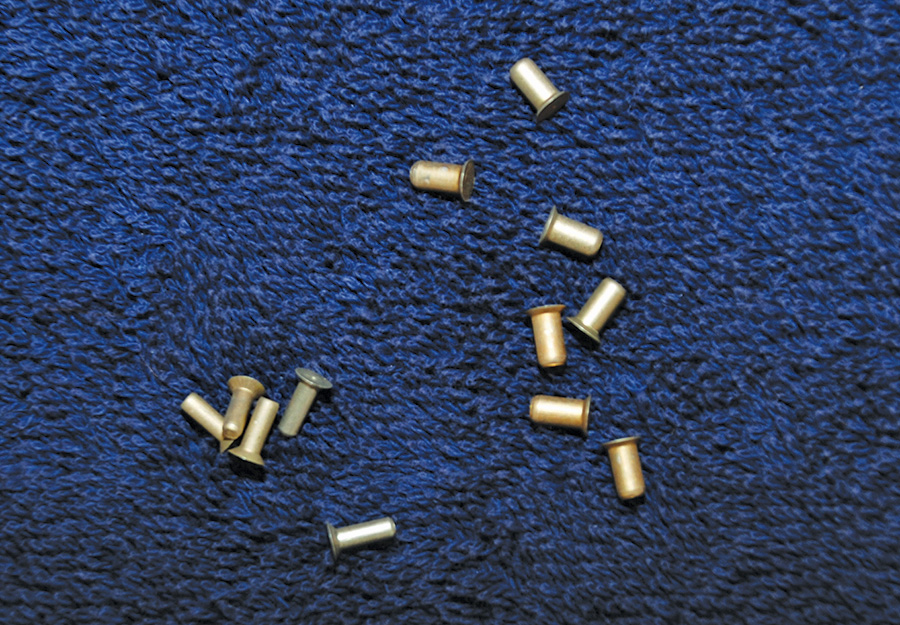
There are two basic options with oversized rivets. The first is to simply use the next larger diameter rivet, for example replace an AN426AD3-4 can be replaced with an AN426AD4-4. This is the simple solution, but cosmetically it may be unacceptable to have a line of 3/32-inch rivets interrupted by the odd 1/8-inch rivets. If that is the case, there is a solution to the problem in the form of oversized shank rivets, sometimes called “oops” rivets. They got the name from builders who messed up a rivet and had to drill the hole out oversized, or maybe accidentally drilled the hole oversized when they were trying to remove a damaged rivet. The oops rivet allows them to hide the evidence of their mistake. Similarly the transition to larger shanks can be concealed by the mechanic repairing smoking rivets by using these oversized shank rivets. The official designation for these rivets is NAS 1097 rivets. Thus a rivet with a 1/8-inch shank, but a 3/32-inch head that is -inch long would be designated NAS 1097AD4-4. Aircraft Spruce and other aviation parts vendors have these rivets in limited sizes.
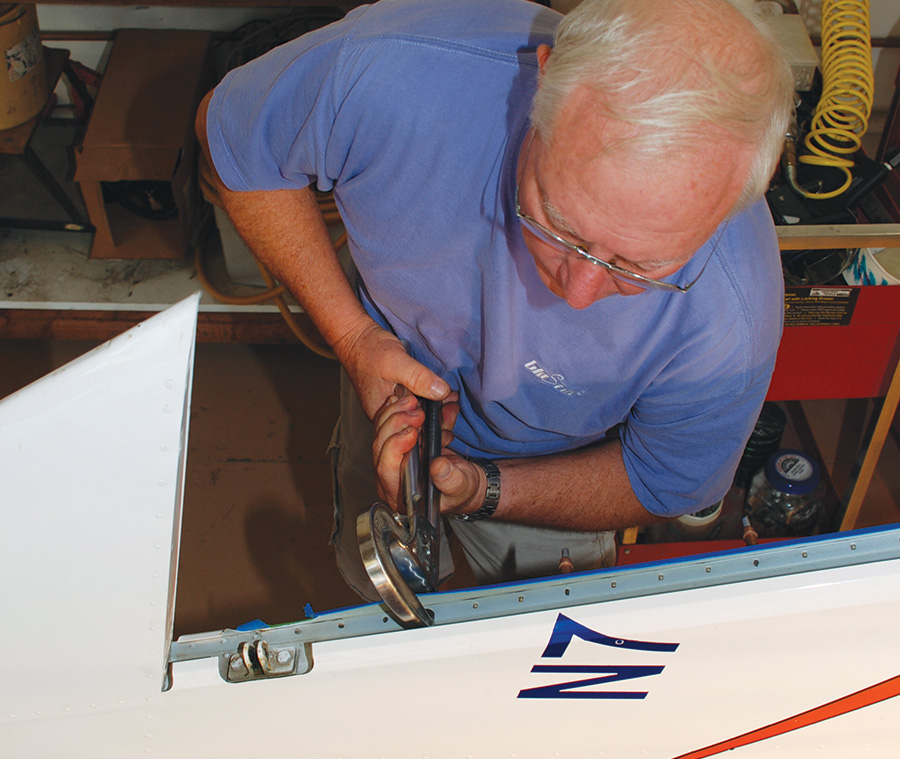
A snapping center punch does a good job of providing a good starting point for the drill bit. The factory dimple in the head of an aircraft rivet makes it easy to find the center.
Removing Loose Rivets
To gain access to the back side of the rivets in a rudder, we had to remove the rudder from the airplane. This turned out be much more work than the actual repair. Some of the most inaccessible cotter pins on the entire airplane are involved in holding the rudder and rudder cables in place. We also had to be very careful to keep the rudder cables straight during removal, so they would be free and properly positioned for reinstallation.
Proper rivet removal technique should be old news to metal airplane builders, but a quick review is still in order. Finding the center of a standard aircraft rivet is pretty easy, since they all come with a small dimple in the head, but it is a good idea to enlarge that dimple with a center punch to make sure your drill starts off correctly. The snapping center punch tool many of you already have will work great for this. Next, chuck up a sharp bit of the appropriate size: #40 for a 3/32-inch rivet. Then carefully drill through the head of the rivet until you are just about, but not quite, at the bottom of the head. Use the drill bit or a small punch to work the rivet head loose and push the shank out the other side. This is easier said than done, but with a little patience and care, you can remove a rivet cleanly. If you are nervous about doing this on your plane, set up a practice piece to reacquaint yourself with this skill.
Carefully drill out the head of each rivet to a point just short of the base of the head. Go slowly to avoid damaging the rivet hole further.
While you are working, it is a good idea to protect the immediate area around the rivets to avoid scratching paint with your tools. Some blue masking tape works well for this and is easily removed later.
With the offending rivets removed, it is time to clean up the holes and see what you have. Use a Scotch-Brite pad and a twisting motion to clean out each hole down to bare metal. A deburring tool with a countersink bit works well to spin a small piece of Scotch-Brite pad. Blow out any residue with a little compressed air and then test each hole with a new 3/32-inch rivet to see how badly the hole is oversized. If the rivet fits with only a few thousandths of an inch clearance, it is safe to replace the loose rivet with another of the same size because the squeezing or driving process will expand the shank of the new rivet to fill the hole. However, if the fit is obviously loose, you will want to drill the hole out to the next larger size and replace the old rivet with an oversized NAS rivet. If you are replacing a 3/32-inch rivet with a 1/8-inch rivet, you will typically use a #30 drill bit for the new hole. Drill and deburr the new holes as needed.
A deburring tool works well to spin a small piece of Scotch-Brite pad to clean out the old rivet holes.
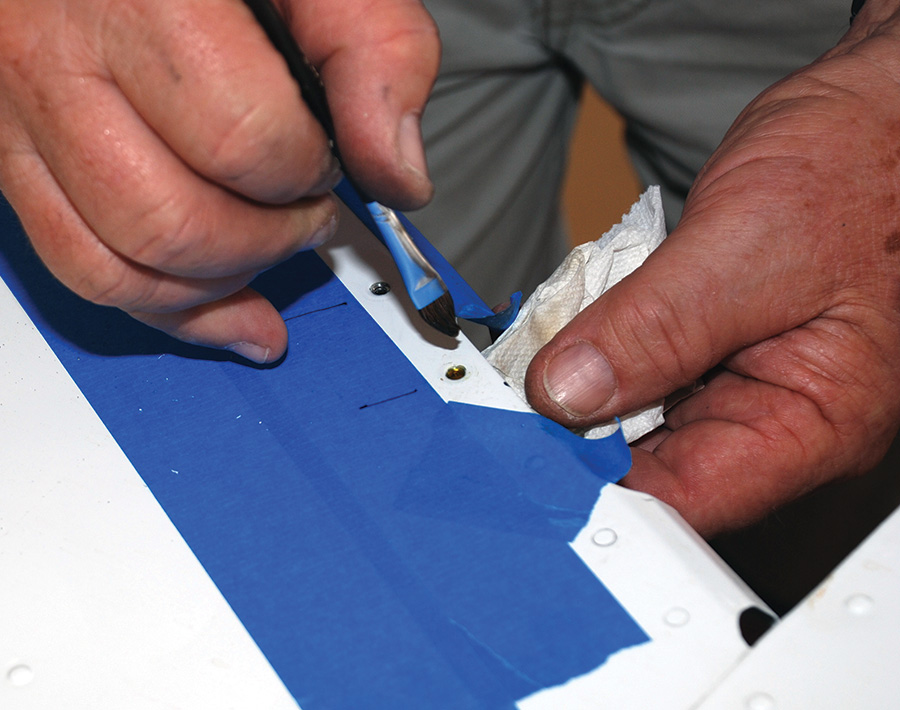
If you have some alodine left over from another project, go ahead and dab a little in each hole anywhere you see bare metal. A self-etching primer such as Mar-Hyde also works well for this. In any case, some sort of corrosion inhibitor should be applied to the bare metal to prevent new corrosion. A small brush works well to apply alodine and/or primer to the rivet hole without messing up adjacent painted surfaces.
Treat the holes with a corrosion inhibitor such as primer or alodine before installing the new rivets. A small paintbrush works well for this.
With all of the preparatory work complete, it is time to install the new rivets. Whether you can squeeze the rivets or will need to drive and buck them will depend on the access you have to both sides of the rivets. Just remember that these may look like 3/32-inch rivets, but they will drive like 1/8-inch rivets. So adjust the pressure on your rivet gun accordingly. If you have a line of more than three or four rivets, install Cleco sheet holders every third or fourth hole to keep everything in place while you are riveting. Hold the new rivets in place temporarily with blue masking tape or riveting tape if you have it.
Remember that rivets should protrude 1.5 diameters from the metal to be joined before squeezing. When the shop head is formed it should be two times the shank diameter and one-half the shank thickness. In other words a 1/8-inch rivet shop head should be -inch in diameter and 1/16-inch thick. Use a rivet gauge or calipers to be sure you are properly squeezing or bucking the new rivets.
Standard aircraft AN426 rivets are shown on left and NAS 1097 rivets are on the right. Both have the same size heads, but the NAS rivets have larger shanks.
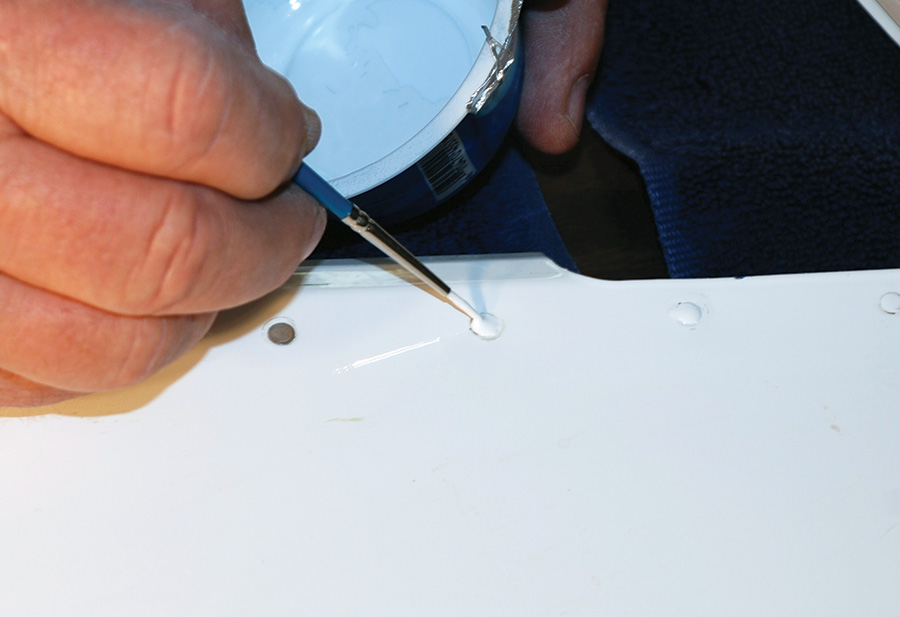
When you are all finished, you should touch up your paint to prevent corrosion of the new rivets. How you handle that depends on the area involved and the type of paint you use. We used a small paintbrush to apply paint with hardener added to the head of each rivet. The final result isn’t exactly show-plane quality, but reshooting the entire rudder on an eight-year-old plane seemed like too much trouble.
The final question, one I have yet to fully answer, is why did the rivets start smoking? We applied a small trimtab to the rudder that would tend to turn the “smoking” side into the wind slightly after some service bulletin work seemed to cause a slight out-of-trim condition in cruise flight. It seems unlikely that this could cause the problem, but there does not seem to be a more plausible explanation. Some close scrutiny and a bit of research are in order for the immediate future.

