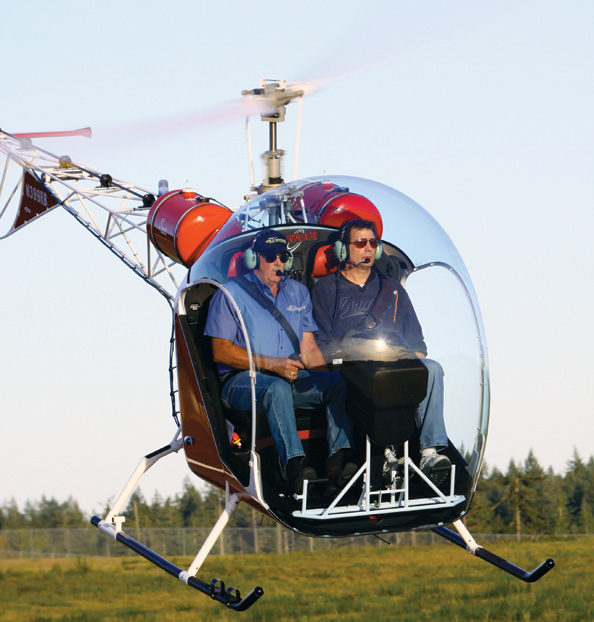
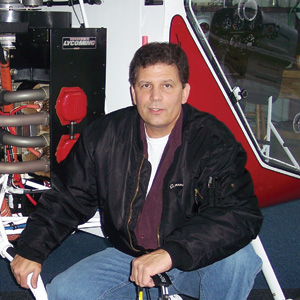
Reese is in the quality assurance business, and he has applied much of that knowledge to making his own project safer and more durable.
When your day job is ensuring the structural integrity of components for the likes of Boeing and Raytheon, it stands to reason that you would see your own building project through this prism of safety. In this line of work, perfectionist tendencies are exactly what the client would want and reward. So it is not surprising that builder Rick Reese would apply such an approach to his exemplary Safari helicopter, where the bid for perfection is evident in every detail.
Further, quality control requires scrupulous documentation of processes, and this too has influenced Reese’s take on his project. With an eye toward the future and assisting other Safari builders, his building log is so meticulous and thorough that, combined with the obviously high caliber of the building itself, the airworthiness inspection took just 45 minutes, and the log provides an in-depth view to how a show-worthy aircraft comes together.
In short, Reese has strived in all ways to do things right, even if that meant doing them more than once. And the result speaks for itself.
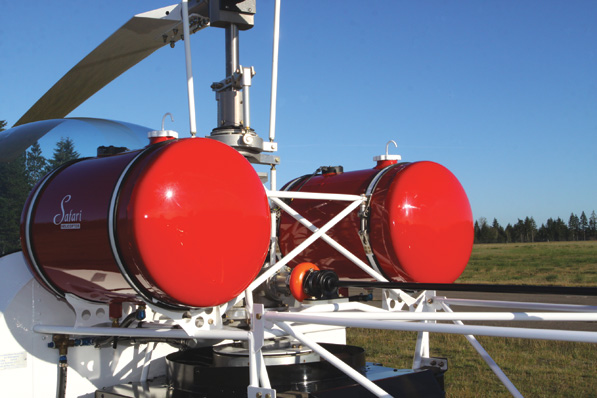
Slightly larger diameter 4130 chrome-moly tubing was used to stiffen the fuel tank bracing. The “snorkel tube” venting modification is visible on both fuel caps; it supplements the self-venting feature of the standard caps.
In the Beginning
The Safari is a longstanding two-place kit helicopter design, reminiscent of a “Baby Belle” (which was its name before it was rechristened in 1999). Formerly offered by Ace Helicopter, the kit is now sold by CHR International, Inc., which was recently acquired and is under new ownership (See sidebar below).
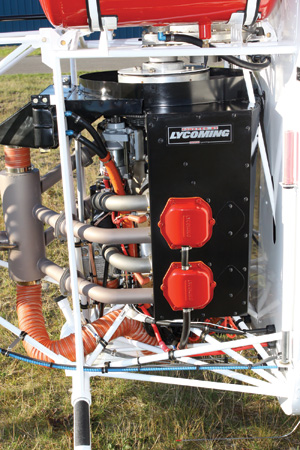
A Lycoming O-360 was chosen over the standard O-320.
Reese had always wanted to fly a helicopter, even as a kid. A former Air Force jet mechanic, Reese got his rotorcraft certificate in a Robinson R-22 and has acquired 170 hours in helicopters and just 6 hours of fixed-wing flying. When he had the wherewithal to build his own helicopter, he began to consider his options. In 2005, his first move in this direction was to purchase a CH-7 Kompress kit helicopter from a builder who had recently completed construction. The owner had caught the left skid in a low hover and rolled the heli on its side with just 2.2 hours on the Hobbs meter. Reese received all of the parts except for the engine and any damaged rotating components, and the idea was that he would disassemble it and rebuild. He soon abandoned the project, and it’s just as well. Reese’s wife had some misgivings about the Kompress’s light weight, jokingly referring to it as a “flying lawnmower.”

| Dynon EFIS-D100, XCOM 760 radio and Becker transponder were added to the stock instrument package. The panel was laser engraved after receiving a black anodize coating. | The custom leather seats after modification. The original seats were too thick and placed the pilot too far forward. The talented upholsterer was able to save the original seat covers. | The lower instrument console was widened to accept the quad gauge displaced by the Dynon unit. Digital CHT gauge and Lamar MC-10 electrical control unit annunciator lights reside below the quad gauge. |
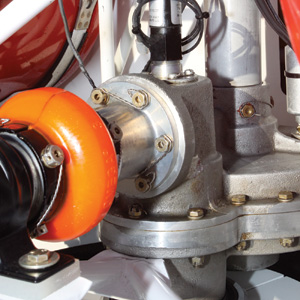
The Omega flex coupling is shown where it connects to the tail rotor output from the main transmission to the tail rotor shaft. It absorbs and damps the force applied to the tail rotor drive train.
Ready to start anew, Reese began weighing other options. There aren’t that many kit helicopters to choose from, and price was certainly among the primary considerations. Reese looked at the RotorWay, but thought the proprietary engine might make spare parts difficult to come by except from the company, whereas parts for the Lycoming O-360 are widely available. (The Safari also uses the popular Lycoming O-320.) He tried on the Helicycle, and admired its fine reputation, but as a tall guy his head hit the top of the bubble enclosure, and the cockpit was a bit narrow. He thought it might also be of limited utility, as he intends to use his helicopter as a commuter, weather permitting.
The Safari was a good fit, literally, and a fair number of them are flying, though Reese believes his is the only one in the Pacific Northwest. His home base is at Sanderson Airport in Shelton, Washington, not far from the state capital in Olympia. He also felt that CHR “was financially sound and would likely be around to support the aircraft and builders.” The company has weathered the recession in part by exporting factory-built machines overseas. Reese’s confidence in the company was reinforced when, unsolicited, the new owners sent him an upgrade kit with parts that he should replace on his airframe.
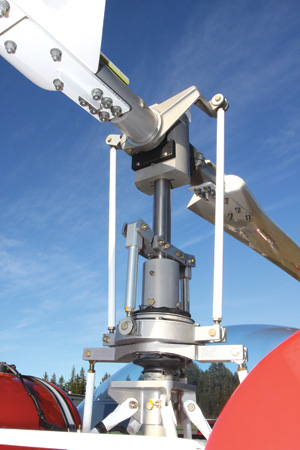
The main transmission and rotor head come preassembled from the factory. The Speedi-Sleeve modification for the main rotor shaft is now standard on all new kits.
Overview
The scope and nature of modifications that Reese has incorporated in his helicopter are too numerous to detail here, but an examination of his approach to the project offers some idea of the trouble he took to make this helicopter exactly as desired. When we first met in the fall of 2009, Reese highlighted some of the aspects that make his project unique. At the time, he was still waiting to have the company check out his ship prior to beginning Phase I flight testing.
To begin, Reese basically magnafluxed the entire airframe to check it for surface and subsurface flaws. He claimed this is “standard aircraft maintenance procedure,” though it certainly helps to have the facility and expertise at hand to do it, something most builders don’t enjoy. And given that some of the kit parts were damaged during transit, this may have seemed prudent. Even after completing this process, Reese had a helicopter expert check out the airframe before the airworthiness inspection.
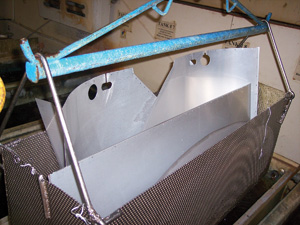
Cabin sheet-metal parts undergo the alodine process prior to receiving a primer coating. For maximum corrosion protection, all sheet-metal cabin parts received alodine, epoxy primer and a polyurethane top coat.
The aluminum skids are hard-coat anodized to prevent scratching. The electrical system had to be upgraded for the Lycoming engine, and each individual circuit terminates in a fuse block to help isolate any problems that may occur down the road. The tail rotor is a titanium unit from a New Zealand dealer to keep the overall weight down (the Safari weighs about 1000 pounds with the engine). A custom-built trailer has a mounted fixture to hold the rotors when the helicopter is in transit.
The battery is a gel-cell type. The T-shaped center console was widened slightly to accommodate a steam-gauge configuration coupled with a Dynon EFIS. The compass module for the D100 is located under the right seat to keep the cockpit tidy.
The panel is laser-engraved and the door handles have colored labels that indicate when they are securely closed. Reese’s wife has a candy company, and she ships the product in laser-etched wood boxes, so that sparked the idea for Reese to create patterns for various etching projects to be used on the helicopter. He designed his own Safari logo and it adorns the tail rotor as well as other parts on the aircraft and even the window of his pickup truck.
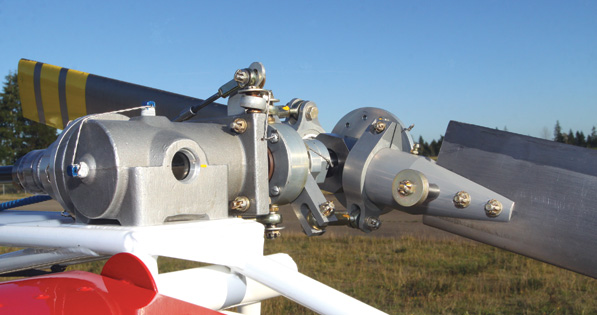
The tail rotor assembly with lightweight aftermarket titanium tail rotor blades.
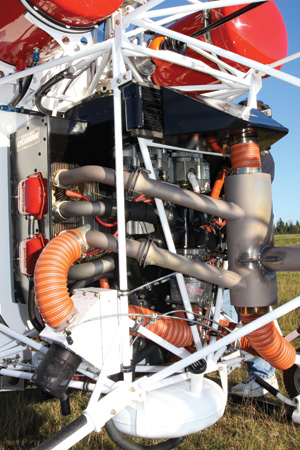
The optional carb heat system is visible in the lower left of the photo. The SCEET tube coming off the lower portion of the exhaust connects to the cabin heat valve mounted on the firewall.
The Safari’s lighting scheme includes an AeroSun LED landing light with built-in wigwag, and there’s an extra strobe mounted on the belly of the ship for increased visibility. It is offset slightly from center on the rear rib in the event that Reese decides to install a cargo hook at some later date.
The cockpit interior is custom. Reese wanted comfortable seats, so he started with thick foam, which had to be cut down because it had him sitting too high “in the bubble” and too far forward. He was able to salvage the seat covers after that misstep. Built-in custom trays slide in underneath the seats for storage. (The trays are fabricated from aluminum and don’t interfere magnetically with the Dynon electronic compass.)
The straps that secure the main fuel tanks to the airframe are similar to the type you see used on semi-tractor trailer rigs. He’s kept a few of them as backup and sold some to another Safari builder who admired the arrangement. Additional fuel may be carried in two 5-gallon “carry-alls” that can be mounted to the skids on custom trays, but this would mean flying solo, Reese said.
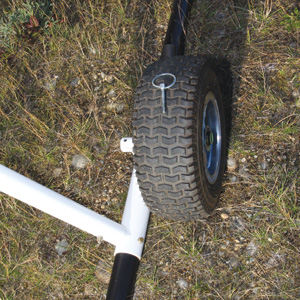
The ground-handling wheels can be locked in place for flight. A jacking handle that stows on the firewall makes it easy to manually push the ship up to crowded fuel islands if necessary.
Mod, Mod World
We caught up with Reese nearly a year later to see how things were coming along. Now that he has a bit of perspective on the project and a few hours on the helicopter, he has had the opportunity to reflect on his penchant for modifying or upgrading everything from components to processes, and we asked him which of these he considered the most significant or important on his project.
Number one on his list is the addition of an R-22 electronic throttle governor. “This upgrade is hands-down the best modification I made to the kit,” Reese said. “Anyone who has flown the Robinson R-22 knows how valuable this piece of equipment is. It not only greatly reduces pilot workload, but also tremendously increases safety. I wouldn’t fly the ship without it.” He added that rumor has it that CHR will be offering its own throttle governor soon.
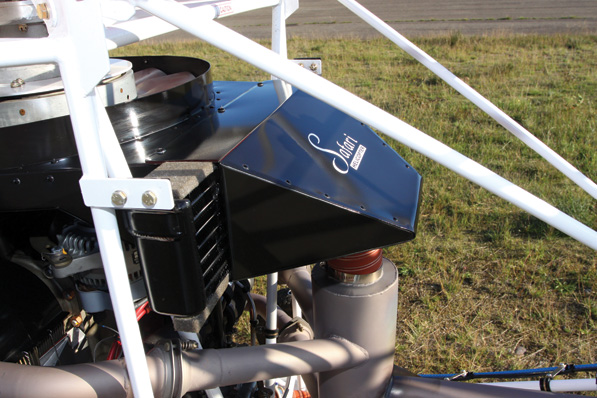
A collector attaches aft of the oil cooler to direct air from the engine-driven fan through the exhaust system for cabin heat.
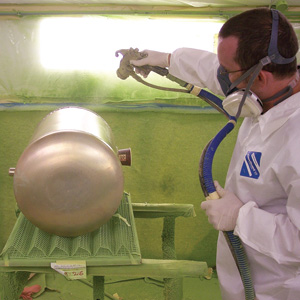
A painter at Reese’s workplace applies a MIL-PRF-23377 epoxy primer to the fuel tanks.
We mentioned the titanium tail rotor blades, which also rank near the top of Reese’s list of mods. “The titanium blades appear to significantly reduce the loads on the tail rotor gearbox since they weigh considerably less than the standard stainless-steel blades,” he said. “They also improve tail rotor response and authority.”
Another upgrade came from the factory: the Speedi-Sleeve mast. “The factory upgrade adds a steel sleeve under the main shaft bearing seal to prevent sand and dirt from scoring and eroding the titanium main shaft,” Reese said.
Remember those clamps for the fuel tanks? The T-Bolt straps were a custom-built upgrade Reese had manufactured by Clampco Products, Inc. of Wadsworth, Ohio (www.clampco.com). He had to order a production run of 20 of them to get what he wanted and keep the per-unit cost down—yet another example of going the distance to get things right.
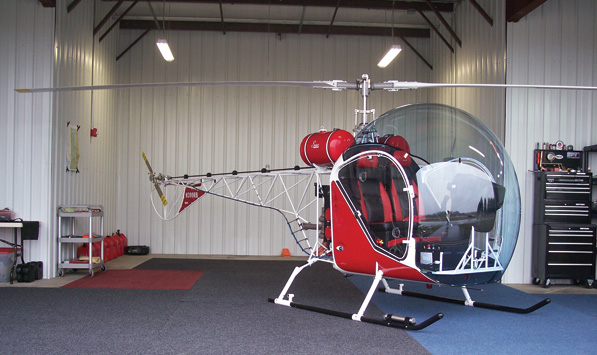
When not at the owner’s shop (equipped with a helipad), the ship is hangared at Sanderson Field.
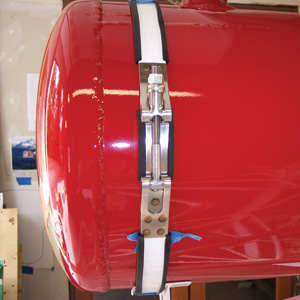
A specially designed T-bolt strap securely attaches each 14-gallon fuel tank.
Many builders opt for an electronic ignition, and so did Reese. Only next time, he’d do things differently. “I kept one standard magneto and replaced the other one with a Light Speed Engineering Plasma III electronic ignition,” he said. “The engine starts very easily and runs smoothly. But if I had it to do again, I’d replace both magnetos with electronic ignition.”
Another crucial process, Reese said, was to ceramic coat the exhaust system. “The special coating not only looks good, but it also reduces the cylinder-head temp.” He advises builders to be careful, though, when choosing a coating, as not all of them can withstand high temperatures. “I’m lucky so far that the Performance Coatings ceramic coat has held up very well.”
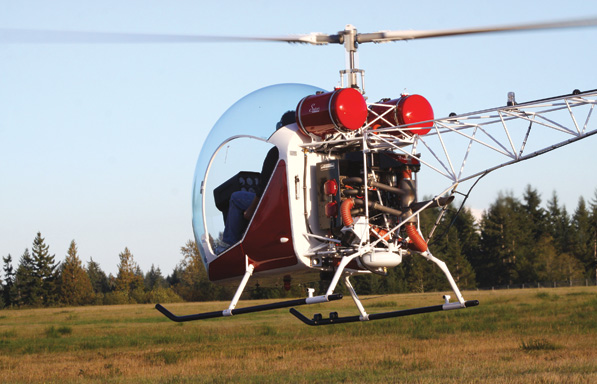
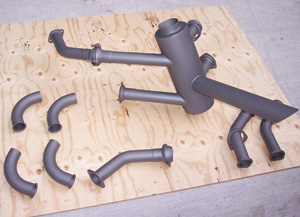
The factory-supplied stainless-steel exhaust system was given a ceramic coating to help keep the cylinder head temps low. A digital CHT gauge monitors and reports the temp of each cylinder.
Skids potentially take a lot of abuse, so, as mentioned, Reese did an anodized hard coating on his helicopter’s landing gear. “The coating is nearly indestructible and really takes a beating,” he said. “If you apply this coating, you won’t wince every time someone stands on your skids.” By the way, ground-handling wheels are standard on each kit, and they allow the helicopter to be “hand-trucked” short distances to “avoid blasting other pilots” in the vicinity, Reese said.
He also learned that precipitation can take its toll on some surfaces. The painted tip stripes on the tail rotor blades have been eroded by rain, something one just has to come to terms with living in Washington state. (Blade tape was applied to the leading edge of the main rotors so they are protected, but the manufacturer of the titanium tail rotor didn’t recommend this.) It wouldn’t be surprising if he came up with some solution eventually to alleviate the problem.

Flight-control components receive fluorescent Zyglo non-destructive inspection (NDI) to reveal any flaws.
Last, but not least, Reese mentioned the importance of “NDIing” (non-destructive inspection) the frame and shot-peening the flight controls. This isn’t really an upgrade as much as it is a precaution, and one that “does provide some peace of mind to the builder,” Reese said. “I had each weld of the entire frame magnafluxed, and there were no cracks in the TIG-welded frame, which is quite a testament to the skill of the factory welder. I think that other builders can rest assured that their factory quickbuild frame was welded properly.” Call it taking one for the team.
He also went above and beyond in testing the flight controls. “I liquid-penetrant (Zylgo) inspected all of the flight-control components and had them shot-peened for increased fatigue resistance,” he said. If you believe you’re only going to build one helicopter in your life, you might as well go all the way.
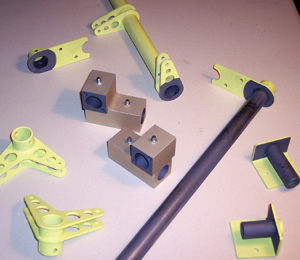
These are the flight controls after priming. The gray coating is a special dry film lubricant, applied in areas of metal-to-metal contact to decrease friction.
Reese has now had some time to reflect on the most difficult aspect of building, other than simply finding the time to do it, and he arrived at an unexpected conclusion. “The thing I found most surprising is the degree of difficulty in actually building the kit,” he said. “I expected that building a helicopter would be a complex and tedious undertaking. In practice, I found it much easier than expected. All of the complicated rotating parts come prefabricated from the factory. You do have to install the transmission and mount the rotor blades, but each step is explained in the manual.” One reason Reese kept such good logs was that the original builder manual was lacking, and he had received a lot of help from another builder’s log during his project. But many of the factory manuals have been updated recently, he said, and “the factory is just a phone call away if you need assistance.”
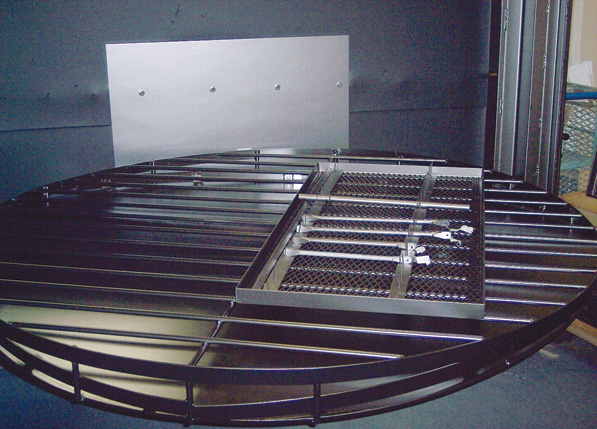
Parts are positioned in an automated shot-peening machine, which propels small steel pellets, at a controlled velocity, at the parts’ surfaces. These small pieces of “shot” induce a beneficial compressive residual stress that combats the formation of fatigue cracks.
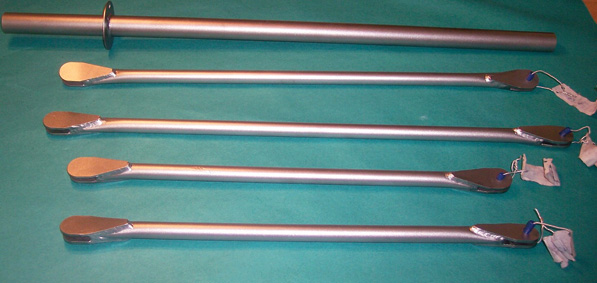
The parts after shot-peening. The small steel pellets also blend any surface scratches that could act as stress risers.
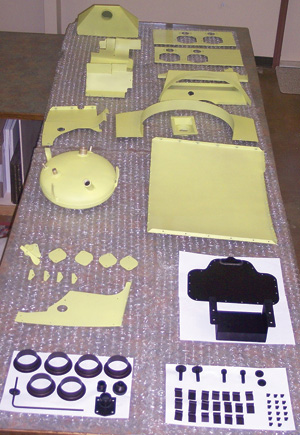
Parts are shown after priming. Those in the foreground have been black anodized.
This is an interesting perspective from someone whose hangar/shop is so well equipped and organized that it brings to mind a hospital operating theatre. Indeed, Reese’s approach does seem to have been almost surgical at times. For example, being new to the brake, he made cardboard templates for any piece of metal before bending it to see if it would fit, and he has kept those templates with future builders in mind. (If only one could count on all surgeons to be as conscientious.) Even with this dedication to craftsmanship, and the extra time investment it required, it’s notable that Reese describes the build as less challenging than he initially believed it would be.
Looking Ahead
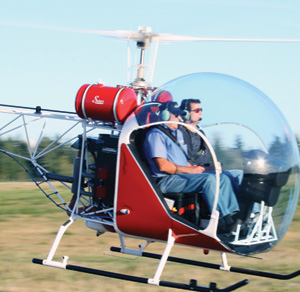
As this issue was going to press, flight-testing was ongoing as Reese continues to become familiar with the performance of his new helicopter. He mentioned that he has thought about becoming a dealer for the Safari kit if the opportunity presents itself, and he’d likely be good at it. The experience of building the helicopter must have been rewarding, because he’s not chastened in the least about the prospect of building again and says he “really misses it.” Geared up with the tools and equipment, a great workspace, access to advanced safety processes and newly acquired knowledge, why not? Van’s Aircraft is such a big presence in the Pacific Northwest that it seems a probable candidate for consideration, and it was mentioned as a contender. The only problem is that Reese says he’s not that enamored of fixed-wing aircraft. Spoken like an inveterate helicopter enthusiast, and a fastidious one at that.
For more information on the Safari, call 850/482-4141 or visit www.safarihelicopter.com. Also see Reese’s online builder’s log.

