Blocking and roughing are important skills for transforming a flat sheet of metal into a compound shape. This month, I’ll use these techniques to form some basic and not-so-basic shapes, including a teardrop, a classic bowl, and a headrest fairing.
Layout and Forming Tools
Here are the supplies you’ll need for layout: permanent markers in several different colors, pencils, a sheet-metal radius gauge, craft scissors, and chipboard. I use lightweight chipboard for patterns, as it is inexpensive, easy to cut, and has enough body to hold its shape, once it is cut. I prefer to cut out the patterns using tin snips; while craft scissors work, I like the heft tin snips offer.
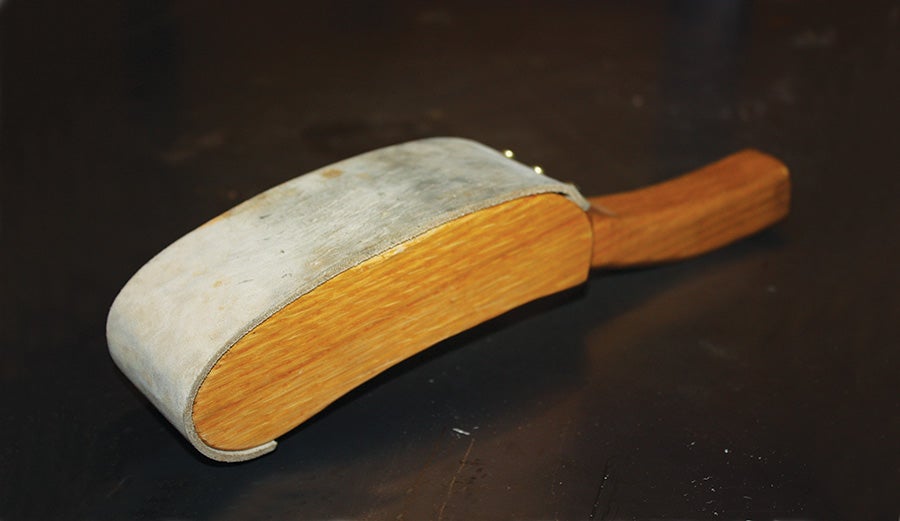
The slap hammer is made from hardwood and the face of the hammer is covered with a thin layer of leather.
You’ll need the following tools for forming: an assortment of mallets, a sand/shot bag, forming heads, an English wheel, and a hand-operated shrinking machine. You’ll also need a set of oxygen and acetylene tanks, regulators, a rosebud torch, aviation/tin snips, electric shears or a jigsaw, a throatless shear, and C-clamps.

A sheet-metal radius gauge helps keep the radius uniform on each part.
Cutting the Basic Shapes
The first step is to make patterns of the parts from chipboard. I transfer these patterns to 3003-H14, 0.063-inch-thick sheet aluminum with a permanent marker. Once I transfer the patterns, I rough-cut the shapes using electric shears or a jigsaw. Whenever possible, I use the straight, factory edges of the sheet aluminum to minimize the amount of cutting with shears or a jigsaw.
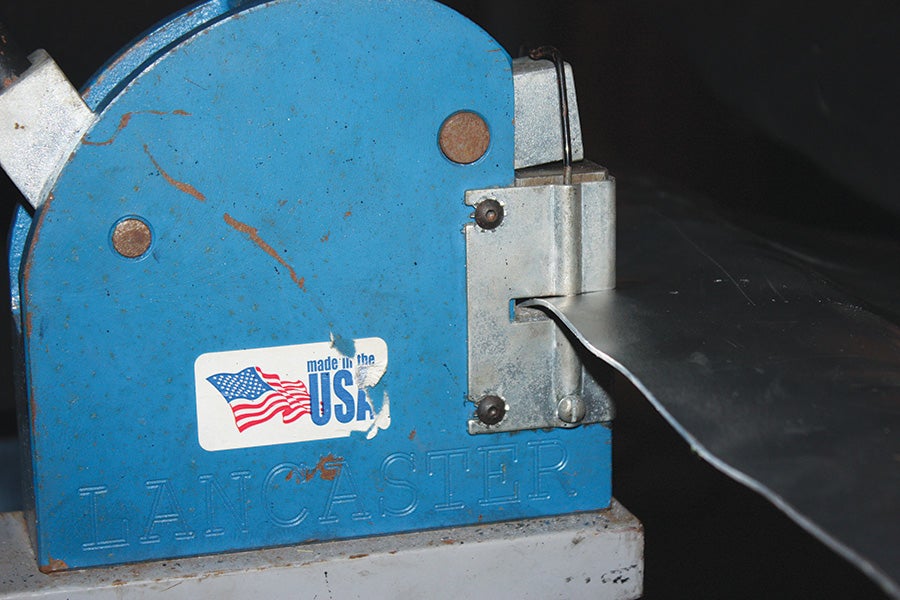
For final trimming, I use a Beverly B2 throatless shear. I cannot accurately cut the shapes using only electric shears. The throatless shear allows me to cut straight and curved lines with a high level of accuracy. Once I have cut the shapes out of aluminum, I use a file to remove any burrs and sharp edges.
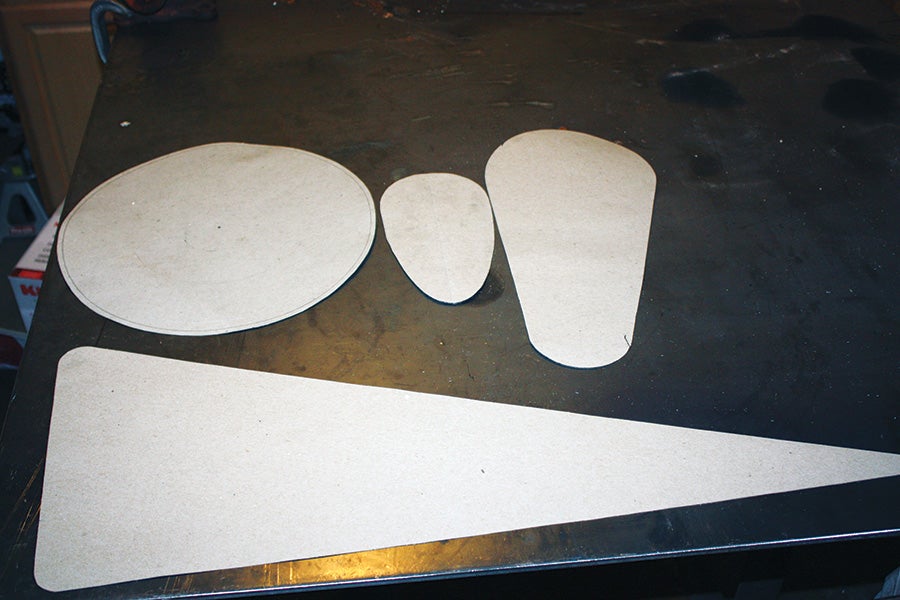
Chipboard patterns are transferred to sheet aluminum for rough cutting with a jigsaw or electric shears.
Annealing the Aluminum
The final preparation step is to anneal the aluminum. This is a simple process that softens the aluminum and makes it easier to work with. When supplied from the manufacturer, 3003-H14 aluminum is half-hard; it needs to be annealed to a dead-soft condition for forming.
Annealing aluminum is not difficult; however, it does take a bit of practice. You need to heat the material with an oxygen-and-acetylene welding outfit. If you’re not familiar with this equipment, seek certified training to learn proper techniques and safety procedures. Another option is to attend a gas-welding workshop at EAA AirVenture. This is a great way to get hands-on training and learn how to do things right.

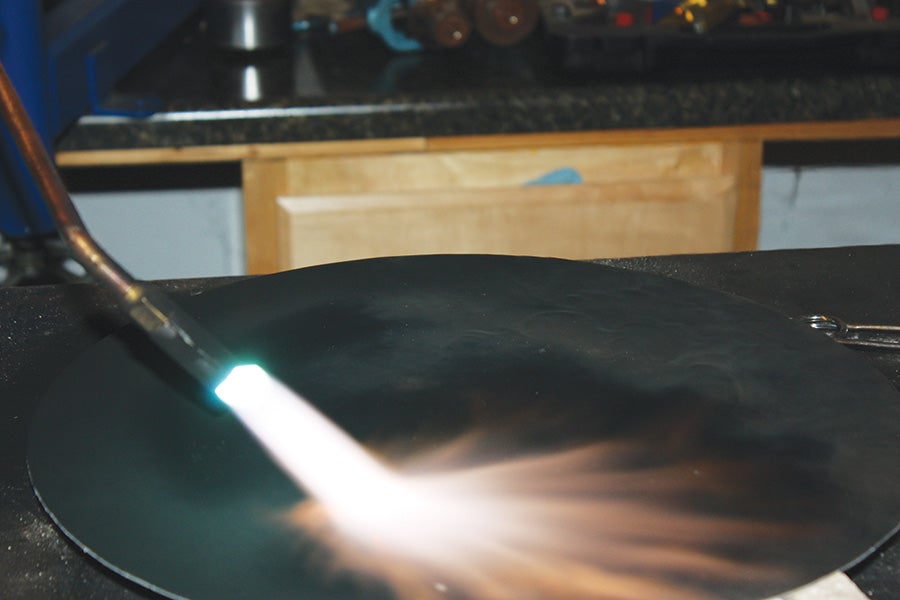
During annealing, aluminum is covered with carbon from the acetylene-rich flame.
When annealing aluminum, it’s necessary to raise the metal shapes off the table. This concentrates the heat on the aluminum only. I use scrap angle iron on my fabrication table for this process. Using an acetylene-rich flame, I lightly coat the entire shape with acetylene carbon. This carbon coating provides a means of identification, once the aluminum is annealed. Next, I set a neutral flame and “burn off” the areas covered in carbon. I keep the torch moving at this point; aluminum anneals at about 800° F and melts at around 1000° F. As you can imagine, if the torch stays in one area too long, you will have molten aluminum, rather than annealed aluminum.
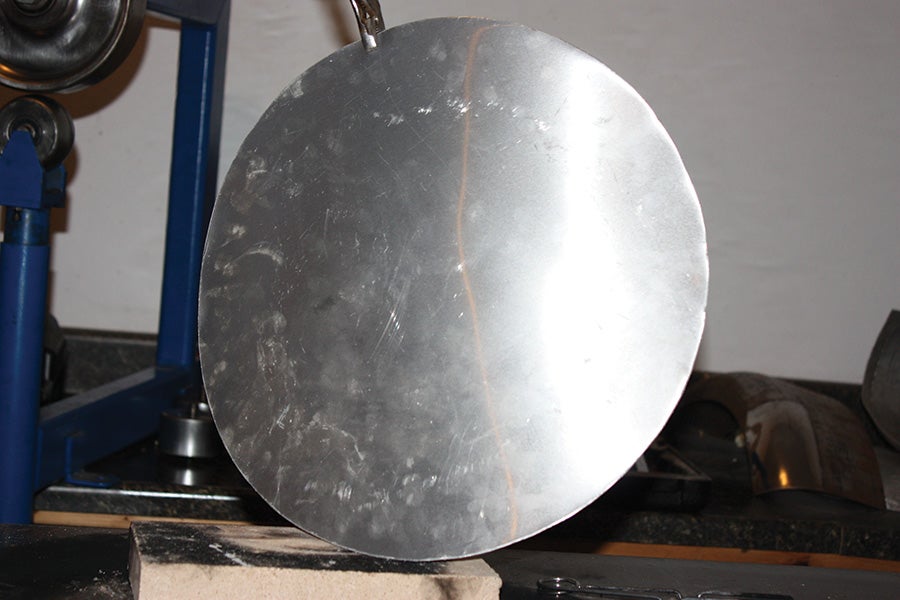
A neutral flame is used to burn the carbon off the aluminum. Once the carbon has burned-off completely at around 800° F, the aluminum is annealed.
Once I clean off the soot with a neutral flame, the aluminum is annealed. It takes about 45 minutes for the aluminum to cool naturally, or it can be quenched with compressed air or water. With this alloy of aluminum, either technique will work without harming the material. For this demonstration, I quenched the aluminum with water.
After 3003-H14 aluminum is quenched, it becomes dead-soft and is no longer a half-hard alloy. This makes the material extremely easy to work by hand.
Basic Shaping Technique
For the pieces shown in this article, I used a mallet to create a deep dome and the English wheel to smooth the work. I used either a hand-operated shrinking machine or a soft-faced slap hammer and post dolly to shrink the edges and to remove excess material caused by doming. To keep the radius uniform on each part, I used a sheet-metal radius gauge.
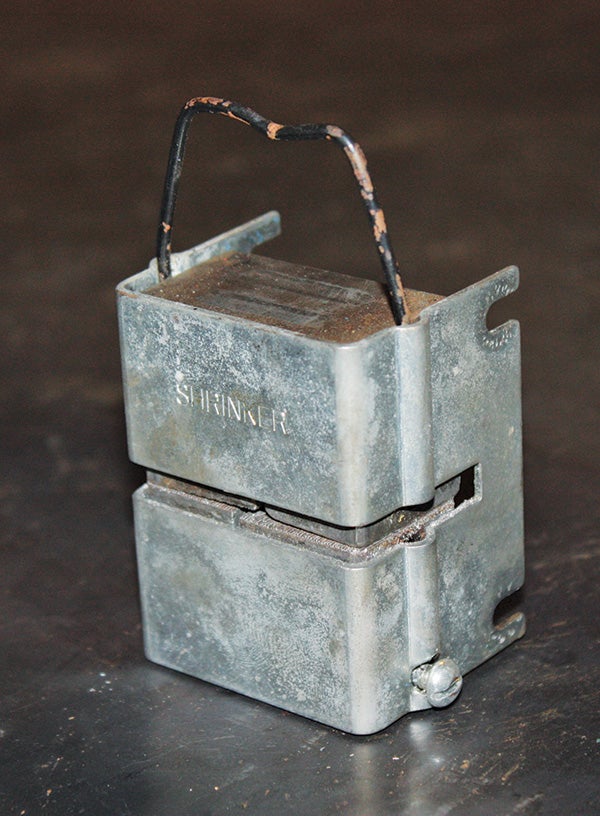
The shrinking cartridge from a hand shrinker/stretcher. The jaws push down and together to shrink the material.
You may notice I’m not using a buck or form to shape the material. At this point, I’m just demonstrating the fundamental skills and techniques required to make a finished part. I’ll cover bucks and forms in detail in a future article.
Forming a Teardrop
Imagine I’m making a blister for a round engine cowling or perhaps a cover for an aileron bellcrank and cable. I choose a low-crown, 1.5-inch-radius mallet to work this piece into the sandbag. When I start to hammer the shape into the bag, the metal starts to curl up from front-to-back and top-to-bottom. At this stage of the game, maintaining control and overall good shape is imperative. If I let this curling get out of control, it will work me to death!
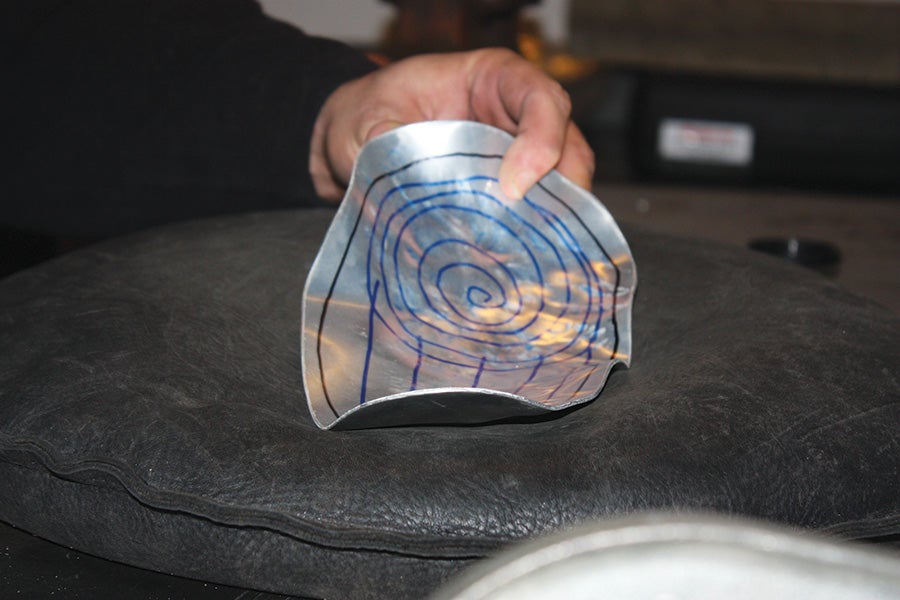
When working on a teardrop, I identify my “do-not-hit” zone with black permanent marker. I draw my spiral hammer pattern with blue permanent marker. I also draw a black line surrounding the perimeter of the part; this denotes another do-not-hit zone. This is the section of the part that will ultimately need to be shrunk.

The small teardrop-shaped pattern is traced onto 3003-H14 sheet aluminum.

A Beverly Model B2 throatless shear is used to cut the final shapes out of sheet aluminum.
How do you know that the edges need to be shrunk? You’ll see ripples or a potato chip effect. The areas with ripples and the potato chip effect are there for you to shrink.

The teardrop shape with blocking pattern and do-not-hit zone.
At the roughing stage it is normal for a piece of aluminum to curl up from top-to-bottom and front-to-back.

The roughly-shaped teardrop. Notice the hammer pattern in blue and the do-not-hit zone in black.
You can shrink the edges with a hand-operated shrinking machine or a soft-faced slap hammer over a post dolly. A soft-faced hammer is made from hardwood like maple and the broad face is covered by leather to provide a soft surface. The post dolly is made from steel and provides a very hard surface.
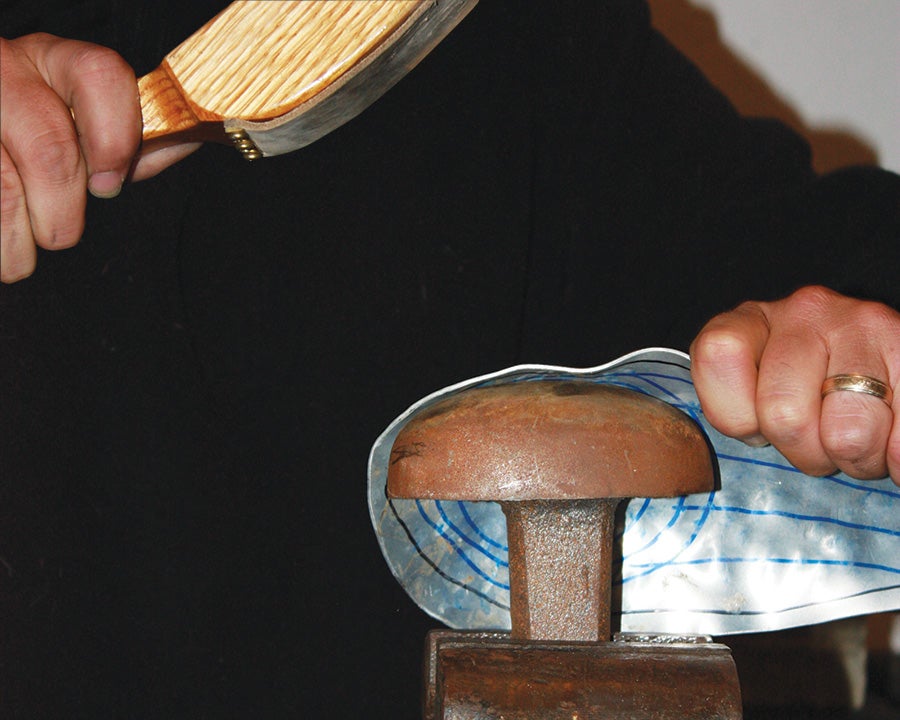
Using a slap hammer to shrink the outside edge of the do-not-hit zone. The do-not-hit zone is for not hitting with a doming mallet; it’s OK to use a slap hammer.
Follow closely here—when soft material like aluminum is struck with a soft-faced mallet (slap hammer) against a solid steel surface (post dolly), it crushes any tucks in the material into themselves. This tightens the excess material that is caused from doming (hammering the material into the sand bag).

Finishing the edge of the teardrop with a hand-operated shrinker.
The alternate approach to shrinking with a slap hammer is to use a hand-operated shrinking machine. The next step is to use the English wheel for smoothing. Choose an anvil wheel to use with the English wheel that best matches the overall shape of the teardrop. Light pressure between the anvil and roller wheel will smooth the overall shape nicely. Keep in mind, when you shrink the edges and smooth the part in the English wheel, you will loose a small amount of dome. You can repeat the process (mallet, shrinking, and English wheel) until you achieve the desired shape.

The completed teardrop shape.
Making a Classic Bowl
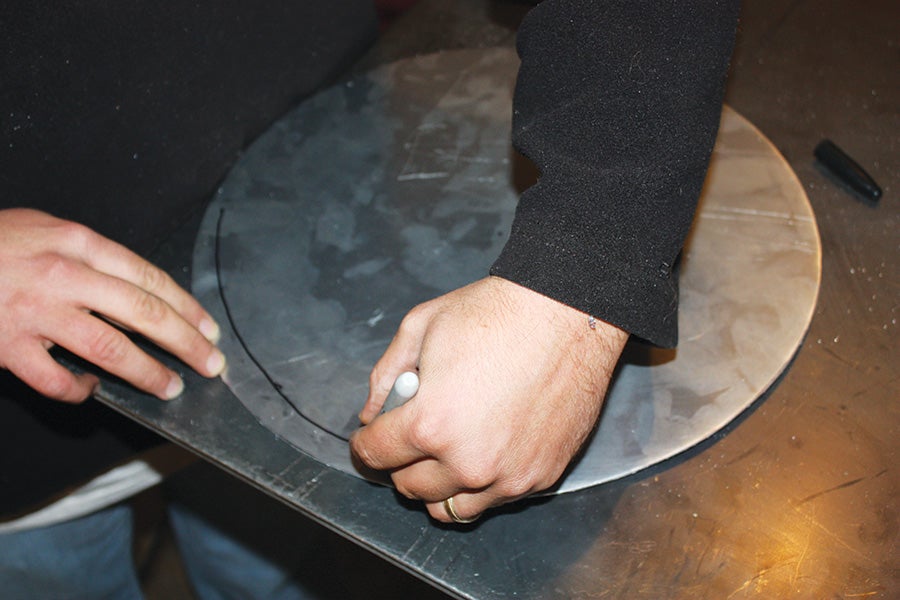
A bowl looks like a simple shape to achieve. However, looks can be deceiving! I start by using a compass to draw a 14-inch diameter circle on chipboard. I transfer the shape to 3003-H14 aluminum sheet and cut out the circle. Next, I clearly mark the center and use a black permanent marker to indicate the no-hit zone around the outer diameter of the circle. Once again, this area will be left for shrinking only. If I hit this area with a mallet, I will be stretching, not shrinking, and working against myself.

The center of the bowl is marked on both the chipboard and the 3003-H14 aluminum sheet.
Black permanent marker indicates the do-not-hit zone. This area is ¾ to 1 inch from the outside diameter of the bowl.
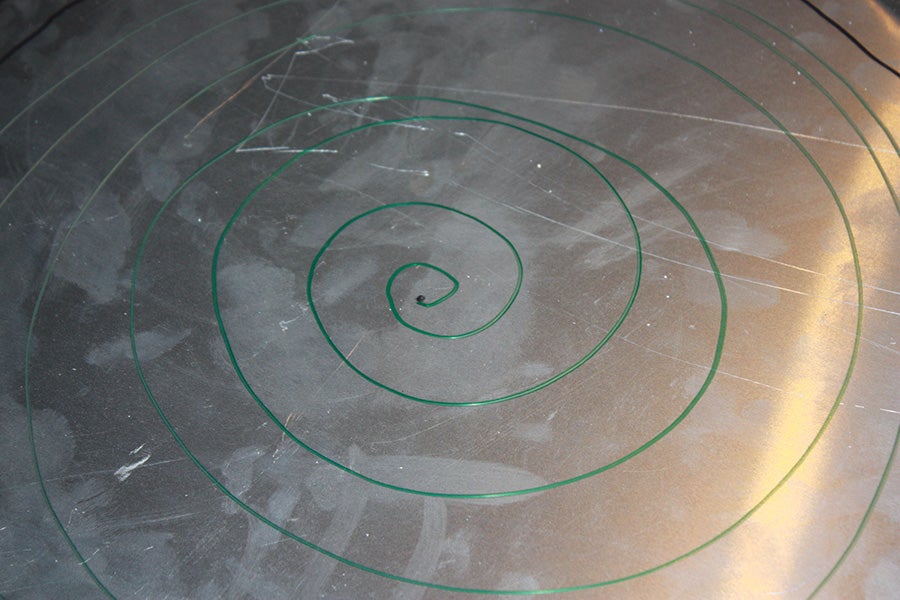
Spiral-hammer pattern is drawn in green permanent marker. Hammering starts at the black dot in the center and moves along the line towards the outside diameter.
I work from the center of the bowl towards the outer edges, following the green permanent marker line that indicates a spiral pattern. I concentrate the heavy blows in the center and use lighter-and-lighter blows as I follow the spiral and work towards the outer edges. At this stage, I need to maintain control of the shape by adjusting how hard I hit and where I continue to hammer. If I maintain hard, heavy blows in the center only, I will end up with an egg shape, rather than a bowl shape.

Working an even spiral pattern by following the green, permanent-marker line.
As the shape is achieved, I use the sheet-metal radius gauge to check for a constant radius around the outside of the bowl .
Once again, there are ripples and the potato chip effect around the edges. These ripples should be even and uniform around the outside diameter of the bowl. Remember that the ripples are there for shrinking, and they are exactly what we’re looking for.

Shrinking the edges of the bowl shape with a slap hammer.
For this project, I used a button-shape forming head and my leather-faced slap hammer to work the tucks back into themselves to shrink the edge. Finally, I smoothed the bowl with the English wheel, tracking from the center of the bowl to the outer edges. I repeated the hammering, shrinking, and smoothing process again and again, until I achieved the desired shape.
Working from the outside diameter towards the center with the English wheel. The English wheel is used for the smoothing process, not shaping.
Just a quick note—anvil wheel selection is an important step in the smoothing process. If I select a flat anvil wheel, I will lose the shape; if I use too large of a radius wheel, it will leave ridges in the soft aluminum. To finish the bowl shape, I must also check to see that all sides have a uniform shape and match the desired radius as measured by the radius gauge.
Shaping a Headrest Fairing
For this shape, I used a similar approach to the one mentioned above, but I added a few steps. This is an asymmetrical shape, so the centerline of the part is less important. I start to hammer with a 2-inch-radius mallet, just above the center of the part. This ensures the top will have a bit more curvature than the bottom.

Working a ridgeline with a 2-inch-radius mallet, just above the centerline of the headrest fairing.
On this piece, the rippled potato chip effect is not as pronounced as it was on the teardrop and classic bowl because I am not doming as deep. With less depth in doming, the ripples are less apparent. To remove these tucks, I used a hand-operated shrinking machine.
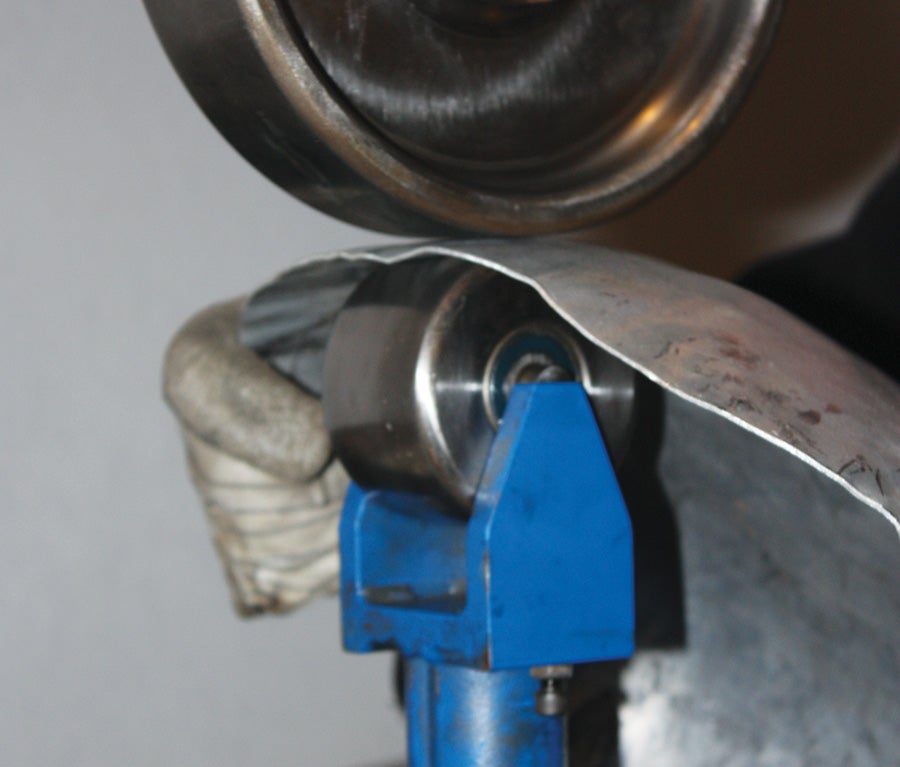
The hand-operated shrinking machine is a very simple mechanical device with a perforated jaw cartridge. As you push down on the handle, the shrinking jaws gather the material and squeeze it together. The drawback to this machine is the marks it leaves on the material. The marks can be removed via sanding, assuming the marks are not extremely deep in the material. One way to avoid the marks altogether is to remove this edge during final fit-up and trim.
Removing the tucks and shrinking the edge of the headrest fairing with a hand-operated shrinker/stretcher.
To finish up the forming of the headrest fairing, I worked simultaneously with the mallet, bag, English wheel, and shrinking machine. I checked the final shape and radius of the part with a sheet-metal radius gauge.
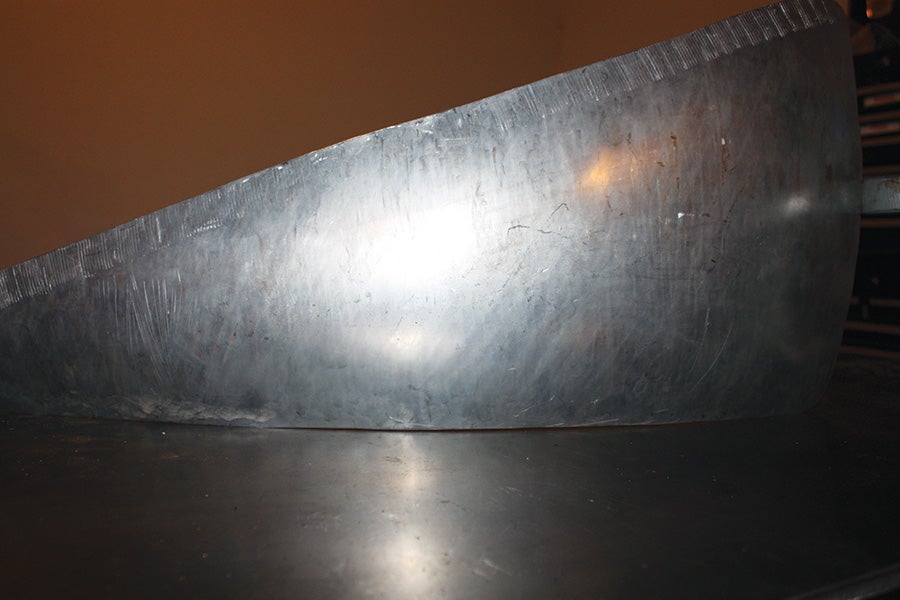
Look at the top of the headrest fairing and you’ll see the marks left by the shrinker. Diligent sanding will remove the marks, once the part is completed.
I hope you have learned some new techniques, or blew the dust off knowledge you currently have. I encourage you to invest some time and capital and pursue sheet-metal forming. The shapes and finished products are only limited by your imagination.

![]()
Mark Lynn first started machining, welding, and fabricating metal when he was 16 years old. He works in sales for a well-known manufacturer of metal fabrication equipment and is also a single- and multi-engine pilot. For the past three years, he has conducted seminars on metalworking at AirVenture.


