When you look at that black-and-green RV-6 in the picture above, youd probably assume that given the business Im in (avionics installation for the newbies among you), the equipment in the panel would be top-notch modern glass. The fact is that, like many of yours, my airplane was built quite a number of years ago, and it is equipped with flight and engine instruments of a vintage that just isn’t modern.
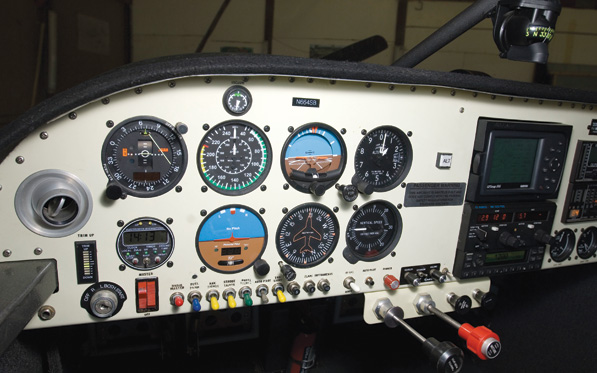
This is perhaps one of the most common panels from the pre-EFIS era. What happens when that attitude indicator and/or directional gyro need repair?
Maybe you own a homebuilt like this and now you’re considering panel upgrades with up-to-date (or more modern) equipment. Welcome to treacherous waters. At this point, you need to carefully consider how to best go about the upgrade without breaking the bank or causing the aircraft to be out of service for many months. Before you start unscrewing old instruments, you also need to decide how far you want to go. Is this just an instrument swap with a mind toward increasing capabilities, or do you want to begin a comprehensive upgrade project? I have recently undertaken this very mission, so allow me to share my thoughts with those of you facing the same questions.
As I have said many times before, you need to define your mission and appreciate your own capabilities at the outset. Please be realistic. If you’re a VFR/sunny-day pilot, think long and hard about how much avgas that upgrade would buy-the VFR package is, by definition, one that requires your eyeballs to do the heavy lifting. VFR pilots don’t need double-screen EFISes, triple-redundant electrical systems, and every bell and whistle in the book.
You should also be realistic about how much actual IFR flying you do, and what the nature of that flying is. If you are a pilot who demands 100% dispatch reliability, and you expect to make virtually every flight regardless of the weather conditions, you are either a complete optimist or you have built a Boeing 737 in your garage. (Who knows…it could happen!)
The Gyro Game
Typically, this is where the process gets started. Your vacuum pump has failed for the umpteenth time, or that electric attitude indicator is beginning to get the leans. It happens. Your hangarmate with the 1972 Cherokee knows the symptoms well.
You have priced replacement and overhaul options for the existing equipment but have decided its time for an investment. The first step is to consider one-for-one replacements-that is, miniature EFISes that fit into the existing instrument hole. There are good reasons for this decision. First, modern digital electronic instruments are many times more reliable than spinning gyros. Second, it can be financially more attractive to purchase a new EFIS instead of overhauling or replacing the gyros or other instruments. Third, you almost always save weight. Lets look at the options.
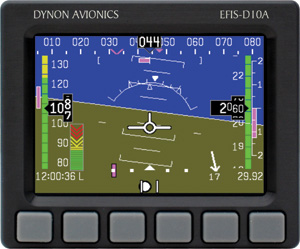
Dynon reports that sales of the D10A continue to be strong despite the development of its big-screen SkyView system.
Dynon D10A/D6
Dynon kicked this category of instrument into high gear with the original D10 (now replaced by the D10A and the new, lower-cost EFIS-D6). Imagine a full set of instruments that fits in a 3.125-inch hole. While the introduction of the large-screen SkyView models might have predicted the demise of the smaller legacy boxes, Dynon says sales have remained strong for the pre-SkyView units.
The D10A is a self-contained EFIS thats actually simple to install. In theory, you could hook up power and ground, connect the pitot/static lines, and call it a day. The D10A has a built-in magnetometer that works adequately in many composite and aluminum airplanes, but it can also be fitted with a remote sensor that will be placed away from ferrous metals such as the engine mount, landing gear, etc. Its my experience that ordering the remote magnetometer is money well spent.
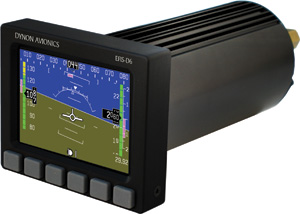
The Dynon EFIS-D6 is a simplified version of the popular D10A; its intended mainly for backup installations because it lacks some of the connectivity you’ll want as a primary instrument.
Dynons D6 can be considered a de-contented D10A that does without several features for the reward of a much lower price; its $1600 versus $2200 for the D10A. For example, the D6 does not have an HSI, cannot do density-altitude, true airspeed or winds calculations;it doesn’t network to other Dynon products; it doesn’t support Dynons autopilot servos, and it doesn’t include altitude or heading bugs. On the other hand, the D6 comes with the external magnetometer standard-it doesn’t have the internal module. The D6 can be fitted with an internal backup battery, and it supports the use of Dynons pneumatic angle-of-attack pitot tube.
Both the D10A and the D6 are slightly wider than a standard 3.125-inch instrument-the face is 4.09 inches wide, 3.39 inches tall-but they fit most panels well. The depth of the units can be an issue with some aircraft, as the units are about 10 inches deep when installed with the connector and pitot/static/AOA fittings. Still, the retrofit installation of a Dynon EFIS can oftentimes be accomplished in less time than it takes to remove the vacuum system it is replacing.
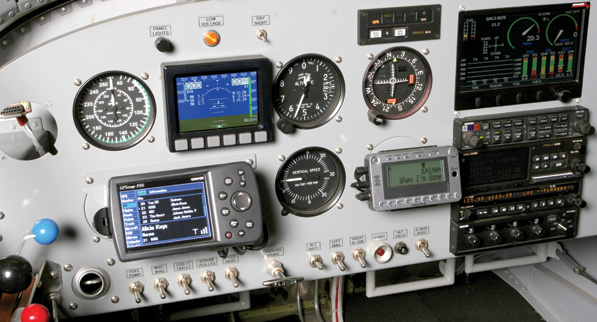
Heres an example of a panel that might have started with a six-pack layout but enjoys updated instruments and expanded capabilities.
One question were often asked is whether to purchase the D10A or the D6. The answer is straightforward: If you’re simply replacing an attitude indicator and have no external devices to interface with, then the D6 is the best choice. However, if you want to interface to a GPS or radio like the SL30, then the D10A is a better choice. I would also recommend the internal backup battery.
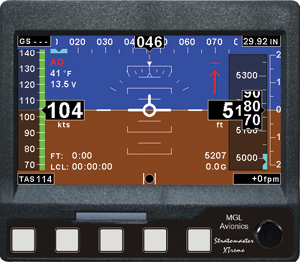
The MGL Xtremes main page is typical of modern EFISes, with tape-style readouts for airspeed, vertical speed and altitude.
Our experience with the D10A has been very good. The device is now well-proven and reliable, and Dynon continues to support it mechanically and through software updates. There’s more than a little something to be said for that corporate attitude.
MGL Xtreme
MGL Avionics has been providing a nice line of EFIS and digital instruments primarily to ultralight and sport aircraft owners for many years. Within the past few years, the company has created some new models aimed squarely at homebuilders that are both feature laden and low cost. The company’s 2.25-inch and 3.125-inch singles have a basic attitude indicator (grayscale black/white) and are low-cost alternatives to gyros. They are easy to install and lightweight.
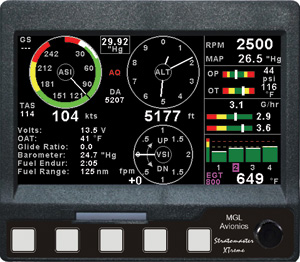
A VFR screen allows presentation of basic information.
While the singles are popular, the main offering to the Experimental market is the company’s fairly new Xtreme EFIS, which mounts in a standard 3.125-inch instrument cutout but has a display 4.3 inches wide that is sunlight readable. The Xtreme EFIS was designed to be both a primary flight instrument on its own or an excellent retrofit for existing steam-gauge panels.
Heres an interesting note. The base-model Xtreme does not have its own AHRS module. Instead, it derives attitude information from pitot/static data and highly accurate GPS position information. In a sense, this is halfway between the pseudo panels we’ve seen on Garmin GPSes and a true attitude instrument; roll and pitch are derived from turn rate and rate of climb/descent, but they’re also aided by having pitot/static information.
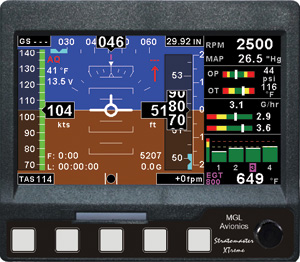
When combined with an engine-monitoring sensor box, the Xtreme can display powerplant parameters in a split-screen form.
To the basic Xtreme unit ($1100), you may add a compass sensor ($260) to get actual heading information-the system will display ground track without this module-or you could add one of two AHRS modules. The MGL system has been selling for a while-the SP-4 attitude sensor ($1000)-brings the cost of the full-function Xtreme to $2360. But there is also MGLs new high-performance AHRS unit, at $2150 alone, which has a newer generation sensor pack.
The Xtreme isn’t done there. It can also be connected to MGLs external engine-monitoring module ($220 plus $425 for a basic sensor set) to get all of these functions in one box. The Xtreme will also support MGLs autopilot servos. Even better, it uses industry-standard eighth-inch NPT bosses for pitot and static connections, along with a 15-pin standard D-Sub connector for the rest. A tiny SMA antenna jack that is supplied with the unit connects to the external GPS antenna. The unit weighs 1.7 pounds.
The MGL Xtreme EFIS is relatively new and has just started shipping as this is being penned, so my firsthand experience with it is limited to twisting knobs at airshows. However, MGLs U.S. distributor reports brisk sales.
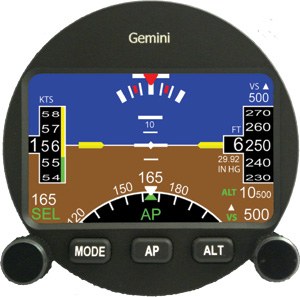
TruTraks Gemini has yet to be released, but with its 3.125-inch size and feature set, it looks like a winner.
TruTrak Gemini
Were a bit ahead of the curve here, as TruTrak has yet to release the Gemini mini-EFIS into the wild. We’ve seen prototypes at airshows, and the unit looks promising. I cant comment about installation or reliability other than to say that based on TruTraks history, both should be stellar. The Gemini is a 3.125-inch instrument thats lightweight with a shallow depth. Capabilities will include a basic attitude display and a full-blown EFIS display plus engine monitoring and a built-in autopilot. Overall, it should be a nice product as a replacement for existing instruments. Well know a lot more when the line begins shipping later this year.
RC Allen
The RC Allen Digital Attitude Indicator (RCA 2600 series) was recently introduced and has been quite successful in certified aircraft as a retrofit option since it was TSOd. At $2500, this unit is in the same field as the fuller-featured EFISes noted here, and might not appeal to all homebuilders. But our experience with this unit is that its nice, fast to install and a no-frills, no-nonsense attitude indicator that will be an easy replacement in an existing cutout. Available in 2.25- and 3.125-inch versions.
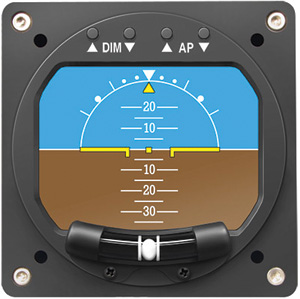
RC Allens new 2600 series digital attitude indicator is TSOd and comes in 2- and 3-inch sizes.
Making It Fit
Before you start removing equipment in anticipation of your newfangled EFIS or digital instrument, there are several things to think about. Most importantly, you need to check the spacing of your current instruments. Many homebuilders have placed their round gauges as close together as possible due to space limitations or other considerations. If the instruments are too close together, its likely that a new instrument will overlap existing instruments such as airspeed and altimeter. While this may not render the aircraft unusable, it can look unsightly and may block valuable portions of the original instruments.
Make sure to measure the outside dimensions of the new unit you intend to purchase to determine if its a good fit in the existing location. This is particularly critical with the larger MGL Xtreme, whose display face is not centered on the instrument hole.
You should also ensure you have adequate space behind the panel. Some new instruments can be as deep or deeper than the steam gauges they are replacing. If you have a fuel tank or other structure forward of the panel, this may interfere to the point that it makes the installation impossible.
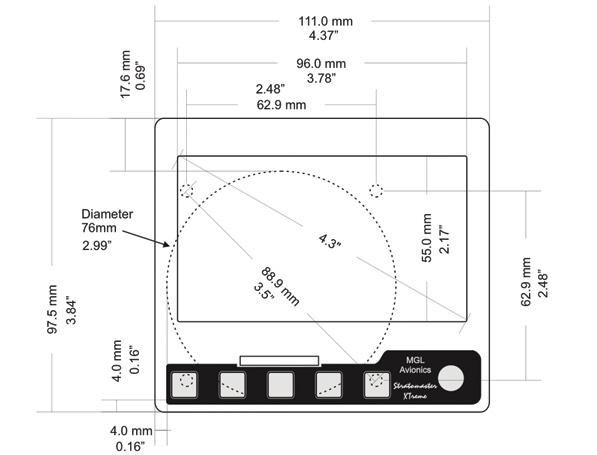
Measure twice, cut once. The Xtremes large screen means that the bezel is not centered on the instrument hole. Be sure you have lateral clearance before buying.
Lastly, consider the electrical load and its associated wiring, switches, circuit breakers and any other interfaces you intend to use. Normally if you are replacing an electric gyro with a new EFIS, you could simply use the same wiring. However, if you are replacing a vacuum instrument, there will probably be a requirement for additional wiring, an additional circuit breaker and perhaps a switch.
Some units have internal backup batteries, and some need to be mounted externally. Some of the new replacement instruments mount from the front, while others mount from the rear of the panel. Depending on the spacing issue, you may need to physically alter the cutouts in the panel to accommodate the new unit.
Dont forget that if you are installing a full-blown EFIS, you’ll likely need to allow for both pitot and static lines, and optionally an AOA system as well as wiring and interfaces to other products that may be installed in the airplane such as autopilot, GPSes, engine monitors, fuel flow, OAT sensors, etc.
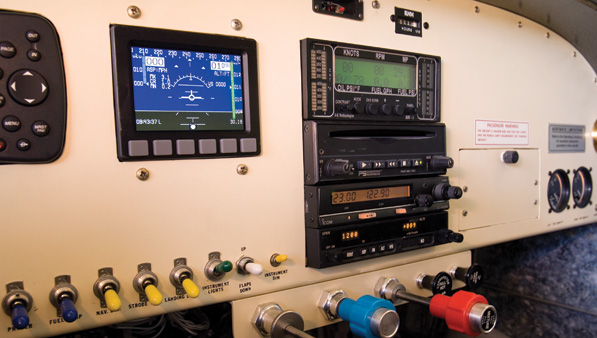
A capable VFR panel: A hard-mounted GPS (just out of frame, left) and a Dynon D10A will get you there and keep the shiny side up in low-visibility conditions.
Going Almost Whole Hog
Another reasonably attractive option for upgrading your panel is to remove the entire six-pack of traditional round instruments and replace them with something that is much larger, yet still small enough to fit into that panel space. Commonly, builders will simply cut a rectangular hole in the panel, using the outer edges of the old instruments as the boundaries for the new hole. They will then fabricate a plate to fill in the hole and attach it with screws, bolts or nutplates. This allows a space of 7 to 10 inches for the new unit.
As with the previous option of replacing a single instrument, builders must take into consideration the space, wiring and power requirements. However, with larger units there are additional issues to be aware of. The majority of larger EFIS or multifunction display (MFD) units are not very deep, typically between 2 and 8 inches, but some are deep enough to interfere with structures, fuel tanks, ribs or front seats in tandem aircraft that are flown primarily from the rear seat. Its typical when replacing the entire six-pack for the builder to simultaneously replace some engine instruments or indicators such as fuel level, fuel flow, trim, flaps or other systems not core to flight instrumentation.
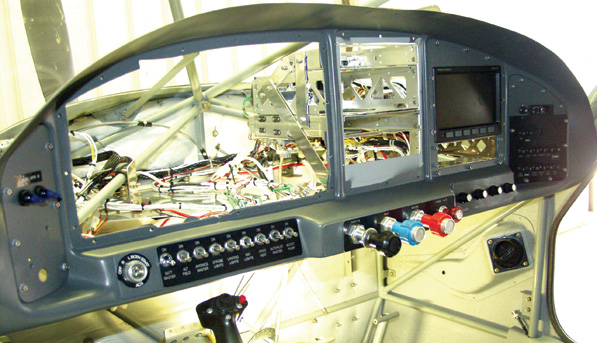
If you have come this far, you might already be beyond a simple, low-cost instrument update.
Thinking It Over
If you’re at the point of retrofitting more than a few instruments, its likely you are close in cost and time to looking at the alternative of replacing the entire panel. This is not a trivial task and can take from weeks to months to accomplish. You can do this by purchasing a completed panel from a professional shop, doing it yourself or flying the plane to a shop to have it done for you.
With significant upgrades may come delays and problems as other systems are affected beyond the flight instruments. You may need to replace or install an entire set of engine sensors, antennas, coax cables and more. Well leave this discussion to another day, as it can get quite complicated. But for today, remember that the small-scale, self-contained instruments provide a lot of capability for reasonable dough, and could save you big dollars on the installation itself.


