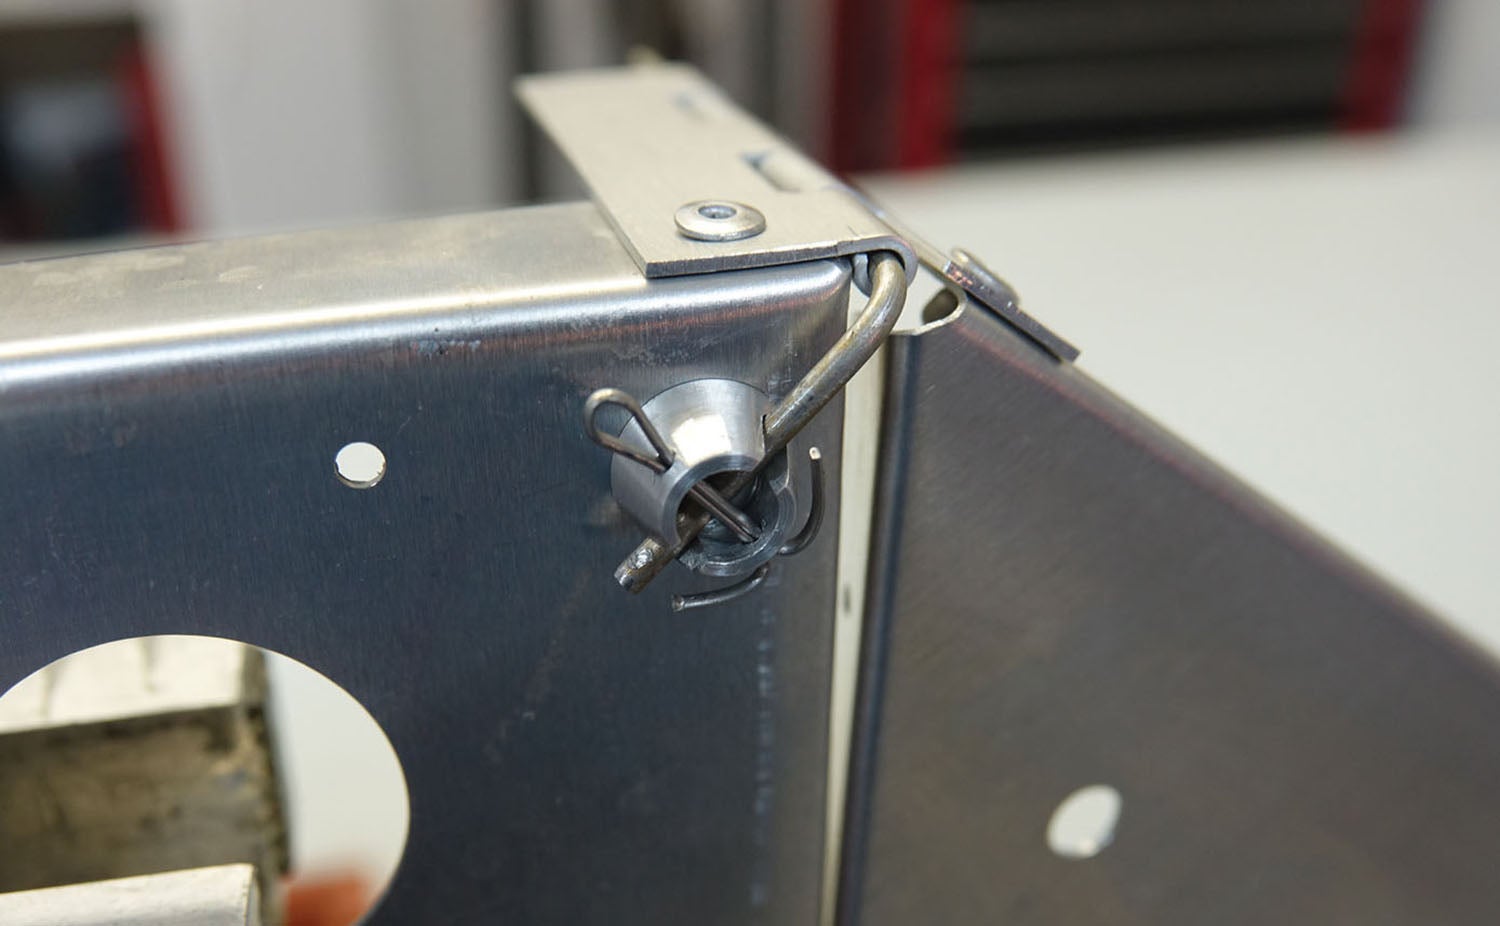
There are lots of creative ways that builders have devised for retaining piano hinge pins. Many of them are “permanent,” so if removal is ever needed, it may require drilling out a rivet or even replacing the hinge pin. Here is a simple retainer that is easily releasable. It mounts with a single 1/8-inch countersunk-head pull rivet and uses a 1/16-inch cotter pin for retention. Like some other methods, this design makes use of a 90° bend placed at the end of the pin. The dimensions shown are for piano hinges with a 3/32-inch pin.
To fabricate, start with a length of 1/2-inch-diameter 6061 aluminum rod that is a few inches long. For ease of handling, save the cut-to-length operation for last. If you plan to make multiples, start with a length of rod that is at least 3/8-inch long for each retainer you plan to make, plus an extra inch.
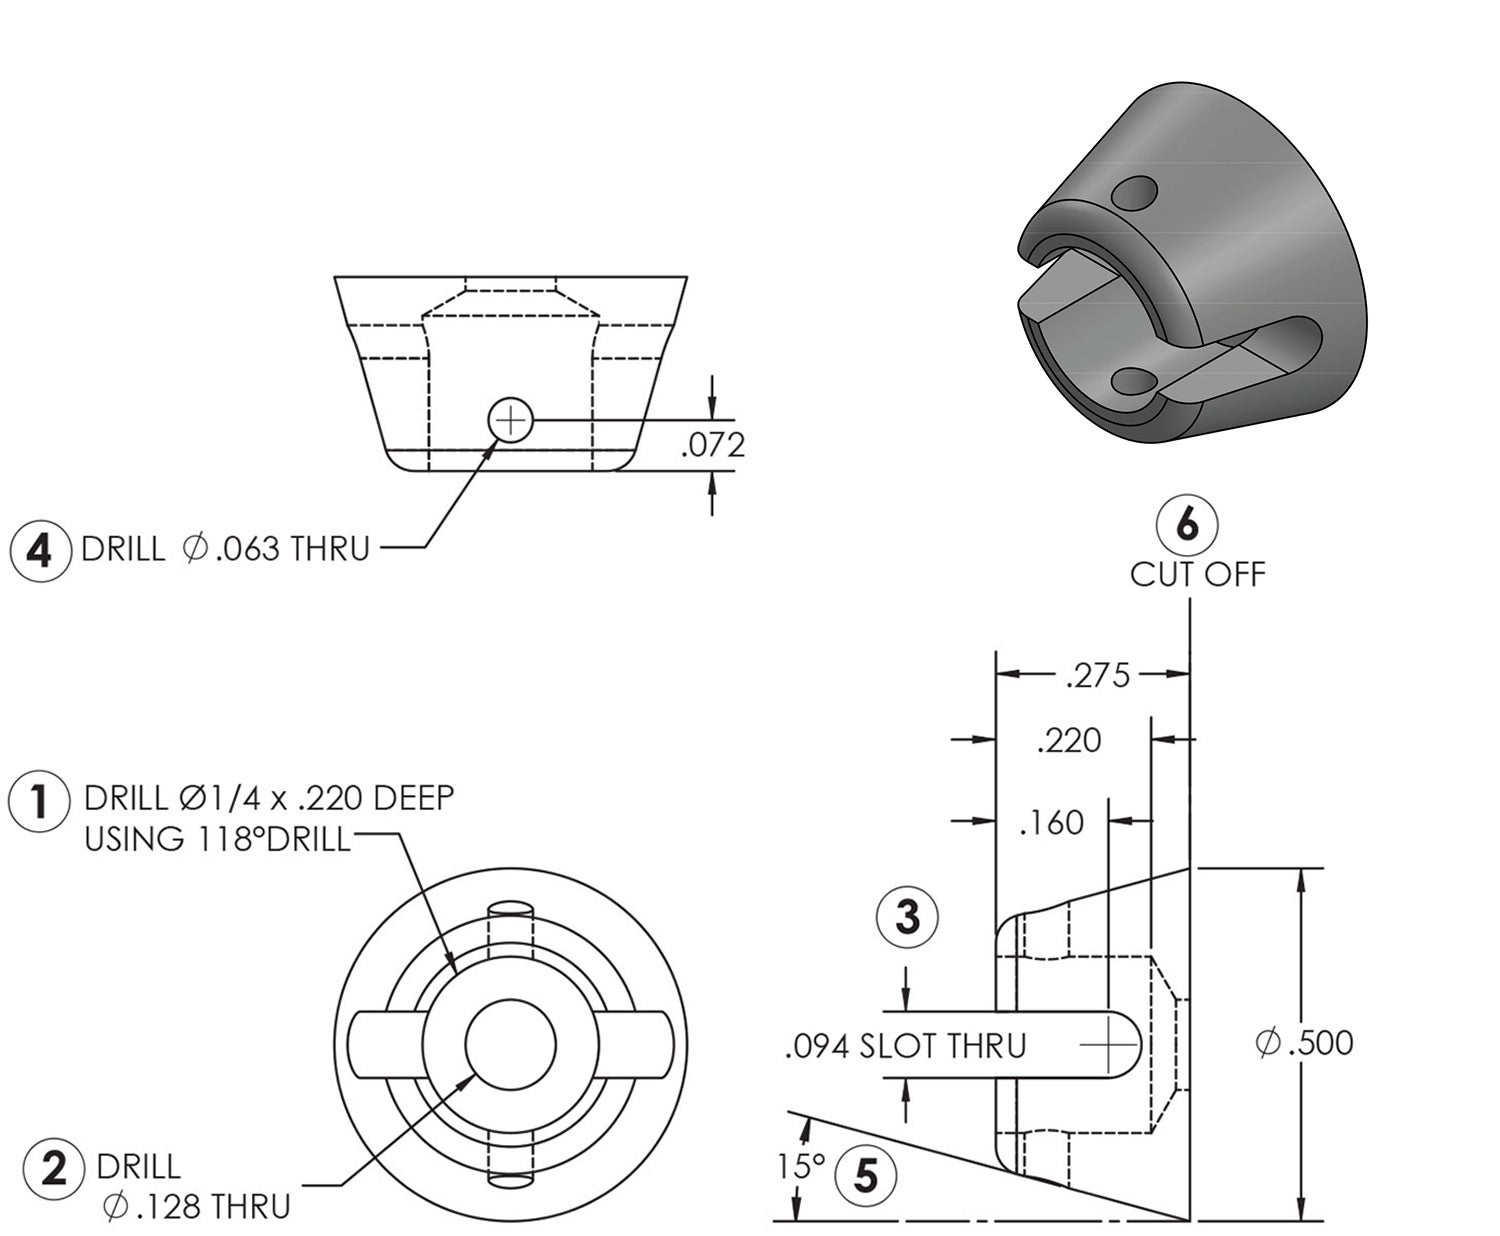
Referring to the drawing, center drill the ¼-inch blind hole first. Use a drill bit with a 118° point angle. This will create the countersink that will closely match the common 120° flat-head pull rivet. If needed, mark the bit at the correct depth with a Sharpie.
Next, drill the 0.128-inch (#30) center hole, then create the slot. I cut the slot in the prototype “backward” on the lathe, putting a ball-end end-mill in the chuck and clamping the workpiece in a tool holder and feeding via the cross slide. You can also mill it, or drill the hole for the bottom radius, saw-cut the slots and clean up with a file.
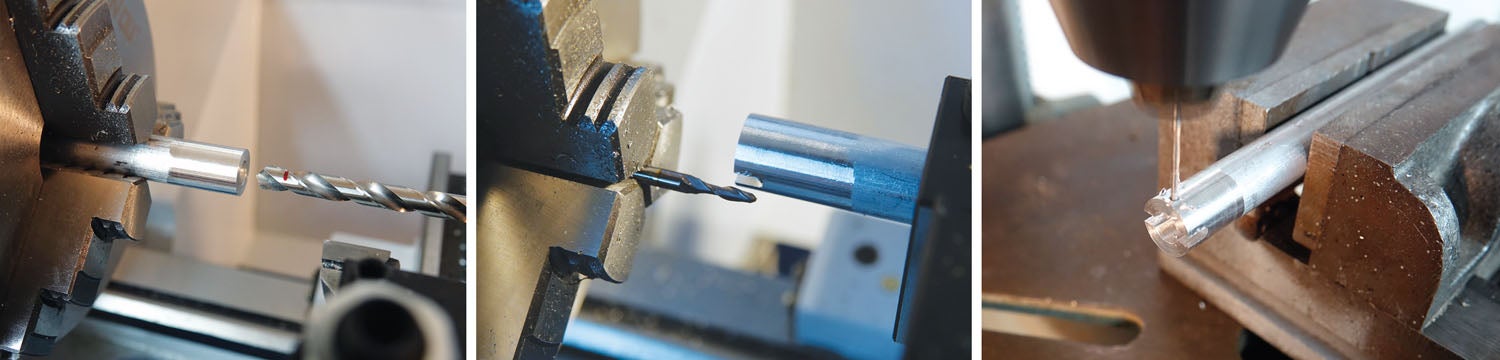
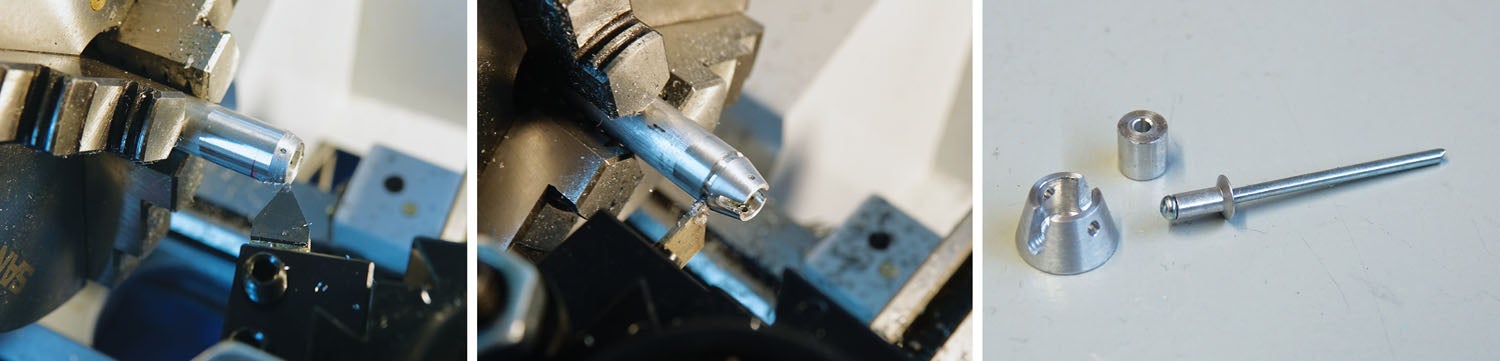
After creating the slot, drill the 1/16-inch cotter pin hole 90° from the slot. Then turn the 15° taper. If you are not using a lathe, create the taper using a belt sander. Next, cut the finished retainer from the end of the rod, deburr and break any sharp edges.
Place the bent end of the hinge pin in the slots of the retainer with the retainer against the mounting surface. Mark the rotational position. Pull and lift the hinge pin out of the way, mark the center and drill the rivet hole.
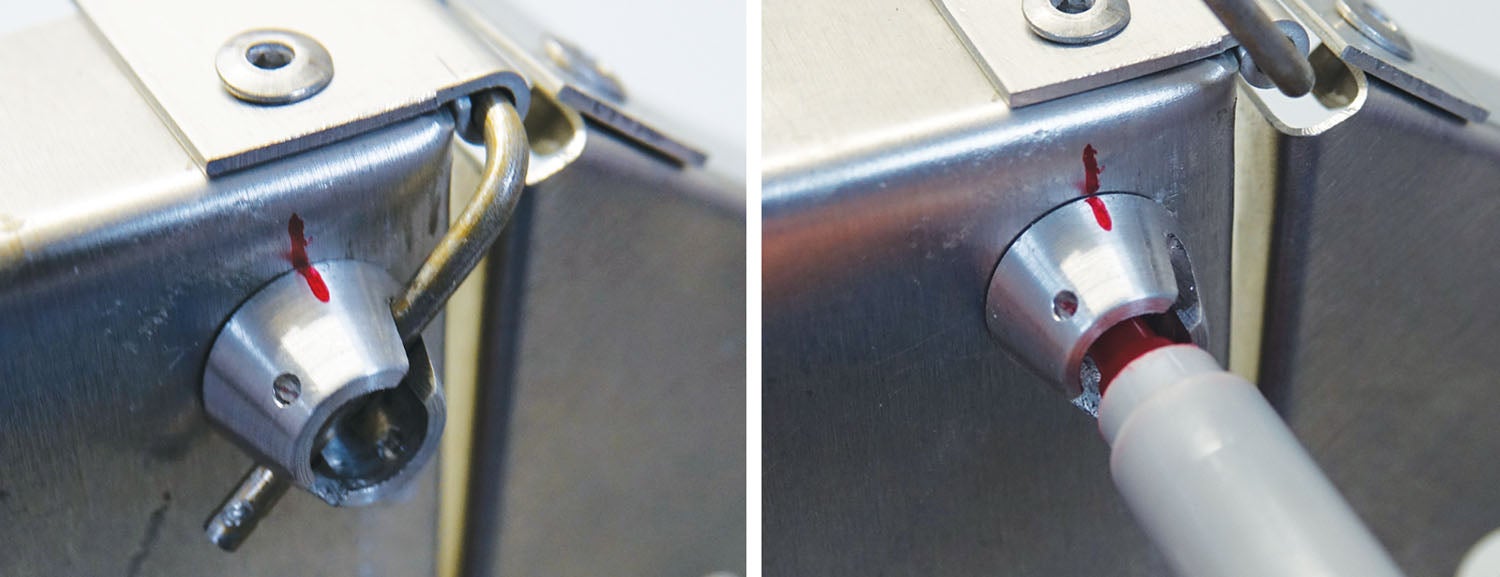
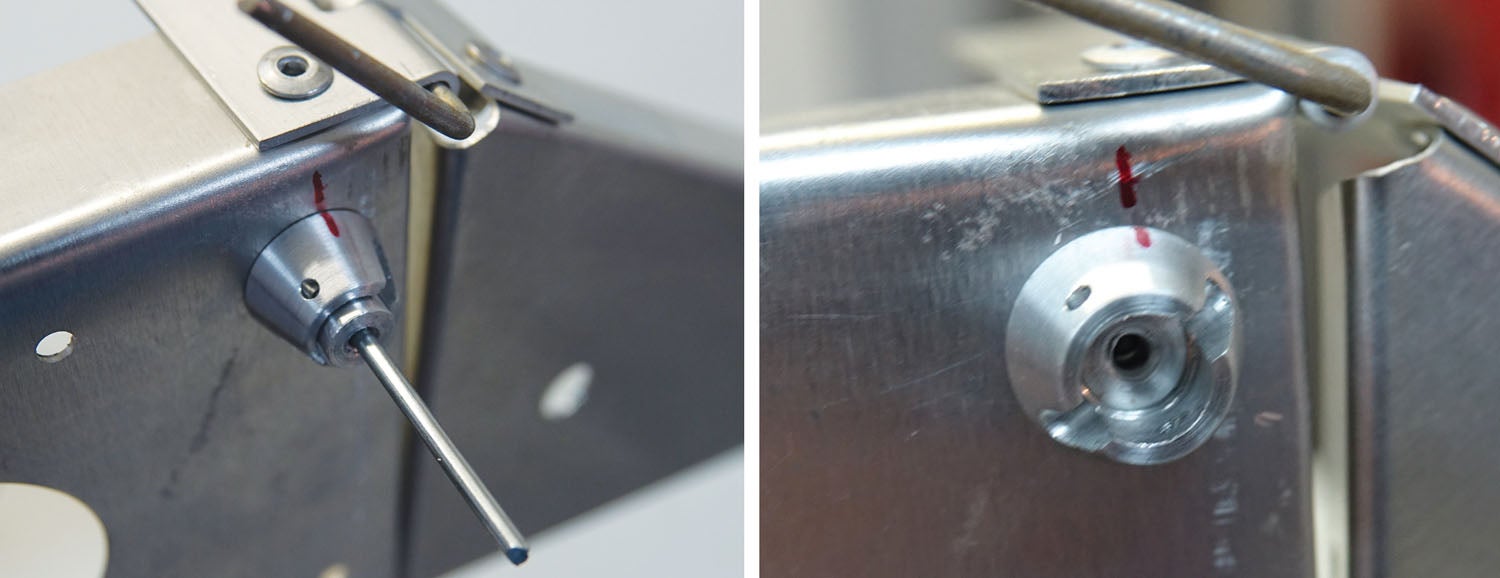
Since the nose of the rivet tool is too big for the ¼-inch opening in the retainer, slide a 1/4-inch diameter x 1/4-inch-long spacer onto the stem of the rivet. There should still be plenty of stem for the rivet tool to grab.
Align your rotational mark and set the rivet. Then remove the spacer. Next, turn the hinge pin back down into the retainer and install the cotter pin. Now, when you need to remove the hinge pin, just pull the cotter pin.


Oh I like this idea.
Cool. Thanks!
I was wondering what happened to you
Dan;
Great idea! Have you thought to fabricate and sell to folks who don’t have a lathe?
Cheers! Stu.
Nice, but a lot of operations to replace a nut plate and 1/2″ section of piano hinge. Especially if you don’t have a lathe and mill.
With a spring loaded access flap on the outer skin for access and substituting an r-clip or a small shackle clip for the cotter pin, you have a way to remove and install a cowl without tools.
Comments are closed.