A little over five years ago I wrote a maintenance article dealing with troubleshooting starter problems. The gist of the article was don’t assume poor starter performance means you need to replace your starter. Well, that is still good advice, but sometimes you do need a new starter after all. Here is how the problem unfolded for me.
I was having trouble starting my airplane from time to time. It would turn over, but it was very sluggish at times. I got stuck once, but a quick jump got me going again. I put the battery on the charger when I got home, and things seemed to be fine for a time. A check with my battery condition tester said that the old battery was in marginal condition, so I bought a new battery. Problem solved for another few months.
Then one day I came back from a $100 hamburger flight, and the plane would not start after re-fueling. I had to tow it back to my hangar. Now I was mad. It couldn’t be the battery—it was only a few months old and checked out great. So now I started digging. I checked the battery voltage at the battery. That was good, so I checked the voltage at the battery side of the master relay, which was the same as the battery voltage. Next, I turned on the master switch to see if there was a voltage drop across the master relay. Only a tiny drop. So far so good.
Since the battery and master relay are in the back of my plane, I went forward to the battery side of the starter relay to check the voltage there. It was only 0.1 volts less than at the battery, which is perfectly acceptable. After disconnecting the starter wire from the relay to the starter, I checked the voltage at the starter side of the starter relay. There was another 0.1 drop across that relay, but a 0.2-volt total drop from battery to the starter was acceptable by any reasonable standard, especially for a plane with a rear-mounted battery.
At each point, I would take apart the connections being tested and make sure they were clean and tight. However, when I got to the final connection, the place where the big cable attaches to the starter, I found that the nut that held the wire in place was just finger tight. That could explain the big voltage drop I was seeing when cranking—it would drop down to only 8 volts.
See, I told you so. It wasn’t the starter at all, or so I thought. The next time, the airplane started without any problem. I was convinced that I had solved the problem and avoided spending the better part of $500 for a new starter.
Not So Fast
The next trip on my agenda was Oshkosh, a two-day, 1600-nm jaunt with the first stop in Winslow, Arizona, for fuel. That morning it started well enough, so off we went. I gassed up in Winslow and loaded up for the next leg to Dalhart, Texas, but the plane would not start. It wouldn’t even turn over. I got a battery pack from the local FBO and tried that. Nothing. We tried various things with no luck. We even tried to hand prop it, but were unsuccessful with that mainly due to our nervousness and inexperience with hand propping. I needed to get to Oshkosh, so out came the credit card.
After a shuttle ride to Flagstaff I was able to arrange to fly commercially to Milwaukee the next day. As you can imagine, buying a ticket the day before you need to fly is not a formula for getting a good deal on air travel. Furthermore, the rental car I had reserved in Oshkosh would do me no good when I was flying to Milwaukee. I found the last rental car available in Milwaukee and paid dearly for it, but I was on my way to AirVenture.
When I got home from the big show, there was still the matter of my plane being in Winslow with a bad starter. Luckily, Richard, a friend of mine who also flies a Sportsman, was available for the three-hour trip back to Arizona. With a new starter, an extra battery, a new starter relay, and lots of tools in hand, we took off for Winslow with hopes of being home for dinner. Being over-prepared and anxious to get going, I had the new starter installed in an hour. I got in, turned the key, and the engine fired right up. But Richard’s plane just made a horrible sound when he turned the key. I had heard that sound before when part of the casting had broken in another friend’s starter as we were flying back from Alaska. I couldn’t believe it. We pulled the cowl off and there it was, a starter with the nose portion of the casting broken completely off.
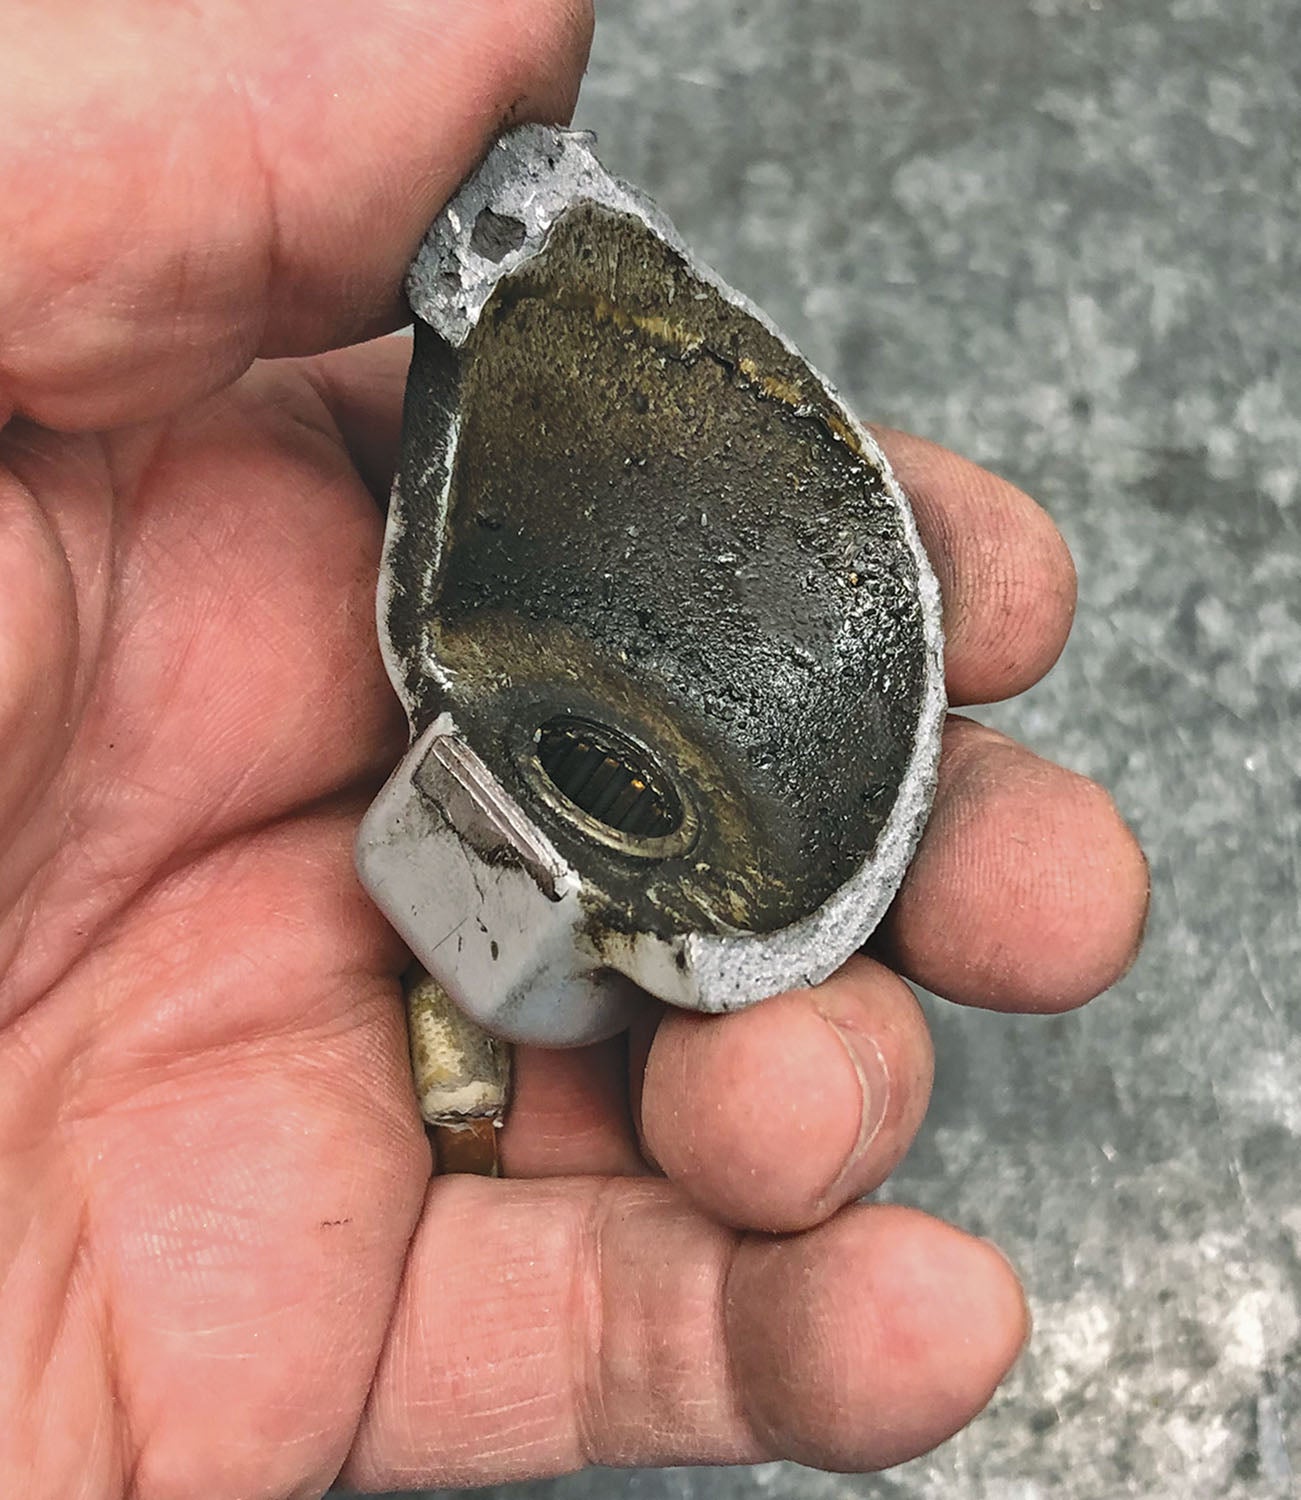
I have no idea if he had a kickback at any recent point or if this is just metal fatigue from 13 years of starting
There wasn’t much diagnosing to do in this case. The starter was clearly broken. The question now was, where are we going to get another starter in Winslow? As it turned out I had a second starter with me, but it was a different configuration that would require major surgery to Richard’s baffles to make it fit. I just didn’t have the tools for the work that it would entail. Since it was now 100 degrees and we were both pretty frazzled, we decided to get a hotel room and see if Aircraft Spruce could overnight us a new starter.
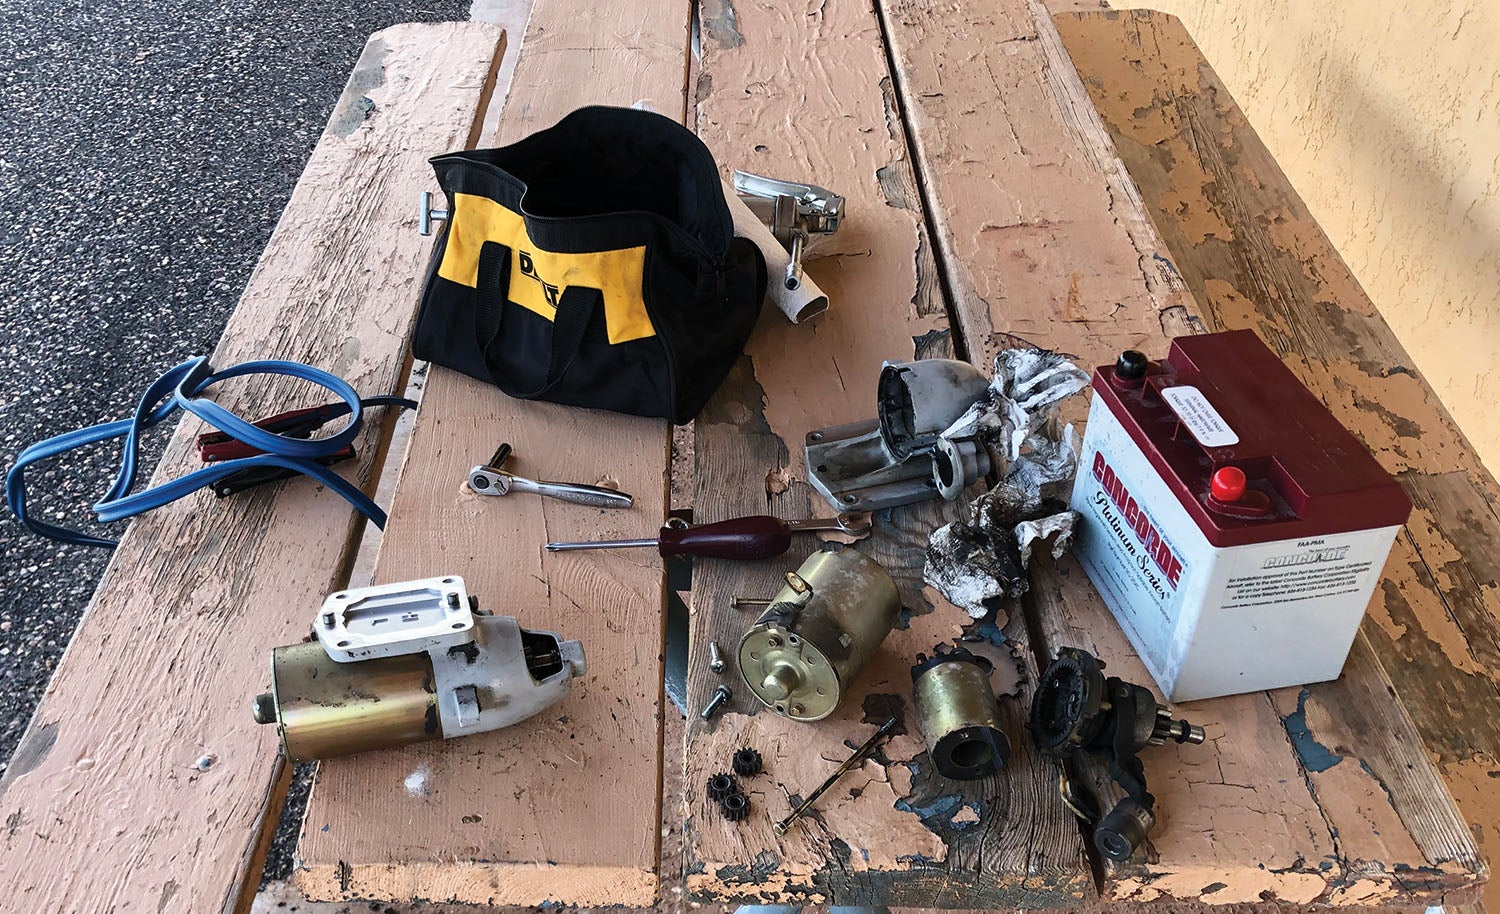
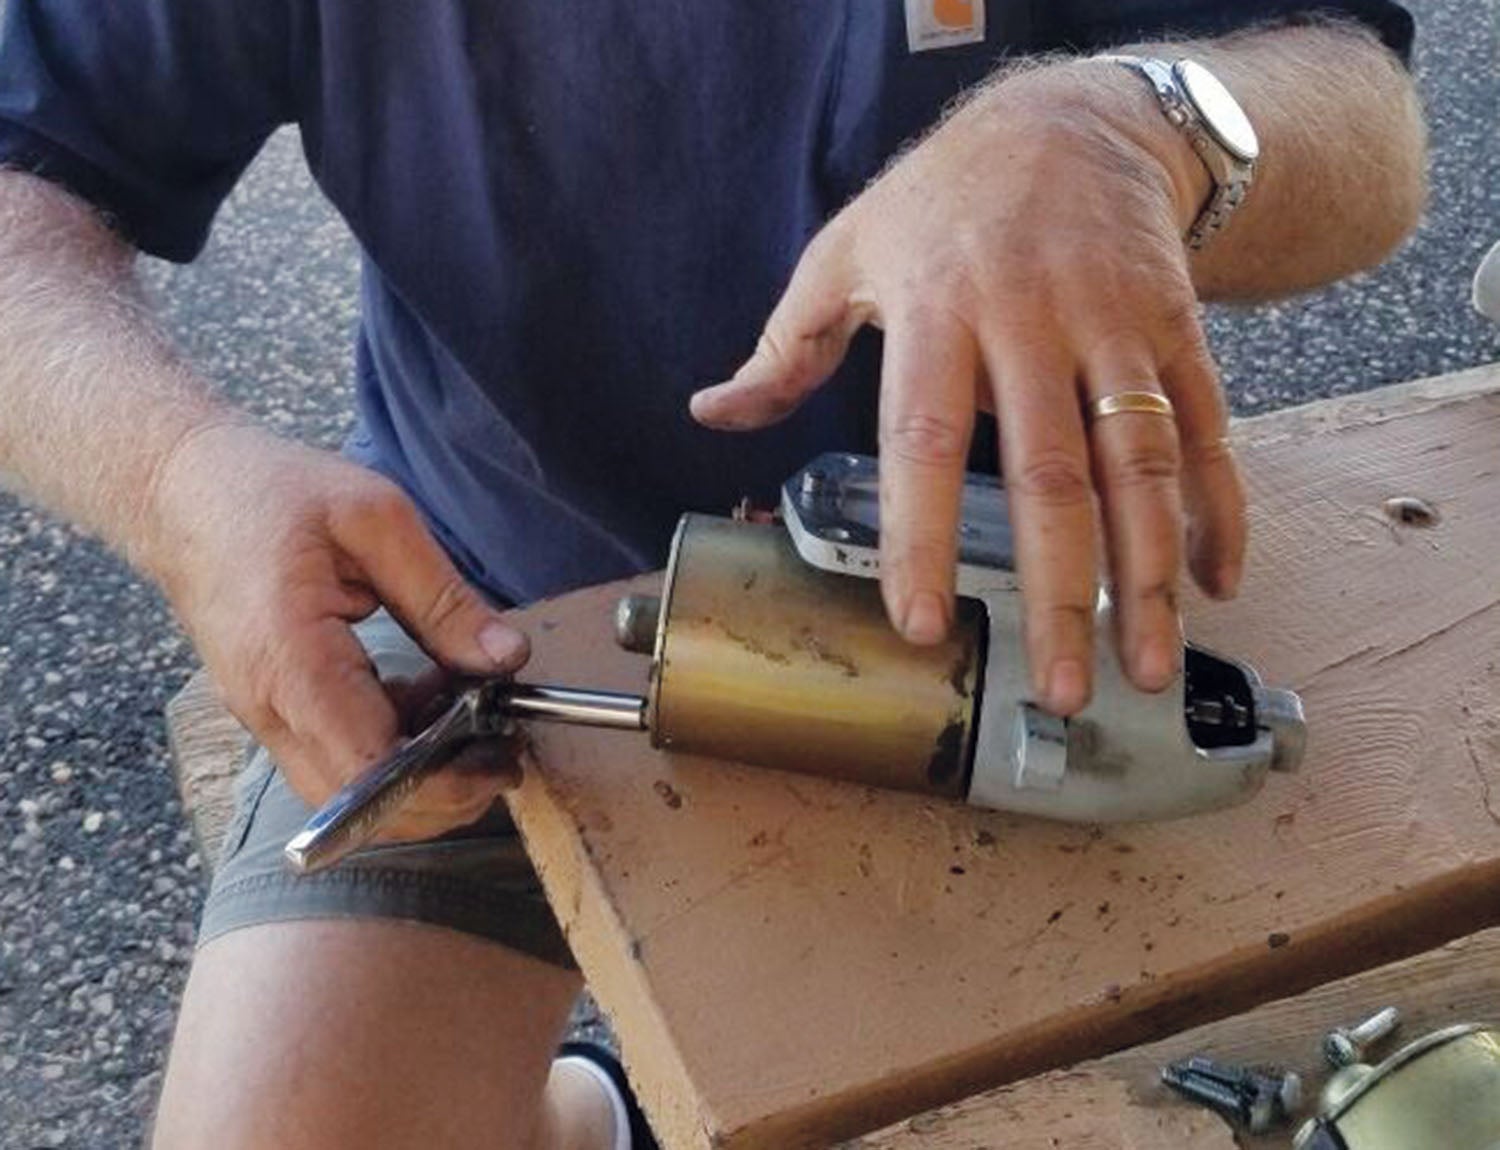
When we got up the next morning and checked the tracking on the starter, we found out that there is no morning delivery in Winslow with FedEx or anyone else. It wasn’t coming until 4:30 p.m. and there was weather heading our way. With the clarity of the new morning we started thinking. What if I took the case from my bad starter and inserted the guts of Richard’s starter into it? His starter was turning over even if broken, and mine had a good case. It could work, so off to the airport we went to make one good starter out of the parts of two broken starters. By 10:30 that morning we had two planes that would start.
A quick look at Foreflight helped us plot a new route to avoid the weather, and we got home by 1:30 without further incident, almost. My vacuum pump died somewhere near the Buckeye VOR in Arizona, but it was clear weather, so that was of no great concern except for the $400 a new one was going to cost me when I got home. And my air conditioner at home blew up while I was in Arizona, just to add insult to injury. That is going to cost me $3000. For next July, I am considering staying home in bed with the covers pulled over my head instead of going to Wisconsin.
Lightweight Starters
Lightweight starters are great in many ways. They generally work pretty well and they are, as the name implies, lighter than the alternatives. Saving several pounds of weight on the front end of most amateur-built airplanes is not something to be dismissed easily. But on the downside of reduced weight is reduced ruggedness and durability. It just has to.
After 13 years, Richard and I were not so much disappointed in the lifespans of our starters as we were unhappy about the exact timing and location of the failures. These were both Sky-Tec 149-12LS starters, which is what I used to replace the starter in my Sportsman, mainly because I wanted something that I knew would drop right into the spot formerly occupied by the old starter. Richard can now decide how long he wants to fly with his parts starter and what to use as a replacement. In my GlaStar project now under construction, I am switching to a Sky-Tec 149-NL starter that is 1.6 pounds heavier but considerably more rugged. I can save that much weight somewhere else. What you do depends on how important weight, especially forward weight, is to you.
When Sky-Tec made our starters, they decided that the best way to get weight down and to protect the engine from harm from kickbacks was to sacrifice the starter. As long as the engine didn’t kick back during the starting process that was a good strategy. The problems came when engines did kick back and the casting part of the starters broke. No one thanked Sky-Tec for protecting their engines, they were just mad about having to buy new starters. Eventually Sky-Tec got tired of getting those phone calls, so they beefed up their lightweight starters and came out with some new starters with a different type of kickback protection. This added weight but increased durability. Today you have a choice.
Troubleshooting Starter Problems
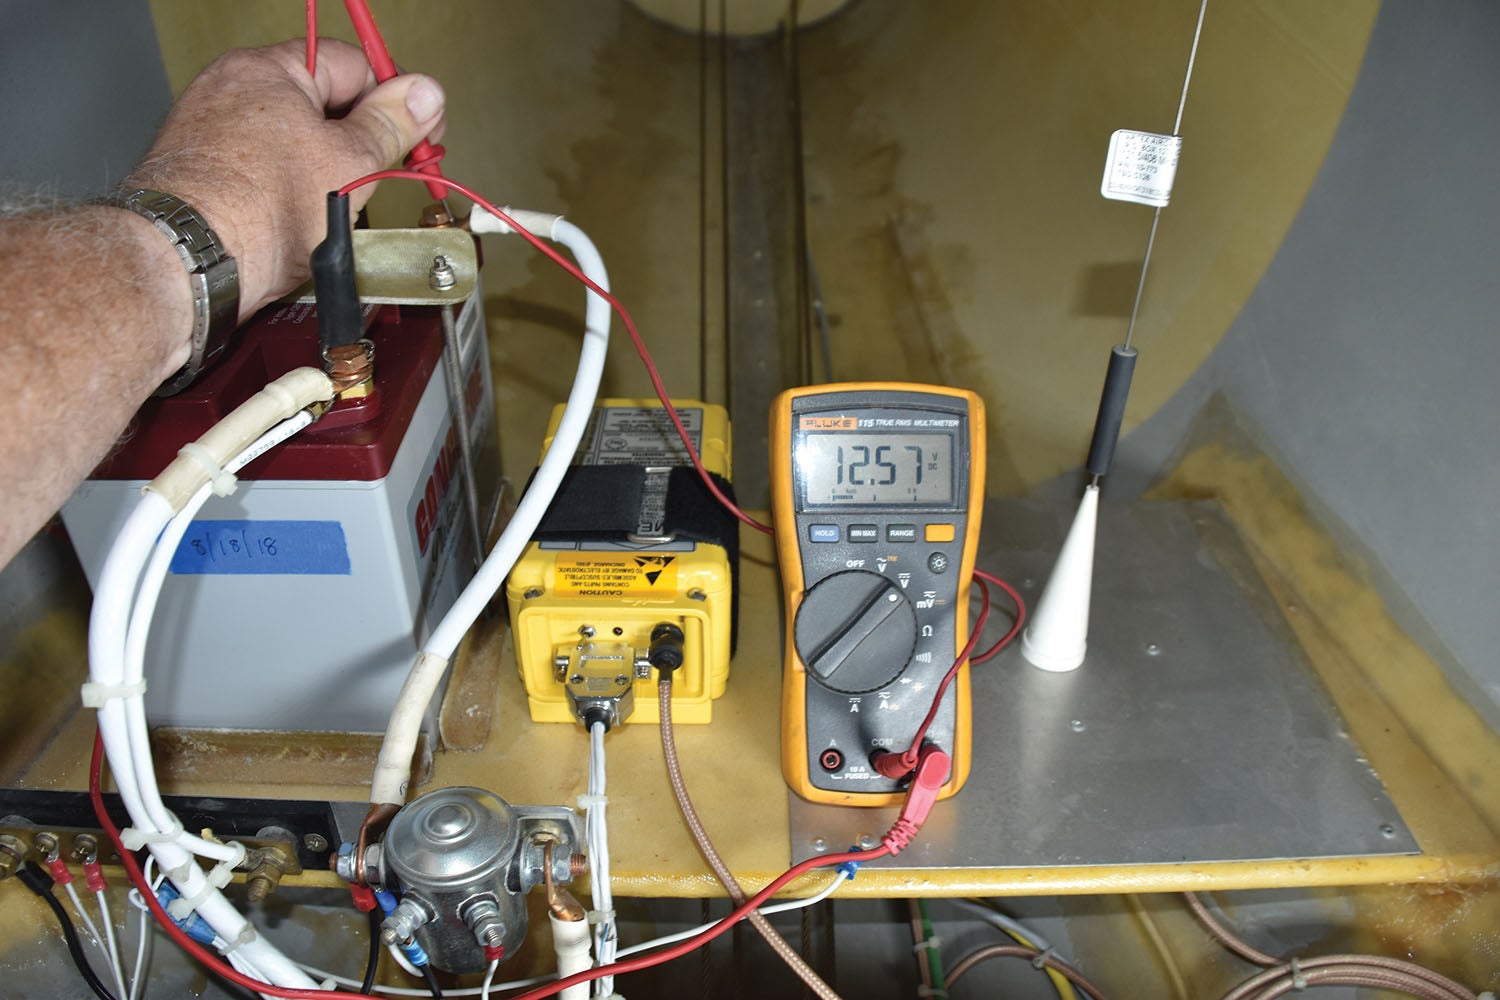
My assumption always is, when having starting problems, that it isn’t the starter at fault. Admittedly, I am sometimes wrong, but buying a new starter is expensive, especially if that doesn’t solve the problem. The best way to sort out starting problems is by first checking the condition of the battery. This can be as simple as looking at the indicated bus voltage on your engine monitor or by using a volt meter. A good battery should put out around 12.8 to 12.9 volts if it is fully charged. At 75% charge you should see a voltage of 12.6, assuming a nominal 12-volt system. If your battery voltage is less than that, the battery is likely the source of your starting problems. Charge the battery and try to start your plane again.
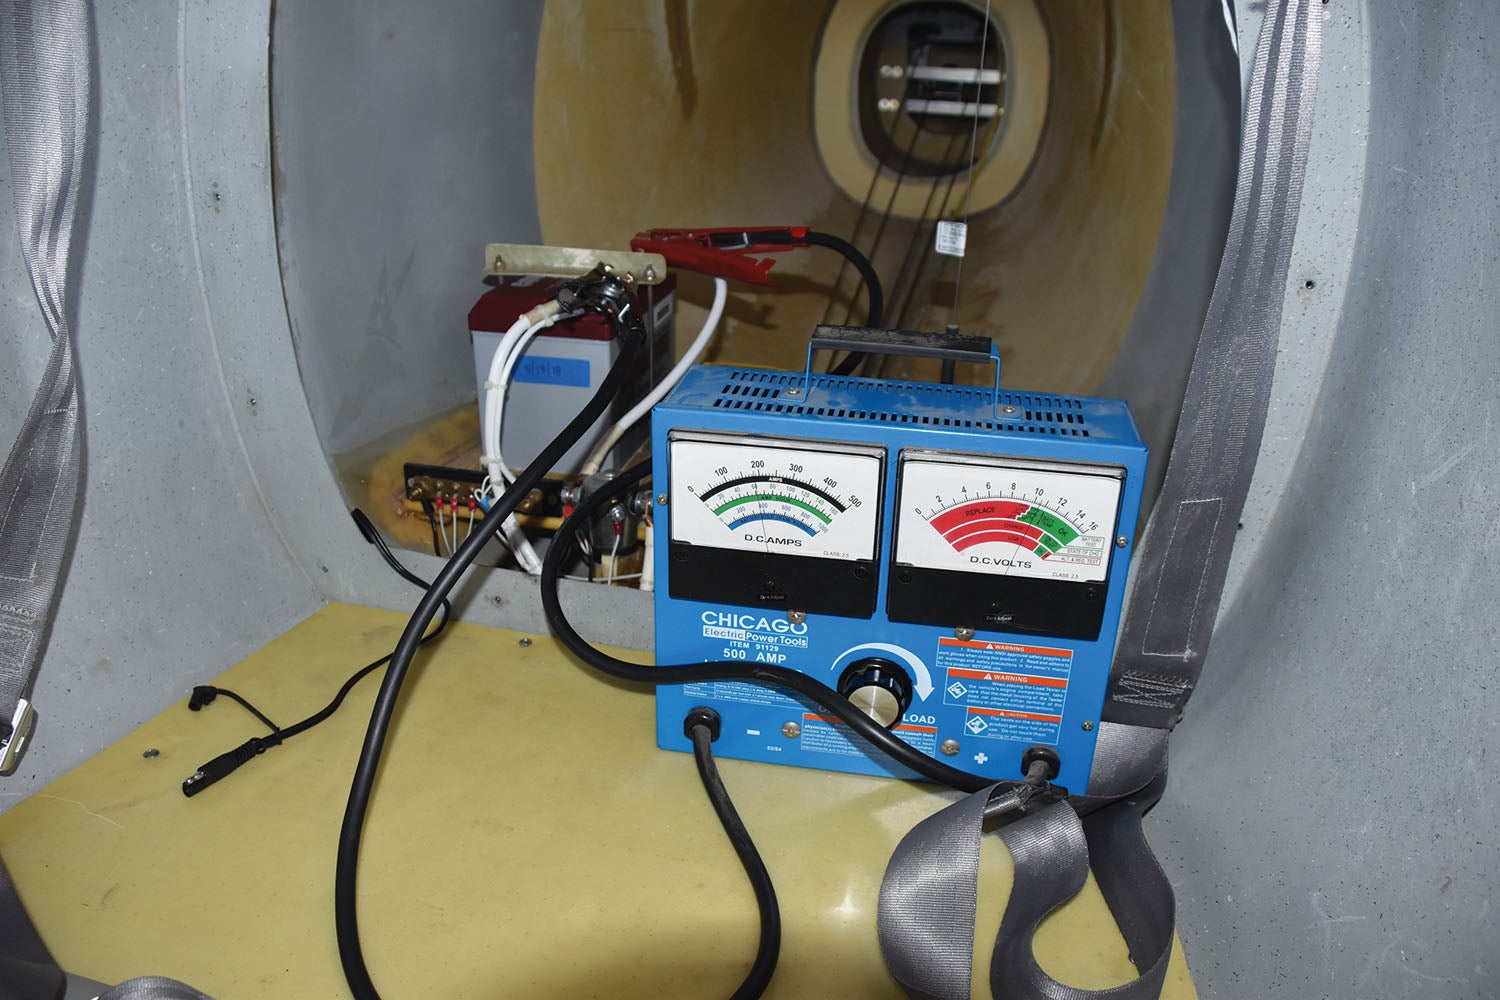
Unfortunately, battery voltage alone does not indicate battery condition, only the state of charge. You really need a battery condition tester to put a load on your battery and see if it holds up. Condition testers are available from Harbor Freight at a fairly low price, so it might be a good idea to get one. With its infrequent use, this is a good item to share among friends or have available in your EAA chapter tool crib. In any case, be sure the battery is in good shape before you go any further. Even if you need a new battery, remember that it is cheaper than a new starter.
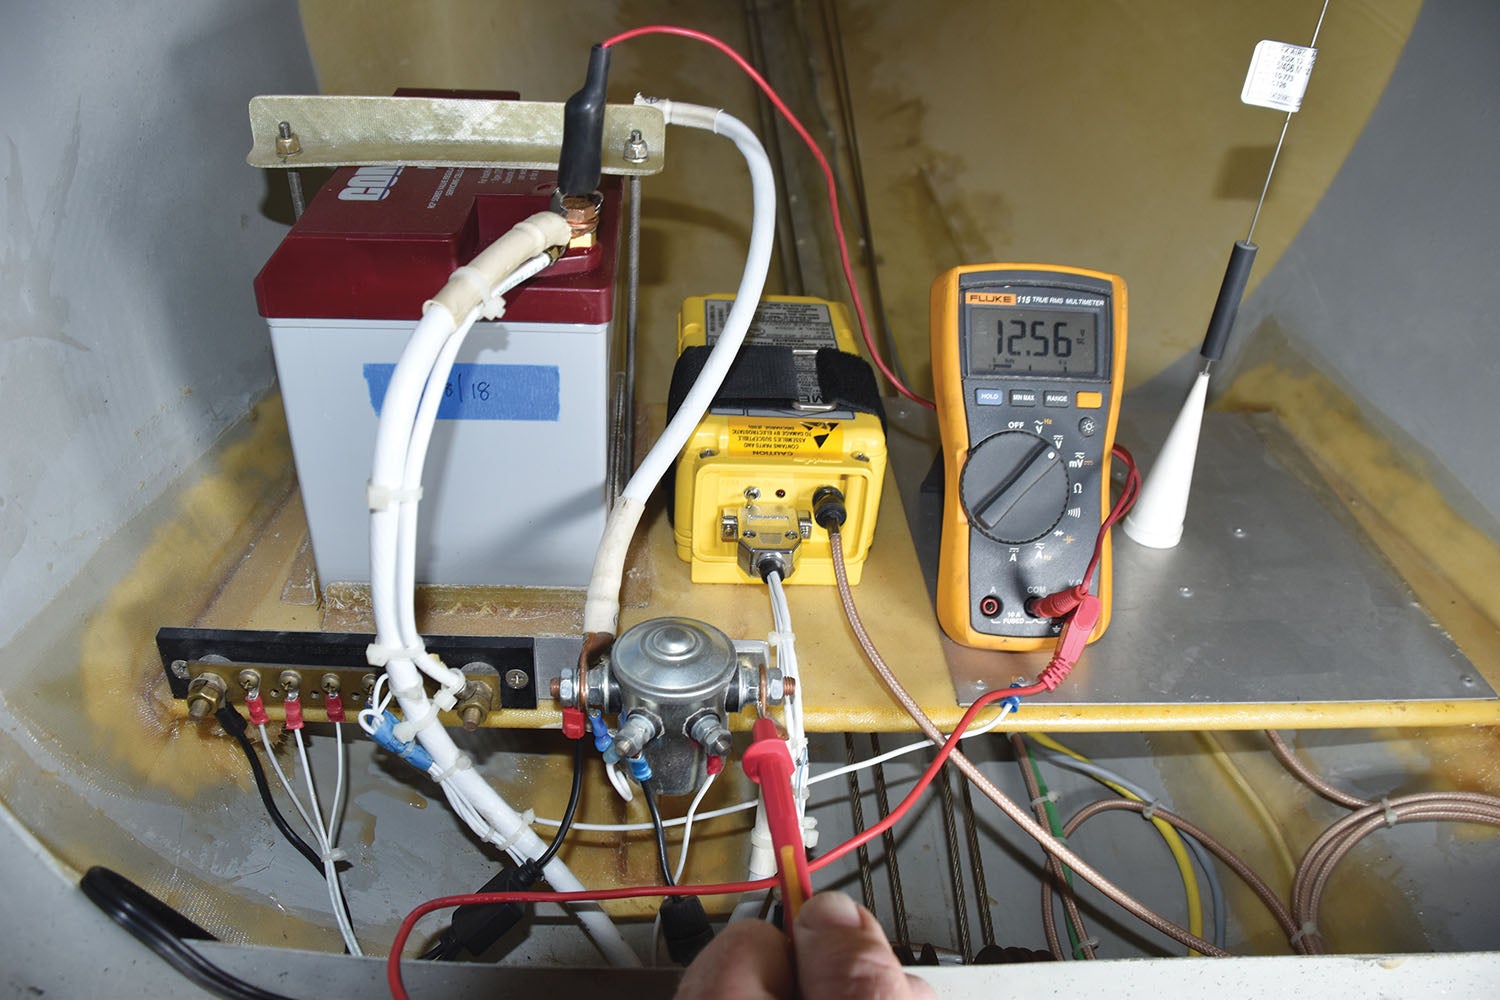
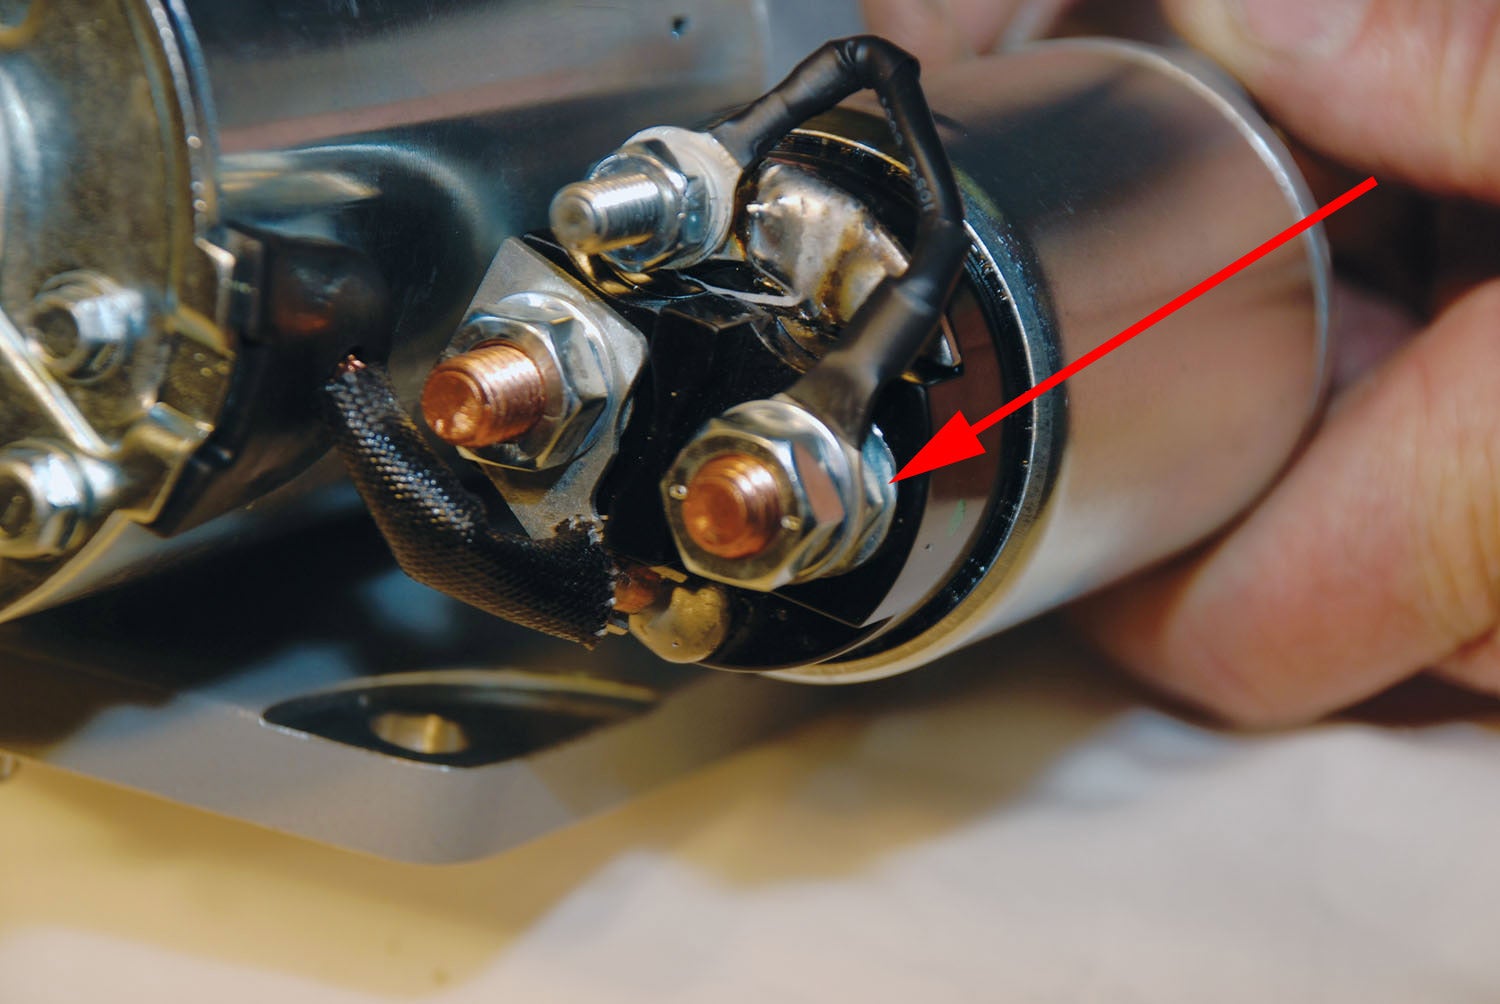
If the battery checks out, then the next place to look for trouble is in the relays and wire connections of your starting system. Start with the battery and check voltage at each connection. Check both sides of the master relay and starter relay. Disconnect the cable from the relay to the starter before you try to check the starter relay. You don’t want to accidentally spin the prop while you are checking the relay. Ideally you should not have more than a 0.1-volt drop across either relay and not more than a 0.2-volt drop across the entire starting system. If you have more than that, you may have a loose or corroded connection somewhere, or a bad relay. The first time I began trying to solve my starting problem I found a loose connection where the cable attached to the starter. After tightening that I thought I had my problem solved. It did help for a while but ultimately the problem proved to be something else.
Another indicator of a problem is a big voltage drop when you crank the engine. My voltage was dropping down to around 8 volts. That will not do. You should expect to see a cranking voltage closer to 11 volts, or hopefully a little more.
As I was preparing for my trip to Oshkosh, I thought I had my starter problem licked. Just to be safe I had the battery on the charger for several days before I left. The plane started well enough on the day I left, but after that it was dead. Sometimes the stars are just lined up against you, but that doesn’t mean that the troubleshooting process is wrong. Sometimes it is just insufficient. Sometimes it is the starter.
What I Could Have Done Better
I was perhaps a little too easily satisfied with my low-cost solution. I should have made one or two short flights in the local area after “solving” the problem and before taking off on a 1600-nm trip. In hindsight that looks like a big oversight. I still believe that it is best to try to find the simplest and most economical solution to a problem and not just replace any suspect, expensive part in hopes you will get it right. On the other hand, buying a new starter after all those years would have not been a crazy thing to do, and it would have saved me a great deal of money.
![[Credit: Lisa Turner]](https://www.kitplanes.com/wp-content/uploads/2026/02/Fuel-Selector.jpg?w=218&h=150&crop=1 "Fuel Follies")


The other connections that get overlooked are the ground cables; , from the battery negative to the airframe, and the jumper strap from the engine mount to the airframe. The connections to the airframe, in both locations, should have the strap in direct contact with the airframe, no washers. Those go under the nut .
One more comment.
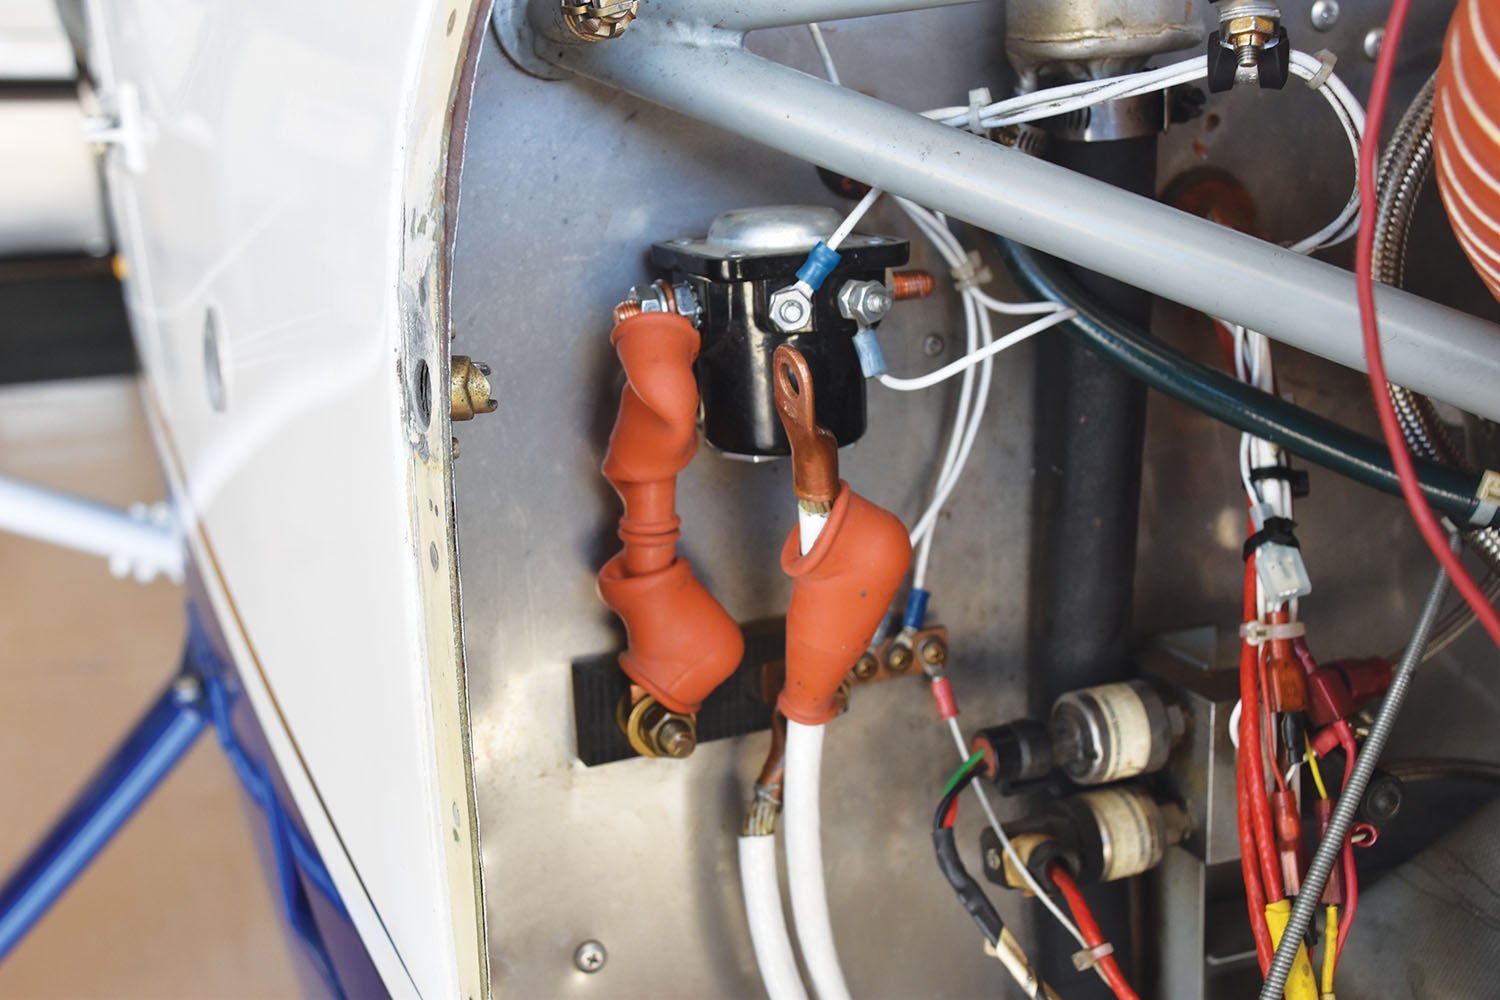
In the photo of the firewall, showing the starter contactor; it is mounted incorrectly. It should be mounted 180 deg from as shown, with the cap at the bottom. When energized the solenoid should pull the armature upward..
As shown , a hard landing could cause the armature to move downward, closing the contacts and energizing the starter…a bad situation and a short life from the starter and ring gear..!
A lot of weight can be saved by swapping to a LiFePO4 battery. Just be careful about the details of true capacity and charging and inbuilt protections. These batteries are better than lead-acid, but less rugged and more demanding of care. I have been using one for years now and the weight went down from 6kg to one kg.
You could have welded the broken part aluminum rod and butane sold at harbor freight tools and saved $400
Comments are closed.