My darn plane won’t start. Do I need a new starter? Well, maybe—but probably not. Tracking down starting problems requires thinking about the entire starting system. That system includes the battery, the starter switch and relay, the wiring (and connectors), and finally the starter itself. A weakness anywhere in the system can bring the whole starting process to a grinding halt. Let’s look at each component and how it plays an important role in the starting process.
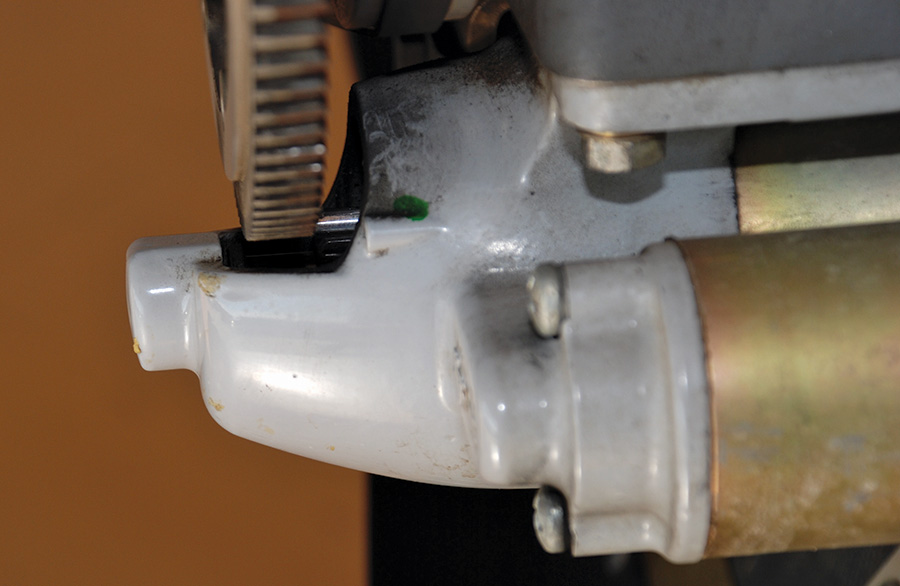
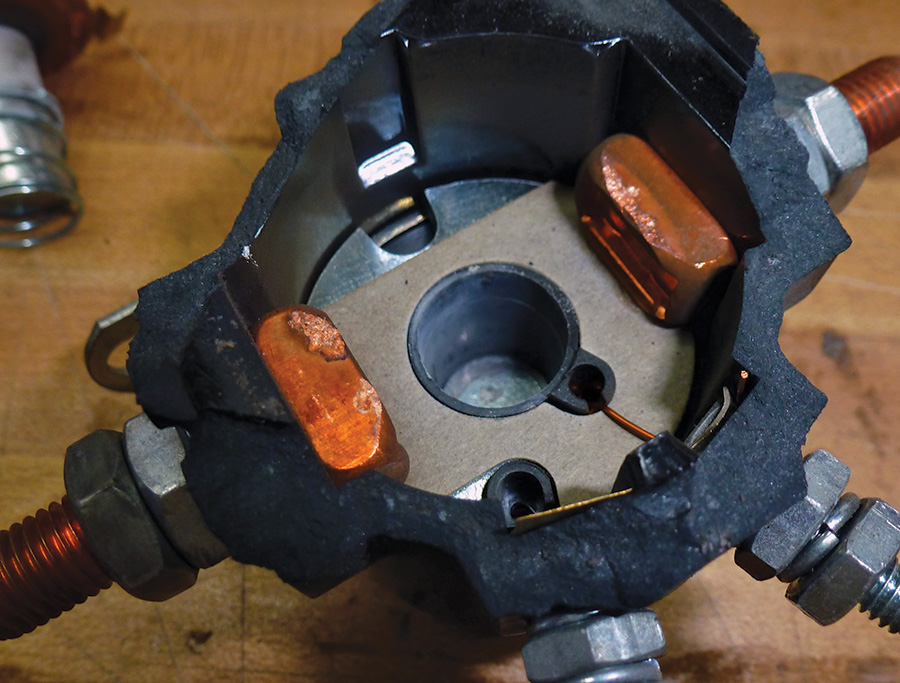
A strong kickback broke the casting of this lightweight Sky-Tec starter. All starters can be broken by kickbacks, but lightweight starters are somewhat more vulnerable to this problem.
But first, a special safety note: Whenever you are testing the starter system, be sure that everyone is well clear of the propeller at all times. It is easy to get distracted by the details of the troubleshooting process and forget this basic safety rule. Please be extra careful not to forget. It is impossible to overstate the danger of a spinning propeller to life and limb.
The Battery
A weak battery that is either too old or not fully charged is the most likely culprit when an airplane is hard to turn over. There is easily an article’s worth of things to say about batteries alone (and Bob Nuckolls is covering those in his Practical Electrical series on these very pages), but a review of a few basic points seems in order. Batteries need to be kept fully charged. With more and more flyers struggling to log even 50 hours per year, it is often several weeks between flights for many people. A trickle charger is a great solution to this problem for infrequent flyers. Of course, more flying is an even better solution. In cold weather, preheating your plane and keeping the battery fully charged will likely eliminate at least 90% of all starting problems. As more people come to rely on smaller batteries for their planes, it is even more important than before that this vital part of the starting system gets the care it deserves.
A fully charged battery should produce close to 13.0 volts with a minimum of 12.6 volts (12-volt system). Unfortunately, voltage doesn’t tell us much about the ability of a battery to sustain a heavy load. That requires a load tester, an item few amateur mechanics seem to have, but one that is easily affordable for 12-volt systems. Share one between some friends or your EAA chapter if you like, but get one. Then check your battery once a year or whenever you are having problems. Remember, batteries don’t last forever. A good battery owes you three or four years of normal service. After that you are on your own. Especially if you regularly fly IFR, plan on getting a new battery every three years.
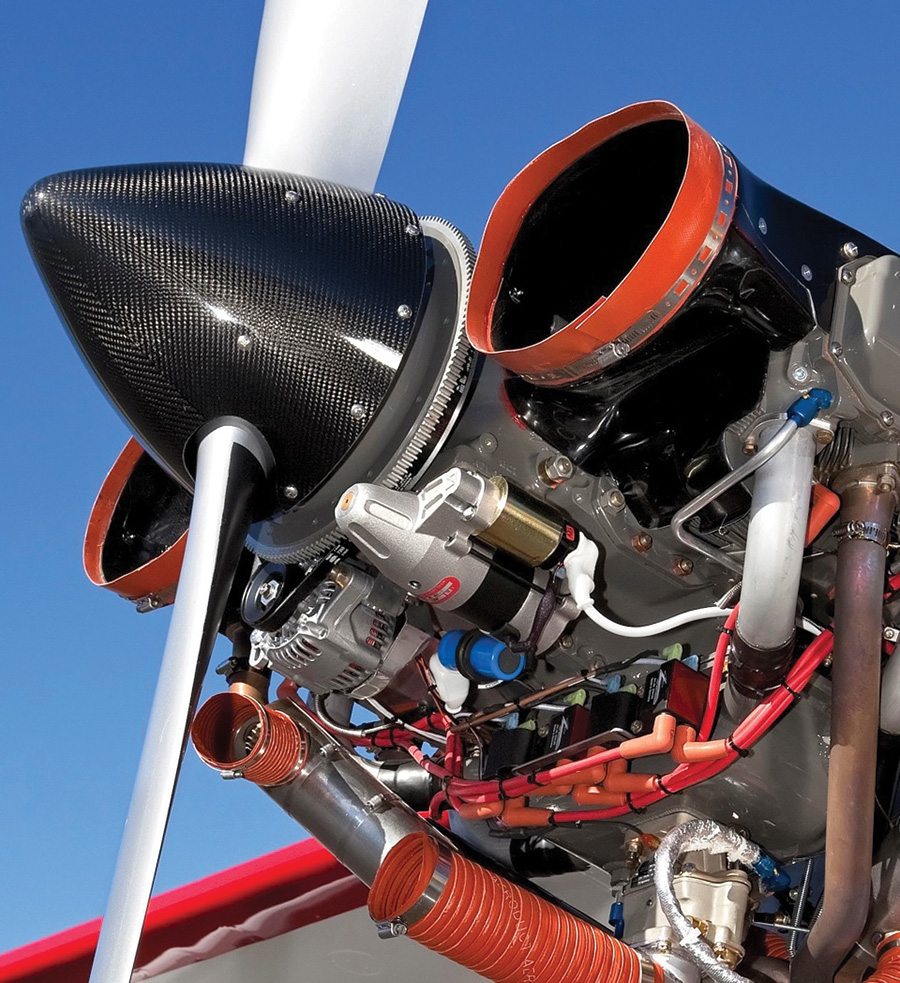
This Carbon Cub with its special O-340 engine is fitted with a Hartzell X-Drive lightweight starter.
Battery Cables and Connectors
Those big wires that go from the battery to the starter relay and the starter are very important and a frequent source of starting trouble. They look so robust and reliable that it is easy to take them for granted, but corrosion at the ends of these cables can easily bring the whole starting system to its knees. After you have checked your battery, if you still have starting problems, take each cable connection apart and clean it right down to the bare metal. A stiff wire brush will usually do the trick, but don’t be afraid to use course sandpaper if you have to. Be sure to remove 100% of any corrosion you may find. It is best to simply replace any corroded nuts or lock washers. When everything is clean, reinstall each connection and tighten it appropriately, depending on its size and the manufacturer’s recommendation. Please note that battery makers will usually have a specific torque for battery posts. Over-tightening can be worse than under-tightening, so be careful. Similarly, starter makers will have recommended torque numbers for the mounting bolts and the wire terminal. Find out what the numbers are for your starter to be safe.
Just as important as the condition of the battery cables is to be sure they are the right size. As an amateur builder you can use any size wire you want, but there is a best size, depending on your particular installation. First of all, always use aviation-grade copper wire. Welding cables or other non-aviation wire may carry the load, but they do not always have insulation that will prevent them from emitting toxic smoke in case of a fire. Aviation wire offers that protection. The size of your wire will primarily depend on how far the battery is from the starter. If the battery is mounted on the firewall, #6 AWG wire will work. For larger engines, especially fuel-injected ones that may require more sustained cranking, it is better to upgrade to #4 AWG wire, even if the battery is very close. If your battery is in the cabin, the length of the wire run becomes the key factor. With a total wire length of not more than 12 feet, you may use #4 AWG wire. Beyond that, you must increase the wire to #2 AWG, to a maximum wire length of 20 feet. If you use the fuselage or cage as the ground conductor, you do not need to count the length of wire saved by using the cage as a ground conductor in your wire length calculation. If you are running a ground wire separately from the fuselage or cage, you will need to count the length of both the positive and negative wires in your calculation. Sky-Tec has a handy table to determine wire size (http://skytecair.com/wire.htm) or you can refer to FAA publication AC 43.13-1B.
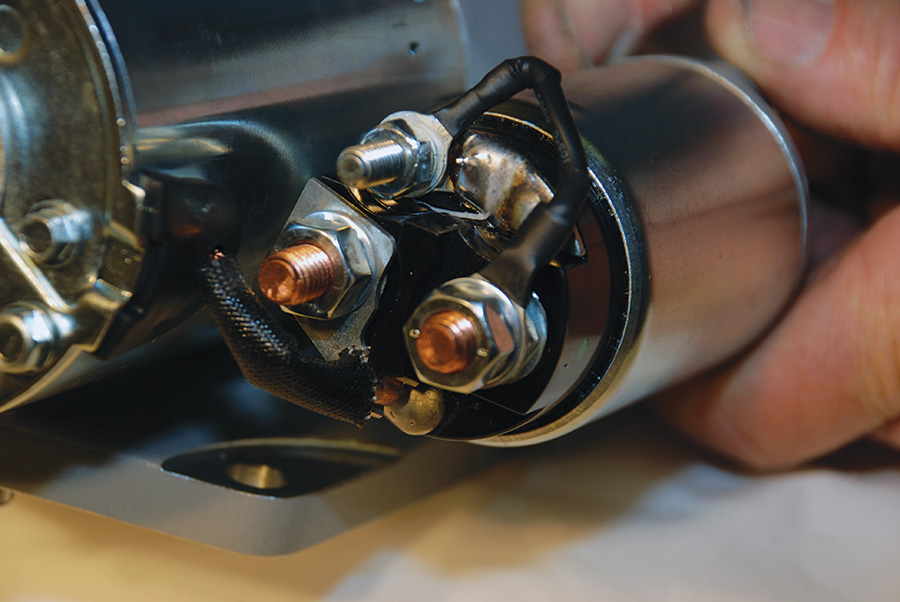
The jumper between the large starter wire post and the smaller post on the solenoid is needed to allow single-wire installation (most common). If you do not have this wire, you should install one to avoid the need for a separate wire to the solenoid.
Remember that the ground strap is a vital part of the electrical connection from the battery to the starter. If you are using the airframe as a ground in your plane, there must be a good clean electrical connection from the engine through the ground strap to the engine mount and to the airframe. Corrosion, paint or loose bolts anywhere in this chain can increase resistance and reduce the power of the starting system. The same applies if you are running a ground wire directly to the engine. The connection must be metal-to-metal and corrosion-free.
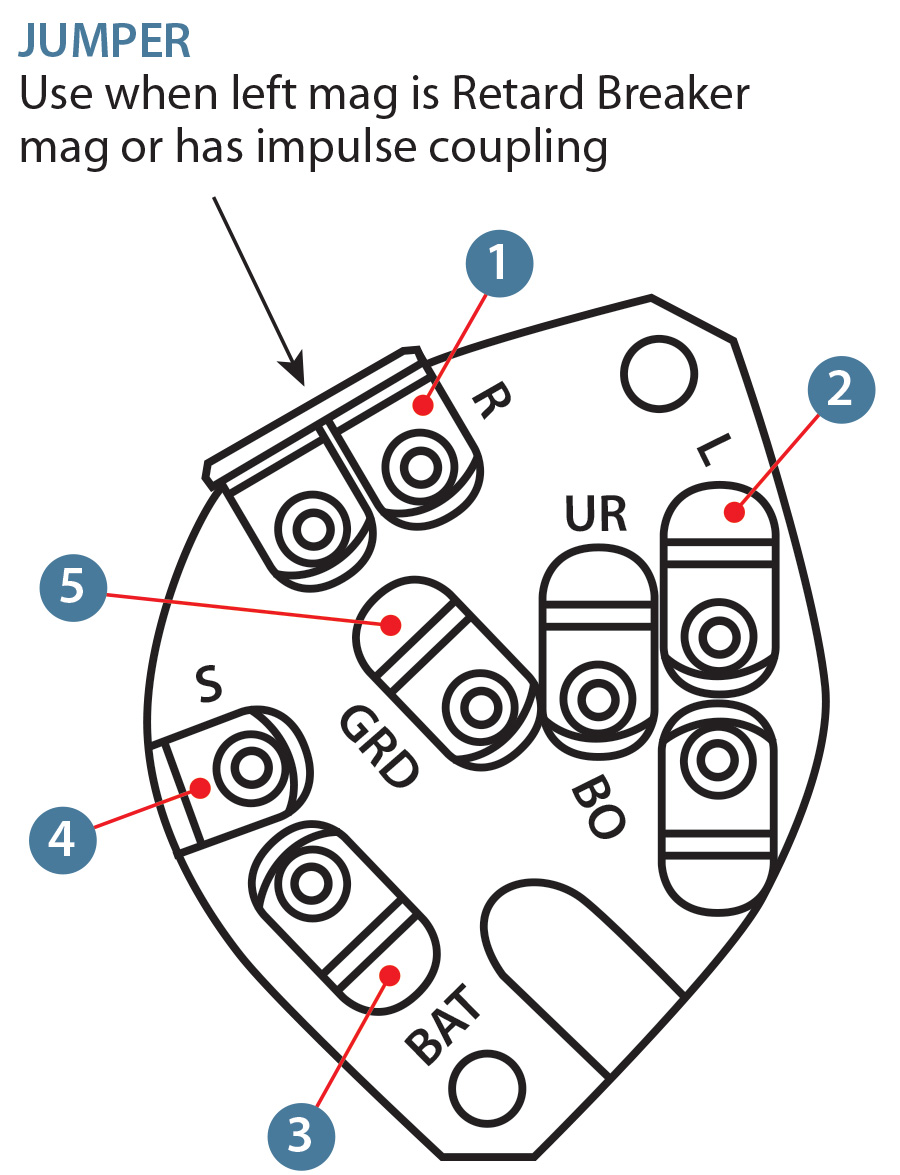
With the master on you should see 12 volts between posts 3 (BAT) and 5 (GND). With the starter switch turned to Start, you should see 12 volts between 5 and 4 (S, for Start). If you isolate the switch, you can measure resistance between 3 and 4. This should be open when the switch is off and less than 0.2 ohms when the switch is turned to Start.
Starter Switch and Relay
With battery cables properly sized and connections cleaned and tightened, the plane should turn over easily, but it doesn’t. Now what? With a good battery and wires, you should at least hear the starter relay click when you turn the key to Start. If you do not, look to the starter switch and wiring for a problem or possibly the starter relay or the starter itself. If the starter has a burnt smell to it, you likely need a new starter, but you will still need to find out why it got that way.
If the starter looks and smells normal, connect a voltmeter to the positive (small) post on the starter relay. Connect the other lead to ground. If you do not see 12 volts when you turn the key to Start, you have a problem with the starter switch or wiring. From here it is a matter of tracing the problem through the system until the faulty component is found and repaired or replaced.
Check the resistance in the wire from the switch to the relay and the wire from the switch to the main bus with an ohmmeter. You should see very low to no resistance (0.2 ohms max.) in these wires. If there is any significant resistance noted, first check, and if needed, replace the connectors at the ends of the wires, or replace the wires if this doesn’t solve the problem. Next check the switch itself. If your wires are good, you should have 12 volts when checking from the BAT post on the ignition switch to ground. Then, when you turn the key to Start, you should see 12 volts at the starter terminal, too. If you do not, you likely have a bad starter switch. You can also check the switch with your ohmmeter, but be careful not to run 12 volts through the leads when the meter is in the ohm setting. It could damage your meter. With the key in any position but Start, there should be an open circuit between the BAT post and the Start post, but when you turn the key to Start, the resistance should go to zero. If your switch is bad, simply replace it.
Experimental airplane builder/mechanic Ed Zaleski checks the voltage coming to the starter relay. The large wire from the relay to the starter has been disconnected for safety.
If the starter switch and wiring all check out, you may have a bad starter relay. To test the starter relay, first disconnect the large wire that goes from the relay to the starter. With this disconnected the starter motor cannot be activated by turning the key to Start. It is much safer this way. Have a helper turn the key to Start and listen for the relay to click. There should be a good solid click every time the key is turned. If there is not, and you have already checked to see if you are getting 12 volts at the wire from the starter switch, you should try one more thing before you replace the relay: The typical starter relay will have two small posts on the body of the relay. These are different from the two large posts that hold the battery and starter wires. It is possible that the wires to the small posts have gotten switched somehow. Remove these wires and switch them to the other post and see if that doesn’t solve the problem.
This older Prestolite starter has been disassembled to show the parts. The Bendix drive and the brushes can be serviced by an Experimental owner/mechanic, but most people discard this type of starter to save weight and maintenance headaches.
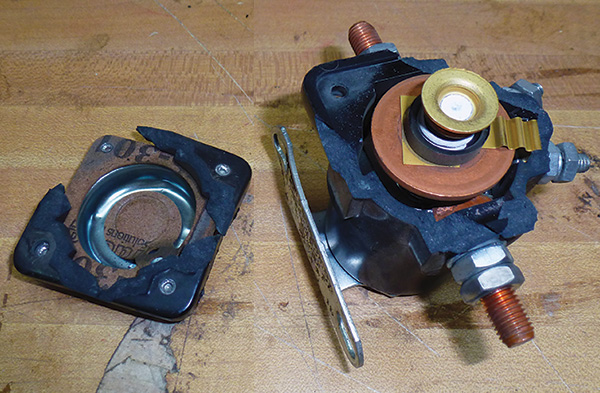
If you are still not getting the results you need, it is time to remove the relay. Remove the wires from the relay and unbolt it from the firewall. If there is corrosion between the relay and the firewall, clean that up and see if that helps. If there is any doubt about the ground connection between the firewall and the battery, be sure to attend to that, too. One last test of the relay can be made by connecting the positive lead from your battery charger to the positive, small post, and the other to the mounting tab of the relay. If you are still not getting that desired click when you do this, it is time to get a new relay.
If the relay makes that nice click when you turn the key, but you are still having hard starting problems, there is still another test you can do. Without even removing the relay from the plane, and with the wire from the relay to the starter still disconnected, check the voltage at both large terminals. The incoming voltage should be at least 12.5 volts, and the outgoing voltage when the key is turned to Start should be very close to that. The maximum allowable voltage drop through the entire starting system is 0.5 volts, but you should not expect to see all of that across the starter relay. If you have a sufficiently sensitive ohmmeter, you should read a maximum of 0.2 ohms across the large posts when the relay is activated. More resistance or less voltage than that means the contacts are wearing out inside the relay. Time for a new one.
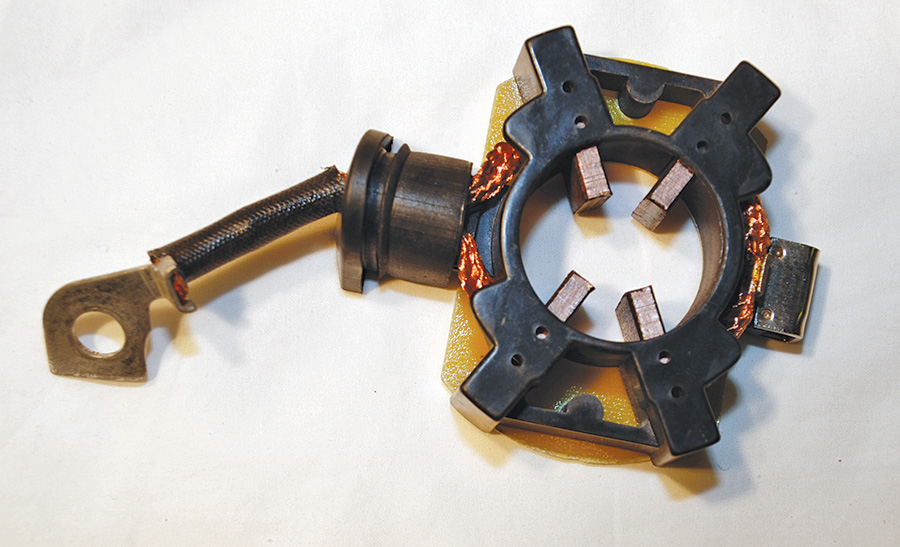
The brushes in a Sky-Tec starter can be replaced, but it is seldom necessary to do so between engine overhauls. At overhaul time it is best if the whole starter is rebuilt or replaced.
It is not easy to measure low resistance, even with a good meter, so take your time, be sure you have good leads making good contact, and repeat your measurement more than once. Also be sure to isolate any component electrically before measuring ohms to avoid damaging your meter. In other words, be sure not to run 12 volts through the meter when it is in the ohms setting.
If your relay emits a series of clicks but won’t stay on, the most likely culprits are a low battery or a bad connection or wire somewhere in the starting system. With the wire from the relay to the starter disconnected, it is possible that the relay may work, only to start that rat-t-tat clicking again when the starter wire is reconnected. That is because the voltage drop of the starting operation weakens the pull of the relay enough to allow the contact inside to spring back momentarily.
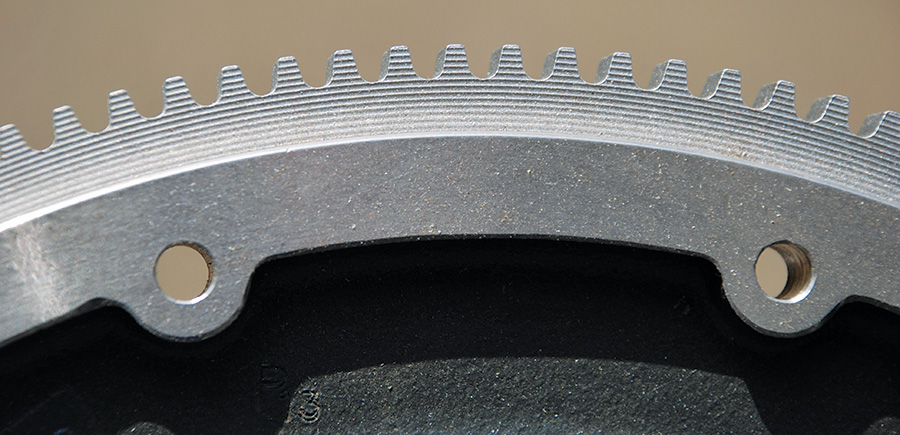
This Lycoming ring gear has 149 teeth. It is easily identifiable by the U-shaped bottoms of the teeth. However, if there is any doubt, count the teeth.
This ring gear off an older O-320 engine has 122 teeth. The sharper-cut V-shaped teeth are a good clue to its tooth count.
Another relay problem you may encounter occurs when the relay welds itself closed (on). This can cause the starter drive to remain engaged in the ring gear after the key is released. On a Lycoming this can quickly destroy your starter and ring gear. On a Continental this can shred metal and dump it inside your engine, leaving you in need of a complete teardown and reassembly. Often you will be able to hear the strange sound a hung starter makes, but sometimes not. If there is any doubt, shut your engine down immediately. If your starter relay is welded shut (on), the starter will start turning as soon as you turn the master switch back on, even without touching the key. Do not attempt to fly a plane with a starter relay that will not shut off. Note that not all hung starters are caused by relays welding themselves shut.
The Starter
With most amateur airplane builders opting for newer lightweight starters, the problems often seen with older starters such as the Prestolite starters and others found on many certified aircraft are less common. New lightweight starters by Hartzell, Sky-Tec, and others should last the life of the engine (until overhaul). This means that owner maintenance and repairs owing to wear and tear should be essentially none, except for keeping connections free of corrosion and keeping the starter nose piece clear of debris. That said, there are a number of problems that do come up as a result of engine kickbacks, improper installation, or abuse. Here are some common problems seen with Experimental aircraft starters:
- When you turn the key to start, you can hear the motor spinning, but the engine isn’t turning over, or perhaps the starter gear is grinding against the ring gear, but not turning it. Lightweight starters are somewhat prone to having the main casting bent or broken by an engine kickback. A bent or broken starter casting can easily allow the starter to disengage from the ring gear. Unfortunately, the solution is to buy a new starter, and while you’re at it, take a good look at potential starting issues such as your engine’s magneto timing, fuel system, and your starting technique. As a solution to this problem, Hartzell and Sky-Tec now have starters available with kickback protection built in. This extra feature will add about two pounds to the starter, but many people feel it is well worth it.
- The most common starting problem is slow turning or no turning of the engine. The most likely causes of this are a weak battery, or loose or corroded connections in the battery cables or the ground strap. Keep your battery well charged and regularly clean and retighten all connections to avoid this problem. Cold weather is especially hard on batteries, so be sure to preheat your engine when the temperatures drop and keep your battery topped off with a trickle charger if you don’t fly very often.
- If your starter engages and starts the engine, but won’t let go after the engine starts, you have a hung starter. This requires immediate attention. Stop the engine right away. With old-style starters the Bendix drive can fail in such a way as to not retract the starter gear from the ring gear (what some people call the flywheel, even though it isn’t). Simply replacing the Bendix drive will solve the problem if the starter motor has not been damaged. With a lightweight starter that uses a solenoid to engage the starter gear, a failure of the starter itself will almost never be the source of a hung starter. Look instead to the starter relay, which may have welded itself shut (on).
- When building your airplane you may have noted that there are master relays and starter relays. The differences are important. Master relays are designed to handle lighter loads for long periods of time, but starter relays are made for high loads of a short duration. If you accidentally use a master relay for your starter relay, you can easily weld the internal contacts together before you know it. A hung starter will quickly follow.
- Another possible cause of a hung starter with a Lycoming engine is too little clearance between the starter gear and the ring gear. Lycoming has a service instruction (SI-1447 B) that tells you how to shim your starter to get the proper clearance. A hung starter will burn up fairly quickly, which will be readily apparent by the smoke and/or burnt smell coming from it. Time for a new starter and a new starter relay.
- Armature damage can result from excessive cranking, so it is important to know the duty cycle of your starter. Hartzell starters can be cranked for ten seconds at a time with a 20 second rest in between start attempts for up to 20 times. After that, you should wait for 20 minutes before trying to start the engine again. Other brands of starters have different, and often more restrictive, duty cycles, some only allowing for six start attempts before extended rest. Be sure to check with the maker of your starter to see what duty cycle they recommend. Otherwise, internal parts can overheat and lead to starter failure.
- Another problem that can happen with a Lycoming engine is a mismatch between the number of teeth on the ring gear and the pitch of the starter gear. Lycoming engines come with either 122 or 149 teeth on the ring gear. A starter made for a tooth count that doesn’t match the ring gear will quickly make hash out of both parts. Always check to be sure your starter and ring gear match before attempting to start your Lycoming engine.
Hartzell Engine Technologies now owns the Lamar line of starters, in addition to the other lines it picked up from Kelly Aerospace, so for problems with these starters see their web site for more information and technical assistance (www.hartzellenginetech.com). Their E-Drive starters with kickback protection weigh about nine pounds. Their X-Drive starters weigh about 7.6 pounds, but do not have kickback protection.
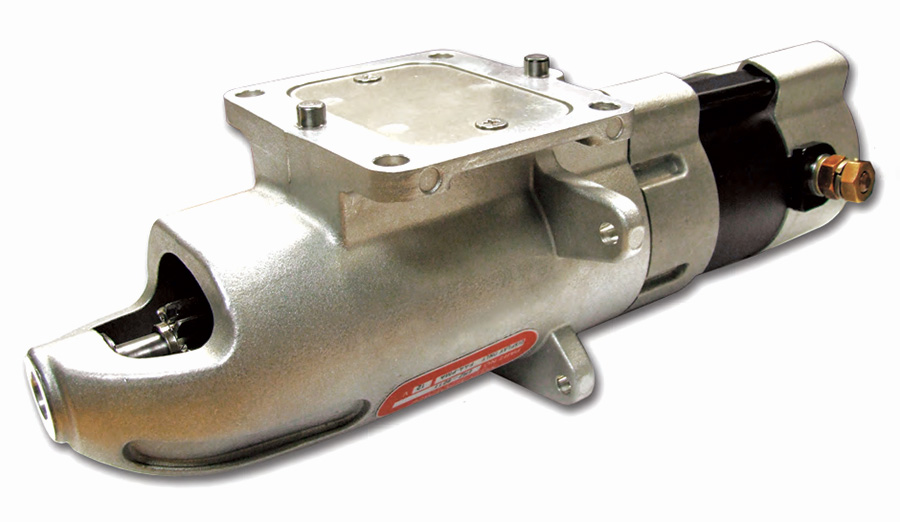
Hartzell’s E-Drive starter has solid kickback protection, but is somewhat heavier and more expensive than their lighter X-Drive starter.
Sky-Tec ultra-lightweight starters for four-cylinder Lycoming engines weigh only 6.5 pounds. They have been redesigned to better withstand kickbacks, but do not include active kickback protection. Their HT starters do include kickback protection, but the tradeoff is an increased weight up to 8.9 pounds and about $90 in added cost.
A special thanks to Mike Disbrow and Tim Gauntt of Hartzell Engine Technologies for their assistance preparing this article. For more information see Hartzell Engine Technologies at www.hartzellenginetech.com, or Sky-Tec Flyweight Starters at www.skytecair.com.
Photos: Dave Prizio, courtesy Hartzell Engine Technologies












Thank you for very interesting article.