 As the saying goes, a homebuilt airplane is never done! Especially with the nature of constant technology evolution, there’s always another new must-have gadget or useful avionics upgrade. There’s also the issue of flying an older homebuilt whose avionics are either obsolete or failing. Time waits for no man, and especially not for avionics.
From the practical side of things, working backward and upside down underneath and behind the instrument panel has never been one of my favorite activities. So when I first built my plane, I decided up front to hinge the panel at the bottom so it could be swung back to a decent angle, allowing behind-the-panel work to be done from the top.
I’m going to detail the approach I took and its essential elements, but my guess is that the approach would vary depending on your particular panel and airplane configuration and available mechanical structures to work with. (Our instigator-in-chief offers a few of his own observations in the sidebar below.) The main message here is not “do it like this,” but, rather, think about it and see if you can find a way to include hinging in your panel implementation. You’ll find it well worth the effort in the long run.
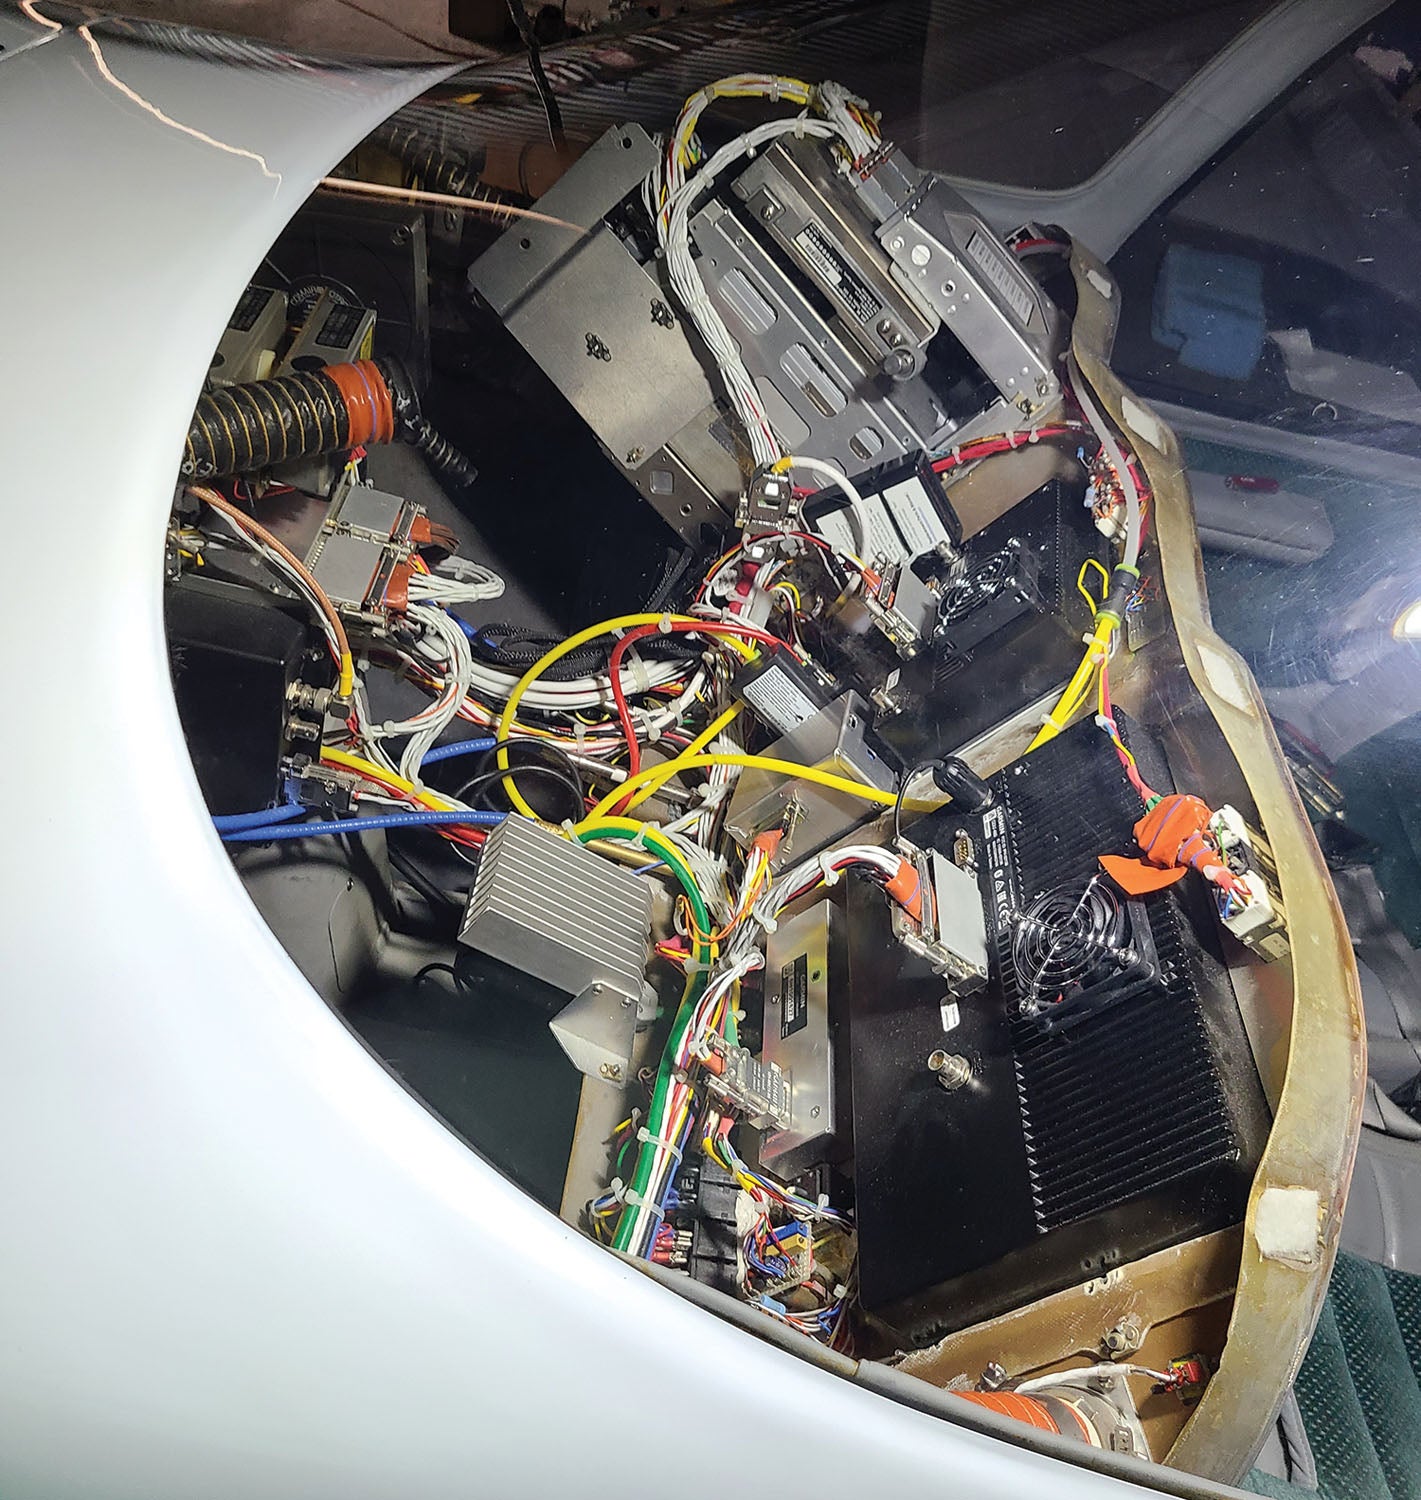
In my case, the entire panel hinges. You may find it easier to apply to individual panel inserts. The essential elements of this hinged panel implementation are 1) the hinges at the bottom; 2) top screwed-in retention points, one on each side; 3) rubber vibration isolation mounts included in each attachment; and 4) rear support for the radio stack. Figure 1 shows the panel swung back, with easy access to everything behind the panel, including items mounted on the firewall and nose gear housing. Work can be done sitting on either the front seats or on the spar carry-through with the seats removed.
Vibration Isolation
Rubber vibration isolators are an optional feature. I went with vibration isolation because my plane originally had vacuum-driven steam gauges, and their bearing life expectancy can be compromised by vibration. There is also reason to believe that avionics life expectancy is improved with less vibration. It’s up to you whether to include this. If so, rubber mounts, like those shown, are available in many sizes from McMaster-Carr.
Hinged at the Bottom
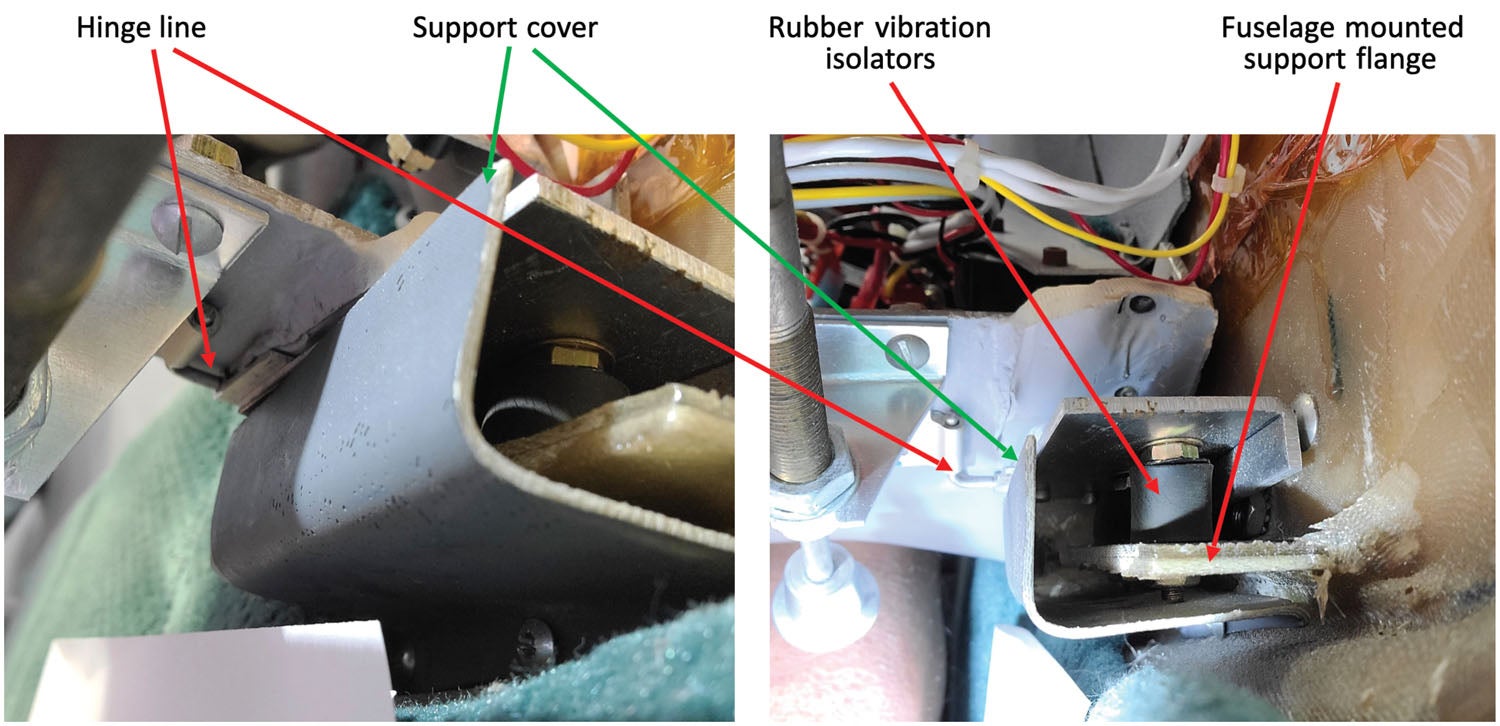
The hinges are short pieces of standard aircraft hinge material. Their flat flange area is easy to mount on one side and accommodates the rubber vibration mounts on the other flange and the other side of the rubber mounts attached to a fiberglass flange on the fuselage. See Figure 2. The assembly, in turn, has a cover to keep from scraping body parts that come in contact with the hinges.
Your biggest challenge might be finding the ideal hinge diameter and coming up with a way to remove the hinge pins should you desire to do so. Because this is not strictly speaking a structural piece, you don’t necessarily have to have the hinges run full span.
Top Retention Points
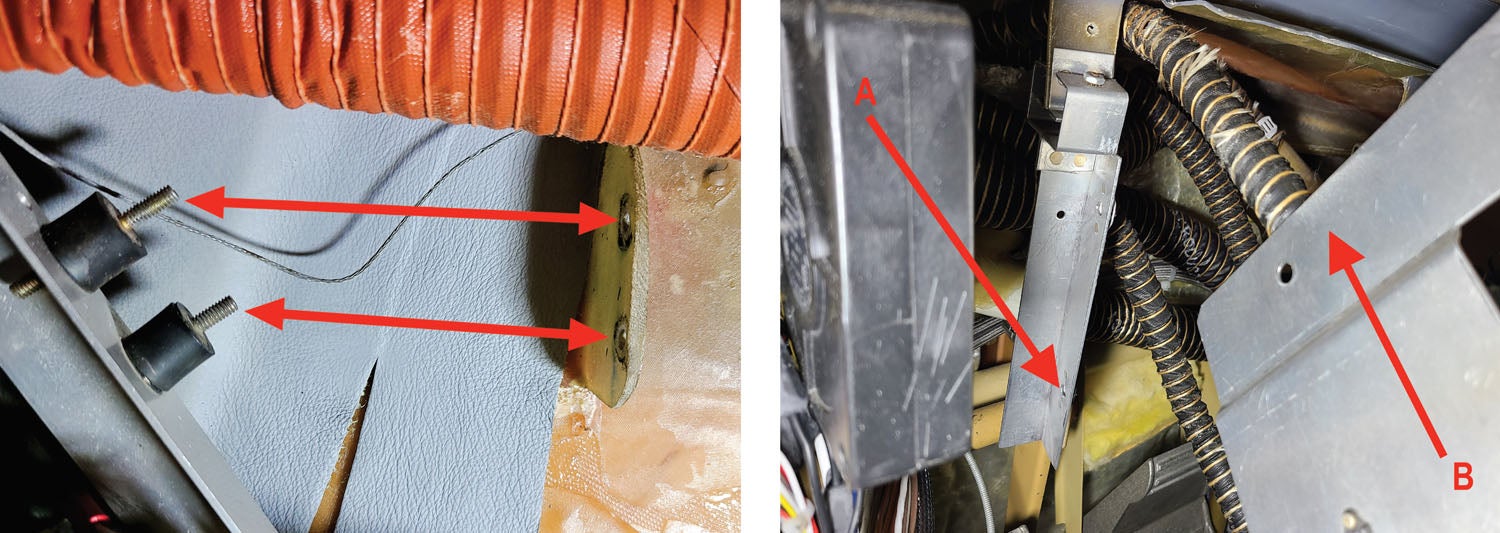
The top of the panel, when swung into place, has a pair of rubber mounts on each side that meet a pair of fiberglass flanges and secure the panel with nuts from the back. Figure 3 shows the left and right attach points in the swung position. Of course, especially in an aluminum airplane, these retention points could be made solid as well as bolted directly through the panel rather than from behind.

Radio Stack Mounting
Depending on whether you have a significant radio stack, you may wish to include some back-of-the-stack support as well. Figure 4 shows this arrangement with the panel swung back. The radio stack includes a pair of side plates, which at the back engage two aluminum angles, each in turn supported at the top with rubber vibration isolation mounts. The side plates are then retained with Southco winged quarter-turn fasteners. Swinging the panel requires reaching underneath to the back to disengage the stack supports, however.
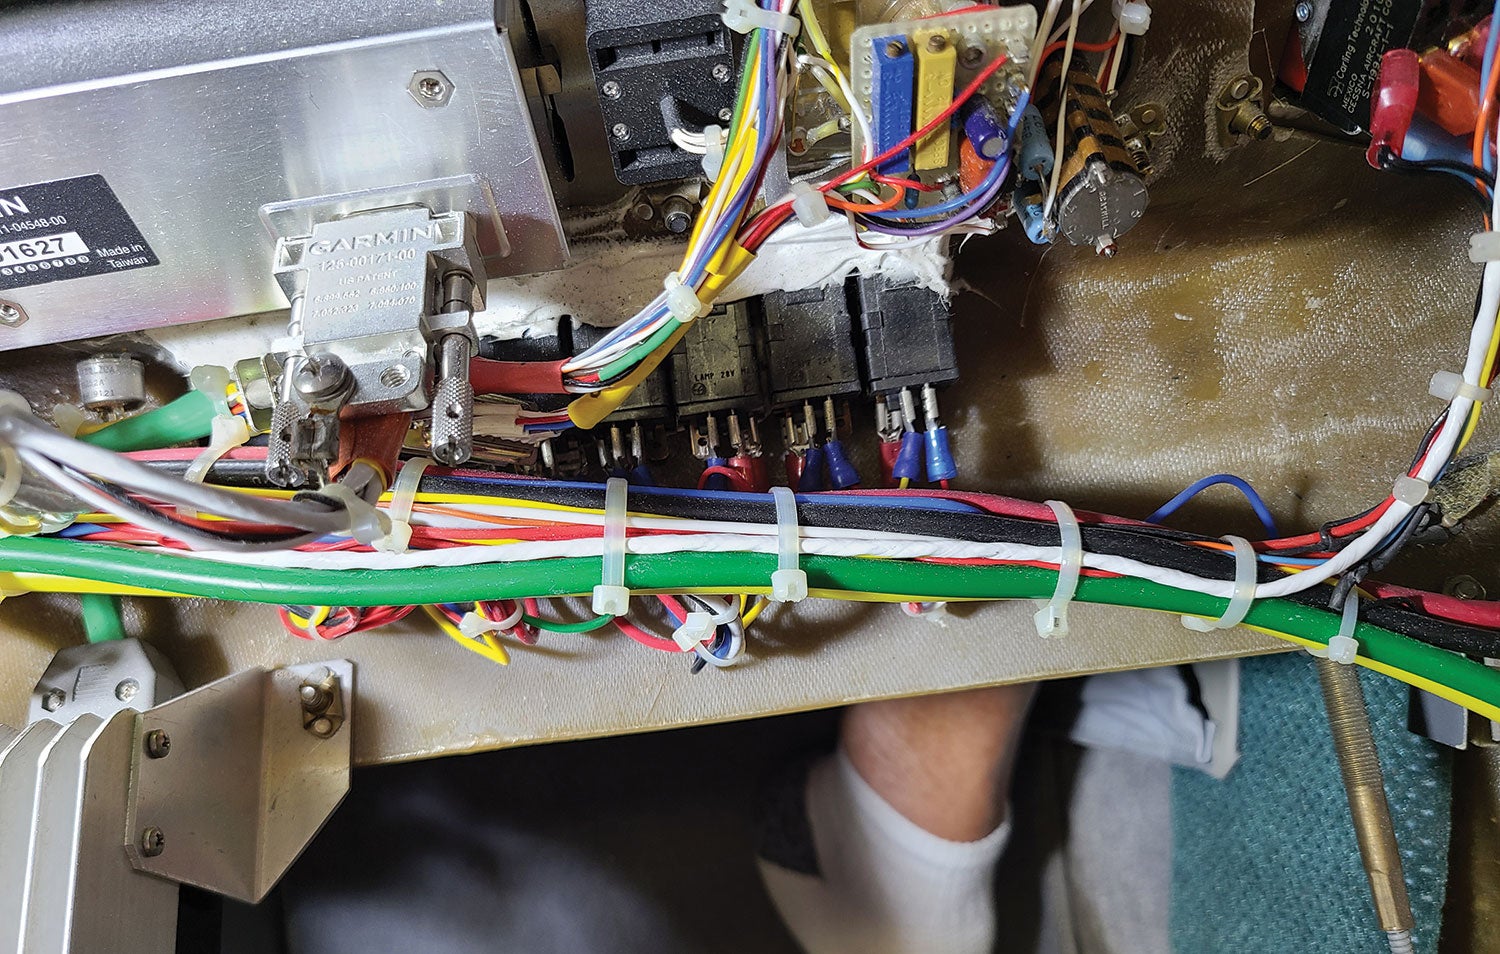
If your panel is hinged, there will be a few additional constraints to consider up front. Those include accommodating air vent hoses and wiring to work with the swing down of the panel. One simple thing is to route all wiring that leaves the panel at the bottom and out the sides so that as the panel is rotated, it simply slightly twists the wiring bundle a bit on the same axis as the hinging of the panel. See figures 5 and 6. Or, wiring that goes forward may include a sufficient amount of slack to accommodate the additional length required with the panel swung down. This may require providing a panel/harness manufacturer with the appropriate guidance on what you plan to do. Fresh air vent hoses likewise will require some slack to allow panel movement.
Sure, it is a lot easier to just bolt that stock Van’s sheet of panel aluminum or that nice pro-built custom panel into the mating aluminum structure. But I would urge you to think about it and come up with your own way to incorporate a hinge mechanism! Your back will thank you!
Photos: Reinhard Metz, Marc Cook.
![[Credit: JetStream Rider]](https://www.kitplanes.com/wp-content/uploads/2026/04/AdobeStock_345999332.jpg?w=218&h=150&crop=1 "2026 Avionics and Lights Buyer’s Guide")
![[Credit: Radiant Technology]](https://www.kitplanes.com/wp-content/uploads/2026/04/550095_5165745cc27748a598699799d796fd94mv2.jpg?w=218&h=150&crop=1 "Radiant Technology Unveils SafeGyro")
![[Credit: Dynon]](https://www.kitplanes.com/wp-content/uploads/2026/04/EMS-stand-alone_HDX.png?w=218&h=150&crop=1 "Dynon Unveils Scalable Engine Monitoring for Kitbuilders")


