The Home Machinist, Part 7
We complete a milling project.
Last month we did an introductory lathe project. This month well show you around the milling machine in a similar fashion. OK, its not something everyone can use, but its something you cant buy and if, like me, you use a PDA as a GPS display this will save your plug. Even if you don’t need it, the operations are a great way to get the feel of the mill. Besides, you may know someone who needs this.
Heres the problem: My wife has an iPaq on the yoke of her airplane. It has a cord that plugs into the bottom edge. Said cord is easily knocked sideways and, at best, simply unplugged. If you’re lucky, you only have to plug it back in. If you’re unlucky, as was I, you’ll trash the plug. Do it repeatedly and I guarantee you’ll be unlucky. That means a new plug and the nuisance of micro-soldering. I don’t want to even think about the hassle, complexity and cost of fixing the socket end of the system should that bite the dust.
The solution is to have a plug protector/strain relief so that the plug comes out only with a straight pull, not sideways. Or, more accurately, you remove the iPaq from the plug instead of the plug from the iPaq. That probably makes about as much sense as telling someone that the zero button on our airport gate keypad was installed upside down. I get a His bungee was about 6 inches too long the last time he went jumping look when I say this, until the next time they use it. (Look at your phone to see what I mean.)
Conveniently, all you need, other than a milling machine, is a block of aluminum about 2.5 x 1.5 x 1.5 inches, an end mill in the range of 0.375 to 0.500, a 0.125 end mill and a fly-cutter if you want to get fancy.
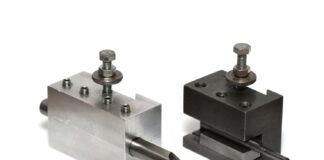
Whats a fly-cutter? Its a cutting tool that spins a lathe bit. Its great for making broad, but shallow cuts that stand above all other adjacent surfaces. This will become obvious as we get into it. You can buy a nice set of three for about $25, so its one of those tools thats affordable even if it only gets used a couple of times. Once you see how it works itll become a birthday-list item real quickly. My favorite source for this sort of tooling is Enco. While writing this, I checked the price: $21.40; on sale for $7.29 at www.useenco.com.
Dimensions on this project are not critical, within 0.020 inch is more than sufficient. Now Im not saying be sloppy, just don’t be more accurate than needed. Keep in mind that quality is not measured by the precision of the part, only by its success in meeting the customers requirement.
Dont believe that? Well, if I made, say, a shovel to within 0.0001 inch, is it a better shovel? Its certainly a more expensive shovel. More significantly, its unlikely that anyone will pay me for that increased cost just because its a highquality shovel.
On the other hand, you’re the customer, so if you will get satisfaction from making the part to tighter tolerances, go right ahead. Me? Id rather get on with a second project.
That said, we want the block to be held in some known position so that whatever level of tolerance we adopt, we do so intentionally. That concept means that the setting-up portion will take the majority of the effort. Think of it as a preflight drill; skip it and you may get to your destination, but you’ll have unnecessarily employed a lot of luck.
Your mother taught you to clean up your bedroom and this is the same. Start with cleaning the mill. No, you don’t have to wax the paint; just get the chips out of the T-slots and wipe down the mating surfaces. If the T bolt is in place, try to get the chips out by dragging the bolt. However you do it, the slot has to be clean at the start of every job.
Clean the bottom of the vise and especially the jaws. Don’t get into the habit of using the air hose. Youll blow those sharp chips all over. Safety glasses on? Better to use a brush dedicated to the task.
Be Square
1>Next lets square the fixed face of the vise. This is an easily overlooked step, but I think you’ll see that its vital if you want your part to come out square. My setup is fairly typical: I mounted a dial indicator on a piece of 3/8-inch round stock and clamped it into the mill head. One of the parallels clamped in the vise produces a surface that is, well, parallel to the jaws. Now move one end of the vise-parallel over to the dial indicator such that the point of the indicator touches the end of the parallel, and then go one more revolution of the pointer. You can zero it either by cranking on the X-axis handle, or just turn the dial of the indicator and zero it. You can see whats coming next, right?
Move the vise on the Y axis and you’ll see by the motion of the dial indicator that the jaws of the chuck are not parallel to the axis of motion of the table. Loosen the bolts holding the vise to the table and gently tap the vise into position. Crank, zero, tap, crank, zero, tap until its acceptable. Its not difficult to get it to within 0.001 inch over 4 inches of travel, so get it where you like it, tighten the vise to the table, and take one last check. Now we can break this setup and put either your fly-cutter or the 0.500inch end mill into the proper collet and mount it in the mill head.
Were going to take a cut on one side of the block and, inasmuch as four sides are already pretty close to square, well trim off one of the saw-cut ends. The jaws of the vise define one axis of rotation of the block; you need to align the other. Heres where you need an accurate square. That 24-inch carpenters square is not going to cut it, but the Mark I eyeball you were issued a few years back will work if you have a decent reference. I typically take the blade out of the adjustable square Ive used for years and set it in the vise.
Tighten the vise, and set your speed and feed. Now comes the math. Just diving in will frequently produce one of several scenarios: Too slow and the tool rubs, dulling it; too fast and surface finish stinks or things go ka-boom.
Dont Panic!
Remember that little book I mentioned previously? No, not The Hitchhikers Guide to the Galaxy. It was Machinerys Handbook Pocket Companion. Going to Page 117, we see that aluminum is best cut at 500 to 600 surface feet per minute. Now I want to use that fly-cutter with a lathe bit that swings a 2-inch diameter circle. The formula is rpm = (cutting speed x 4)/fly-cutter diameter.
So, rpm = (500 x 4)/2 for 1000 rpm. That sounds about right, but what about the feed rate? Another formula applies:
IPM = FPT x N x rpm.
Thats inches per minute = (feed/ tooth) times the number of teeth times rpm. FPT controls the thickness of the chip and is, therefore, a function of the material were cutting. It comes out of Page 121 at 0.002 so:
The feed rate is 0.002 x 1 x 1000 = 2 inches per minute.
That will put one mark every 0.002 inches, but I want a nicer finish, so Ill slow down to half that. Don’t extend this slow-it-down practice ad infinitum, though, or you’ll simply rub the material and create a dull tool.
As you can see, the window of speeds and feeds that yield a good result is not tiny; with experience you’ll be able to set it up by eye. In fact, checking a half-dozen sources revealed suggested rotational speeds as high as 8000 rpm and as low as 3600 rpm for a 0.250 end mill. The variance is due to the sharpness of the tool, how long the tool must last, coolant used, etc.
While were at it, lets check those values for the 0.250 end mill. The result is 8000 rpm! My machine wont even go that fast, so Ill slow it down to about 1500 rpm. Yes, I know that Im multiplying feet and inches. In this case using a correction factor of four removes the need to convert one to the other, and also eliminates having to use pi to calculate circumference. Im just trying to make this painless. Doing it the long way results in 7640 rpm, which is still beyond my machine.
Setting the feed rate with the same method, I get the FPT out of the book at 0.002.
0.002 x 2 x 1500 = 6 inches per minute.
That happens to be 1 inch per 10 seconds. My machine moves 0.100 inch per revolution of the handwheel, so I need to crank about one revolution per second. Those higher speeds work fine for huge NC machines that are flooded with coolant, so in addition to slowing down a bit, Ill use a lubricant called Tap Magic. Neat stuff…you’ll smell like a machine shop and everyone will think you’re a real pro. Oh, and it helps make a good surface finish as well.
One last thing to do before we start cutting is to check your dials. Make sure you know what each wheel does, that is, how far it goes in one revolution and what each mark represents. It should also be emphasized that, though you can turn the handles in both directions, if you overshoot the setting you want, back up one full, and then come back to the desired number. This is necessary to compensate for slack in the system.
Now all you have to do is get the safety glasses on, review all the settings, make sure that the things that should be tight are tight, nothing is inhibiting the desired motions, and, with the power off, bring the cutting tool down to the highest point on the block. Move off to the side, power on, and go down about
0.010 inch to smoothly crank into that first cut.
It looks good, so do this again to remove all the saw marks. The one thing we haven’t really discussed is the depth of the cut. An end mill can easily cut a slot an inch deep at the Skunk Works. For us, though, lets keep it to about
0.050 until you get the feel. A fly-cutter, however, is a finishing tool; keep it to about 0.005 inch.
Shut everything off, pull the block out, clean the vise, reset the block with the other end up, and trim that end to square. This is getting easier isn’t it? Like so many things, its all in the preparation; the doing is the easy part.
Now is when I like to use a layout fluid such as Dykem so that I can literally draw the finished shape onto the block. Ill do it several times during the build simply because Im cutting material away and it helps me keep track of which side is which.
From here on its a matter of cutting the pocket and slot. You should check the tool every so often for chip buildup. If it starts to clog the flutes, you’ll have to pick it out with an awl. If it clogs consistently, try putting a little Tap Magic on the tool and on the surface you’re machining. Wear a shop coat, though, and don’t drown the part; a little is sufficient. Kerosene also works well, but its flammability and inconvenience make a dedicated cutting fluid a far better choice.
The only remotely clever bit here is to cut the pocket first, leaving a thick base. That gives you something on which to clamp the vise. When the top is done, flip it over and you still have a lot of material for clamping. Now cut the base to the desired thickness. If you have not tried the fly-cutter yet, this is a perfect surface for it. The corners? I cheated by rounding them off on the Scotch-Brite wheel.
Once the part is finished all thats needed is to glue it to the back of the iPaq sleeve. Don’t have an iPaq? Design a different one to hold the cable on your setup, build it and send in a photo. Id like to see it.
I hope you realize that though this may seem a trivial component, general aviation has, until recently, been only slightly ahead of the Amish in adopting new technology. The force of homebuilders has been a key agent in blasting them off dead center. By taking up your own machining on your homebuilt airplane, you’re part of that pressure. Congratulations on joining the revolution.
Editors note: If you have specific questions for author Bob Fritz, or if you have certain projects you d like us to cover, email us at [email protected] with Home Machinist in the subject line.


