In a prior Plane and Simple article (“Debunking Deburring,” March 2023), we discussed the importance of removing the burrs created by drilling holes in aluminum before installing rivets or other fasteners. A brief summary for those who missed that story might go like this: Burrs left after drilling holes can create a condition where rivets may become loose over time. Cracks may also develop in the metal sheet as a result of those burrs. Let’s take a look at a popular technique and tool that experienced builders use for removing those burrs. There are other methods that can be used here, but the objective of burr removal is still the same.
The deburring process should include addressing not just rivet holes but all perimeter edges, large holes and any internal openings in a sheet. I am going to focus just on deburring small rivet holes. A metal airplane has thousands of them, and this is where most of the builder’s effort is expended.
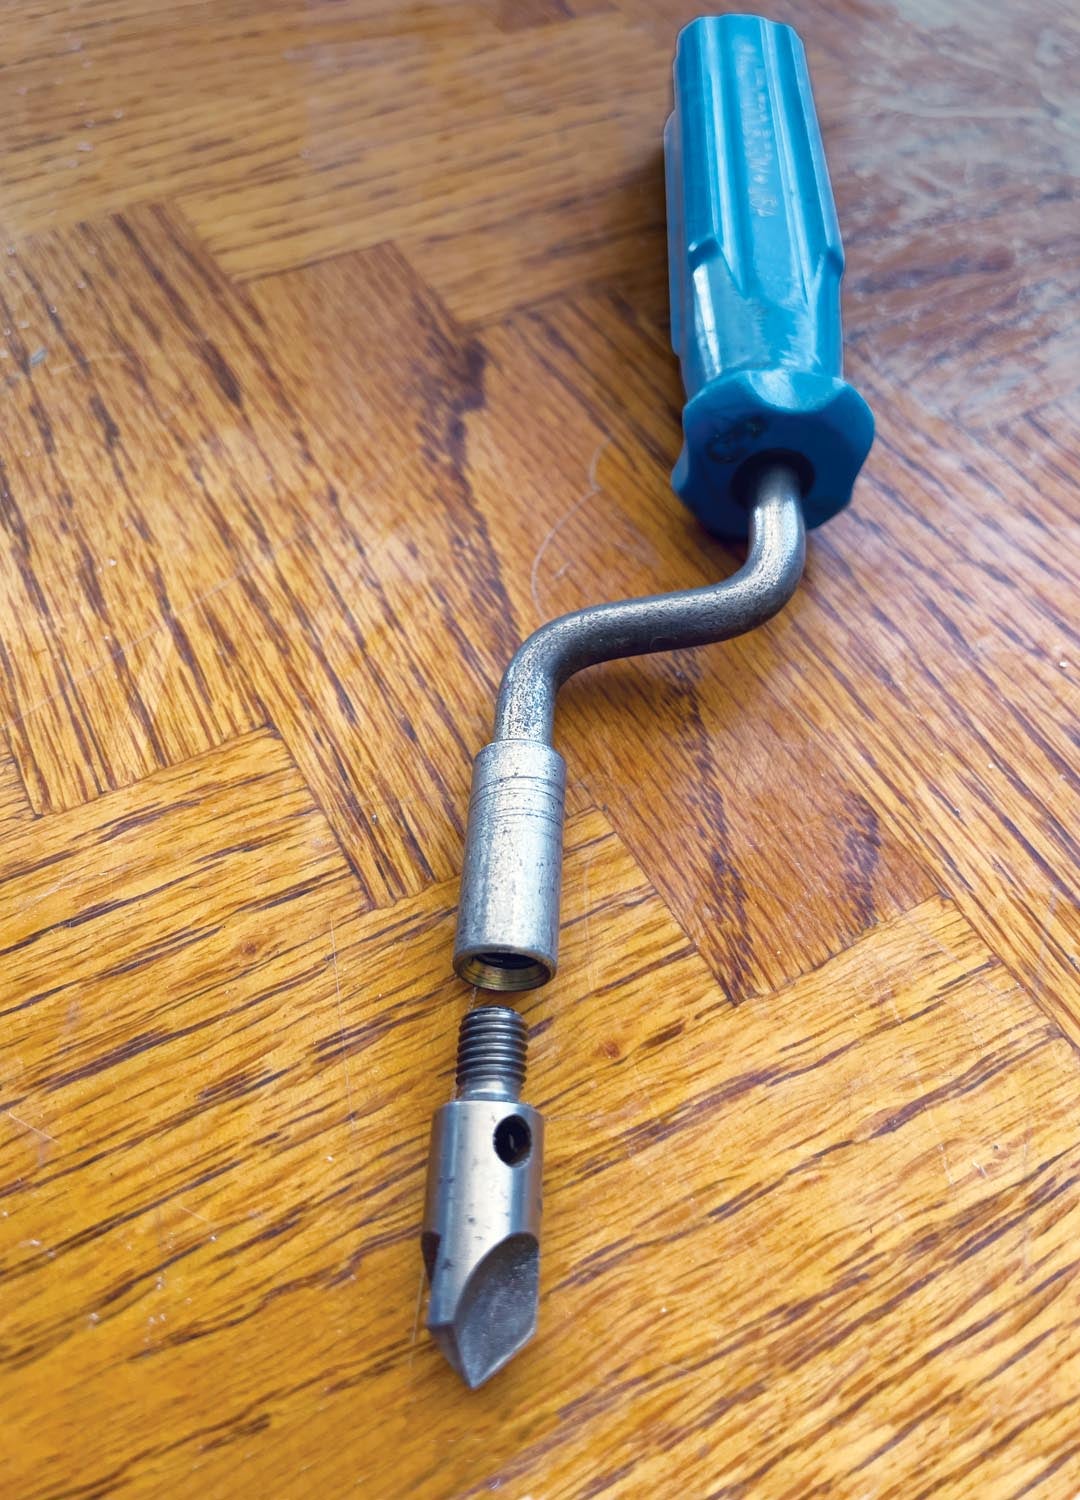
The most common tool used for hole deburring is the swivel countersinking tool. A popular model is the Avery “speed deburring” model shown here. There are other brands and variations of this design available from your favorite aviation tool supplier.
This hand tool is made of two parts: a simple handle with a swivel shaft and a cutting (deburring) fluted bit that screws into the swivel shaft. While it may be obvious to guess that this tool will be rotated after inserting it into a drilled hole, we should pay attention to what is happening as that bit cuts away at the holes. This deburring bit is a variation of a countersinking cutter bit. These are normally used to countersink holes for flush rivets or screws to be installed. They come in various diameters with specific cutting angles and grind away just the right amount of metal from a hole so that countersunk rivets and screws install flush with the metal surface. So why does a variation of a countersinking bit make a good hole deburrer?
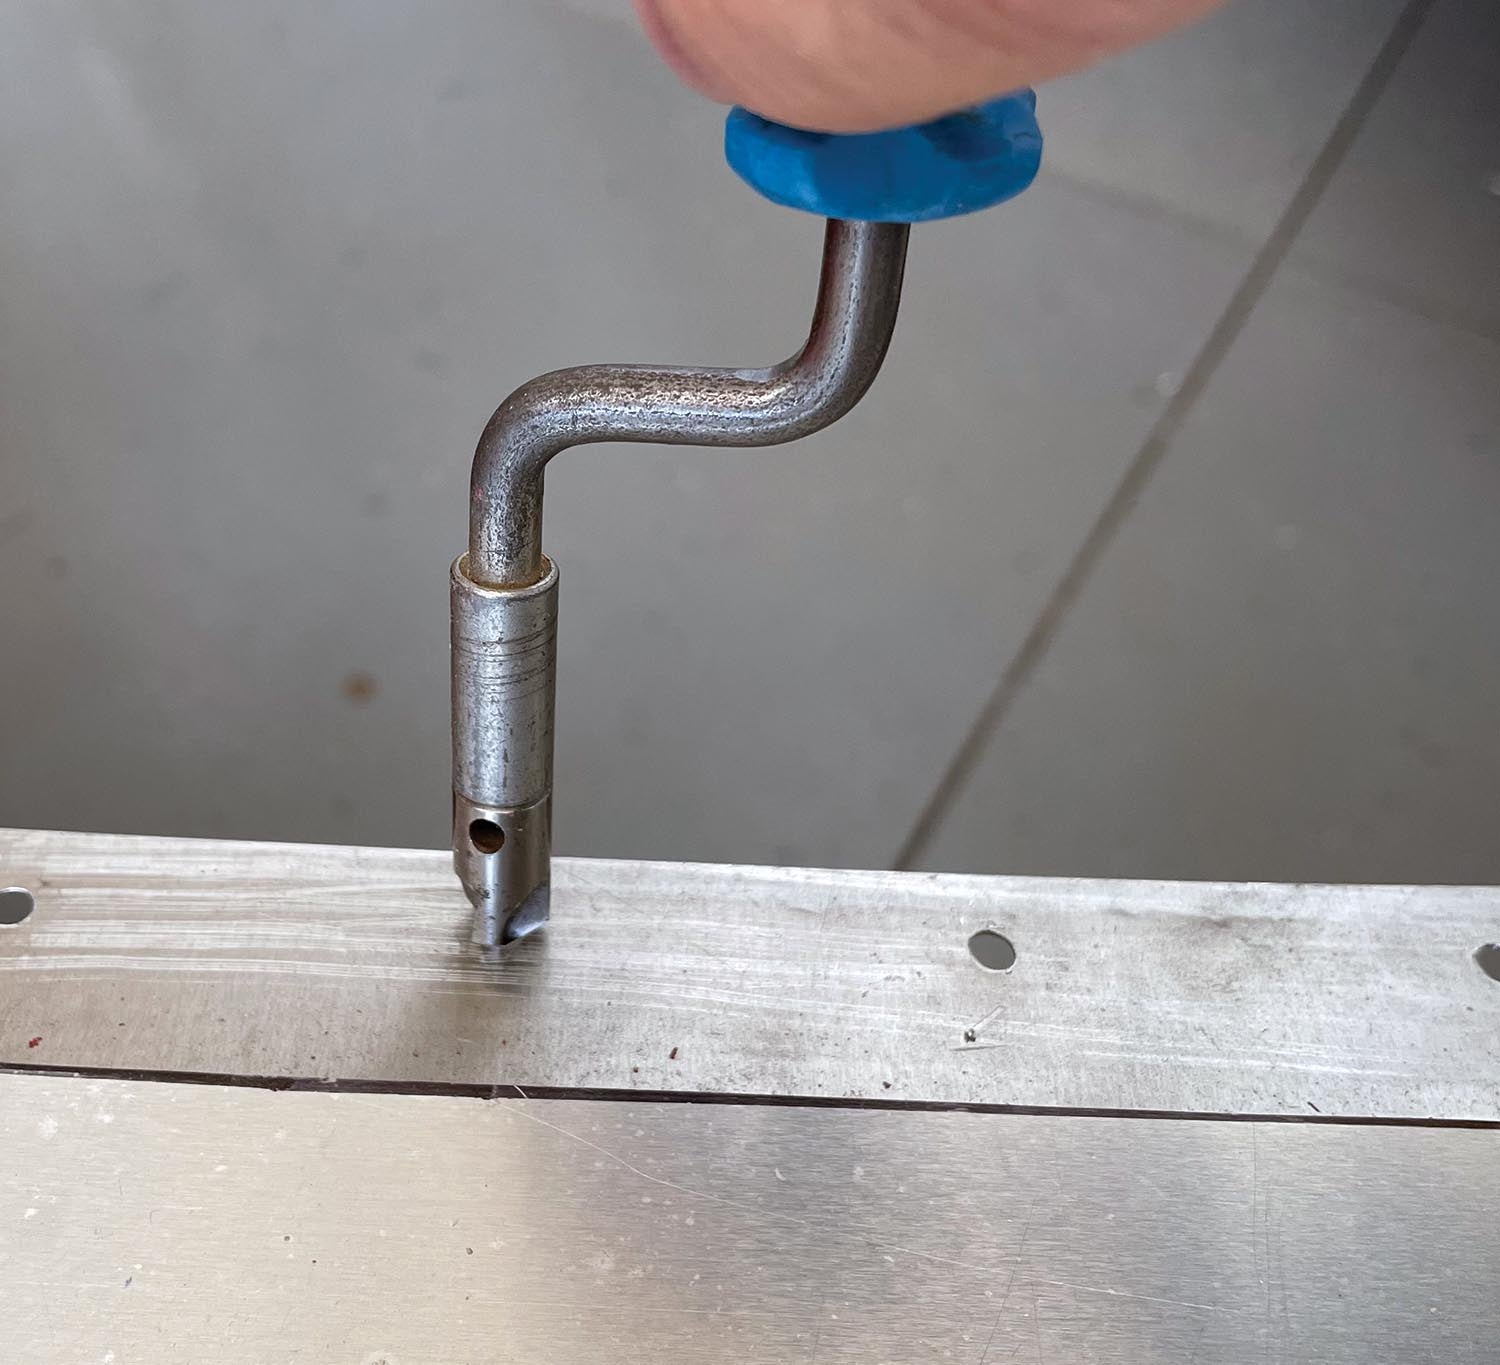
The deburring bit diameter is sized a bit larger (3/8-inch or more) than the rivet hole. If we make just one turn of that bit (using the swivel handle) in the rivet hole while applying moderate pressure, we have just begun the countersinking process. While we do not want to countersink our holes, this operation does a good job of removing material (burrs) above the edge of the hole. Just one turn should do it. If you keep rotating the bit, you start to countersink—which is not what we want. So, proper use of this tool means no more than one rotation of the swivel handle while visiting each rivet hole.
While countersinking a hole in thick metal is desirable if you want to install flush screws and rivets, it is not acceptable in thin sheet metal. (Proper countersinking requires a bit that is matched to the specific hole size—deburring does not.) When flush rivets and screws are desired with thin sheet metal, we dimple the hole. Dimpling deforms the hole, but it does not remove material. The danger in countersinking holes in thin material is that it leaves the thickness inside the hole’s edge razor thin. What we know about razor-thin edges on aluminum is that they are great stress risers. Stress risers may attract cracks that can ruin your flight. So, one turn of the swivel tool is all that should be needed for deburring!
The deburring bit is also available with a short shank that can be used in a drill motor instead of the hand swivel. I cringe when I see deburring done this way on thin metal skins as there is little control in keeping the rotations down to one. If deburring holes in thicker aluminum L angle, for example, the concern of potential countersinking becomes less of an issue. This is the same with deburring holes in steel parts where it is much harder to remove material compared to aluminum.
The swivel deburring tool is a popular means of quickly deburring your drilled holes prior to assembly. You can literally see the burs break off from the holes and the process takes about a second per hole. I have found it advantageous to lift the sheet slightly off the table to allow the center point of the deburring bit to protrude through the hole to gain full contact. Don’t forget to deburr both sides of your holes if this is needed.
Another way to make use of this deburring technique without this tool is to use a drill bit instead. (The bit should be about 3/8-inch or larger diameter.) Wrap some tape around the flutes so you don’t cut your hand. Simply rotate the bit in the hole (one turn for thin sheets) and the deburring process is completed. If you have lots of holes to work on, you may find the swivel handle tool to be less stressful on your hand. Your choice! Plane and Simple.


Those swivel shaft deburring tools are a pill. Our EAA chapter has teens assembling a Zenith kit. We’ve had to enlarge hundreds of holes which some of the teens accidentally countersunk. One half turn with very light pressure on the handle is all it takes. Much more and your .020 and .025 sheet is damaged.
Been advising a newbie on his Sonex recently. Everything went great until he proudly showed me his de-burring. More like countersinking…..
To easy to do when using the type of tool shown in the article, for sure .
Comments are closed.