
If you are building an aircraft kit that requires drilling holes into metal parts, there is no doubt that the subject of deburring will get mentioned more than once! I have yet to meet a builder who honestly looks forward to the task of deburring. It is more often that I hear the suggestion that some builders think deburring is not really required. If we understand the reasons behind the deburring process, we will then appreciate performing that task. Let’s cut to the chase and discuss the reasons we need to deburr our holes and the consequences of skipping this step while building.

Life would be so much simpler if the act of drilling a hole in a piece of metal left nothing but a clean hole. Unfortunately, the reality is that most drilled holes possess a ragged ridge around their edge. The reasons for the creation of this ridge are numerous and can be controlled to an extent. This raised area around the hole is also known as a burr and is easily seen in the photo (note the smaller hole). The act of deburring is the removal of this ridge and any other irregularities in that area. But why is it so important to remove this ridge? How can it possibly do our aircraft any harm?
The holes we create will generally be filled with a fastener such as a rivet or bolt. We generally want our fasteners to stay tight for the life of our aircraft! The burr that is left after drilling a hole will keep the head of the bolt or rivet from contacting the metal surface—almost like a crude washer. But unlike a washer, the burr is not a solid or consistently formed spacer. It will crush when setting the rivet or tightening the bolt. There will be no solid grip between the fastener head and surface of the metal. Eventually, this burr may break and fall out. This leaves the fastener just a little loose! You could tighten a loose bolt—but a rivet has no retightening feature so it will forever be loose. Not a good thing for an airplane structure. If only a couple of rivets are a tiny bit loose, it is probably not a major concern. However, if you never deburr any holes then potentially there might be thousands of rivets that are not holding things as tight as they could or should. The bottom line is that we want the head of our fasteners to be tight against their holding surfaces. Only a hole with no burrs or ridges fits this requirement.
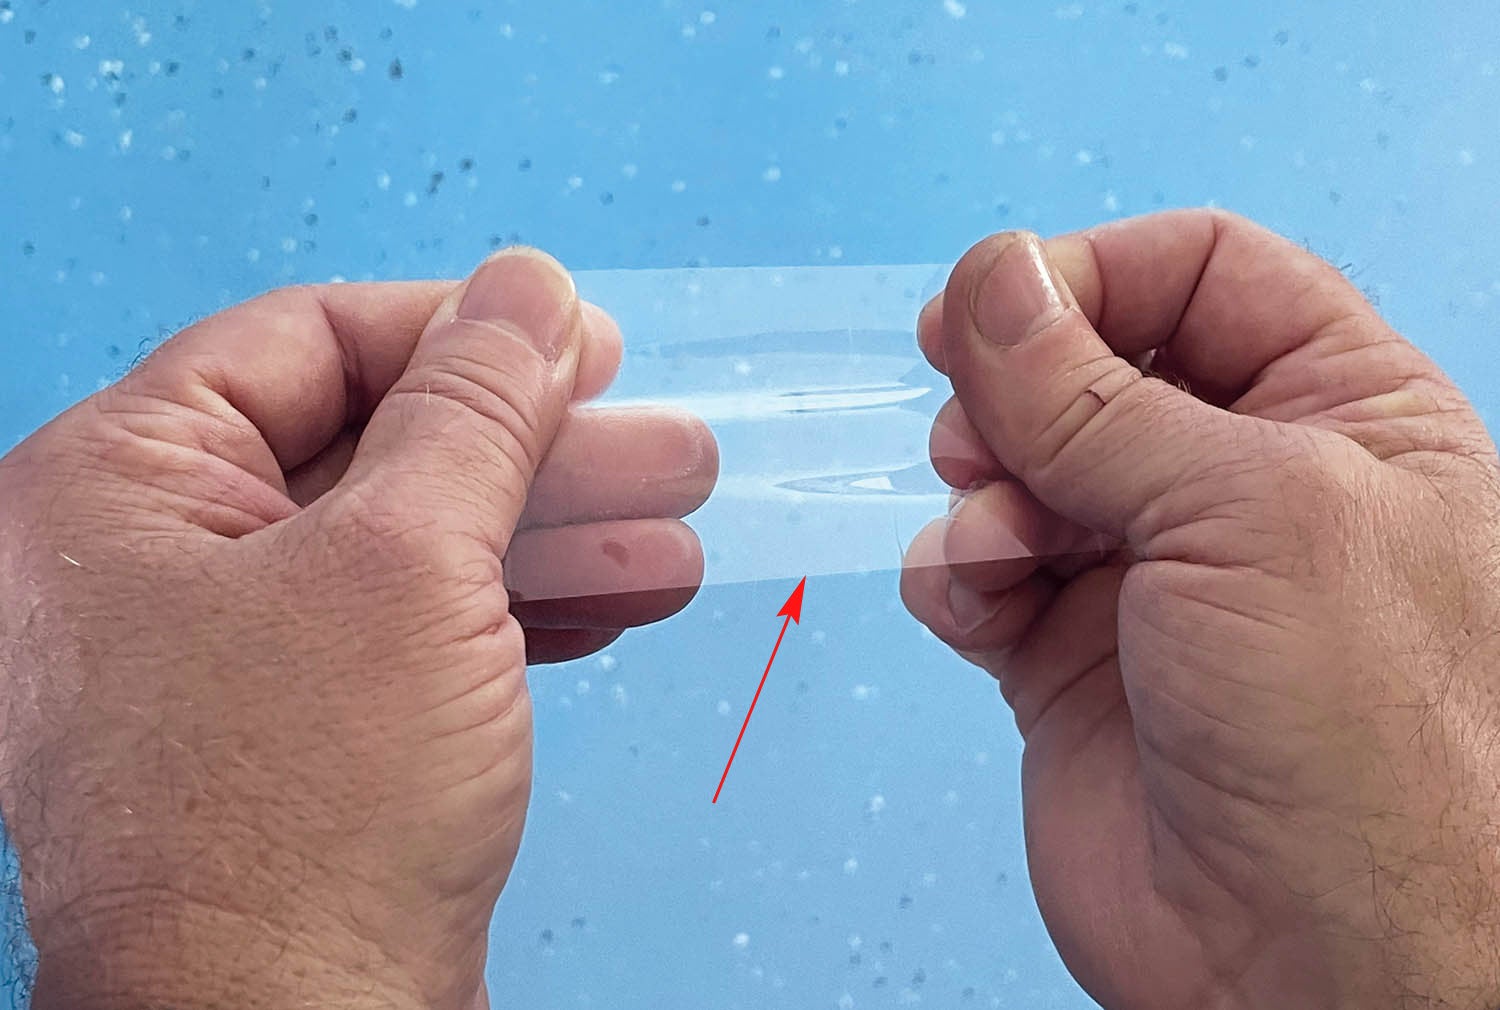
Another potential problem we want to avoid is crack propagation. What is that? My favorite analogy to understand how insidious this action can be is to take a piece of clear packing tape between your fingers as shown in the picture. Pull as hard as you can—you may not have the strength to tear it apart. Then place a tiny, tiny nick on the edge of the tape with a pair of scissors, for example. Pull again. This time, without effort, the tape breaks into two pieces as the tiny nick propagates into a crack that travels all the way through the piece in your hands. It’s rather amazing how the immense strength of the tape is quickly compromised with a tiny cut!
The same is true with sheet metal. Any edge of the metal, whether the perimeter edge of a sheet or the edges that surround the inside of each and every hole in that sheet, has a potential location for a propagating crack. Jagged burrs can be thought of as tiny nicks that could propagate into a crack. This is why we need to deburr the perimeter edges of our metal sheets as well as every hole we drill. The vibrations and stresses imposed on our aircraft structures are not unlike you pulling on that packing tape. We don’t want a simple crack caused by an edge irregularity to undo all of our work!
By keeping in mind that deburring holes and metal edges ensures that our fasteners stay tight and that edge cracks will not easily form, we are building a much better, stronger and reliable aircraft structure. Yes, it can be tedious, but deburring significantly adds to the integrity of the overall aircraft structure. It is a worthwhile expenditure of effort. Plane and simple!


Great information!
One thing that always confused me was: while a concave nick in metal can cause a crack to form much more easily, I don’t see how a ridge would. I always grind the edges of sheet metal with a fine grinding wheel because I know I’m supposed to. But I wonder if this is really needed. Or is it that the corners aren’t the culprit, but any micro nicks in those edges are.
Thanks!
John,
Good point about deburring. Most people don’t know the proper way to debur a hole. Counter sinks in a drill motor should not be used. It could cut away too much metal. A drill bit twisted or spun in your fingers will do the job quickly. and leave a clean flat surface. I do not like to use a file either, it could cause scritches in the surface. If the drill bit feels too small, the shank diameter could be increased with tape or other material. You may remember that I am building a Zenith 650 from plans. Thousands of holes in thin sheet metal.
Are you still spending winters in Treasure Island FL?
A simple fix for this is to make as many holes as possible with a punch like the famous Whitney punch. This is limited by the ability to reach the hole location determined by the throat of the tool. And it’s important to make sure your punches and dies are sharp.
Using a sharp drill bit at the right speed will minimize the creation of burrs, and small drill bits as used for rivet holes should be considered consumable items and thrown away regularly.
Deburring does not have to be an onerous task, and as with most other tasks good tools and lots of practice can make it a non issue. Always practice a lot on scrap until you have it down so that it’s painless to produce good results.
The real question is; what is the correct end result after deburring?
Cherry suggests a sharp corner for the rivet to bite into. A drill bit gives a countersunk rounded edge, scotch brite removes loose burrs but hardly achieves a flat surface. Maybe undersize drill and ream it out.
While all of Jon’s statements are correct he completely ignored one of the primary problems caused by burrs: the loss of component to component friction. According to the stress engineers I worked for for decades at Boeing, shear transmitted between the components resulting from intimate clamping is a very significant contributed to design assumptions for mechanically fastened joints.
Ken Scott in his article “Speed Deburring” (Kitplanes Feb 18,2016) makes the point that you’re not simply removing material which would prevent good contact between two pieces. He suggests that the goal is also to treat the edges of the hole. The edge needs to have a chamfer. “By changing the geometry of the edge, the chance of cracking is dramatically reduced.” A sharp edge is to be avoided. It’s challenging to chamfer holes on thin aluminum sheet. “The resulting bevel should be visible—but only just—to the eye.”
As an old structures worker I found the best hole is drilled with a block of wood backing the structure up from behind as to get no deformation while drilling.
For the deburring side I found a countersink bit mounted in a wooden file handle does a very tidy job. A large dull drill bit, say 1/2 inch in diameter wrapped in masking tape to save your fingers can also work well.
The results we tried to produce on all sheetmetal structures was clean parallel holes with a clean deburred lead in that wouldnt scratch the anodise off the rivet as it was installed.
On a solid rivet the deburr also helps a little with the set of the rivet.
As for the edges of the sheet, they are always rounded off and then polished with sandpaper an scotchbrit.
Comments are closed.