 Many Van’s Aircraft models require the builder to countersink what’s called an AEX wedge, a beveled stiffener that’s riveted as part of the trailing edge of many of the control surfaces. When it came time for me to complete this task, I wasn’t superconfident using the method in the manual—the pictures detailing the process were small and not very clear in the printed plans. It wasn’t obvious to me how that method would work.
I had seen a jig for drilling the wedge on a popular Van’s tool supplier website, but I wasn’t in the mood to drop the asking price for the item or wait five days to get it. So, I thought I would try fashioning one of my own. Using a piece of scrap aluminum angle, some hand files and a bit of patience, I came up with a tool that made the countersinking process easy and effective. I was also able to scratch the OCD, tool-builder and stingy itches all at once.
Using the AEX wedge as a guide, start off by marking the wedge outline on your scrap piece of aluminum angle (Image 1).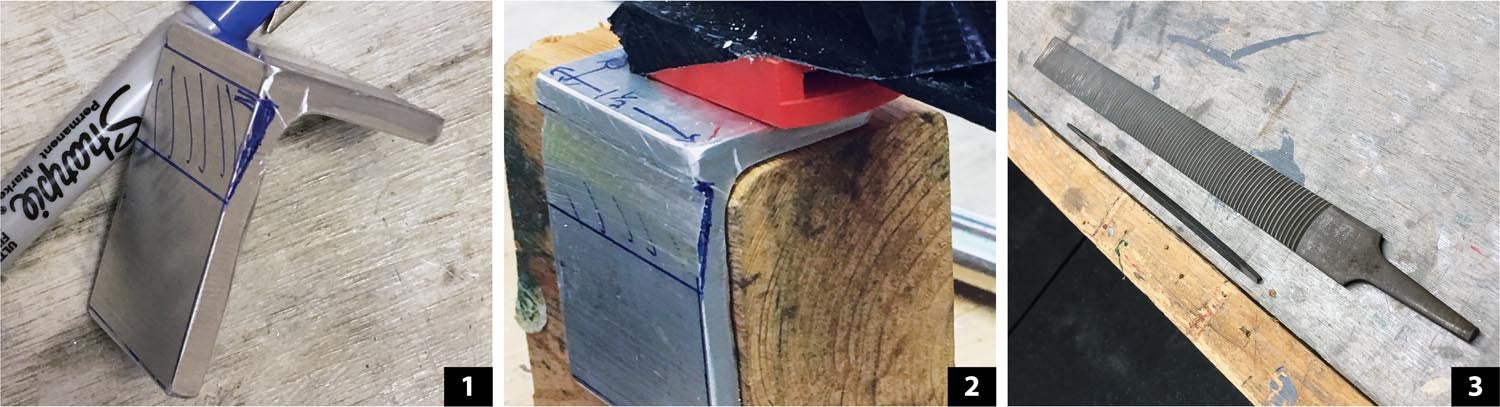
Secure the workpiece and then begin working the shape with a set of files (Image 2). I used a small Nicholson triangular file and a Vixen file (Image 3). Be sure to check the AEX against the piece of angle (Image 4). After about an hour and a half, you’ll get the desired shape.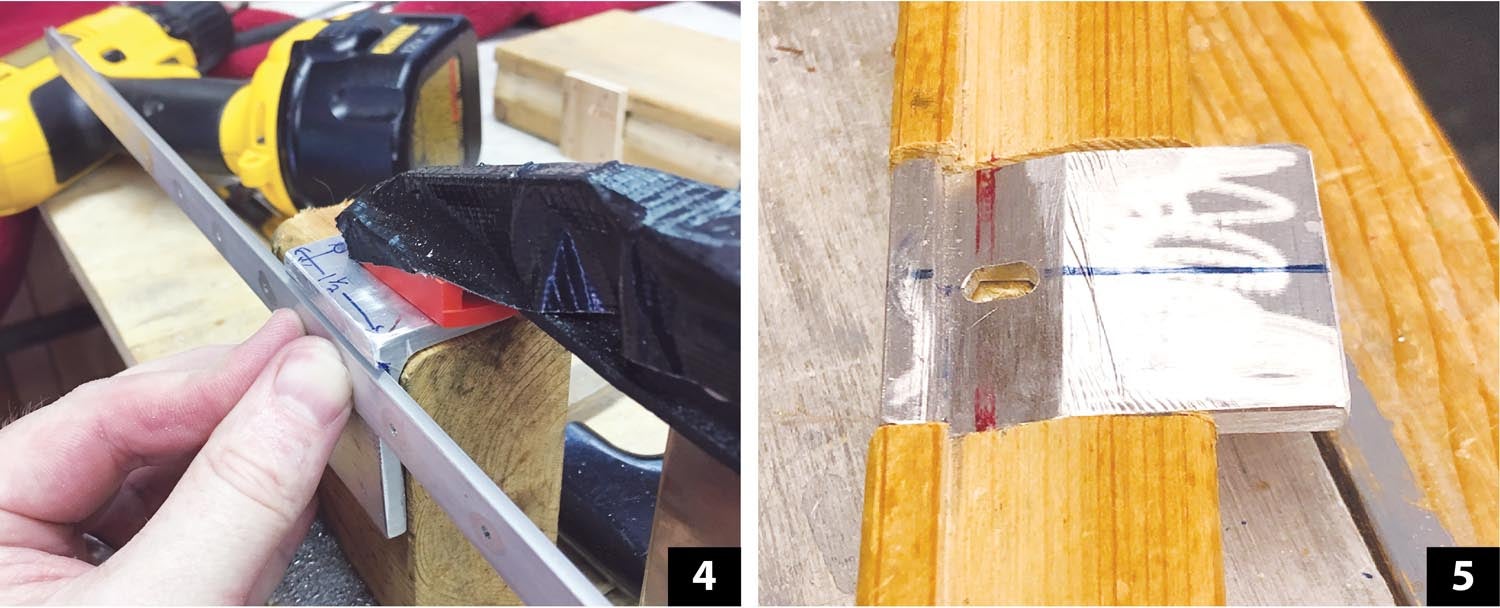
Since I used scrap angle, I needed some way to make the plate sit perpendicular to the drill press. I decided to mount it to a wood block. I ripped a 2×4 lengthwise and routed a channel that matched the wedge profile (Image 5).
I created the channel in the wood using a router and router table. If you use this method, know that I also supported the back of the wood with some AEX wedge to keep the angle correct during the cut (Image 6 and 7). If you don’t have access to a router, I’m sure the task can be accomplished using a variety of wood tools (chisel, Dremel, wood rasps, sandpaper, etc.). It’s not important that this channel is hyper-accurate; it’s just there to keep the AEX wedge aligned.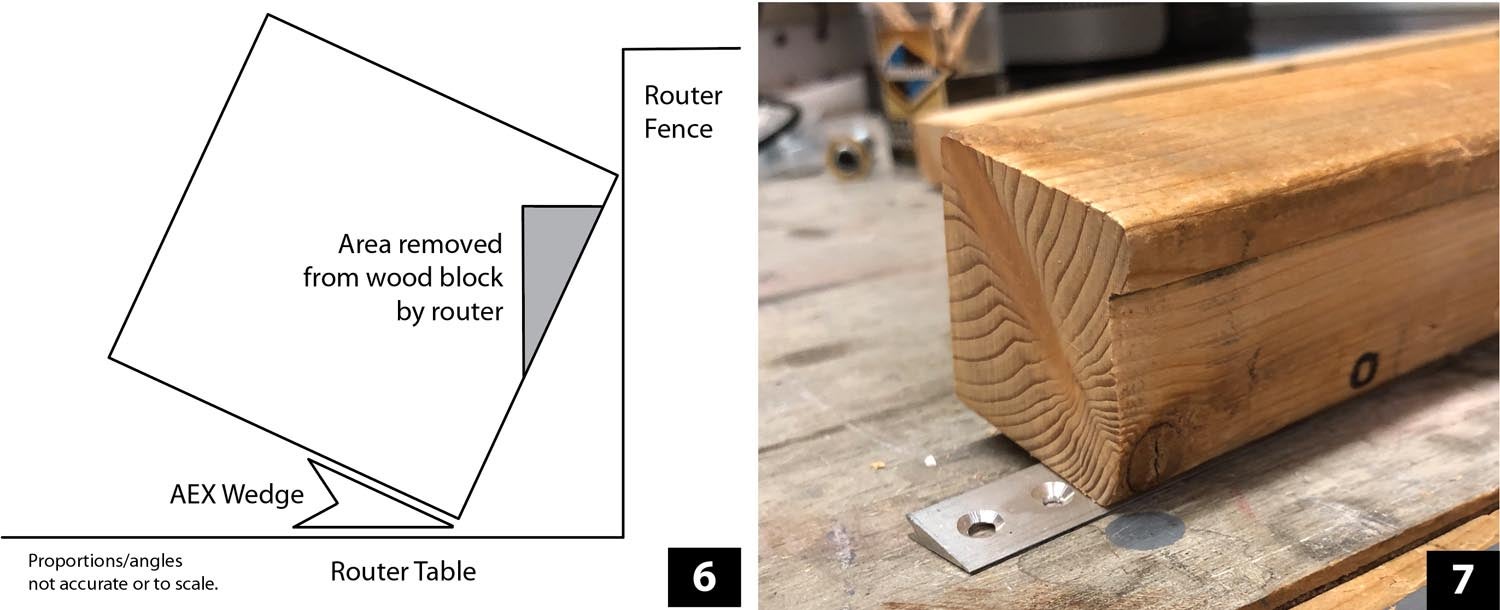
Next, notch out a recess for the metal jig in the wood so that the jig top is flush to the wood face and the channel on the jig lines up with the channel on the wood (Image 8). Additionally, the countersink point requires a recess in the jig, so I fashioned that in both the jig and the wood.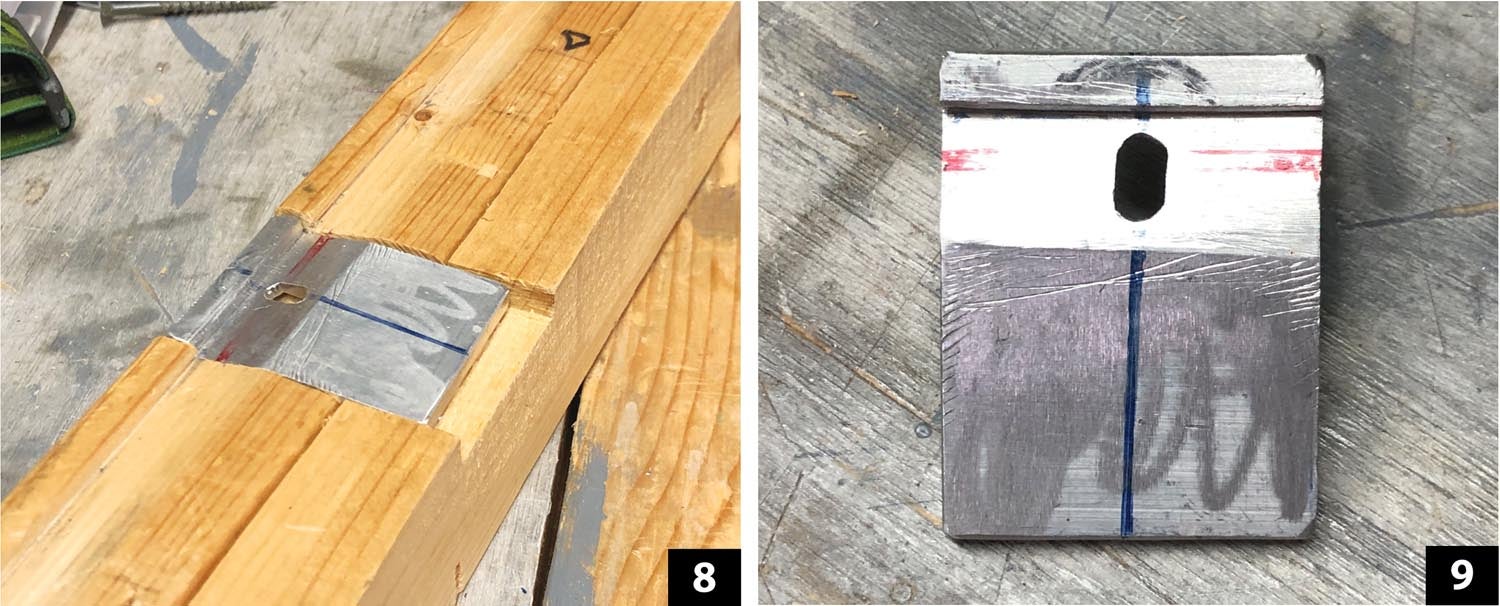
You can also see in Image 8 that, after flattening some of the surfaces on a belt sander, I attached the second half of the 2×4 back with screws. I then drilled a few holes in the jig and mounted it with screws to the wood (Image 9 and 10).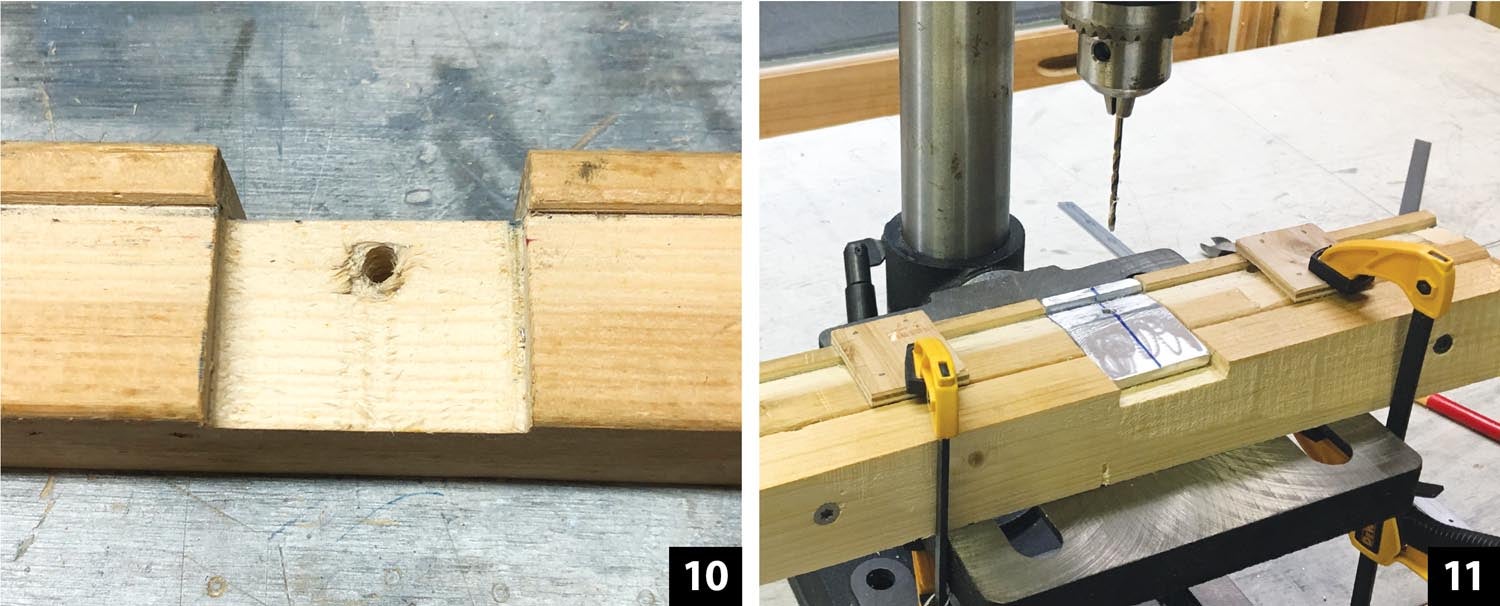
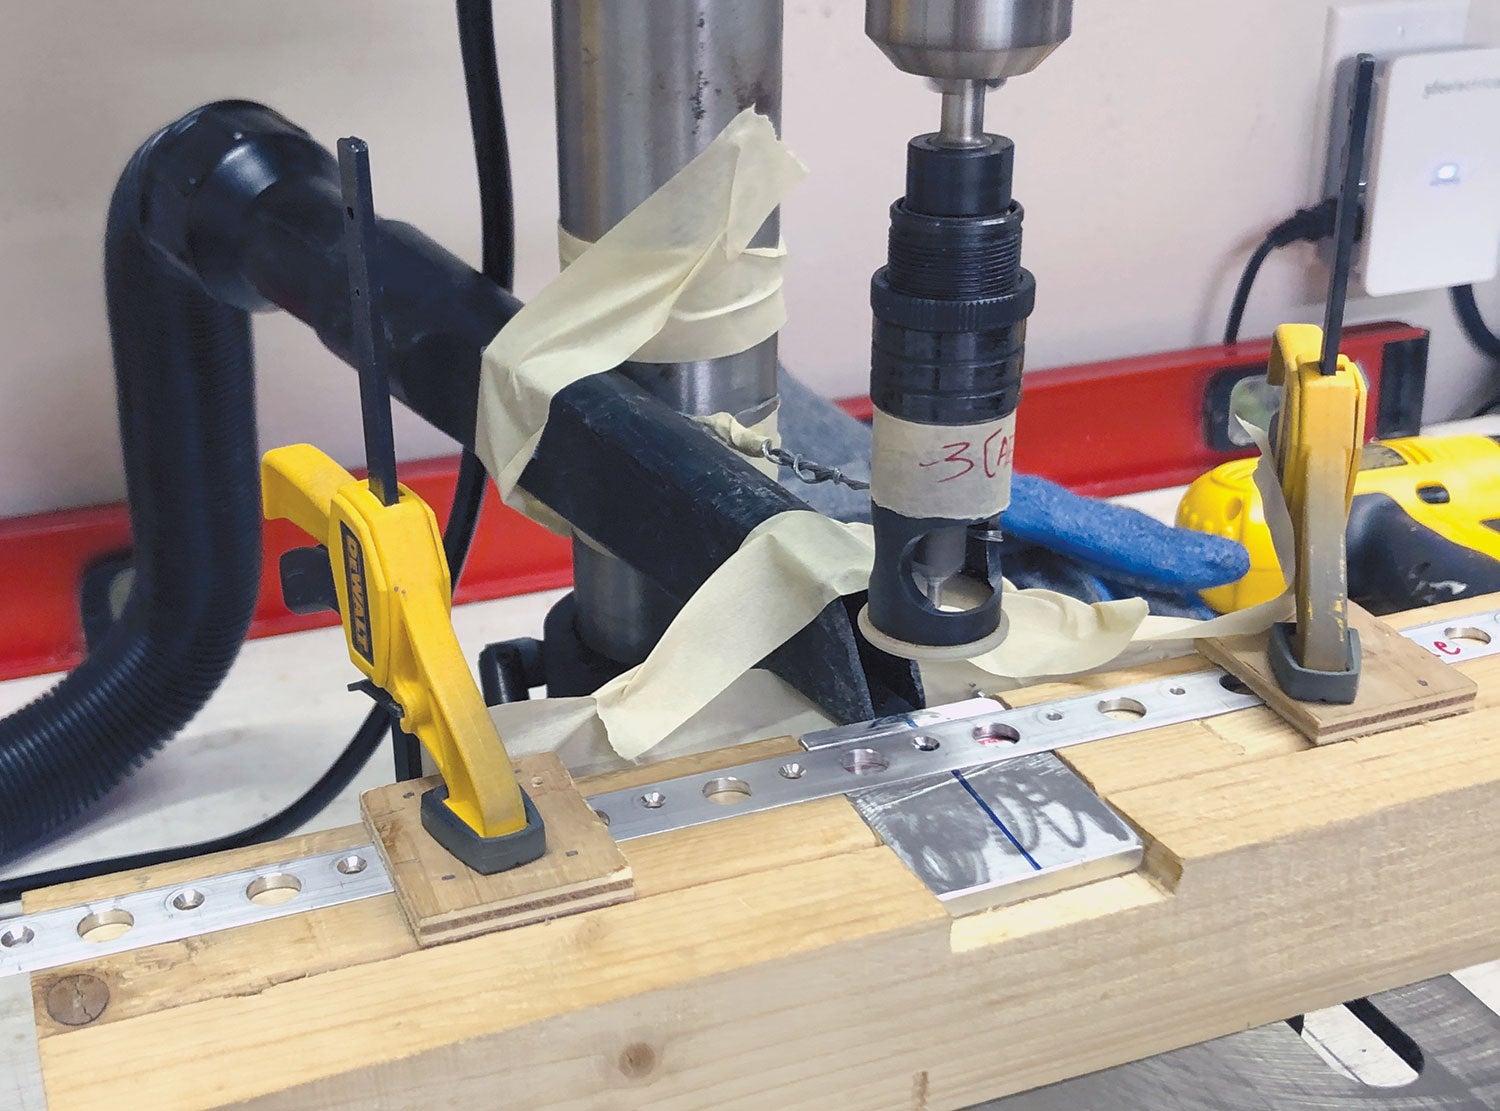
Finally, I attached two small pieces of wood to help hold the wedge in the channel. I was then ready to begin drilling holes in the AEX wedge (Image 11), followed by countersinking.


