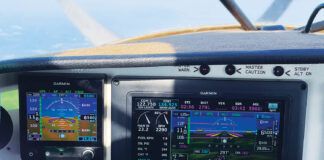
You can shop for cool avionics until you drop, but nothing will work until properly wired. In that short sentence is the reality of Experimental avionics circa 2008: There is tremendous capability for amazingly little cash (when you consider the overall value) in modern instruments and radios, but they are, like their Narco Superhomer progenitors, intolerant of badly conceived and executed wiring.
Whats more, before you build and wire the actual panel (well cover that in a future article) you’ll need to figure out how to integrate all of the new boxes into the plane itself as well as the engine and other subsystems in the airframe.
The first thought you may have is to start from the front and work your way back, but when building an Experimental airplane we need to do things a bit differently because the “front” (read: expensive fan-turning device, or engine) is one of the last things many people buy. When it comes to wiring and systems integration, we will start from the back (and wings), and then work our way forward and inward. Because we covered basic power systems in the May issue, well jump right into talking about the systems that need the power.
Break It Up
Trying to think of all the wiring at once for the entire plane can be daunting, so its easier to break up the pieces and do it a little bit at a time. The best way to accomplish this is to create a spreadsheet with a few columns in it that will be your wiring book-its so useful that everyone should create one. The wiring book will allow you to keep track of the wiring in the plane, and it has the added benefit of allowing you to know how much and what size/color wire to order. A typical wire book consists of the following columns: unit to be wired (strobe, nav lights, flap motor, etc.), current draw, length of wire, color of wire, gauge of wire, from, to and termination. You may find other columns useful, but these are what I think are the basics.
By entering data into your spreadsheet, you can easily keep a running total for the amount of wire needed by size and color as well as the total amount of maximum current draw the plane will require from the alternator and battery. It also gives you a good basic roadmap to review after the plane is flying should you need to troubleshoot any of the wiring-and take my advice when I say put this roadmap in a safe place. You will need it some day.
Now that you’ve created the template for your wire book, lets start putting all of the subsystems together. I use the term subsystem to allow you an easier way to get your head around the entire project of wiring the plane. Being able to focus on one system/group at a time is much easier than trying to visualize the entire aircrafts systems. The groups of subsystems we like to use are: lighting, flaps, trim, fuel, antennas, control grips, accessory and ancillary items and, finally, the main aircraft power.
Light the Way
Lighting is one system that you can start working on fairly early in your project. For example, many of us have the tail and wings built early in the process. This is a good time to study and decide which lighting products you’ll likely use. Your decision will affect a variety of items such as wire sizing, alternator sizing, switching and more. Navigation/position lights that use LEDs draw much less current than regular incandescent lights, so lighter-gauge wire and a smaller overall current capacity of the airplane are required. For landing lights, the newer HID (high-intensity discharge) and even more recent LED landing lights are also low consumers of current compared to the standard incandescent lights. Again, wiring sizes and current supply may vary significantly depending on your lighting package.
The strobe package can affect what is required for wiring. Those that use a single centrally mounted power supply require fairly heavy and large high-voltage wires to be run to each strobe bulb. Strobes with remote power supplies (those that have a power supply located near each bulb) still require a power and ground wire, but the need for large high-voltage cables is eliminated. One is not necessarily superior to the other, but either way you need to consider the wires and where they will be located. As a general rule, we want to keep the noisy high-current strobe wires (the ones from the power supply to the bulb) away from other sensitive wires, particularly com and nav coax, or trim and audio wires.
While on the subject of lights, we should mention the topic of grounding.
Improperly grounded strobe systems account for a large portion of radio noise in homebuilt and certified aircraft (you know, that whoop/whoop or squealing-hog sounds you hear on some radio transmissions). While it is possible to locally ground some things (like low-power lights) in metal aircraft, the only way this will work is if there is a solid and unbroken connection between the light and the battery ground.
People often assume that because an airplane like an RV is all metal, the entire airplane must be a ground. This is not necessarily true, because things like anodizing, powder-coating, paint and primer all will negatively affect the ability of the joints to provide a clean ground path. In a composite aircraft its even more important to ensure a contiguous ground path from the battery to the location you intend to ground.
Flaps and Trim
One group of systems has an effect on the flight of our aircraft, but isn’t necessarily required for flight. Both flaps and trim systems (as well as items like spoilers/airbrakes) make our planes easier to take off, fly and land. But they can also have the opposite effect: If there is a failure of either system, it can be inconvenient and sometimes dangerous.
Typically, flap motors and trim servos will have at least two wires. Both of these wires will carry power depending on which direction we want the motor to run. With trim and flaps, its common to have additional wires so that their relative positions can be displayed on the panel. Wiring for the flaps and trim systems should be thought out enough in advance to allow for safe and secure routing of the wires throughout the fuselage. Its important that these wires not chafe or run against any ribs or bulkheads. With the trim wiring specifically, its often nice to have a terminal block (or junction block) somewhere under the seats or near the control sticks/wheels. Often, trim systems have power/grounds running to the stick grip, then from the stick grip to the servo motors.
Fuel Indicators
Almost all homebuilt aircraft have an interaction between the wiring and the fuel system. Low-wing airplanes will almost always have at least one electric boost pump, sometimes two. If this is your primary fuel delivery source, make sure the wire routing and sizing are carefully planned. High-wing homebuilts often have transfer pumps to move fuel between tanks, so its imperative that this wiring is correct, and that associated indication systems (how do you know how much fuel is in the aux tank, or when that tank is empty?) are considered beforehand. Most of our planes also have electric fuel level sensors installed in the tank(s). These can be either float/resistance type or capacitance type. Both require wires to be routed from the fuel tank to the panel to the fuel-level gauges or engine monitor. Additionally, some EFISes such as the Garmin G900X have inputs to display which tank is currently selected, so there is additional wiring to be run from the panel to the fuel-selector lever.
Getting a Grip
Stick grips or control wheels are areas many people forget about until they are almost done with the plane, only to realize that if they choose to have various electrical functions on the stick grip, there is an associated amount of wiring that goes with it. Typically, you will have at least a radio PTT (push to talk) switch, and often electric trim switches. Additional functions that are popular include autopilot control-wheel-steering/disconnect, flaps, smoke system, transponder ident and com radio flip/flop. Less frequently used are starter, fuel pump, light controls and, with some EFISes, screen selection. All of these functions require wires from the panel, and in many cases additional wires run to various components. Because some of the components (such as flap motor and fuel pumps) draw more current than the stick grip will handle, you need to install relays.
If you desire to have the trim system activated from both sticks, plan to use additional relays or a dedicated trim-control system. An alternative is a simple switch that determines who has control of the trim systems, pilot or copilot. With added relays, you’ll need to plan someplace to locate them and their associated wires from the panel and various components. A relay deck is simply a plate that consists of multiple relays to control higher-power devices. The relay takes the signal from the low-current capacity switch in the stick grip and, when signaled, causes the relay to switch the much higher current device such as a flap motor or fuel pump.
Another consideration when wiring stick grips is the possible removal of the passenger stick. If you decide to do this, then you need to plan which if any electrical and avionics devices will be controlled by the passengers stick. You also need to install some sort of connector that allows the wires to be secure both when connected and disconnected from the stick.
Lastly, its common for people to install a “lockout switch” that will disable any electrical functions from the passenger stick. Typically this is a small toggle switch installed near the pilot.
Auxiliary Items
Some items are not primary to the main aircraft, but many people are beginning to add them to their planes. Oxygen systems that are built into the aircraft present their own unique set of challenges. Not only do you have to provide wiring from the tank/regulator, but you also need to plan for routing of oxygen tubing and lines. Some systems have an optional panel-mounted indicator for monitoring each seat and user, as well as a toggle switch for emergency oxygen. If you plan on installing extra entertainment systems such as video screens for the back-seat passengers, you’ll need to account for the routing of those wires in the airframe and in the seats.
Another item that often gets installed in the wing is a heated pitot tube. This normally requires a run of 14-gauge wire from the pitot tube to the panel, so plan accordingly. Many people will choose to install an angle-of-attack system. The two most popular now come from Advanced Flight Systems, either as a standalone box or as part of the company’s EFIS lines, and from Dynon Avionics, which include AOA as part of the EFIS-10A, -D100 and FlightDEK D180. These systems require either one or two small tubes to be run from the wing panel up to the instrument panel. For the Dynon, its one tube; for Advanced, its two. Either way, you’ll need to plan for these lines to come into the cockpit.
The ELT often escapes planning as its usually independent from the aircraft, but it still requires a run of wire from the ELT to the remote panel-display switch. The ELT also requires room to run a coax cable from the ELT itself to wherever the ELT antenna is installed.
Another consideration is the tremendous growth of autopilot installations in homebuilts. You may have one or two servos located in various places in the plane. A roll servo will typically be located in the wing, and a pitch servo will typically be located in the aft area of the plane. From either servo a number of wires will be run to the instrument panel. Keep autopilot signal wires away from strobe power lines and any coax cable between a transmitter and antenna.
Under the Panel
Next is the panel itself. Aside from the obvious components in the panel, a variety of components will need to be mounted behind the panel. Often you’ll have a separate altitude encoder box for the transponder. Many lighting dimmers have separate modules from the knobs in the panel, and they must be mounted and located. Most EFISes now come with remote compasses (magnetometers) that are mounted in the aircraft as far from the panel as possible, usually in the wingtips or aft area of the fuselage, so you’ll need to plan for that wiring. Speaking of EFISes, you should know that all of them require pitot/static inputs at some point, either directly into the EFIS, or into a separate air data or AHRS box. This box also is either built in to the EFIS screen (like Dynon and AFS) or remote mounted (like GRT, Chelton and Garmin). Wires will need to be run from the panel to the AHRS box if its remote-mounted, along with pitot/static tubing for the EFIS.
Engine monitors normally have two separate bundles of wires. The first bundle is typically for CHT and EGT measurement and is made up of thermocouple wire. A second bundle is for various probes and sensors (oil temp, oil pressure, fuel flow, etc.) that also runs forward from the panel. Fuel-flow sensors can either be mounted forward of the firewall or in the cockpit, but also require wiring to run to the panel. Another sensor that is typical with most EFISes but not necessarily close to the panel is the outside-air temperature. It also has a wire that goes from the sensor back to the EFIS.
Overall, its wise to spend some time early to figure out at least roughly what you intend to do further down the road. Its always hard to know ahead of time exactly what you’ll do with electronics, but its wise to keep a bit of your mind on that subject from the very beginning.
Stein’s Rules For Wiring
1. Thou shall start making a wire book or a list of all the known (and even some anticipated) components that are going to be installed in the plane. Start this spreadsheet early, and by the time you’re done you’ll be darned happy you did it.
2. Thou shall plan on running more wires than you anticipated. This means leaving more space for wires, a conduit in the wing and other aids to running wires. Even with planning, by the time you add coax cables and pitot/static tubing, you may be surprised by how much wire you need.
3. Thou shall not be sloppy in the routing of your wires and coax cables. Try not to mix and match the physical routing of wires and coax cables. Also, you should try to separate out noisy wires firewall forward (specifically alternator and magneto wires) from other sensor wires running through the firewall to the panel.
4. Lastly, do not run the main alternator power wire up to the panel to a large (40 to 60 amp) breaker and then to the battery. This is, in my view, poor practice and should be avoided. Why? The alternator wire is potentially one of the noisiest wires in the plane next to these connected to the magnetos. If that wire is in the panel, it can introduce noise into your electrical system. Next, because the battery is located (in the majority of planes) on or near the firewall, running that alternator wire to the panel and back again is just extra wire, extra weight and more potential for problems. Use a local-near the battery-current limiting device for the alternator output.
Basically, plan well. It can seem difficult to try and imagine which EFIS you’re going to use when you start on the rudder, but if you take it in small bites and start a worksheet early on, you’ll be fine. Begin with the things you do know (will you install a light in the rudder or not?), and as you move on to the next part of the project, start planning for those components. When doing the wings, are you going to want a heated pitot? Autopilot? Antennas in the wingtip?
Unfortunately, there is no perfect checklist that everyone can follow because each airplane is unique. We all have the same basic equipment, but where we put it and how its installed can vary drastically. Start a wire book early, keep updating it throughout the entire project, and you’ll thank me when you’re done!
If you have specific questions for author Stein Bruch, or have certain projects youd like us to cover, email us at
[email protected] with “About Avionics” in the subject line.

