We’ve all had one of those parts to rivet. The squeezer won’t fit, so it has to be the gun and bar, but it’s light or an odd shape. Holding it while driving with a gun and holding the bar in the other hand is sure to result in less-than-perfect rivets, smileys, dents, etc. You have two hands, but need one more. The part could be clamped, but it’s thin and damage is always a danger.
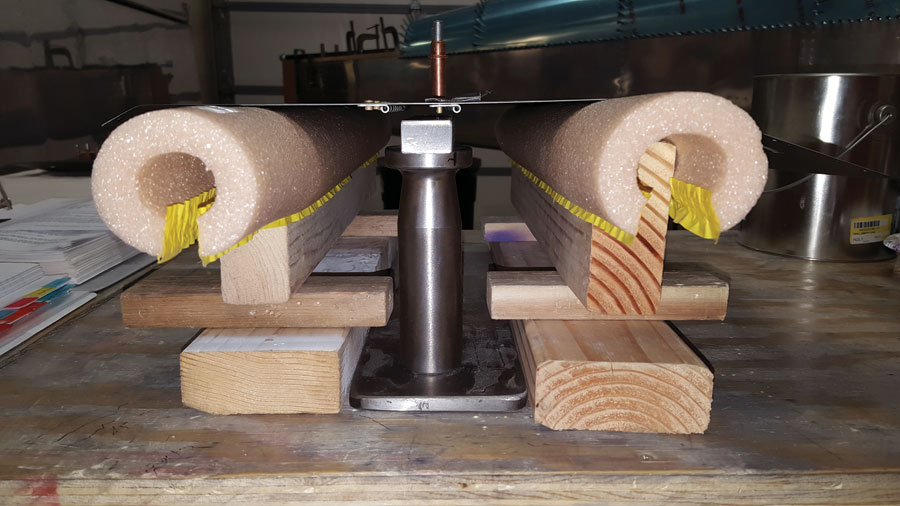
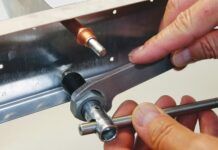
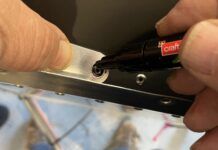
I learned this trick riveting ribs to a spar. This photo shows a seat floor. The job is riveting the seat-back hinges to the floor. The rivets are #4 universal rivets, so they can’t be back riveted the conventional way.
Place your back rivet plate on the bench with a back rivet bar on top. The back rivet plate provides a nice flat, solid surface. I like to put a tungsten bar on top of the back-rivet bar for added mass, but it works just fine without it. The tungsten provides a nice square edge.
Stack some blocks and shims under the part until the rivet shank is barely clear of the bar. If it’s a solid part, use soft foam for the spring action. If it’s flexible, the foam is not needed. I used the foam pictured here to prevent scratches; the seat floor is already painted and ready for final installation.
Put a rivet in a hole and double-check that the bar is centered under the rivet shank and will clear any parts. The rivet can be driven just like any other rivet. I also drew an “X” on the bar. This made it easy to reposition the next hole. Just center the hole over the target, double-check the position underneath, and drive the rivet. It takes a little more time, but the result is perfect factory and shop heads with no damage!

