Last month we looked at the preparatory steps of designing and building a custom wing for a Cassutt Formula 1 racer. We covered aerodynamic considerations and assembly preparations using a CNC milling machine (computer numerically controlled mill). This month, we’ll start with construction of the spar and skins, and see the wing through to final completion. A picture is definitely worth a thousand words when it comes to composite construction techniques, so this month’s article will document the process mostly through photos and captions.
From an assembly point of view, it’s convenient to separate the wing into internal (spar, ribs, aileron torque tube, etc.) and external (wingskins) components. Once the upper wingskins have been laid up in their respective left and right molds, the two molds are precisely aligned and the internals-beginning with the spar-are installed. Once the spar, ribs, and aileron (there is no flap) fittings are in place, the lower skin is lowered onto the assembly and the wing is closed out. There are surprisingly few parts, and the process is relatively fast.
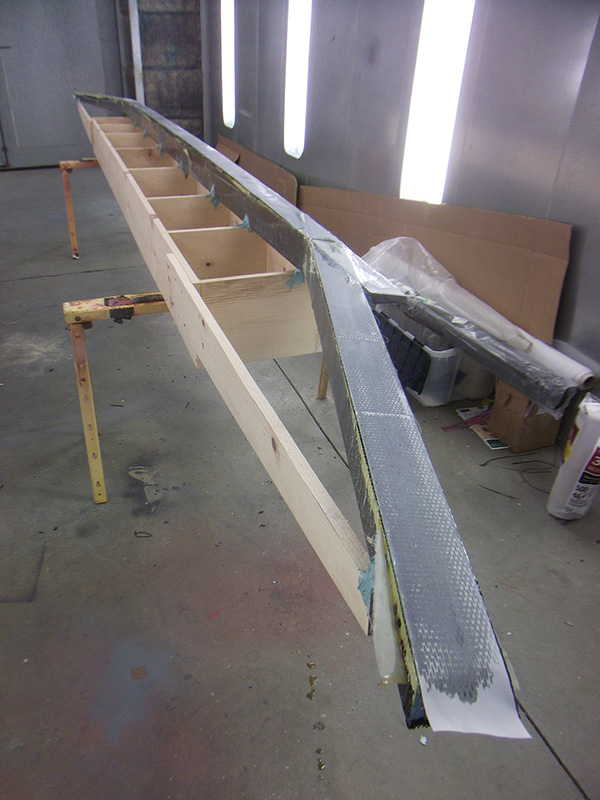
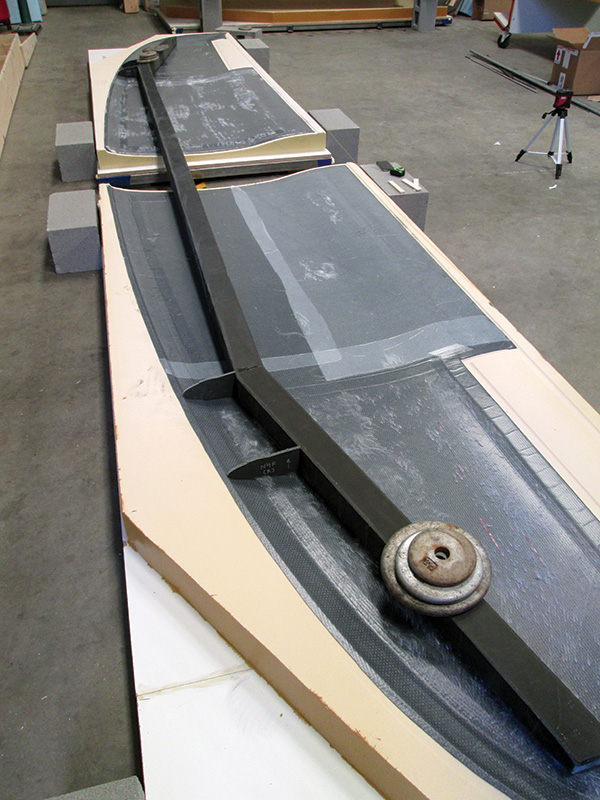
CNC prep is finished, so let’s build! The first part to be fabricated is the spar. Here, the spar foam core has been carefully assembled on a long, flat table and the upper spar cap and shear web laminated. Once the lamination cures, a wood support frame is constructed. Bondo holds the frame to the spar, and allows the spar to be flipped over while remaining perfectly straight.
The spar has been flipped and the lower spar cap is laminated. Spar caps are a tapered schedule (i.e., many layers at the root, fewer at the tips) of unidirectional carbon while the shear web is bias carbon BID (bi-directional fabric).
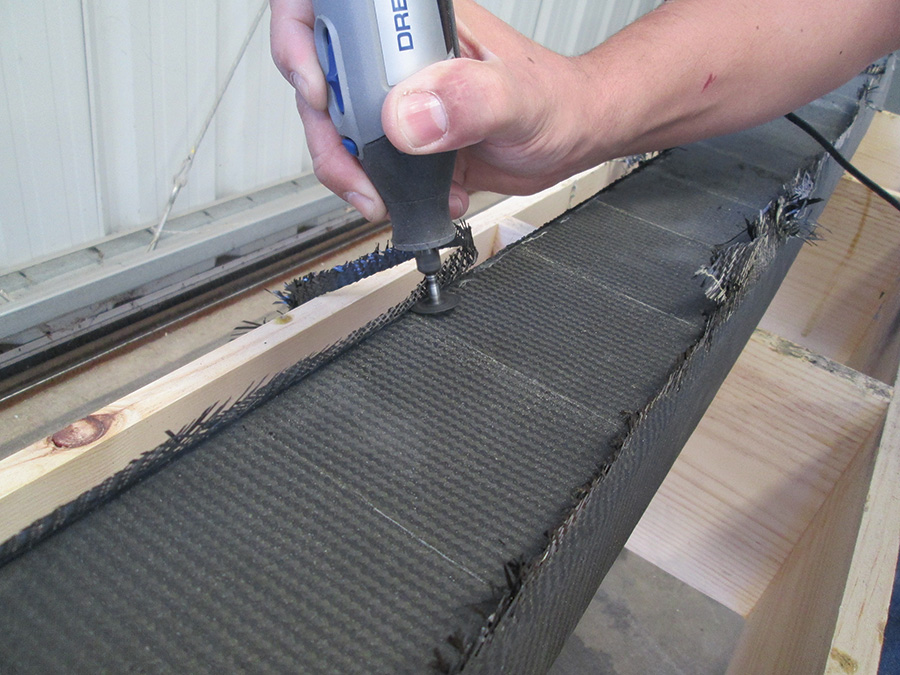
After a final BID wrap ties the upper and lower spar caps to the shear web, the spar is trimmed, lightly sanded, and ready for final assembly.
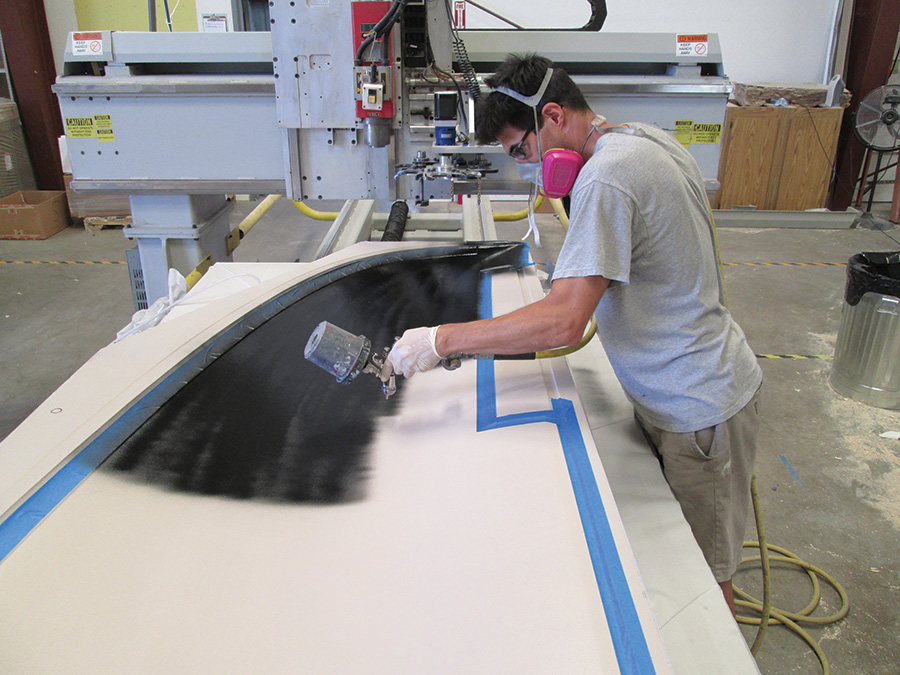
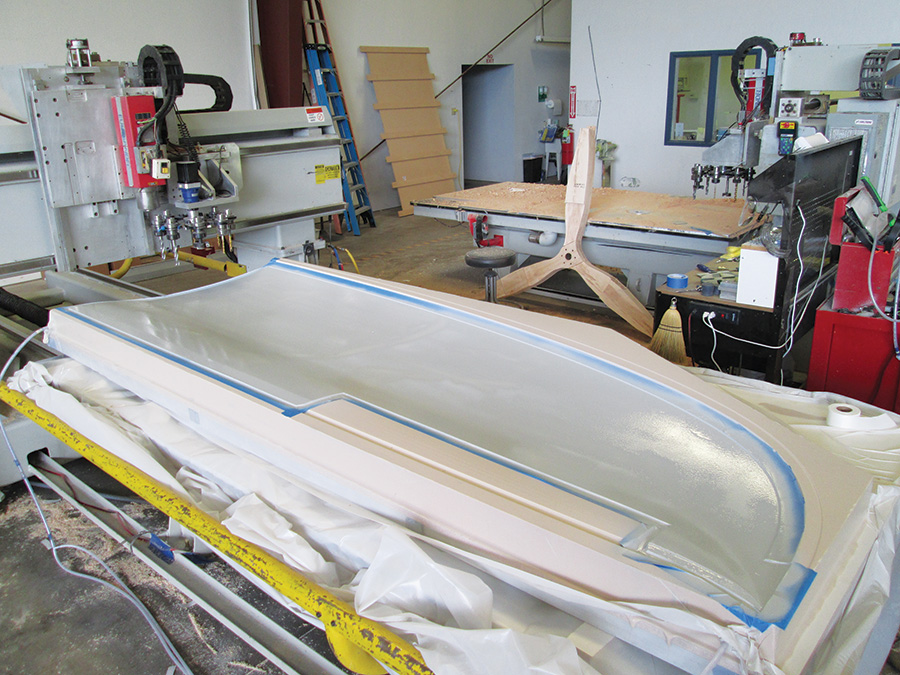
Next, we prepared the molds for vacuum bagging of the wingskins. For rapid prototyping, we used a method called double bagging. For this technique, the mold itself is first vacuum bagged with plastic, which acts as a mold release, allowing the foam mold to be used straight on the CNC with no further finish work. Here, the author sprays the plastic with epoxy primer. The primer transfers from the plastic bag to the carbon during the bagging process and helps minimize pinholes in the molded part. Blue tape acts as an edge guide and is removed after priming. Below is a primed mold, which will be ready for layup as soon as the primer cures and tape is removed. (As part of an experiment, upper and lower surfaces received different color primers.)
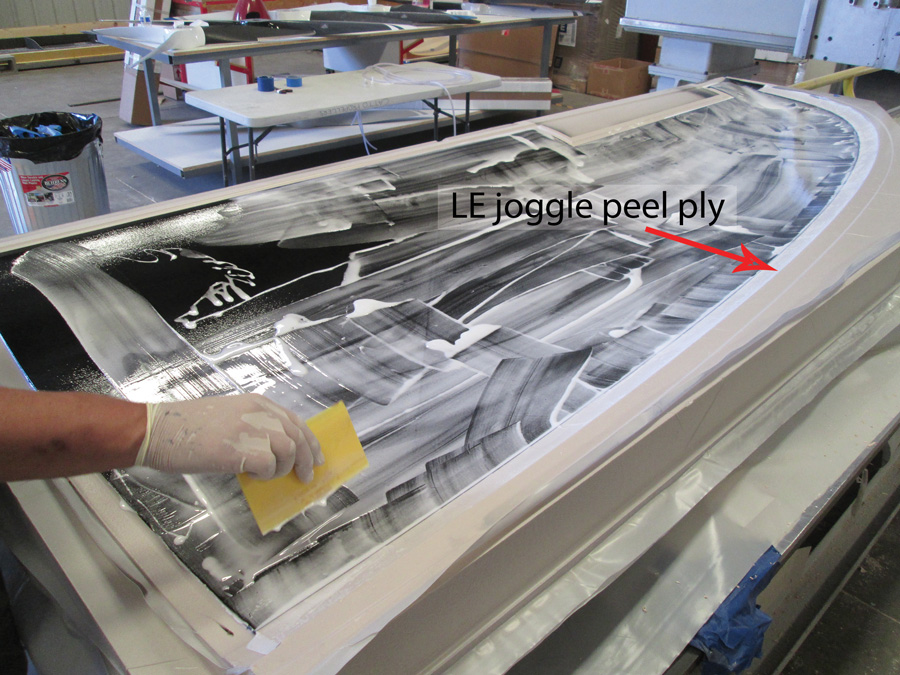
To further prevent pinholes and inhibit print-through of the fabric, a thin slurry of micro (microballoons and epoxy) is squeegeed on the mold before laying out the carbon fiber. In addition, a strip of peel ply is laid up on the leading edge joggle. After the wing is assembled, the peel ply will be removed and the leading edge will be ready for taping.
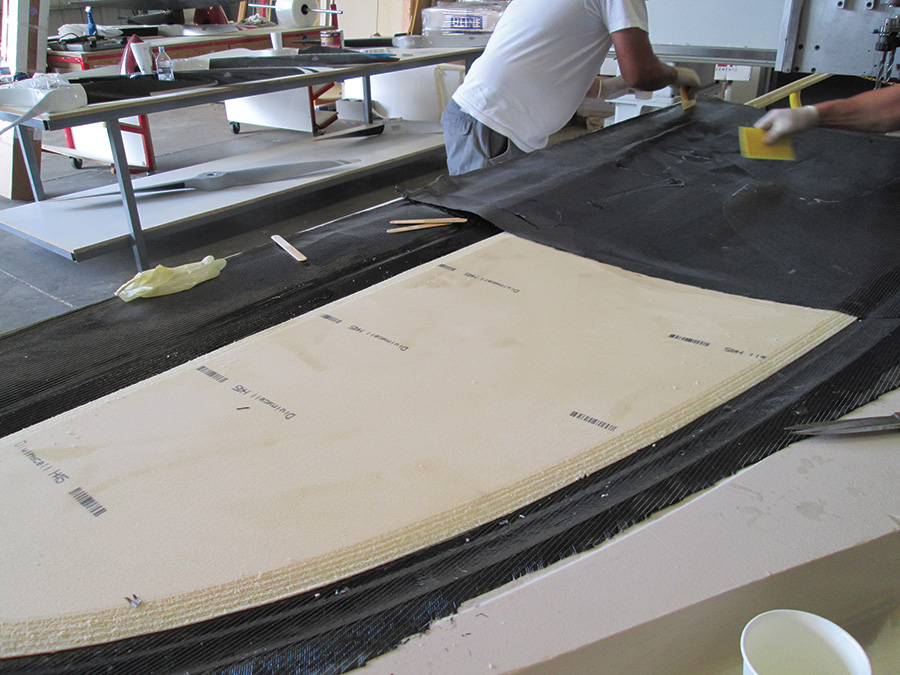
The layup begins, all hands on deck! Here, the exterior layers of carbon have already been cut to size and wet out on the mold, and the core has been placed in position. Paulo Iscold (left) and Craig Catto are wetting out the inner layer of carbon. The author was able to momentarily break the hypnotizing spell of mixing endless batches of epoxy and snap a quick photo.
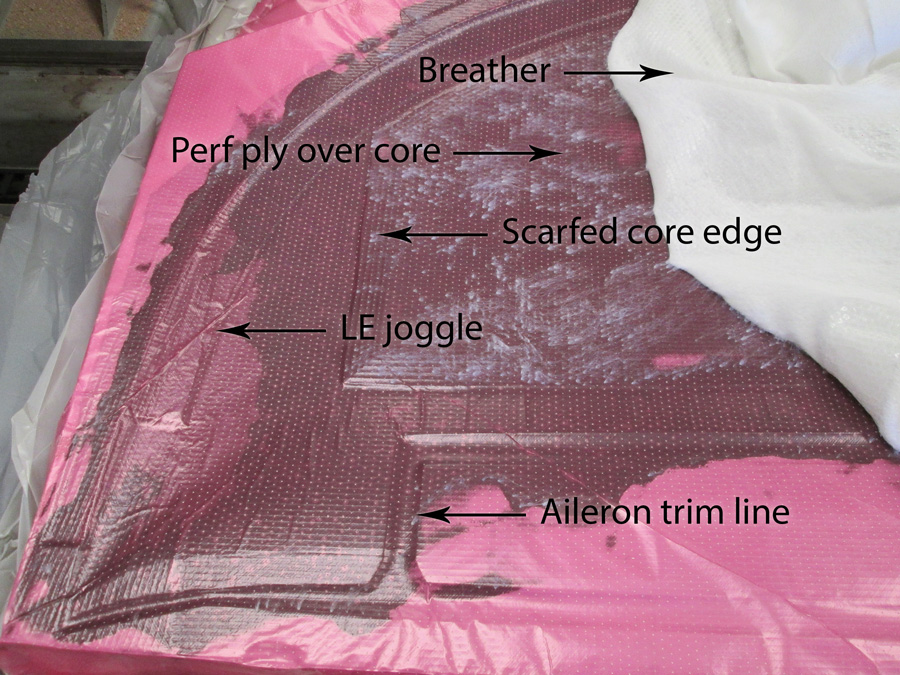
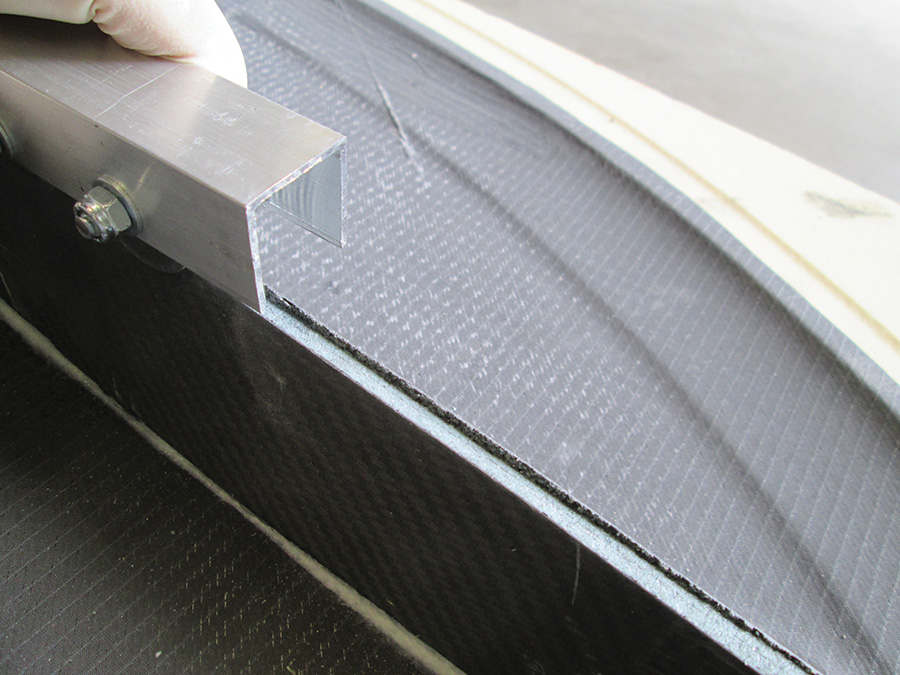
After the carbon-Divinycell-carbon wingskin has been laid up, a layer of peel ply, perf ply, and breather are applied. When peeled from the finished part, peel ply (typically 3-ounce Dacron) leaves a rough surface ready for bonding ribs and spar. Perf (perforation) ply allows excess epoxy to bleed through into the breather. The breather (typically polyester batting) acts to both absorb excess epoxy as well as distribute vacuum evenly throughout the bag. In this post-cure photo, the batting has been peeled back to reveal the pink perf ply. The batting and perf ply will be peeled off and discarded. The peel ply is generally left in place until the part is ready to be assembled. Also visible is the stepped bevel of the Divinycell core scarfing, as well as the joggle for the aileron cutout.
Bag it and tag it! The outer bag has been sealed with tacky tape and vacuum applied. The white breather fabric can be seen covering the entire layup. Two vacuum lines run to the interior bag and two more lines to the exterior bag. Here Paulo does a perimeter check, listening for possible air leaks.
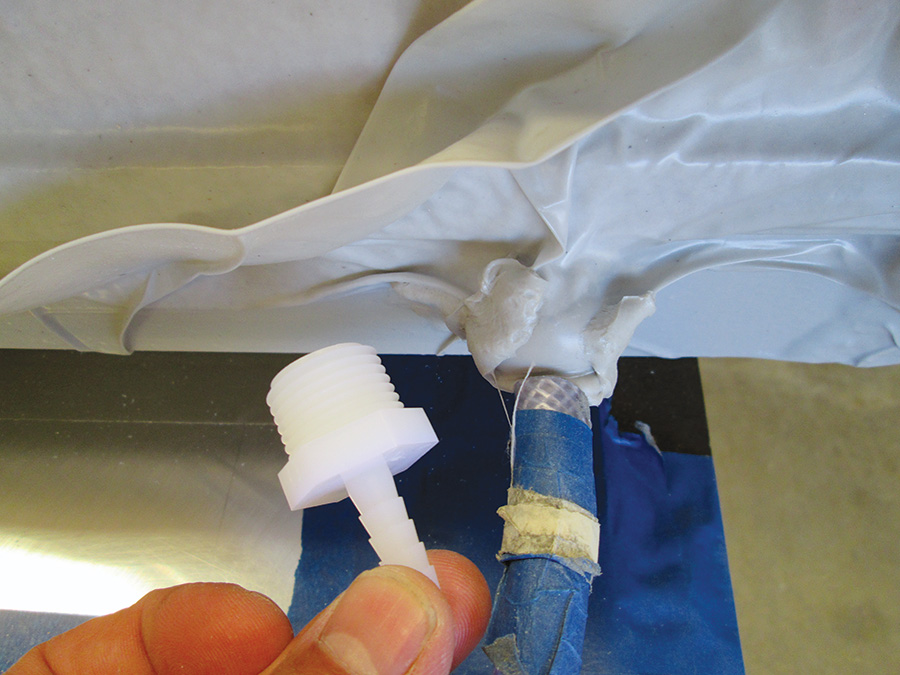
While specialty composites stores sell various fittings for vacuum bagging, we simply used these cheap barbed nipples from the aviation department of Lowe’s, sealed to the bag with tacky tape. Quarter-inch ID reinforced hose and T-connectors (also from Lowe’s) are used to distribute vacuum.
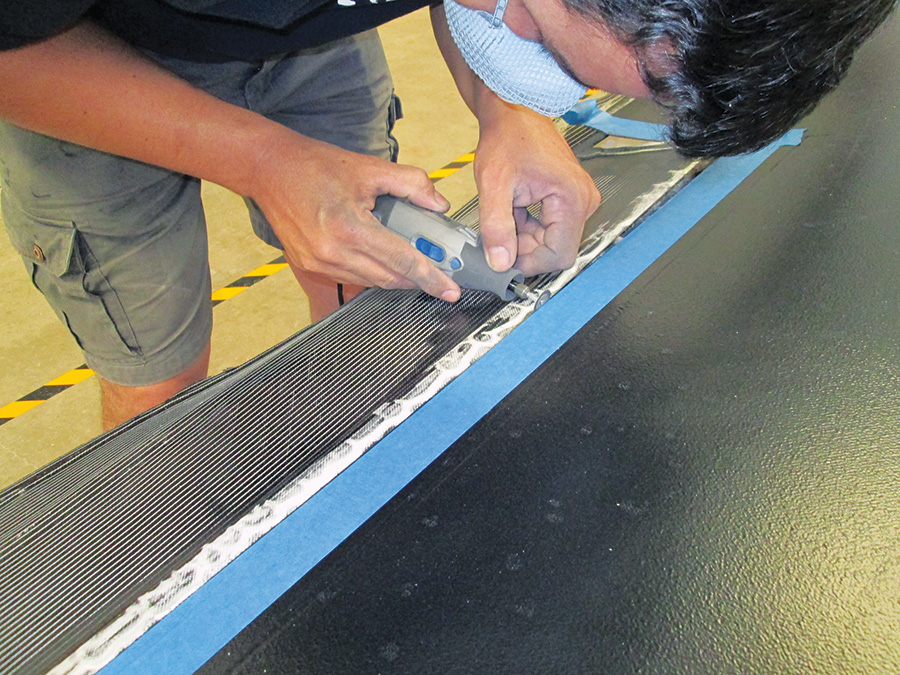
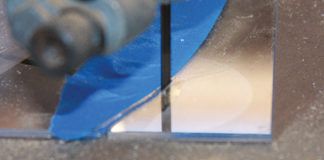
The upper right wingskin demolded and being trimmed for assembly. Paulo trims the aileron cutout with a diamond disc Dremel. The blue tape serves as a cutting guide, and the final edge will be block sanded for straightness.
Close-up of the skin surface. Doesn’t look very laminar, does it? The primer/micro layer is sacrificial, and block sanding will leave a perfectly smooth surface finish.
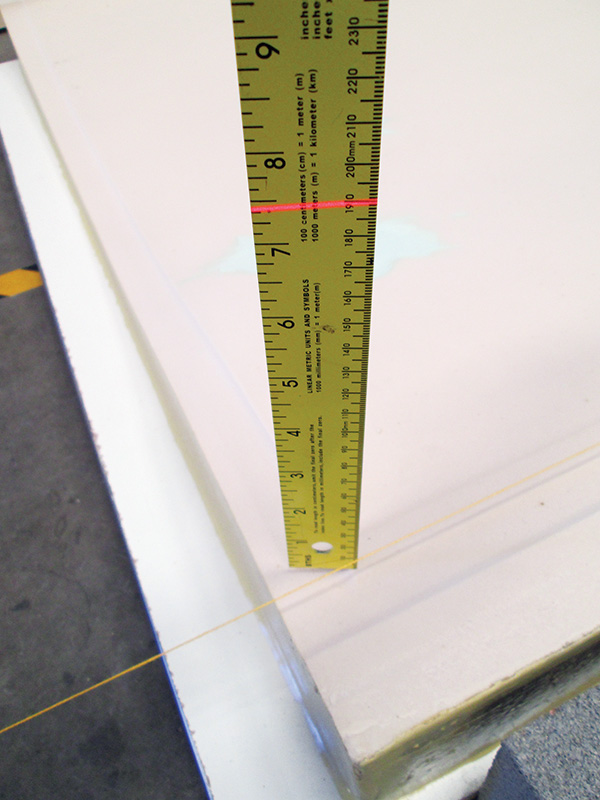
Once all four skins have cured, it’s time to assemble the wing. First, the top skin molds are positioned and shimmed for proper relative alignment using a taught string for straight trailing-edge alignment, and a laser level and ruler for vertical alignment.
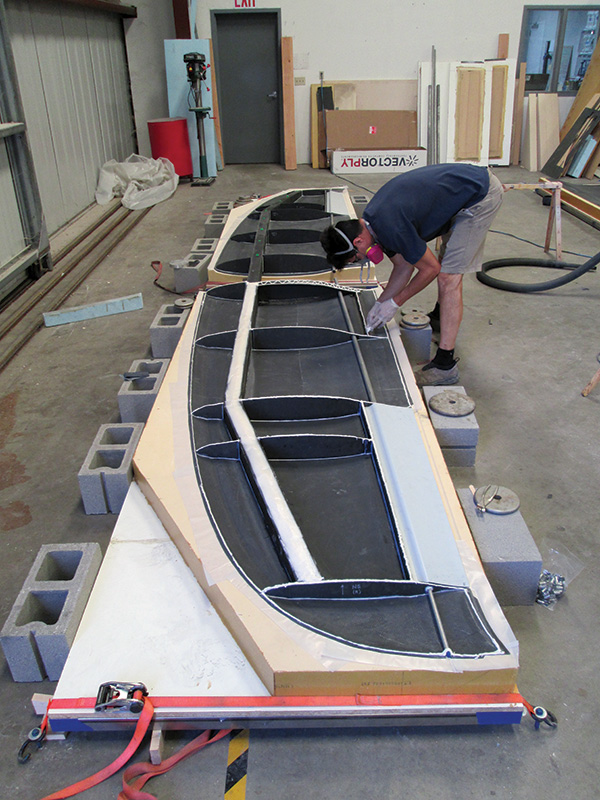
The top skins are dropped back into their molds and the spar and ribs are temporarily installed to check for fit. Although there are different schools of thought as to whether to assemble the wing right side up or upside down, upside-down assembly allows controlled bonding and visual inspection of the upper wingskin-to-spar bond. Since airplanes typically see higher positive than negative Gs (that’s certainly the case for a pylon racer), delamination of the upper skin due to compressive buckling forces is a greater concern than delamination of the lower skin (which is in tension under positive G loads); the upper skin-spar bond is thus the more critical. When the wing is closed out, the builder has less ability to control and inspect the closeout bond, so this bond is often made on the less critical lower surface.
The foam core of the ribs is troughed with a core recessor for bonding. This is done immediately before bonding, since the foam has a tendency to spring back after a few days. Once all peel ply has been removed, the ribs and spar are ready to be bonded to the skins.
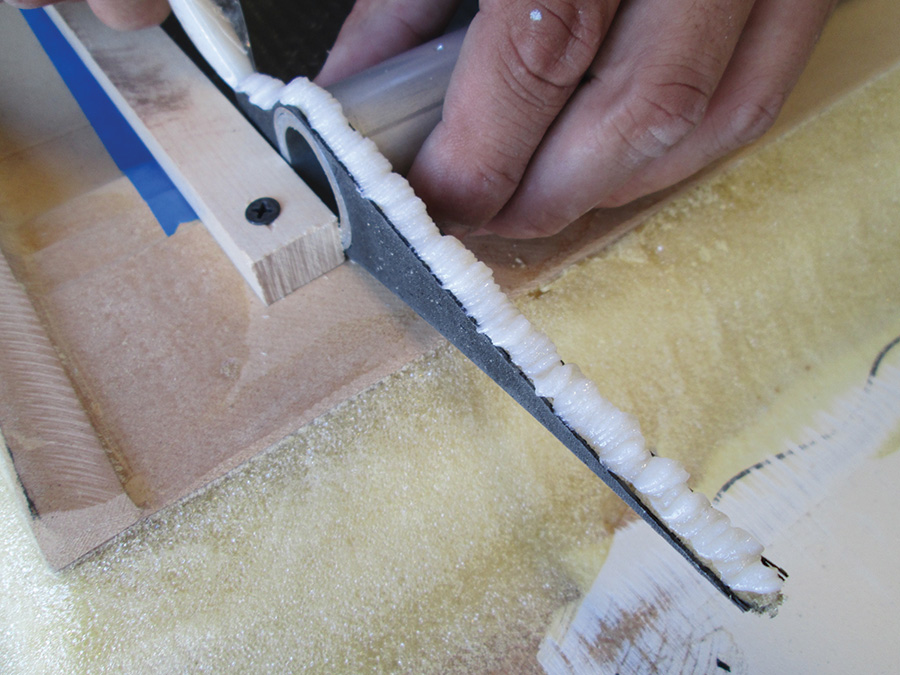
Manny Espana applies structural adhesive (a mixture of epoxy and cotton flox) to the spar. Note the beveled shape of the adhesive: peaked along the centerline and tapering to the edges. When the spar is dropped in place, the adhesive pushes out to make a nice solid joint with no voids-you only get one chance to do this.
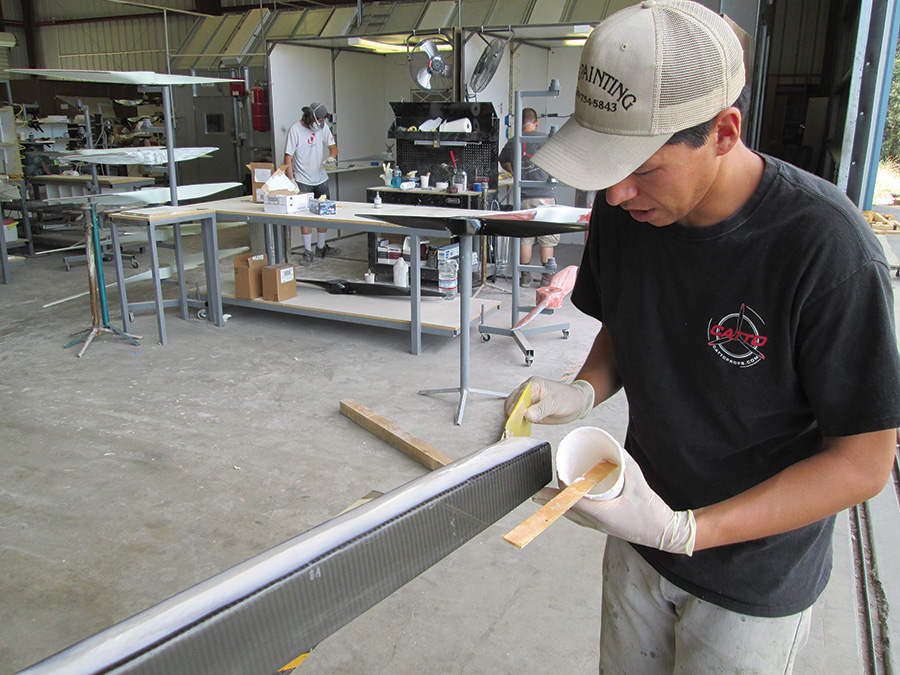
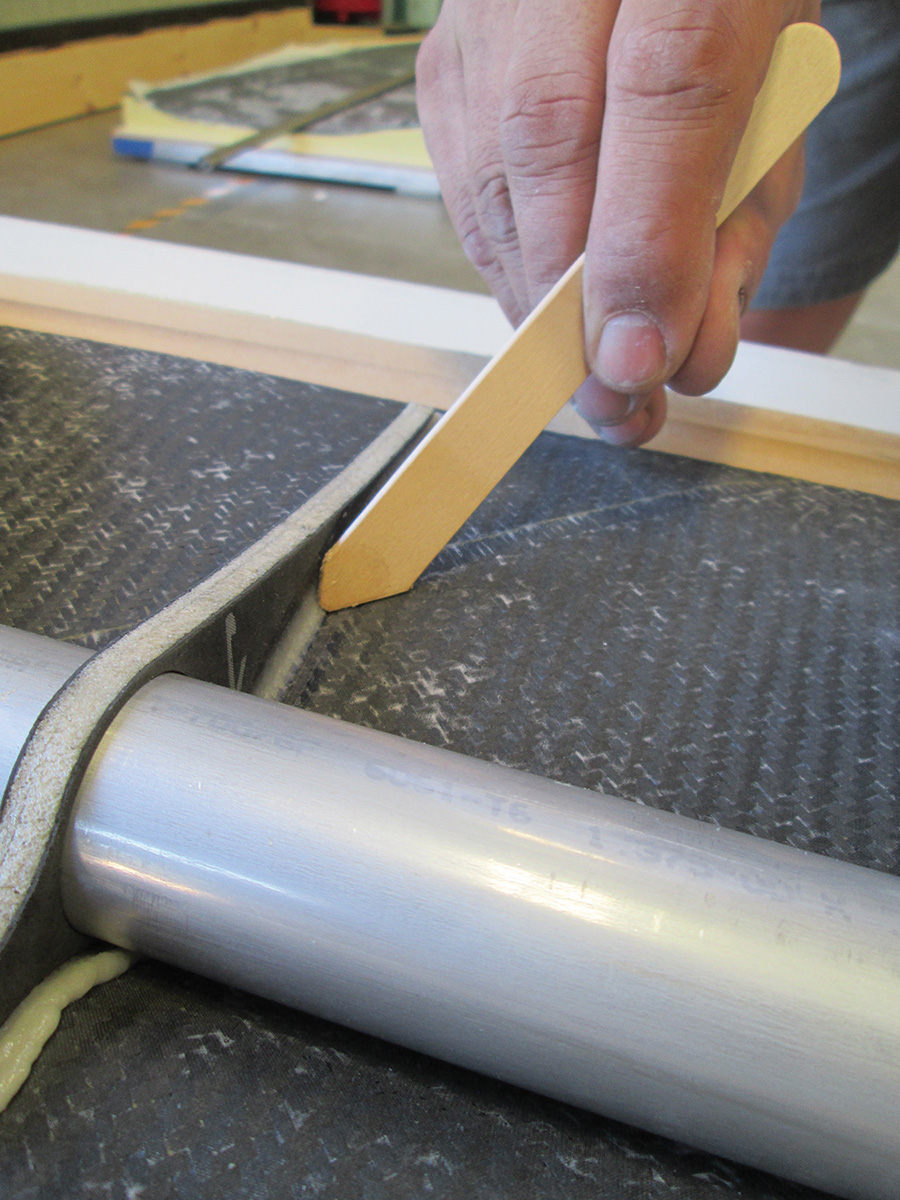
Elsewhere (ribs, trailing edge, etc.) structural adhesive is applied pastry-bag style and filleted with a tongue depressor. (Only the tip of the pastry bag is visible, but it’s simply a heavy duty freezer bag filled with adhesive and a small tip of the corner cut out. This allows the adhesive to be squeezed out in a clean, controlled fashion.)
These pics show construction of the aileron, in which the aluminum torque tube also doubles as the aileron spar.
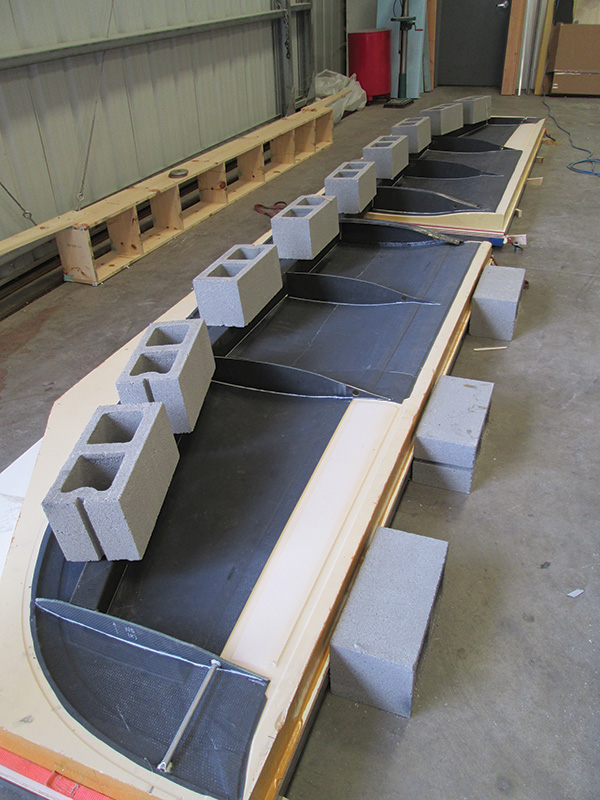
Ribs and spar have been bonded to the top wingskin and are held with “gravity clamps” while the resin cures.
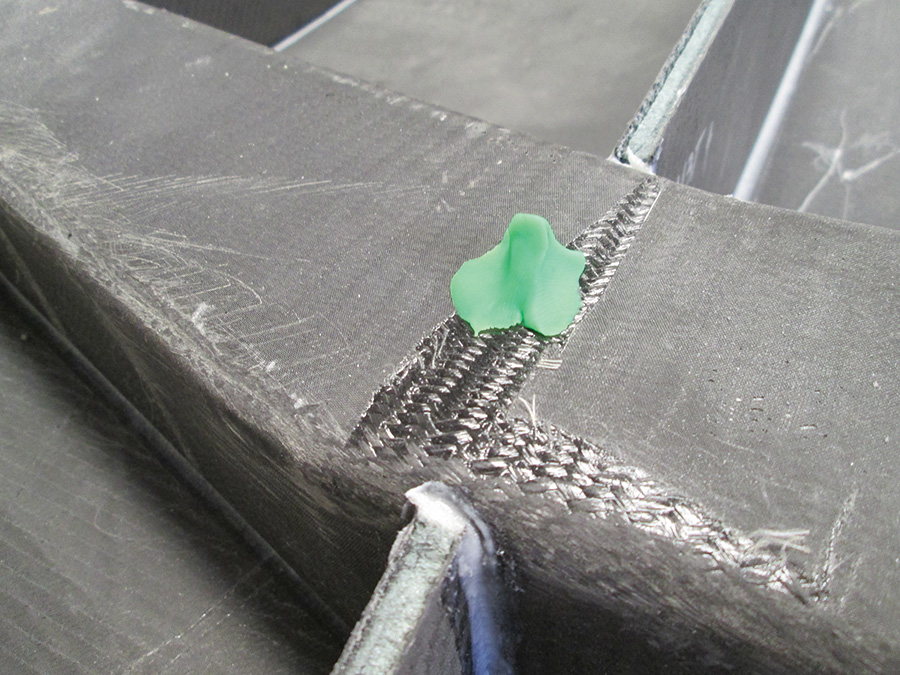
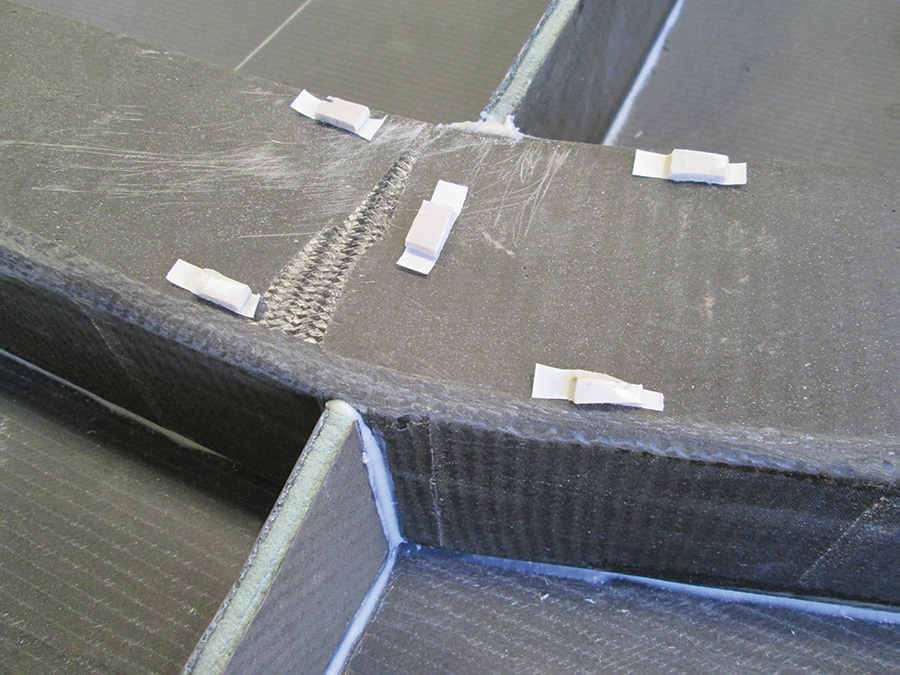
inally, the bottom skin is prepared for bonding. Play-Doh pyramids are located along the spar to plumb the gap between spar and skin, and determine the quantity of structural adhesive necessary to fill the gap. When the bottom skin is temporarily fitted in place, it smashes the Play-Doh down, thus providing an indication of the skin-spar gap.
acky tape is used to locate the bond line of the spar and ribs by placing strips of tacky tape paper-side down on the spar (wax paper has been removed from the upper surface) and then again temporarily fitting the skin in place
When the skin is removed, the tacky tape sticks to the skin and shows the location of spar and ribs for bond line taping.
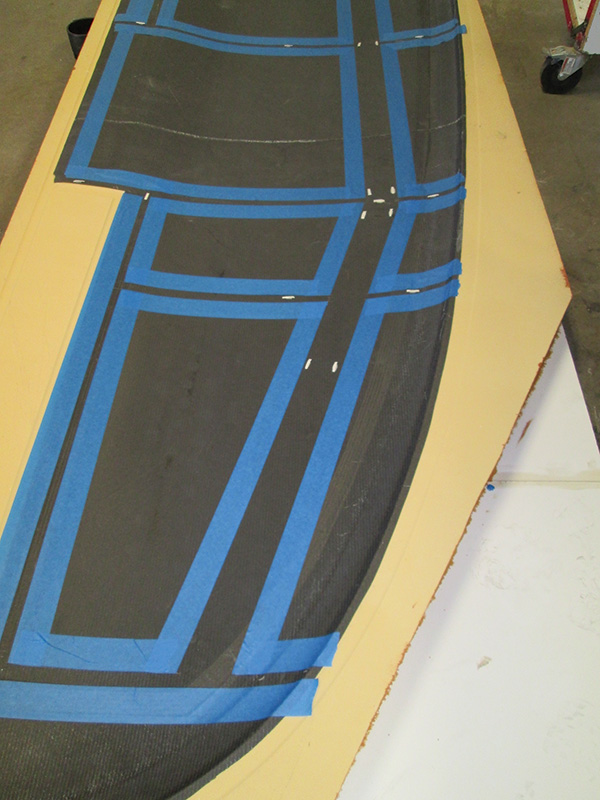
All bond lines are taped, scuffed, and wiped with acetone for bonding (including the aluminum aileron spar/torque tube).
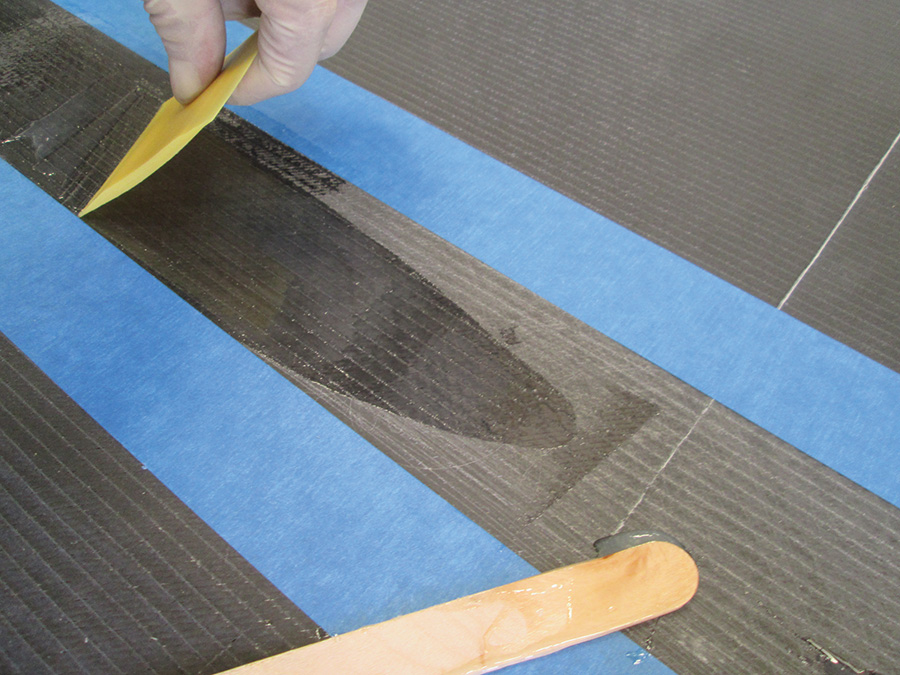
Just before closeout bonding, the bond lines are painted with straight epoxy to ensure a consolidated skin bond with the structural adhesive.
Structural adhesive is applied to the lower (here facing upwards) surface bond lines (spar, ribs, trailing edge and leading edge flashing) and the right lower skin is dropped in place.
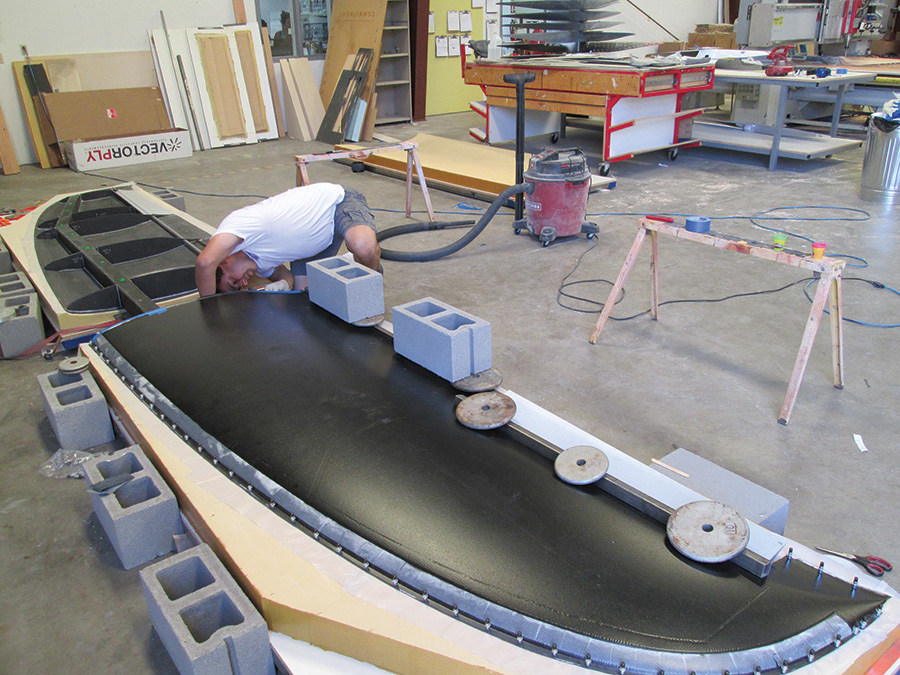
The leading edge is Clecoed (Cleco holes were drilled earlier during initial fitting) and weights are applied to the trailing edge. Here Paulo inspects the root rib bond line.
After the bottom skin bonds cure, the wing is placed leading edge up on a stand and the leading edge flashing is removed with a diamond disc Dremel. This creates lots of carbon fiber dust, so a full safety suit and respirator are essential. The leading edge peel ply is also removed at this point, and following a bit of sanding, the leading edge is ready to be taped.
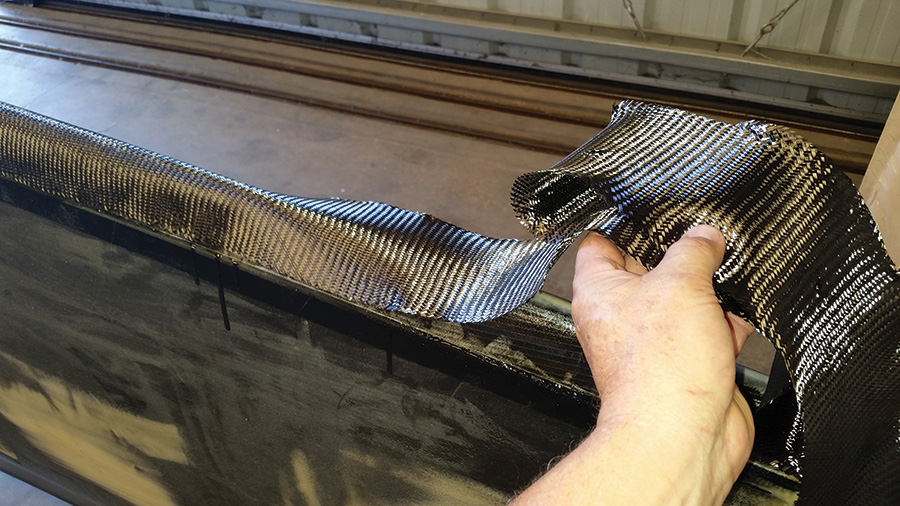
Three layers of bias carbon tape are applied to the leading edge. Bias requires careful handling as it has a tendency to deform easily, although this is the same property that makes it great for taping high-curvature areas like the leading edge.
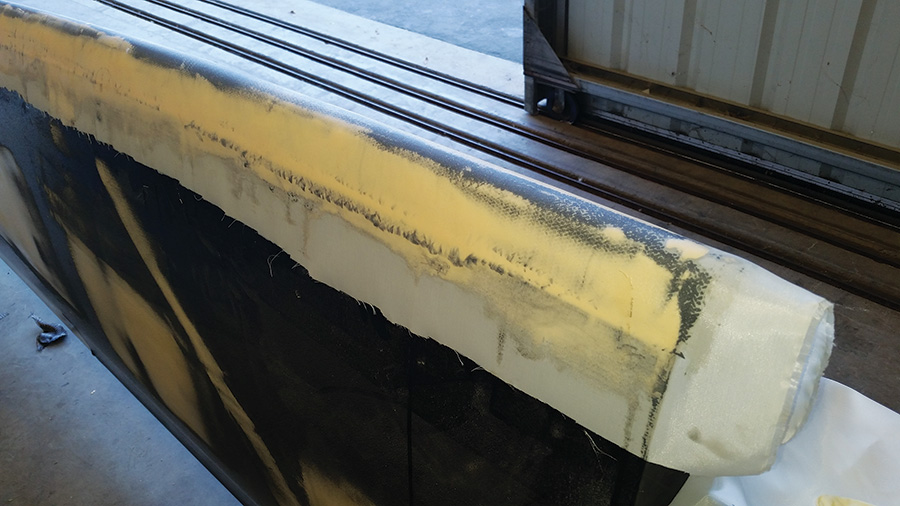
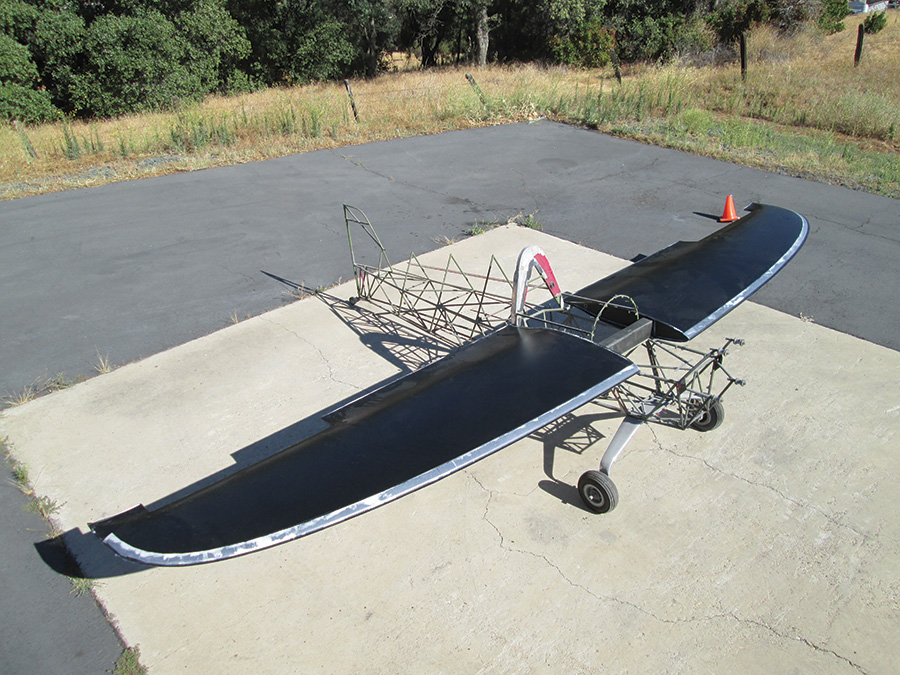
After the final layer of tape, a layer of epoxy and microballoons is applied to smooth the transition between the tape and the wing mold joggle, followed by peel ply. After cure, the wing is block sanded smooth. This removes any irregularities in the leading-edge region, as well as the primer orange peel.
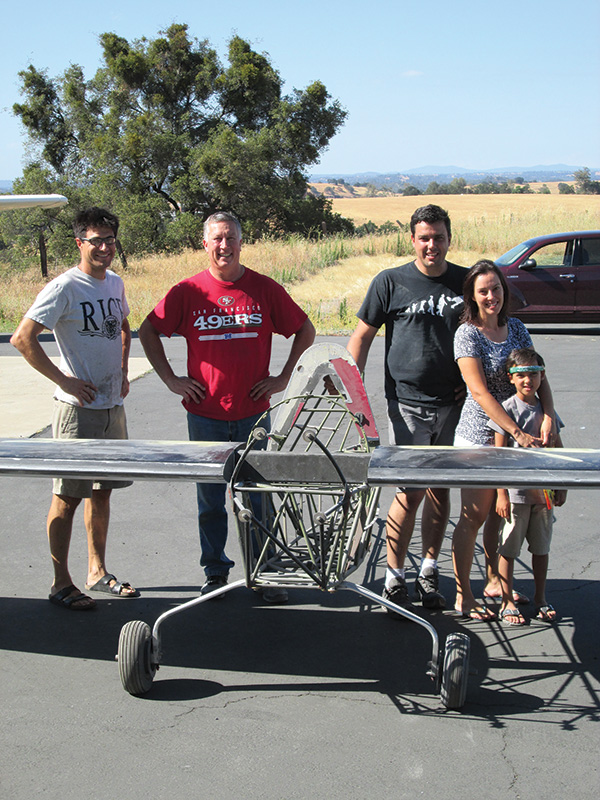
(L to R): the author, Craig Catto, and Paulo Iscold with his wife Amy and son Mateus with the finished wing. Time to go bowling!











Very good and great tutorial. As said ,a picture worth a thousand words.
How many layers of carbon have been used per skin ?
outstanding
tell me about the first one !!!