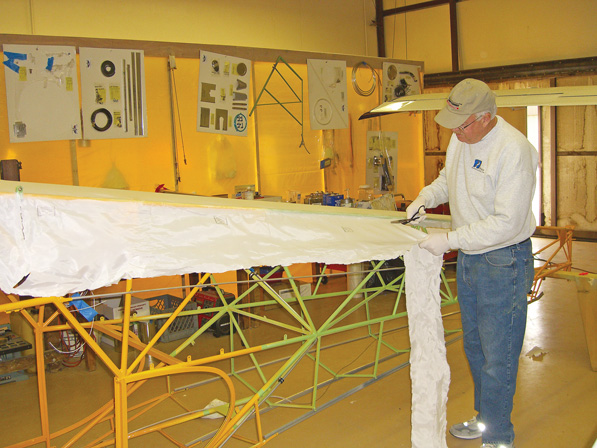
Pinking shears are used to trim excess fabric from the wing.
Eager and nervous described our feelings as we approached this key element in the construction of the Cub. We wanted to learn about fabric covering, but it is so different from our previous experience with the two GlaStars that we were also a bit anxious. What if we screwed it up? With aluminum it is definitely possible to make so much a mess of a part that it has to be discarded. With fiberglass it is much more difficult to completely destroy something with simple ineptness. With fabric, well, we just didn’t know yet, but we would soon find out.
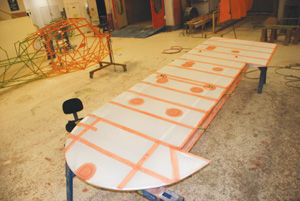
The almost completed wing shows covering and taping, except for wingtip and leading-edge tapes. Round areas are reinforcements for inspection holes that will be cut out later.
PolyFiber versus Air-Tech: That was the first question. Picking a covering system comes before any work begins. There are other possible choices to be sure, but these are the ones offered by Texas Sport. Covering and paint go together in one system, so the final finish must be considered along with the covering. Both systems are good choices, but each has its pros and cons.
PolyFiber is probably the best-known modern covering system. The company offers a great book and DVD that really make the whole step-by-step process clear. It is a confidence builder to be able to see the video before and even during the covering process. If there is a negative to the PolyFiber system, it is that there are a number of different chemicals for the various steps, and the basic solvent is MEK, nasty stuff.
The Air-Tech system is not as well documented, which is not to say it is poorly done. It is just not as well described as the PolyFiber system, which is extraordinarily well done. However, the Air-Tech system has two points to recommend it. First, it uses one adhesive for everything—attaching, taping, sealing—with the various processes simply requiring different levels of dilution with the standard reducer. That reducer is acetone, a somewhat less nasty solvent compared to MEK. Second, the primer can be applied to the fabric without a sealer coat, unlike PolyFiber, which requires a coat of PolyBrush before the primer (silver) coat.
So as not to be partial to either supplier or write without firsthand knowledge, I ended up using both systems, just not on the same parts—a major no-no. Actually it wasn’t planned; it just worked out that way. We started covering smaller parts because we were waiting for paint for the fuselage, which was coming with the Texas Sport-recommended Air-Tech system. We got impatient, ran down to Aircraft Spruce, and bought enough PolyFiber materials to get started. I must admit that we are truly blessed to have Aircraft Spruce & Specialty a mere 15-minute drive away.
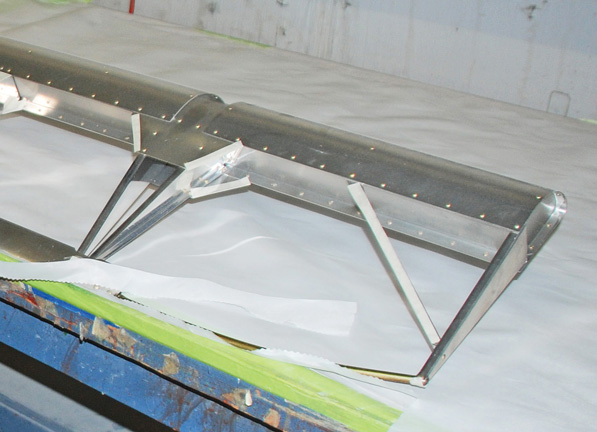
Sharp edges and screw heads get anti-chafe tape before fabric covering goes on.
Stick with One System
Let me say right now that I do not recommend using two different systems on your homebuilding project, even on different parts. By far the preferred method is to stick with one system. Because of our impatience we had to carefully document which parts we covered with PolyFiber and which we covered with Air-Tech to avoid problems down the road if we had to make a repair. At the time we blew it off as no big deal, but in retrospect it was sort of a boneheaded thing to do.
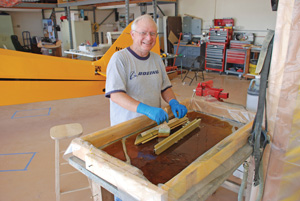
Ed Zaleski treats aluminum parts with Alodine before painting. A temporary tray is made with 2x4s and plastic sheeting.
This situation begs for a brief comment on getting impatient in general. Impatience and building airplanes do not go together well. When the two are mixed, more often than not bad stuff happens. In this case the bad stuff consists of laying the groundwork for a future problem, but in many cases the consequences can be much more immediate. In the long run, doing things correctly is always more important than doing them quickly. With experience, you can learn how to do both at the same time, but few people gain enough experience building airplanes to do so. Please be careful and patient. You are much more likely to live a long and happy life that way.
It was good practice for us to start with some smaller parts and to learn by doing. The good thing about fabric covering is that if you really mess it up, you just get out your pocketknife and cut it off. The metal structure underneath doesn’t care how many times it takes for you to get the fabric covering right. This is less satisfactory if the thing you mess up is the main fuselage or one of the wings. Having to redo one of those could really put you in a bad mood, which is why you start with small parts like the elevators.
Firsthand Experience
I would highly recommend taking an EAA SportAir workshop on fabric covering, or some other similar course, before you get started on a project like this. The PolyFiber book is great, but there is just nothing like seeing it in person to get the understanding you need to do a good job. As it worked out we didn’t take the SportAir course, but we did spend some time at the Texas Sport factory watching and trying fabric covering under the supervision of the company’s experts before we started on our own plane. That was very valuable. Besides the basics, we got a number of good tips from the pros on how to make covering easier.
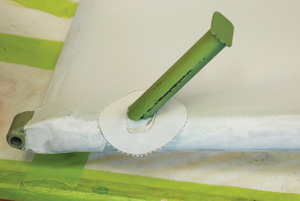
Protrusions through the fabric such as this step on the landing-gear leg need extra reinforcing.
When we got home to Chino, we were full of confidence and enthusiasm. We grabbed an elevator and got to work. The covering went on easily enough. Then it was time to shrink it with the iron. The shrinking process goes in three steps or temperatures—250°, 300° and lastly 350°. The first two went great, but there was a hot spot on the iron at 350° that melted a hole in the fabric. A teachable moment presented itself. When the book says do not exceed 350°, it isn’t kidding. I had earlier checked the surface of the iron in a few spots, but in one place that I didn’t check, the temperature was over 400°. This didn’t work.
We experimented with some different irons before we found a combination that worked well for us. We ended up with a small iron from Aircraft Spruce that costs less than $20 (part number 09-37400), and for the large areas I like a carpet seaming iron by Crain. Upon the recommendation of the Texas Sport guys, I got the model 920 S from a local carpet supply store. It was pretty pricey at about $100, but it holds the temperature well and distributes heat evenly across the plate. If you get one, be sure to order it with the smooth plate, because it more commonly comes with a grooved plate that won’t work for fabric. You can also use a more traditional iron, but be careful of hot spots. Check the temperature of the iron often. We had good luck with a non-contact infrared thermometer from Radio Shack for about $15 (part number 22-325). This is much easier to use than the thermometer that comes in the PolyFiber practice kit.
After working through a few personal challenges on the tail surfaces (yes, we got the pocketknife out a time or two), it was time to tackle the fuselage. This is intimidating at first, but fabric is more forgiving than you might think. We put the bottom on first, which is really pretty easy, though the rest of the fuselage is a bit trickier. The PolyFiber book says to cover the balance of the fuselage in two pieces with a flat, double-stitched seam just in front of the vertical fin. For a certified airplane this method is required to meet the STC. Texas Sport recommends running a simple seam along the entire backbone, and then taping over it in the conventional manner. The company is tied to the somewhat different ASTM standard, so it can come up with its own way of doing things. We chose to go with the Texas Sport method, because it produces a cleaner look.
Sew It Seems
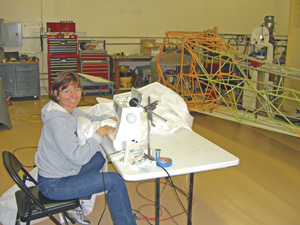
Heidi Tillinghast sews the envelope for the fuselage. A single seam down the back makes for a clean look when finished.
Neither my building partner Ed Zaleski nor I have a sewing machine or any knowledge of how to use one if we did, so we called up our GlaStar buddies Steve and Heidi Tillinghast for help. They came eagerly with a sewing machine in tow, and in a few hours we had the fuselage fabric marked, pinned, sewed and glued in place. It was easier than any of us thought, and it came out really nice. One of the great and somewhat unexpected benefits of building airplanes has been meeting great people like Steve and Heidi. We hope that building the Cub will serve as a means to meeting more wonderful people like them.
While Steve, Heidi, and Ed were covering the fuselage I was back in Sulphur Springs, Texas, covering the wings with a little help from my friends at Texas Sport. I hadn’t planned to use any factory help on this project, but for a number of reasons it ended up making sense to do so. The wings were just sitting there in Texas waiting for a spot to open up with the trucking company, I needed to get another look at and some more pictures of the Jabiru engine installation, I wanted to get a little more time flying in the demo airplane, and I was getting impatient. Admittedly some of those are better reasons than others, but be that as it may, off I went.
Finishing the wing assembly process came first. Once the balance of the wing structure, fuel tanks, wiring and pitot-static system lines were installed, the covering could begin. Cub wings are pretty big for one person to handle, so some expert help made things go much more easily. The guys at Texas Sport have covered a lot of wings, so they move pretty quickly, and I had my hands full keeping up with them.
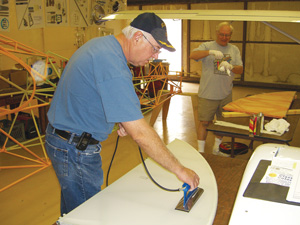
Prizio tightens the fabric on the horizontal stabilizer with a larger Crain iron.
No Coverup
Application of fabric starts by covering screw heads and sharp edges with anti-chafe tape. Next, adhesive gets applied to the leading edge, and then it is allowed to dry. Once this was done we snapped some lines along the leading edge an inch above and an inch below the center of the leading edge. The fabric lines up with these and gives a 2-inch overlap. A single piece of fabric, 70 inches wide by 16 feet long, covers the bottom surface. That is why some help is nice to have. The fabric gets glued to the leading edge by painting on reducer through the fabric to activate the adhesive below. Acetone is used with the Air-Tech system, but MEK would be used with PolyFiber products. The process is the same; just the chemicals are different. Once the leading edge is fully attached, the fabric gets glued to the trailing edge, the wingroot and the wingtip. The excess is cut off with pinking shears, and the wing gets flipped over so the top fabric can be applied. The top fabric is lapped over the bottom fabric. This gives us a 2-inch overlap at the leading edge where the most strength is needed.
With the big pieces of fabric now securely in place the iron comes out. Shrinking the fabric goes in three steps. With the iron set to 250°, everything gets the once over. It is important to check the temperature of the iron in the beginning and from time to time to make sure the temperature is right. The fabric takes heat out of the iron, so it may be necessary to let the iron recover for a minute or two every now and then. Hot spots on the iron must also be avoided to prevent damage to the fabric. At 250° it is safe to go over the metal underneath the fabric; at higher temperatures it is not. The process gets repeated at 300° and 350° to fully shrink the fabric, with special care being taken at the higher temperature not to linger too long in one spot or iron over underlying metal. We didn’t want to melt a hole in the fabric after we’d come this far.
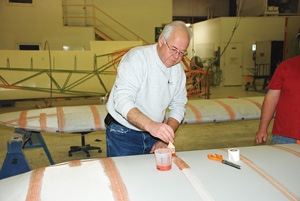
Two-inch tape is placed on top of the rib stitching on the wing.
Next comes the rib stitching. We started with the smaller tail pieces, and I had already done some rib stitching, but a little review is in order. First, a 2-inch-wide stripe of adhesive is applied over each rib. After this quickly dries, reinforcing tape the same width as the underlying rib goes on anywhere stitching will be applied. Stitch spacing then gets marked out with a pencil and punched with a straight needle, and we were ready to start sewing. Stitch spacing varies, so be sure to check with the manufacturer to see what spacing is required on each part.
Seeing Is Believing
The PolyFiber video pays for itself in this one step, even if you were to use the Air-Tech system. Just pop the DVD into your laptop computer and set it right on the wing—that’s what I did. Play the rib-stitching section a few times to get the process in your head, and then get out the needle and thread. The starter knot is pretty easy, especially for you old Boy Scouts. It is just a square knot with an overhand knot on each side. Tie it off tightly and slide the needle through to the next hole in the top skin. Play the video one more time and get started. If you get stuck, stop what you are doing and play the video again, pausing wherever you need to. Two or three times through this drill and you will be stitching like a pro. The video is available from Aircraft Spruce & Specialty, Wicks or any other PolyFiber distributor. Of course, when I started stitching the Cub’s wings in Texas, I couldn’t help but notice that the Texas Sport guys were putting in about five stitches to every one of mine. So much for stitching like a pro.
Once the ribs are all laced up, the tape goes on. The same diluted adhesive (or PolyBrush) that we used before gets applied to the tape. Two-inch tape goes over the ribs, 3-inch tape goes on the trailing edge, and 4-inch tape covers the leading edge. A special bias tape is used for the curved wingtips. There is an order as to which tapes go on first that I won’t go into here, but you need to read the literature and pay attention to what goes where and in what order.
Lastly, the entire wing needs a good once-over to work out any bubbles under tapes, loose edges where there isn’t quite enough adhesive or any rough spots. The small iron is really nice for this work. The final product will not get better looking as you go on if you leave untidy work behind you at this point. With Air-Tech you are now finished and ready for primer, but with PolyFiber you will need to apply a coat of PolyBrush to the entire wing before going on to paint. The tail surfaces and fuselage incorporate the same steps in slightly different ways.
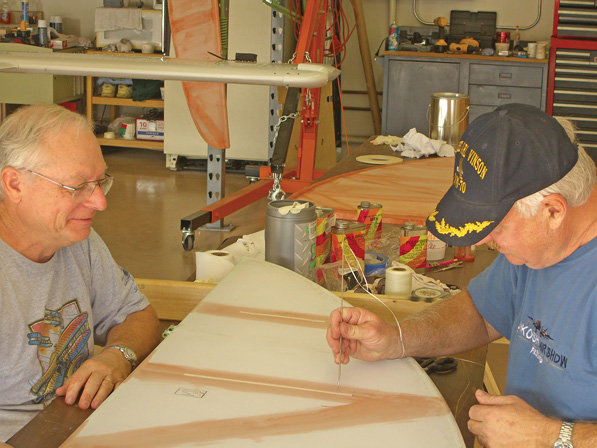
Zaleski and Prizio stitch along the ribs of the horizontal stabilizer. Note reinforcing tapes along the ribs.
At first the fabric process seemed a bit scary, but it turned out to be fun and not that difficult. The shrinking process pulls everything together and makes things look crisp and clean, even in places where we initially had some doubts. We were especially nervous around the vertical fin, but the iron made us look like geniuses. OK, that may be a little strong, but it did turn out really nice. My point is that covering is something you can do well the very first time if you just follow the instructions in the book and get a little training. If you can learn how to pound rivets or do fiberglass work, you can learn how to go a good job with fabric. It isn’t any harder, just different. Painting comes next. I can hardly wait!
For more information, call 866/746-6159 or visit www.txsport.aero.

