
Most metal lathes come with a three-jaw chuck for a good reason: They are the best option for general-purpose work. They accommodate the widest possible range of diameters and the rapid scrolling mechanism allows work to move at an efficient pace. The downside to a three-jaw chuck is that it can’t match the precision of collets or the versatility of an independent four-jaw chuck. This isn’t to say you can’t produce precision work using a three-jaw chuck—you can—as long as you work within the limitations inherent to the design.
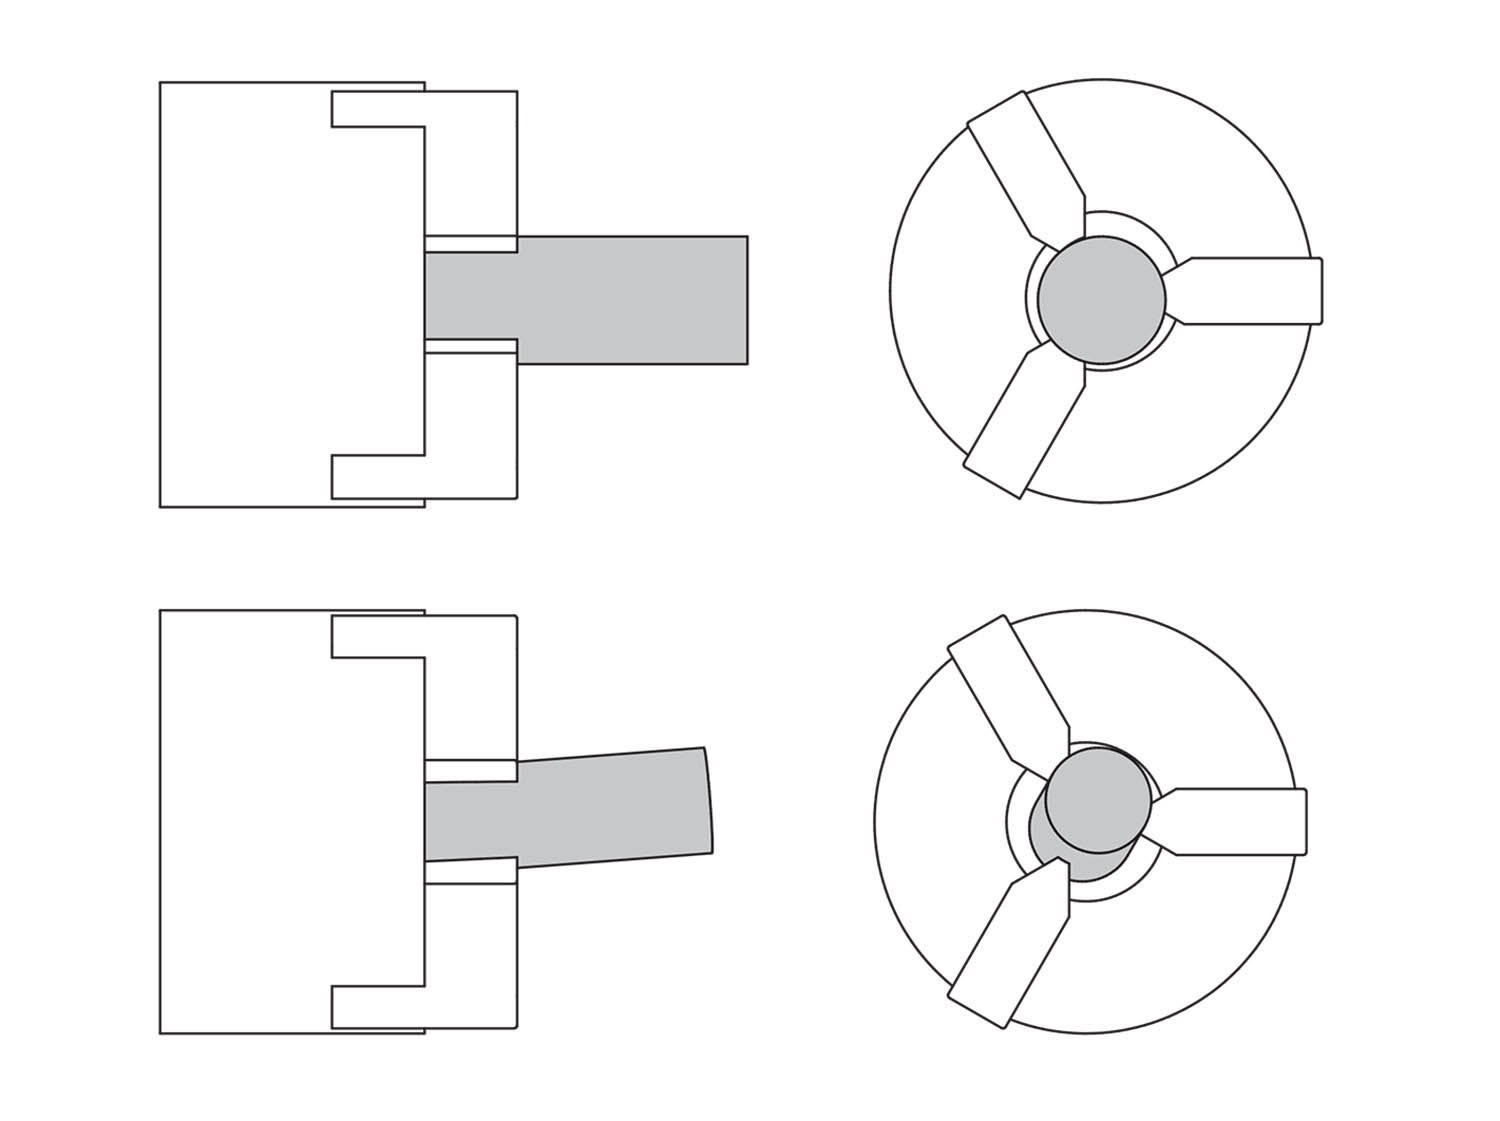
Runout is the primary reason three-jaw chucks lose to collets when it comes to precision. Runout is the off-axis error that is exhibited during rotation. Wobble can also be an issue with three-jaw chucks. The most common cause of wobble is a stray piece of metal getting pinched between the workpiece and one or more of the chuck jaws. That’s an easy fix: Clean the jaws. But the culprit could also be a damaged jaw. A chuck that has lived a particularly hard life may have one or more jaws that have become bell-mouthed (wider at the tip than at the back). This can be fixed by regrinding the grip faces of the jaws (as a matched set), but that’s a topic for another day.
Wobble can also occur when you’re trying to grip a very short segment of the workpiece with the tips of the chuck jaws. Wobble of that type can usually be eliminated by repositioning and retightening the work in the chuck or by using the tapping method described in my July 2022 column, “Cogswell’s Molds.”
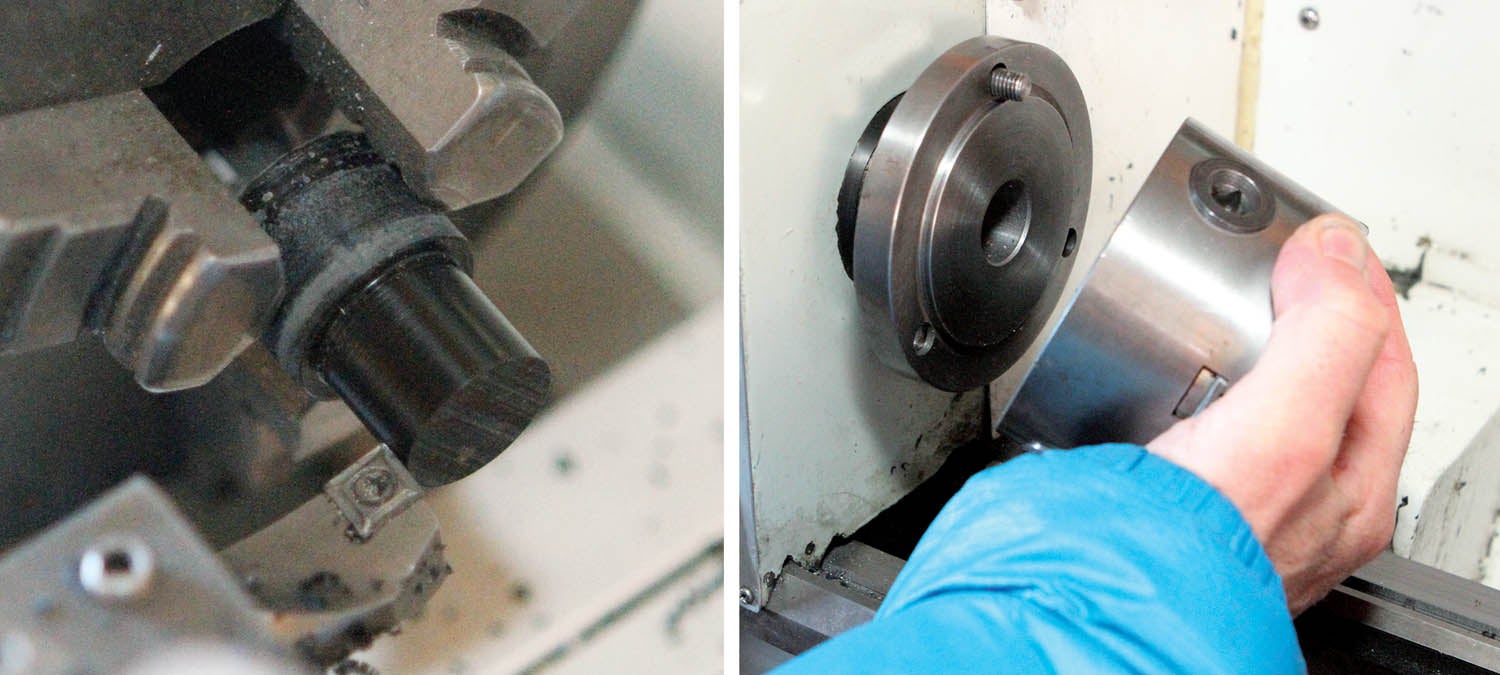
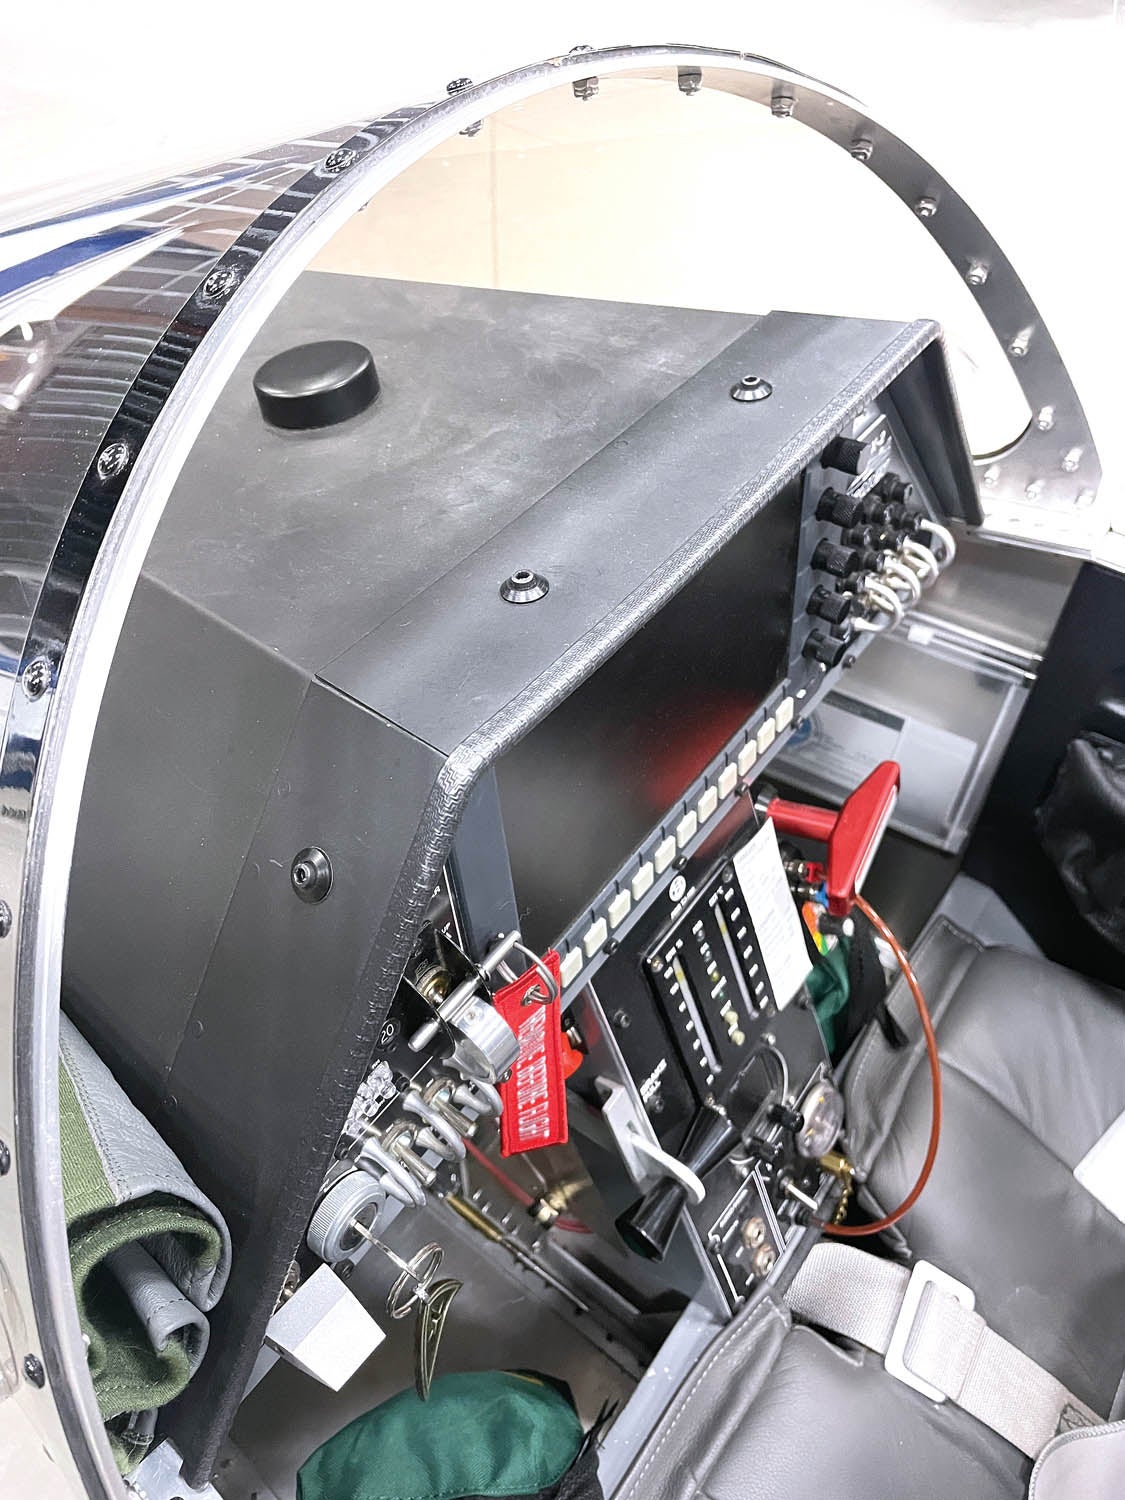
Another potential issue with three-jaw chucks is that they are big and bulky, which can make them less than suitable for small or delicate parts. Which brings us to the subject of this project: using collets instead of the three-jaw chuck to make a set of decorative washers for the glareshield on Paul Dye’s SubSonex jet.
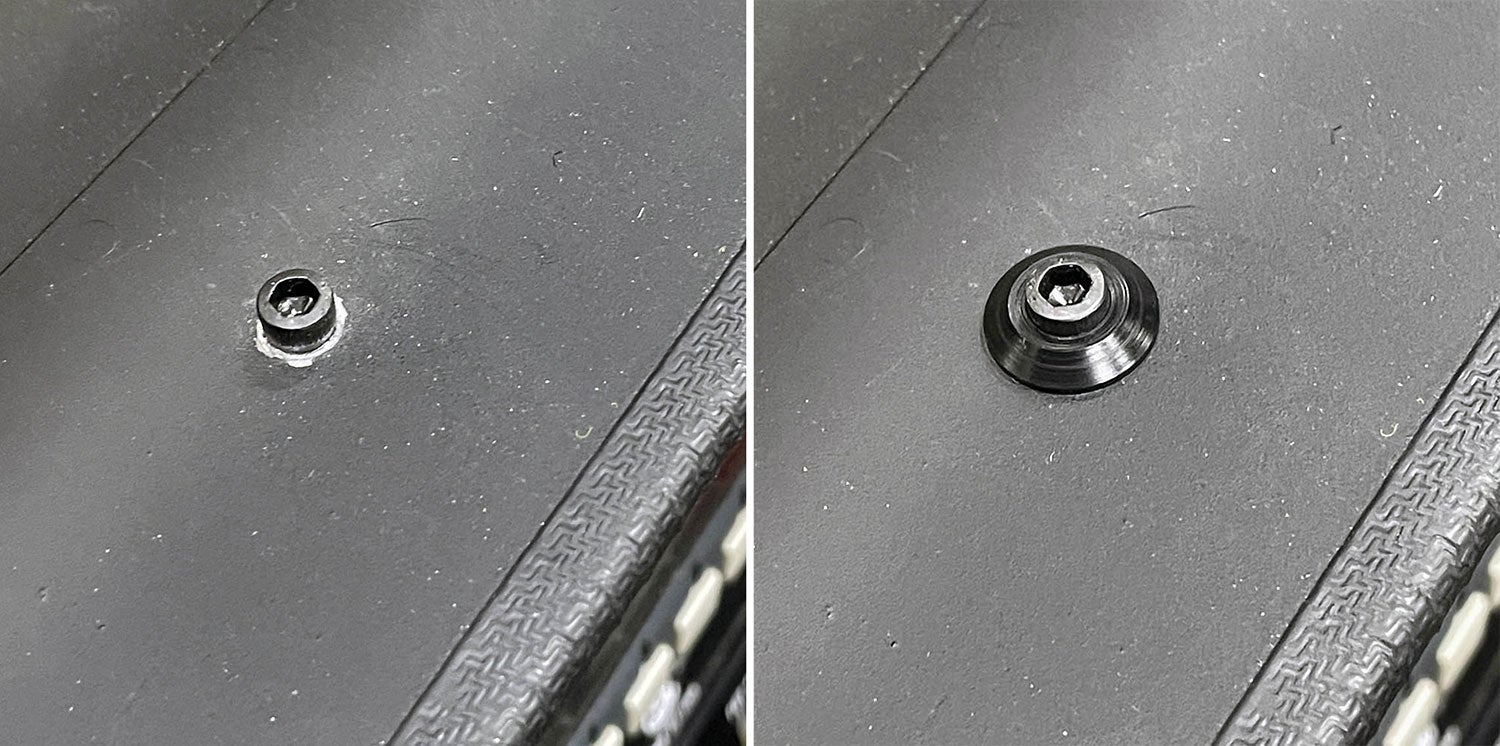
Paul had originally used buttonhead screws (thread size 8-32) on the glareshield. Buttonheads were a good choice. They combine a low profile with a relatively large face. But after a few times removing the glareshield for various tweaks, and despite the fact that they only needed to be moderately tight, the two screws closest to the canopy (one on each side) were stripping out due to the shallow socket and sharp angle, which required the use of a ball driver. In the end, Paul changed all the buttonhead screws to socket head cap screws (SHCS). This solved the problem of the heads stripping out, but presented a minor (but annoying nonetheless) issue of bare metal showing where the paint had worn off from the old screws. You can’t have that on a show-quality airplane!
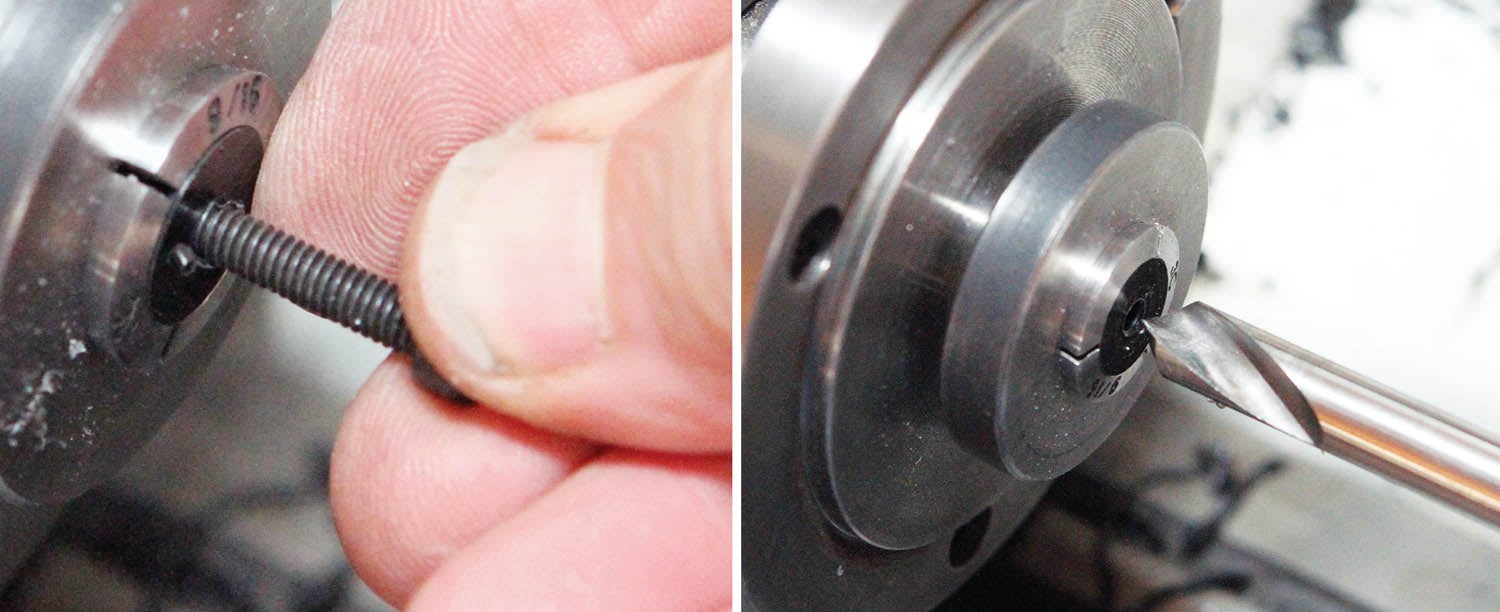

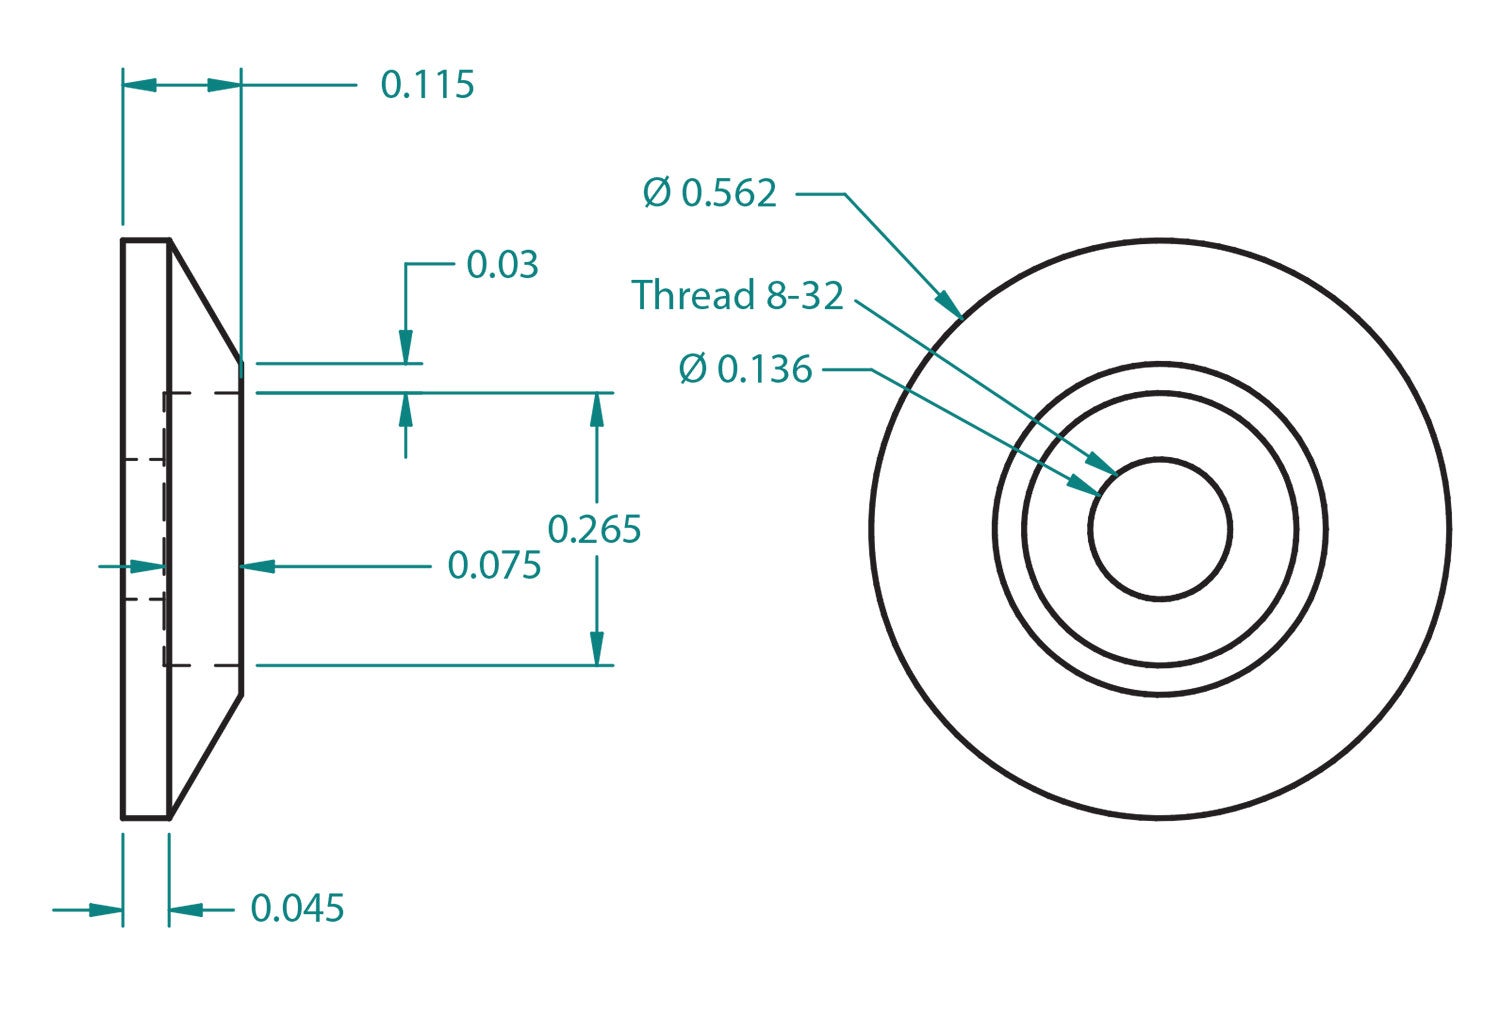
Short of respraying the glareshield or using flat washers, which Paul did not want to do, we conjured up the idea of making decorative washers to conceal the missing paint and dress up the look of the screws. The material we selected was black Delrin, a tough, easy-to-machine DuPont plastic that’s similar to nylon. Unlike a basic flat washer, these were made with a close-fitting counterbore and a beveled face and they are threaded so they stay married to the screws when removed. (Anyone who has ever spent the better part of a day trying to find a small washer among an array of wiring harnesses will agree: That is a good feature.)
That’s it for now. Time to get back in the shop and make some chips!


