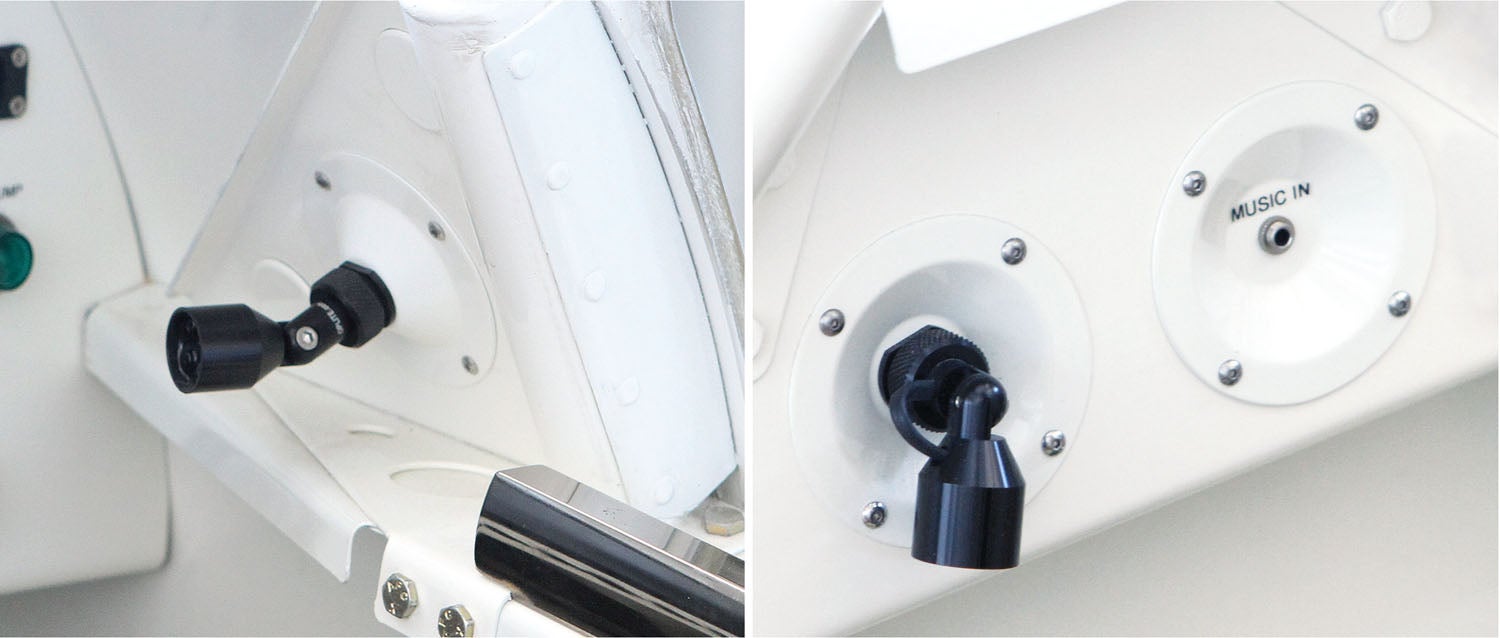
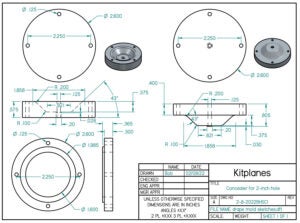
Some of the many cool details of Steve Cogswell’s RV project from last month’s column were the fiberglass parts made to conceal various lightening holes in the cabin bulkheads. Steve showed me the molds for his “concealers” (my description) with the idea that it would be a good subject for the Home Shop Machinist. Steve made two versions of the concealers, recessed and protruding. The conical shape offers more structural rigidity than a simple flat panel and also adds a sense of design to the cockpit.

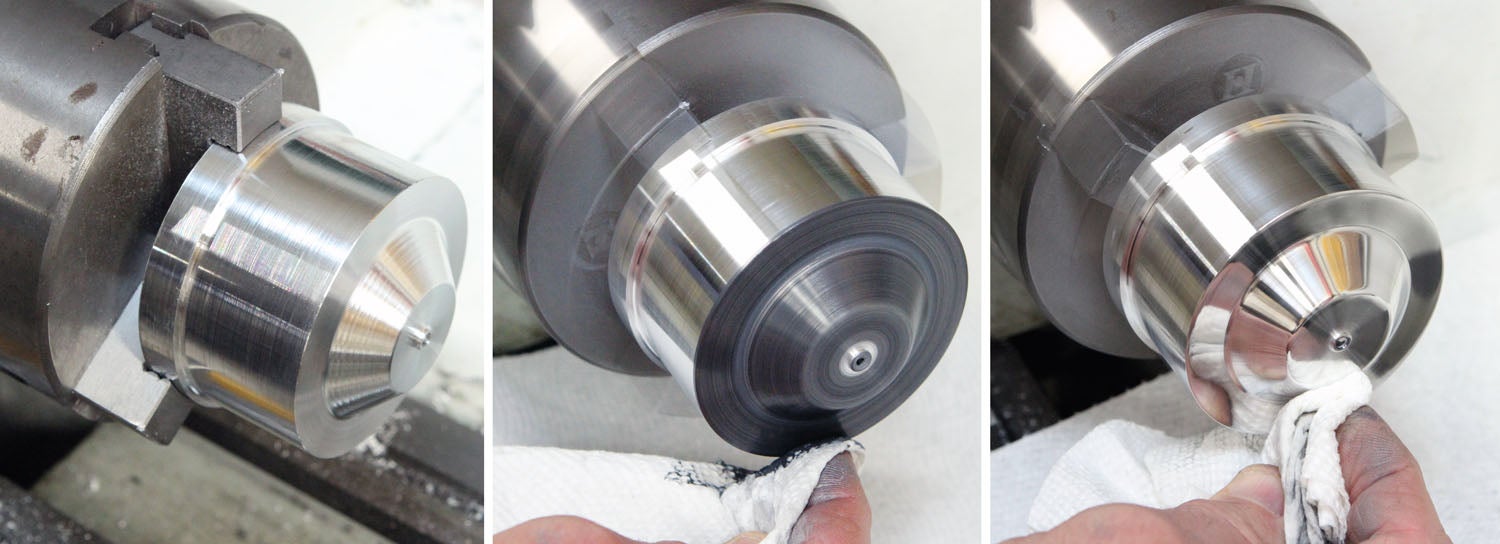
Drape and slump molds have been used by ceramic and glass formers for centuries. A drape mold is a protruding form; a slump mold is a recessed form. In the case of these concealers, the mold face is polished mirror smooth so when the cured part comes off the mold, it’s 99% ready for paint.
You might be thinking, why not use the same mold and use the back side for the reverse shape?
You could, but the “off-tool” face is far superior to the non-tool face. For simple molds like these, the effort to make the extra tool is often less than all the filling and sanding it would take to make the back-side face as nice as the off-tool face.

Most of the techniques used to make Cogswell’s molds will be familiar to regular readers of KITPLANES®. The use of the cross slide to make tapers was covered in the January 2020 issue, and power polishing was the subject of my March 2020 column. It’s worth noting that this project does introduce an old machinist’s trick: how to dial in rough-cut stock in a three-jaw chuck to minimize runout.

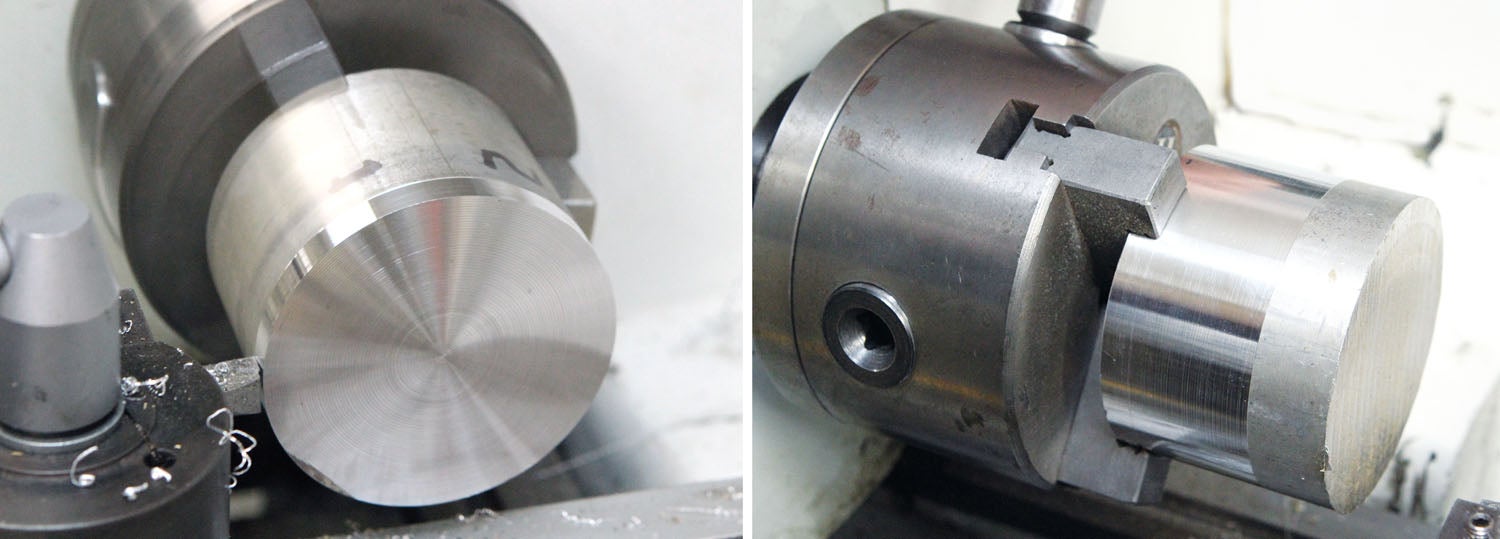
Most of the time, a three-jaw chuck or collet will grip enough of the stock to automatically clamp the workpiece concentric with the lathe axis. But occasionally you may encounter a combination of factors so that, when the stock is tightened in the chuck, it wobbles. This typically happens when the diameter of the stock is bigger than the grip length of the chuck jaws. This can also be associated with the face of the workpiece not sitting square to the face of the chuck. The machinist term for this situation is “cattywampus.”
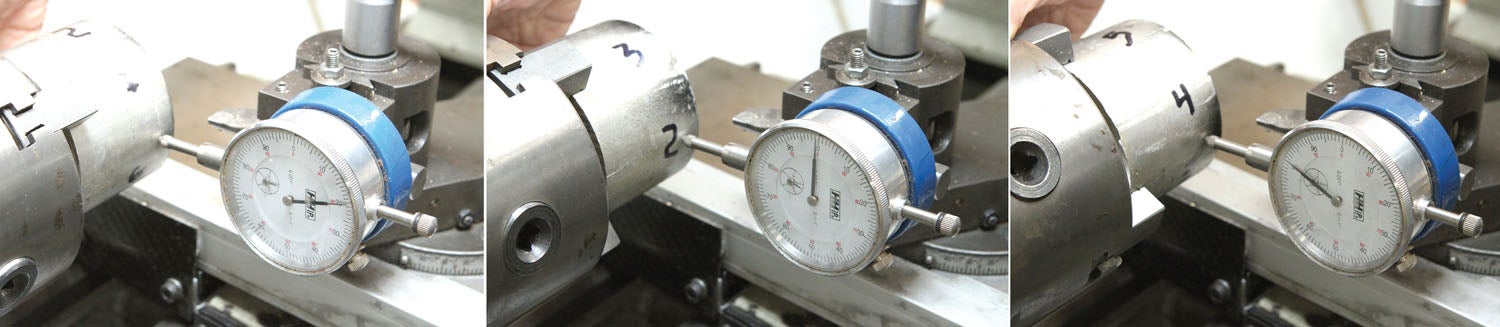
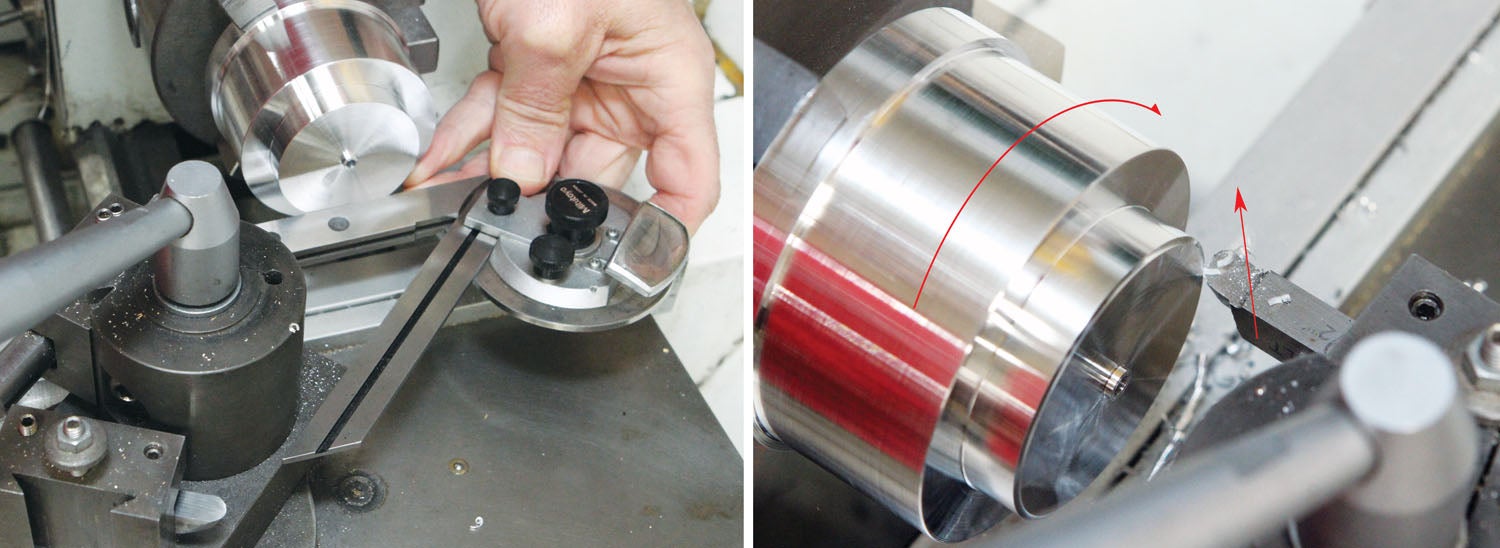
Anytime you are turning large stock, before turning on the power, you should spin the lathe by hand to check for runout. If the part wobbles noticeably when being rotated by hand, it should be corrected. An experienced machinist will expect this situation and, instead of fully tightening the chuck to begin with, will first cinch the chuck barely tight—just past snug—and spin the part by hand to check for runout. If any runout exists, they will then use a wood mallet or brass hammer to tap the stock until it’s centered and running true. Once true, the chuck is tightened securely, and the turning can proceed. Most master machinists do this by eye, without any measuring or indicating devices.
The procedure for an apprentice machinist is only different in that they will use an indicator to measure the runout and confirm the adjustment. That’s the procedure shown in the photo sequence.
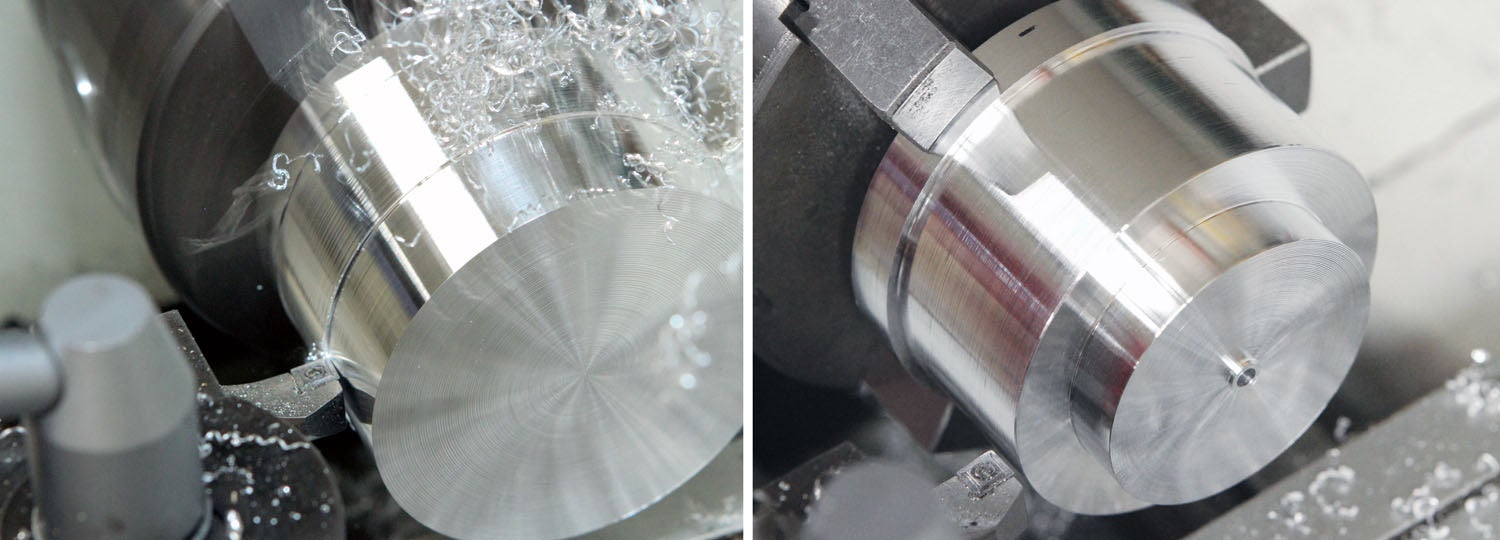
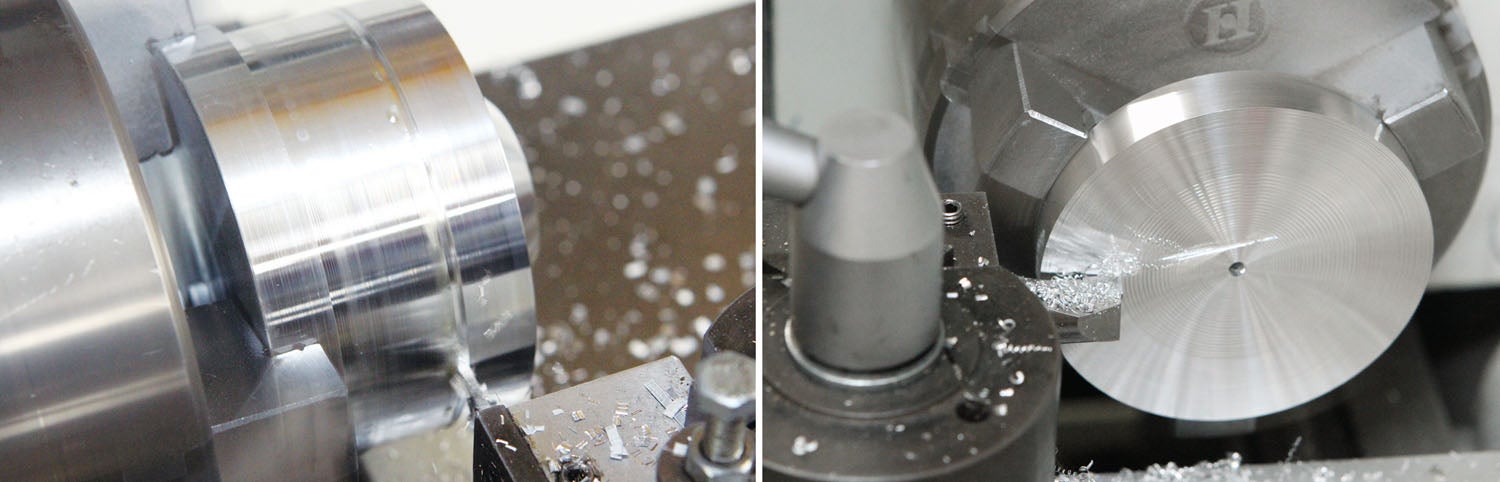
For this column, we’ll focus on making the drape mold, which yields the recessed concealer. Next month we’ll conclude the project by making the slump mold and go over Steve’s choice of fiberglass and his lay-up procedure for making parts.
In the meantime, it’s time to get out in the shop and make some chips!


Beautiful, but a lot of work that just made the plane heavier. Both the light and plug receptical could have been mounted to a sheet of aluminum/
Comments are closed.