
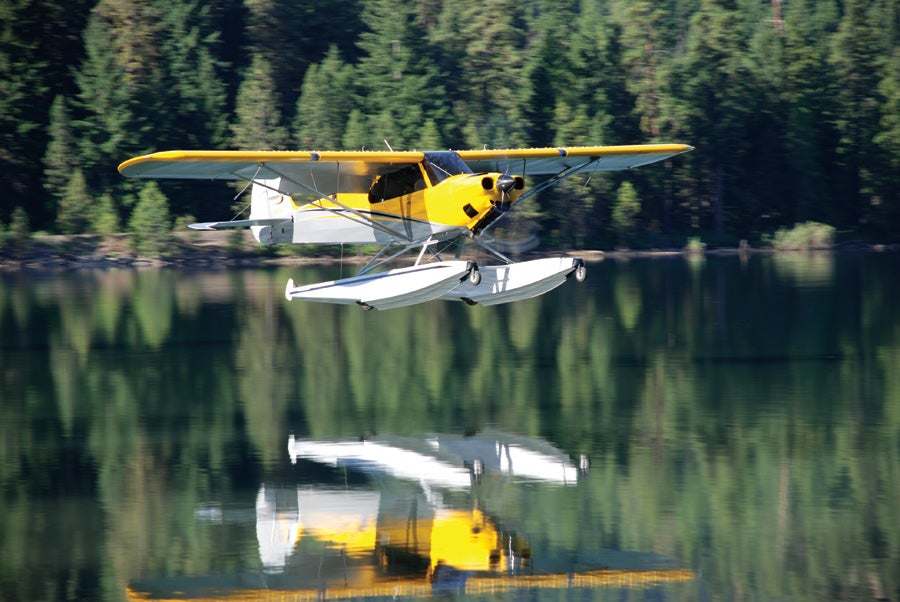
What could be more fun than flying a great plane on a great day to a beautiful mountain lake surrounded by pine trees? Well, not much unless you could set that airplane down on that lake wherever you wanted. With the new amphibious float-equipped Carbon Cub, that is exactly what you can do. And, at the end of the day, you can fly back to your favorite landlocked airport and put that plane back in its hangar. Sadly this is not a cheap thrill, but it is one you don’t want to miss if the opportunity presents itself.
When the chance to test fly the new Carbon Cub prototype with an extra-large engine and Aerocet amphibious floats came up, no one had to ask me twice. Even though I live in a place where float flying is virtually banned, I still try to keep my seaplane skills from getting too rusty. If Yakima, Washington, seems like an unlikely place to test a float plane with its arid, Southern California-like weather, it is worth noting that a quick half-hour flight west will have you at the eastern edge of the Cascades, or a quick trip east will put you over the Columbia River and a number of lakes. For our testing we headed west to Rimrock Lake.

The Plane
Our test plane was a standard Carbon Cub EX airframe with floats and a larger engine, but otherwise fairly typical of the type. The people at CubCrafters were looking for an engine with more pulling power than their standard 180-hp CC340 engine, so they decided to try an ECi O-370 mill making 200+ horsepower. This is a heavier engine, but it was thought that the extra power would justify the extra weight. At this point in their testing CubCrafters is not so sure the larger engine really produces a significant improvement in performance. In addition, the O-370 has proved to be rather hard on propellers, but more on that later.
The plane we flew was a standard Carbon Cub EX, which means it did not have the improvements of the new EX-2 installed. The EX-2’s better ailerons would have been nice on the floatplane because the floats themselves do slow down the roll rate and diminish the crispness of the plane’s handling somewhat. Even so, its performance did not disappoint. Smooth power, lots of cabin space, and the ability to cruise well and fly slowly were all there with the Carbon Cub on floats, just as they are with the wheeled version. (For details on the cost and features of the standard Carbon Cub EX-2 please see the article in our October 2015 issue.)

The spacious cabin of the Carbon Cub gives pilots of all sizes plenty of elbow- and legroom. Flap handle is on the left and high, with no need to bend down to work the flaps.
Aerocet Floats
Aerocet composite floats rated at 1550/1746 pounds kept us on top of the water. Floats need to be rated for at least 80% of the gross weight of the plane, thus the floats need to support 1865 pounds x 80%, or 1492 pounds, which at 1550 pounds they do. The second number is the weight it takes to completely submerge a single float. At our test weight of about 1780 pounds they seemed to provide plenty of buoyancy. Higher capacity floats would provide more flotation but at a cost of more weight and drag.
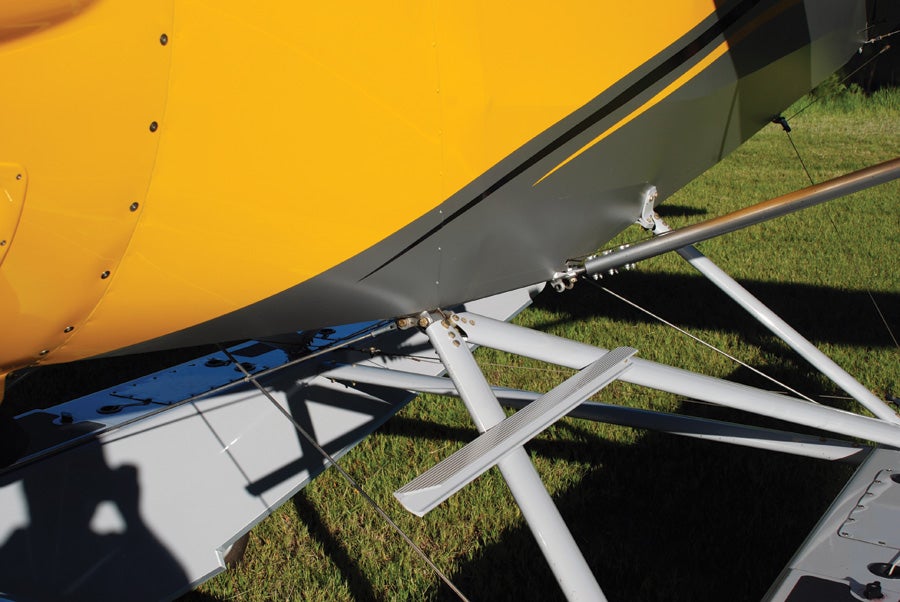
Carbon Cubs come with float fittings already in place, but there is a lot of rigging needed to attach floats to any plane.
These new amphibious floats, developed specially by Aerocet with the LSA market in mind, are well-suited for the Carbon Cub, and CubCrafters is the official launch customer for Aerocet. They feature seamless fiberglass construction with manually operated hydraulic gear retraction/extension and a unique gear warning system that minimizes the possibility of landing with the wheels in the wrong position. This is vital because, while landing with the wheels up on land is embarrassing and will scrape some material off the bottom of the floats, landing with the wheels down in water will result in the plane instantly flipping over. Not everyone survives such a mishap. Electric gear actuation was considered for its possible weight saving, but the hydraulic option promises greater reliability with very little weight penalty.
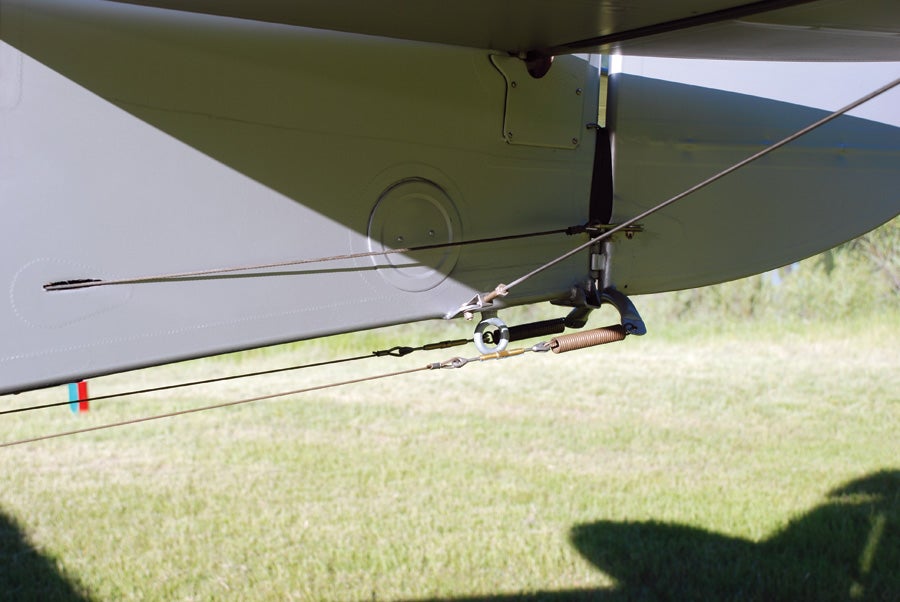
With floats the tailwheel is removed and cables are rigged to the rudder and routed down to the floats. They can then work the water rudders when they are deployed.
The seamless design does a great job of keeping the inside of the floats dry, something that traditional riveted aluminum floats do not do nearly so well. It also makes the storage lockers in each float much more usable when the chance of getting things wet is so much less. Pumping out the bilges is still part of the preflight routine, but rarely yields much water inside the floats. The downside to the slick fiberglass floats is that they can be a little “sticky,” especially on glassy water. In other words, they can resist letting go of the water. This is easily remedied by lifting one float out before the other on takeoff. In the early morning, when the water was very smooth, this technique came in handy, but once the wind started to make a little chop on the water, it was unnecessary. On the good side, the slickness and shape of the Aerocet floats produces relatively little drag, yielding cruise speeds comparable to a plane equipped with 26-inch Bushwheels.
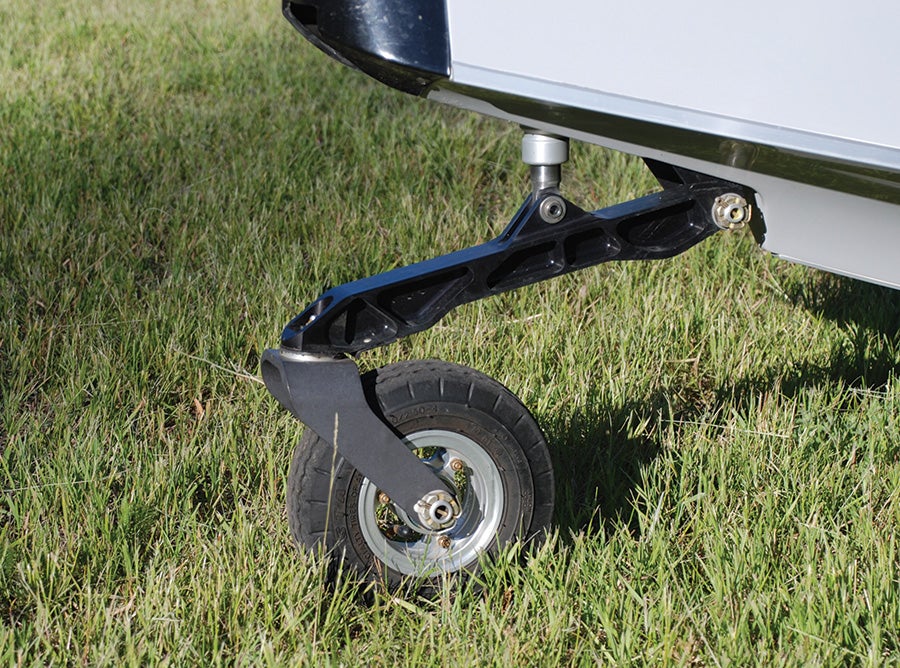
Aerocet machines their landing gear parts from billet aluminum and then double coats them to resist corrosion. Their wheels use special seals to keep water out of the bearings.
On the water these floats worked great. The way they set into the water on landing made me look better than I really am, and takeoffs were equally smooth and easy. They would get on the step fairly quickly and broke loose and flew in less than seven seconds at our load and conditions. Their deep-V design cuts through rough water easily, but did not produce quite the same feel of getting on the step as a flatter-bottomed float would. This is not a problem, just an interesting difference from what I am used to. Step taxiing was smooth and stable, and normal taxiing with the water rudders down was very predictable, with good control, even as we turned sideways to a moderate 10- to 12-knot wind.
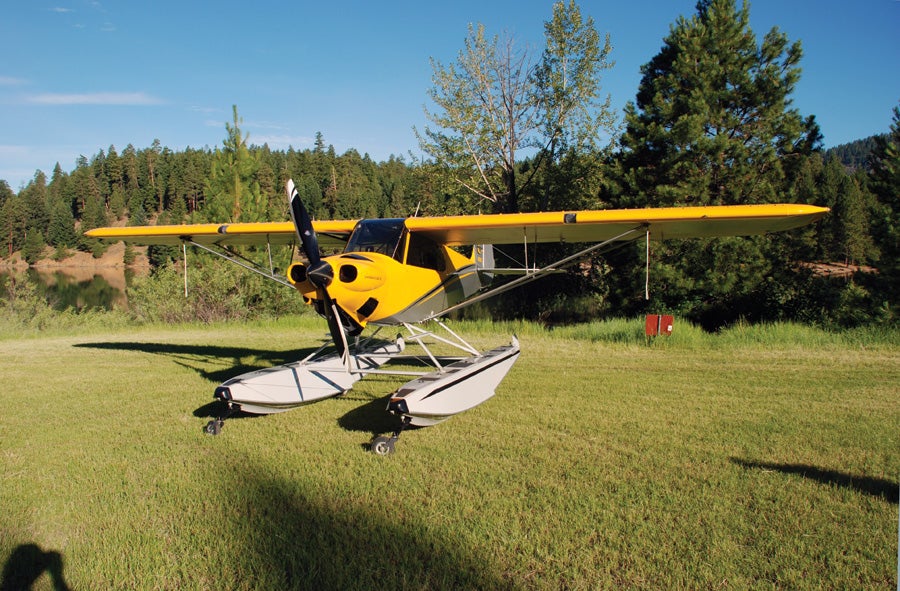
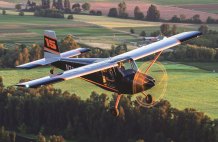
Amphibious floats make the Carbon Cub at home on water or land. This grass strip next to Rimrock Lake is the perfect spot for overnight camping or just a leisurely lunch.
Landing the Aerocets on pavement is a little different, but not too challenging. The landing attitude is more like a tricycle-gear-type landing, since there are no tailwheels on the floats. Set down on the mains first and hold the nose up until you run out of elevator authority. There is no rudder steering once aerodynamic forces drop off, so steering with the brakes is the only control you have on land. If you have been flying a tricycle-gear plane such as an RV-6A or a GlaStar trike, this will seem quite natural. However, if your experience is mainly in a taildragger, such as a Carbon Cub on wheels, it may take a little getting used to. Another thing you notice is that you are sitting much higher than you are in a wheeled plane. It isn’t too hard to adjust, but the first time it seems a little odd.
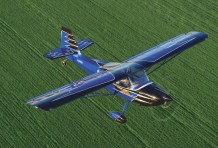
A glassy water landing makes for a beautiful picture, but special care is needed to pull this off safely because it is impossible to accurately judge your height above a mirror-like surface.
The Cost
The completed cost of a Carbon Cub EX-2 kit is about $145,500, or more if you load it up with options. Keep in mind that this price is based on using a Catto fixed-pitch prop. A constant-speed prop, once a suitable one is found, will undoubtedly add to that price. For the amphibious float option add $42,950 if you install them and $49,950 if CubCrafters installs them. The Carbon Cub airframes already come with float mounts, so no welding is required to install the floats, but there is a fair bit of work involved in setting them up. For one thing you need to be able to lift the entire plane up to remove the wheel gear and install the floats.
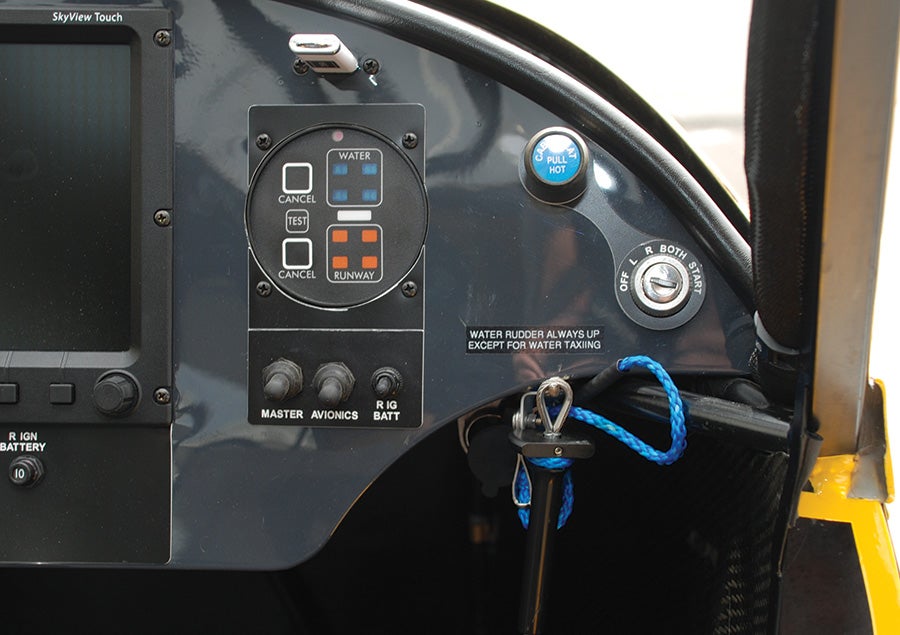
The landing gear warning system is an important part of the Aerocet float amphibious package. The handle to raise and lower the water rudders is just below and to the right of the gear warning system. Water rudders are lifted for takeoff and landing, and lowered for water taxiing. If you take off with the rudders down, you owe the group a case of beer, after the flying is done for the day, of course.
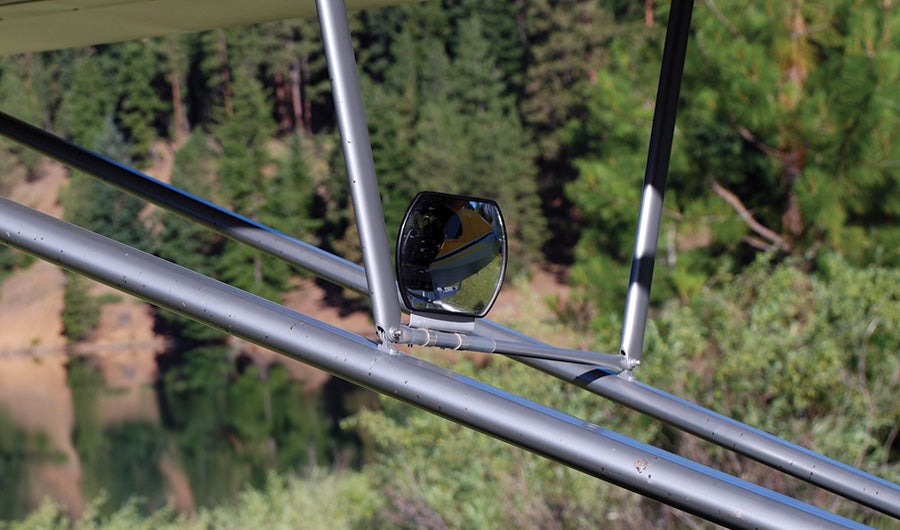
As a backup to the gear warning system, the Carbon Cub utilizes a mirror on each wing to visually verify the position of the wheels before landing. Landing in water with the wheels down is a guaranteed disaster.
Another cost sometimes overlooked as the new seaplane pilot rushes to install floats is the price of insurance. As a rule of thumb it will cost about $3000 per year to fully insure a Carbon Cub EX on wheels, depending on the hull value you insure. More total hours, more taildragger experience, and more time in make and model will help to lower that. If you install straight floats your insurance cost will roughly double. If you install amphibious floats your insurance cost will roughly double again to something like $12,000 per year.
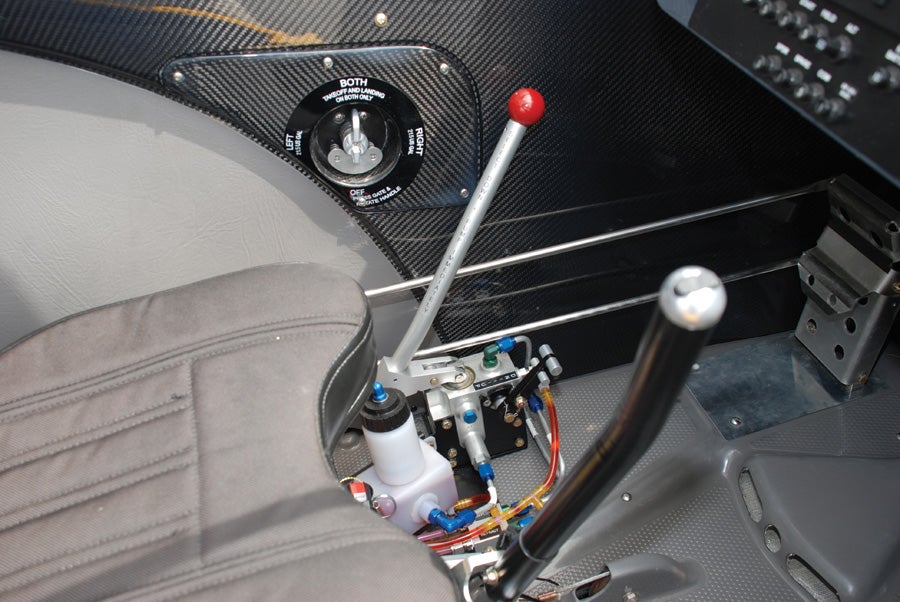
The gear retraction system operates by means of a manual switch and pump mechanism at the lower left of the pilot’s seat. It takes about a dozen pumps to cycle the gear.

This is not something unique to Carbon Cubs; it is pretty much standard across the industry. Installing amphibious floats on a Super Cub or a Cessna 185 will be similarly expensive. Float experience will soften this somewhat, but it will never be close to what it costs to insure a plane on wheels. The potential for a wheels-down landing in water is the main driver of the higher cost for insuring amphibious floats. Such an incident will totally destroy the plane and quite possibly kill the occupants, so insurance companies see this as a big risk for them. I have heard of insurance companies prorating the float coverage if you only leave it on floats for part of the year, but you will need to work that out with your insurance agent. The point is to ask your agent about insurance before you go and buy a set of floats.
Lots of Fun with Few Problems
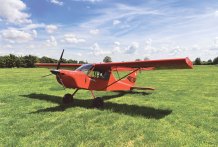
Consider how much fun you could have with this plane flying from lake to lake in Minnesota and Wisconsin or maybe Florida, just to name a few places you could go. Then with the wheels down, you could land on grass or pavement and resupply for another adventure hunting, fishing, or just having a great time in the outdoors.
With CubCrafters and Aerocet you have two companies known for quality and performance. Customer support will not be a problem. Building a Carbon Cub on floats is a challenging task for a first-time builder, but not a daunting one. The kit is extremely complete and well-documented, and customer support from CubCrafters is strong and readily available. About two years of dedicated part-time effort will have you flying. After that just imagine what you can do.


![]()
Dave Prizio is a Southern California native who has been plying the skies of the L.A. basin and beyond since 1973. Born into a family of builders, it was only natural that he would make his living as a contractor and spend his leisure time building airplanes. He has so far completed three—a GlaStar, a Glasair Sportsman, and a Texas Sport Cub—and he is helping a friend build a fourth, an RV-8. When he isn’t building something, he likes to share his love of aviation with others by flying Young Eagles or volunteering as an EAA Technical Counselor. He is also a member of the EAA Homebuilt Aircraft Council.


Hello,
I’m putting together a Hangar 9 Carbon Cub FX-3 ARF Kit, it came with wheels, but I want to
put it on Floats.
Dave can you provide me with the important measurements, and incidence I must follow?
a schematic view of a full scale will help.
the step in the floats must be where in relationship to CG?
Length of Pontoons to length of Plane etc.
will you help me please?
best regards
Daniel Reichert
It would be nice to know that information. I would like to do the same. Any chance?
Cheers,
Lindsay Duerden
RC enthusiast
Comments are closed.