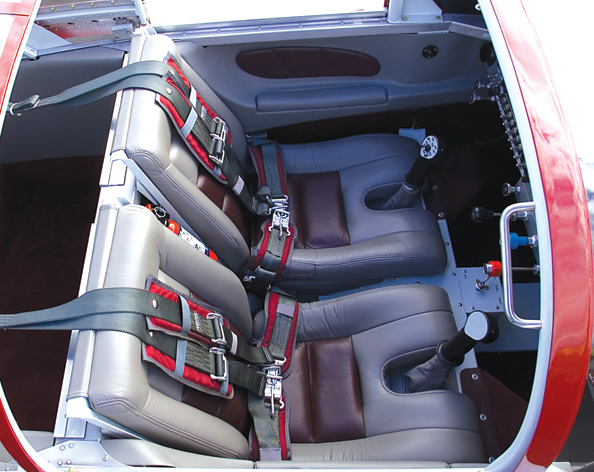
If all has gone as planned, you decided to do your own aircraft upholstery in April, you fabricated your own foam cushion in May, you made your own seat covers in June, and now all thats left are the carpet and panels. This time we’ll look at how to make your own carpet set and upholster your panels.
Let’s start at the bottom and work our way up. Carpet sets are simple to make; nevertheless, there are a lot of things to consider. For example, when I select an aircraft carpet, I want short, dense pile and a stiff backing. I hate flimsy carpet that bunches up under my feet. Thats why most automotive carpet is a bad choice for aircraft. Its made to be flimsy so it will easily contour to car floors. Most aircraft have flat floors, so stiff carpet works just fine and does not slide around and bunch up.
A Pattern is Developing
As you’ve probably noticed, I like patterns, and making patterns for carpet sets is no exception. Heavyweight paper such as butcher paper, freezer paper or rosin paper works well for making carpet patterns. You don’t want to use anything that will change shape when you transfer the pattern to the carpet.
This is important: When transferring the pattern to the carpet, make sure that its right side up if you’re marking on the front side of the carpet, and upside down if you’re marking on the backside of the carpet. I wont admit to having made mistakes on this, but if I did, I would have to fess up to doing so an embarrassing number of times. Yes, more than once!
We’ll assume you wont pick an ugly color. Enough said about that. Cut-pile carpets seem to be more popular than loop carpets, and cut-pile carpets have a nap. The nap is the direction in which the fibers of the pile lay. You can usually tell which direction the nap runs by looking at it. But if that doesn’t work, run your hand in different directions across the pile. You’ll notice that the carpet feels similar when you run your hand back and forth across the pile, and it feels different when you run your hand up and down the pile. One way or the other, the pile will feel smoother, and thats the way the nap runs. So what? Its customary to run naps down or forward. This will provide the longest service life for the material.
Binding Agreement
Most people like some type of binding on the carpets edge. It prevents the carpet from unraveling and provides a nice finished edge. There are several types of binding, and the most popular are pre-made cloth, pre-made vinyl, custom-made vinyl and custom-made leather binding.
Pre-made binding can be the most convenient, but you cant always get the exact color you want. Custom-made binding can be convenient if pre-made isn’t available, the biggest advantage being the vast selection of colors. If you want the carpet binding to match the other interior components exactly, you can use the exact same material for the carpet binding.
To install pre-made binding, you simply wrap it around the carpets edge and sew it into place. This can be a bit more challenging than it sounds, especially if the carpet is large with an unusual shape. Nevertheless, thats how it’s done.
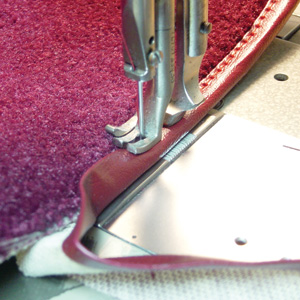
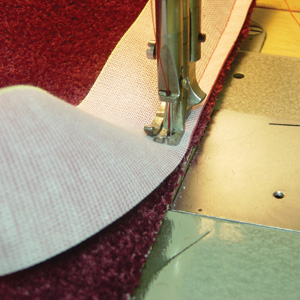
I usually install custom binding using the French roll technique, a two-step process that provides an attractive rolled edge. The first step is to place a long strip of vinyl or leather face down on the right side (the fuzzy side) of the carpets edge and sew it with a seam allowance of about a quarter inch. If you prefer a wider binding, take a larger seam.
If you prefer a narrower binding, thats fine. Just make sure that you don’t sew so close to the edge that the seam pulls apart. If you have any doubts about how close is too close, practice with different distances on some scraps. Not all carpet is created equal, so even though an eighth-inch seam works well on one carpet, thats no guarantee it will work well on another.
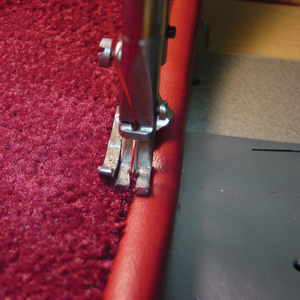
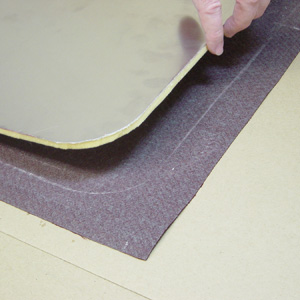
After the first step is complete, meaning that all of the edges have your binding material sewn to them, roll the binding material around the edge of the carpet and sew it into place by sewing on the right side of the carpet-just inside of the binding. Make sure the stitching catches the binding material on the backside (see the photos).
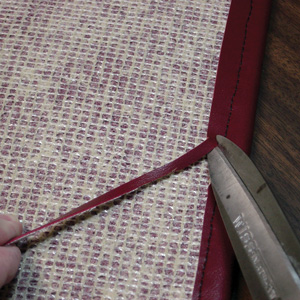
When step two is completed, trim the excess binding material from the back of the carpet. They say life is too short to learn everything you need to know from your own mistakes, and you need to learn from the mistakes of others. Heres your chance to learn from mine.
If you plan on making your own custom vinyl binding, it’s important to remember that vinyl is a directional material: It stretches more across the roll than up the roll. Usually, when you have a long piece of vinyl to sew, such as boxing or binding, the vinyl should stretch the least in the direction of the sewing. Therefore, the vinyl binding should be cut going up the roll.
Its tempting to slice binding off the end of the roll, because thats normally the easiest way to do it, especially if its a new roll. And I suppose everyone has done this at one time or another. If the world wont end when you cut the binding across the roll, why bother to cut in the other direction? The answer is that the sewing process tends to stretch or compress the materials being sewn. For example, lets say were binding the edge of the carpet that goes next to the seat rails in a Cessna. If the binding stretches when its sewn to the carpet, the carpet might not lay flat. It could curve up at the ends, twist or bunch up. None of these are good.
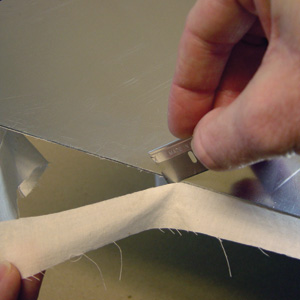
Cutting the binding up the roll is not a guarantee that bad things wont happen, but it makes them less likely. Another practical benefit is that your binding will have fewer seams, unless your roll is not longer than it is wide.
It’s a good idea to plan ahead enough to start and stop the binding and place its seams in inconspicuous locations. Before you start sewing, set the carpets in place, and take a look at them inside and outside of the plane to determine a good starting point.
When the binding is done, place the carpets in the aircraft, admire them and congratulate yourself on a job well done. Don’t spend too much time on this step, though, because the panels still need to be done.
Panel Covering
There are many different and acceptable ways to cover panels. One of my favorite quick-and-easy ways is the foam-relief method, which is a simple technique that does not require a sewing machine. It works best when cloth or leather is used to cover the panels, but vinyl will also work. The reason vinyl may not work as well as cloth and leather is that glue does not stick as well to vinyl, especially if the vinyl is brand new.
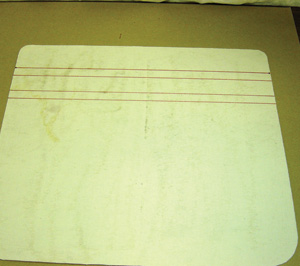
Whatever covering you use, the steps are the same. Prepare the panel. Create a cool design. Transfer the design to the foam. Cut the foam. Glue the foam to the panel. Remove portions of the foam from the panel. Install the covering material. Admire the finished panel.
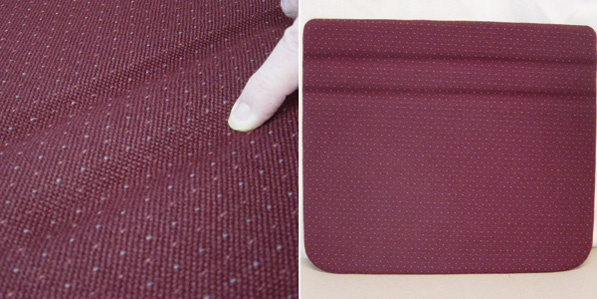
To prepare the panel, make sure it is clean enough that contact adhesive will stick to it. Then glue a thin piece of cloth to the entire right side of the panel and trim the edges flush with the panels edges. I used lightweight unbleached muslin, but anything that glue sticks to well will work.
It might seem that this step is unnecessary, and if I were covering a panel made from plywood or panel board, I would skip it. However, on an aluminum panel the muslin provides better adhesion for the covering material than the bare aluminum will. But isn’t the muslin stuck to the bare aluminum, you might ask? Yes, but it is stuck to a much larger surface area than the covering material will be.
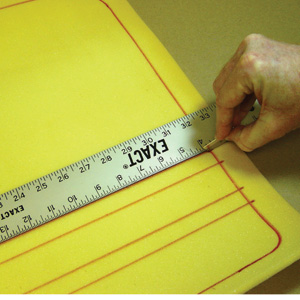
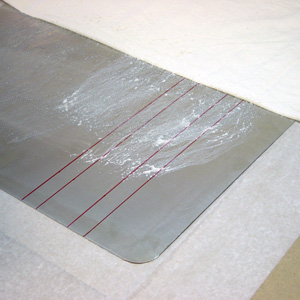
Developing a cool design is the most fun part. It can be a simple straight line or a complex pattern. However, until you get a feel for what can be accomplished with this technique, delicate, detailed, complex patterns should be avoided. Keeping that in mind, well use simple straight lines on our panel.
I drew the design on the panel so I could use it as a reference. This was not really necessary, but it gave a good feel for whether the design would be appropriate in terms of scale and overall appeal. Sometimes designs don’t turn out as well as you imagined they would.
After you are satisfied that the design is acceptable, trace the outline of the panel onto the foam. I cut the foam larger than the outline of the panel so Id have a margin for error, and then laid out the design on the foam.
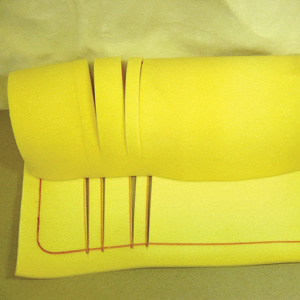
I used quarter-inch, firm poly foam because I just happened to have it on hand. However, landau-top foam is most commonly used for this technique. Another thing about the landau-top foam is that it has a slick skin, and you usually have to scuff it up for the glue to stick well; ScotchBrite pads or fine sandpaper do the job. Some guys insist on sanding off the entire skin, but enough scuffing to dull the sheen is fine. One more thing about the landau-top foam: It gives a sharper edge to the relief than the poly foam, which might be a consideration when determining a design. Of course, you could mix the two for an additional level of sophistication.
Use a straight edge and a razor blade to cut the foam on the design lines. Stop the cut short of the edge of the foam, but beyond the outline of the panel. That way the foam stays in one piece while you glue the panel to it.
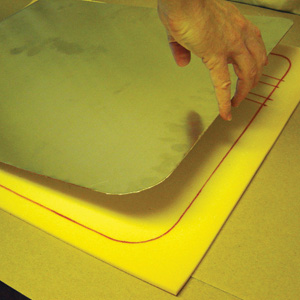
Once all of the lines have been cut, apply glue to the foam and to the panel. With the foam on the worktable, carefully lower the panel into place and then press to make sure there is good contact between the foam and the panel.
With the simple design used here, there was no need to keep track of which side was which. However, if the panel is not symmetrical or the design is not symmetrical, you’ll need to keep careful track of which side is which. Otherwise, you could get an upside-down or backward design.
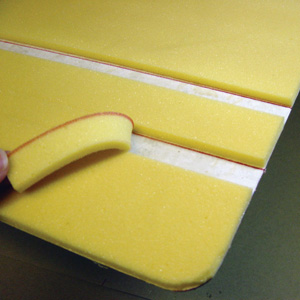
The next step is to flip the panel over and make sure the foam is well stuck in the places where you want good adhesion-everywhere except the relief areas. With that done, trim the foam flush with the panels edges, and peel out the strips of foam that will create the design.
The same technique is used to install the covering material to the foam side of the panel. Lay out the material and spray it with glue. Then spray the foam side of the panel with glue, making sure to get plenty of it in the design area. Set the panel on the material. The relieved areas really need contact adhesive to keep the material stuck, so if you cant spray on the contact adhesive, you’ll need to brush it on.
Turn the panel over, making sure the material stayed in place, set it material-side up on the worktable, and carefully, smoothly press the material onto the foam and into the areas without any foam. It’s the areas without foam that create this design.
This step needs to be completed with deliberate attention to pressing the material straight down onto the panel. If I had pushed the material up, down or sideways, it could easily have wrinkled, and a wrinkle at this stage of the game could ruin the design.
As a matter of fact, if a panel is ruined at this stage by a wrinkle or torn foam, its often easier to start over by making a new panel from scratch than it is to remove the material and foam from the ruined panel so it can be used again. Don’t ask how I know that. My blood pressure rises just thinking about it.
The almost final step is to use contact adhesive to attach the edges of the material to the backside of the panel. Trim the fabric about half an inch from the edge of the panel, apply contact adhesive to the panels edge and the half inch of fabric, roll the fabric to the back and stick it into place. The final step is to stand back and admire the panel.
This technique lends itself to practically unlimited artistic expression. Ive seen intricate designs, simple designs, designs that used multiple layers of foam, designs that looked great and designs that looked, well, not so great. Artistic talent seems to be a gift, so don’t be too disappointed if the finished product doesn’t look as good as you imagined it would.
Now that you have the concept of how to do this, you can see that the same effect can be accomplished with various approaches. Let your imagination and creativity be your guide, and go for it! You will have a lot of fun with this technique.
