Homebuilding is not what it used to be. When I was a teenage hangar rat, there were a few old guys on our field putting together homebuilt airplanes that looked only slightly less disreputable than the tin hangars in which they were being built. I exaggerate, of course, but taking a look at these tube-and-fabric craft, it was easy to see the heritage of Cubs and their cousins. There was also this company called Aircraft Spruce that was selling plans, and even putting together materials kits for some of the more popular designs.
Modern kit building came along years later, though the term “kit” means many different things, depending on who is doing the “kitting” and who is doing the building. Sales brochures have always promised fast build times with little effort, and everything you need to get in the air included in the box. Well, almost everything. Unless you like waiting around for hurricane-force winds, you might want to buy an engine, which is usually considerately left out so that you could choose it.
Today, kits range from a set of plans and a box of unbent aluminum to marvelously prefabricated, mostly assembled works of art with razor blades taped in little pockets on the outside of each box to open it.
The builder’s success in completing a kit depends on numerous factors, many of which have nothing to do with the completeness or form of the kit itself. But there is no getting around the fact that the more pure fabrication that needs to be done in the workshop, or the more parts that need to be purchased separately, the greater the chance the unfinished kit will appear in the aviation want ads, looking for the next builder to come along. If you really want to get a good handle on how much work you are getting yourself into, it is important to find out just how much fabrication will be required, and the skills involved. Sometimes it is hard to tell in advance, but taking a good look through a variety of kit documentation, instructions and plans can give you a pretty good idea.
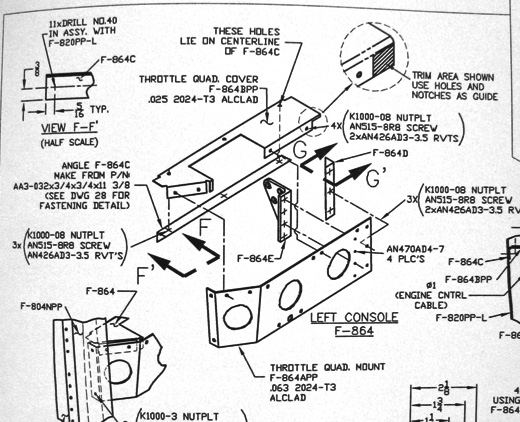
The RV-8 drawings and parts are complete and clear.
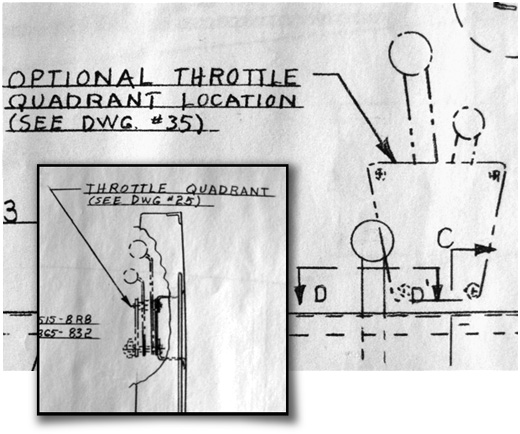
The RV-3, on the other hand, leaves much to the imagination!
Closer Examination
Let’s examine two kits of different generations from the same manufacturer. Van’s Aircraft has reported more than 7600 airplanes completed and flying, and a good guess is that a fair number more were never reported to the factory. The kits range from the first offering, the RV-3, to the newest, very complete Light Sport Aircraft, the RV-12. In between are a number of two- and four-seat models, each kit representing a different rung on the evolutionary ladder. From the RV-3’s “plans and preformed parts” to the RV-8’s matched-hole technology that allows you to Cleco the structure together without a jig, the amount of effort that goes into building varies considerably. The RV-7, -9 and -10 all use the new technology to help things fit without a great deal of laying out and measuring. The -12 even goes together without final drilling.
The RV-3, however, is a good place to start when talking about a simple kit that requires a lot of thinking and planning on the builder’s part. While it is now possible to buy a quickbuild wing, the rest of the kit comes as bare aluminum, curves pre-bent and bulkheads formed. Welded parts are included, but instead of the newer kits’ powder-coated finishes, bare metal glints at you when the boxes are opened. The drawings have seen quite a few revisions over the years, and there are more than a few places where they don’t quite match, or the numbers don’t add up. It pays to be skeptical when building one of these machines, as my wife and I have learned the past year while constructing our RV-3. A few key measurements such as the front-to-rear spar distance are vitally important. If that is wrong, the wings won’t fit. Other than that, well, let’s just say that there is as much art as there is engineering, and I seriously doubt that any two RV-3s will measure exactly the same.
Aside from the tricks and trials of getting the measurements right and decoding the plans, the RV-3 is a simple kit, with little in the way of cockpit refinement. In fact, it pretty much tells you that you’ll need a throttle somewhere, so find one and install it where you will. This is a good place to examine the differences between first- and last-generation kits: the throttle quadrant. As an example, let’s take a look at the RV-3 and RV-8 plans.
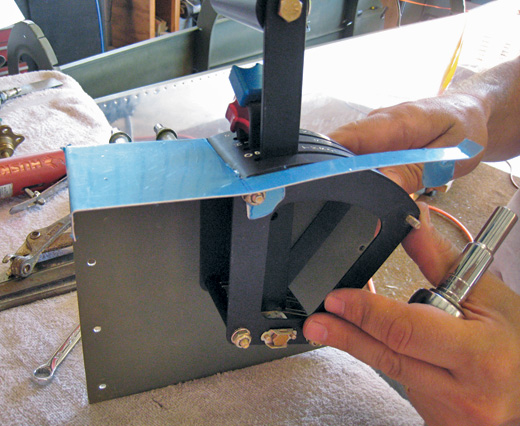
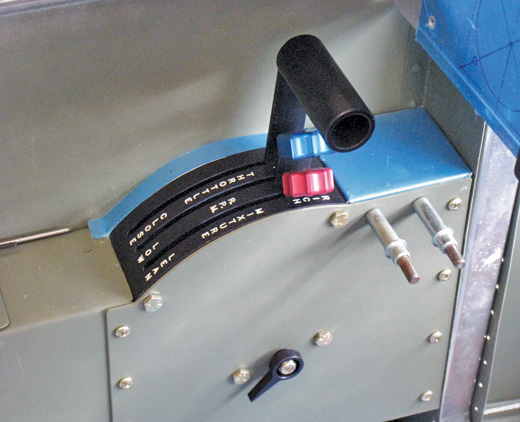
The RV-3 quadrant closeout under construction (above) and installed (below). Imagine the author’s surprise when he realized he could actually match
The Throttle Quadrant
The parts for the RV-8 throttle quadrant were pre-formed, prepunched and ready to install. They matched the drawings precisely, and fit where they needed to be. Even though I went with the Deluxe quadrant, the fit was good right out of the box. As important to note is the fact that, with a top closeout panel, the entire quadrant was fully designed to look finished.
The RV-3, on the other hand, just says, “You’ll need a throttle quadrant. Mount one on the left side.” Actually, this is fine for a person who is happy customizing and building things from scratch. But for builders who need a little more guidance in the design and construction of acceptable mounts and structures, it can be a bit intimidating. Where should it go so that it doesn’t interfere with anything else? Can you drill through the skin to hang it on the wall, or is there a better method? Will it stand up to the loads imposed by flight and ground operations? And how do I make it look nice?
Pattern Recognition
In the case of our RV-3 project, designing the throttle quadrant mount was a small part of a larger project to build a finished-looking cockpit with side consoles that would be both useful and secure. I wanted to have an electrical and switch panel on the forward right side to complement the throttle quadrant on the left. Once I had constructed all of this, I was happy with it except for the open hole in front of the quadrant, and along the skin side. These needed something to look finished.
Fabricating a part like this takes some creative thinking and the ability to see shapes before they exist. In this case, I needed a square of material in front of the quadrant, with a narrow strip running down the outside. The quadrant has a curved top, so the skinny piece really needed to match that curve to look nice. Thinking through the problem, I decided the square piece should have a flange on the inside edge to tuck inside the side of the quadrant mounting plate, and another flange on the front so that you wouldn’t see an exposed, raw edge. Flanges, even short ones, also do a great job of stiffening a part and making it look more “manufactured.”
On the back edge of the square, where it ties into the front of the quadrant, I knew I’d also need some sort of edge other than raw, cut aluminum. I decided to make this a skinny flange that I bent under in a tight curve to just “kiss” the quadrant. These flanges all need to be considered (along with bend allowances) before you start hunting for the right size material. I realized this as I thought about the thin strip running down the outside of the quadrant. It needed a couple of tabs to pick up the quadrant through-bolts, and if I did them just right and used thin material, they’d put that nice curve I was looking for right into the shape. Thin poster board is great for making mockups of pieces like this: Draw them, cut them out, and see if you have considered all the flanges and tabs you need before you commit the design to aluminum.
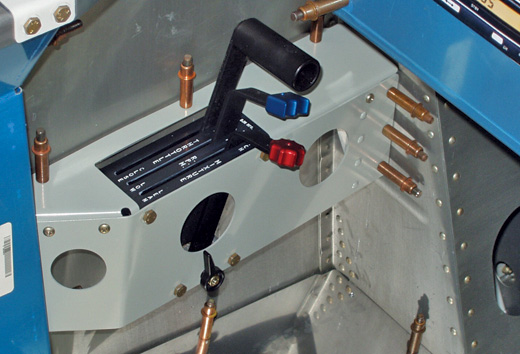
The RV-8 throttle quadrant console.
Moving into Metal
Once your pattern pieces have been laid out on poster board, you can think about aluminum. Digging through the scrap bin, I found a nice, flexible piece of 0.025-inch aluminum. A little origami, and I had a sort of L-shaped piece, with those tabs sticking out to pick up the top through-bolts on the quadrant. Imagine my surprise when it actually worked!
The outboard edge, where the closeout meets the side skin, would probably require a thin rubber seal, so it wouldn’t abrade. But other than that detail, we had one more box checked off under “nice interior.” That took a couple of hours of shop time to get right, and you should expect to waste some material. My suggestion: If you’re building a less complete kit, buy some sheet stock in a reasonable size that is appropriate to the thicknesses generally used in the kit, and keep it handy. It is much easier to make a part if you have the material on hand, and it’s easier to remake a part if you don’t like the first one when you have additional material available.
Whether your kit is first or last generation, you can make it look beautiful and custom-made; it’s all about the details. But beware: These details take time, and detours from the straight and narrow can push the date of first flight out a long way. Choose your projects wisely. It is wonderful to show off the personal touches you have added to your masterpiece at the fly-ins and pancake breakfasts you will attend. But to get there with your airplane, you have to finish it first.


