Most airports provide provisions to tie down transient aircraft. I’ve seen everything from loops of rebar sticking out of asphalt to cables and ropes strung across the ramp. I remember once I tied down for an overnight stay at an airport that used old tires to mark where the chains were anchored in the asphalt. Presumably, the tires were there to keep you between the links or, horror of horrors, tagging a prop on a mound of chain.

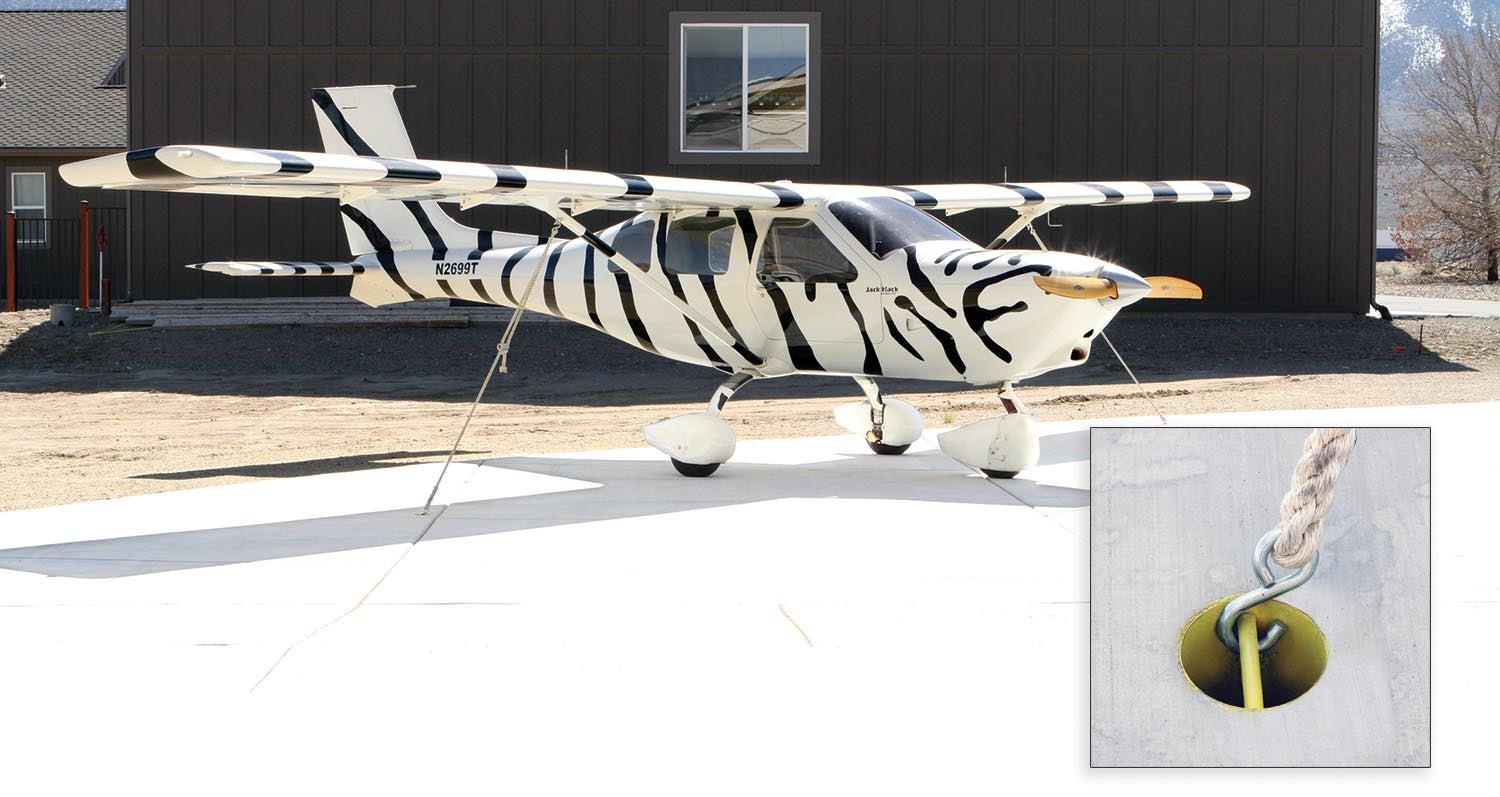
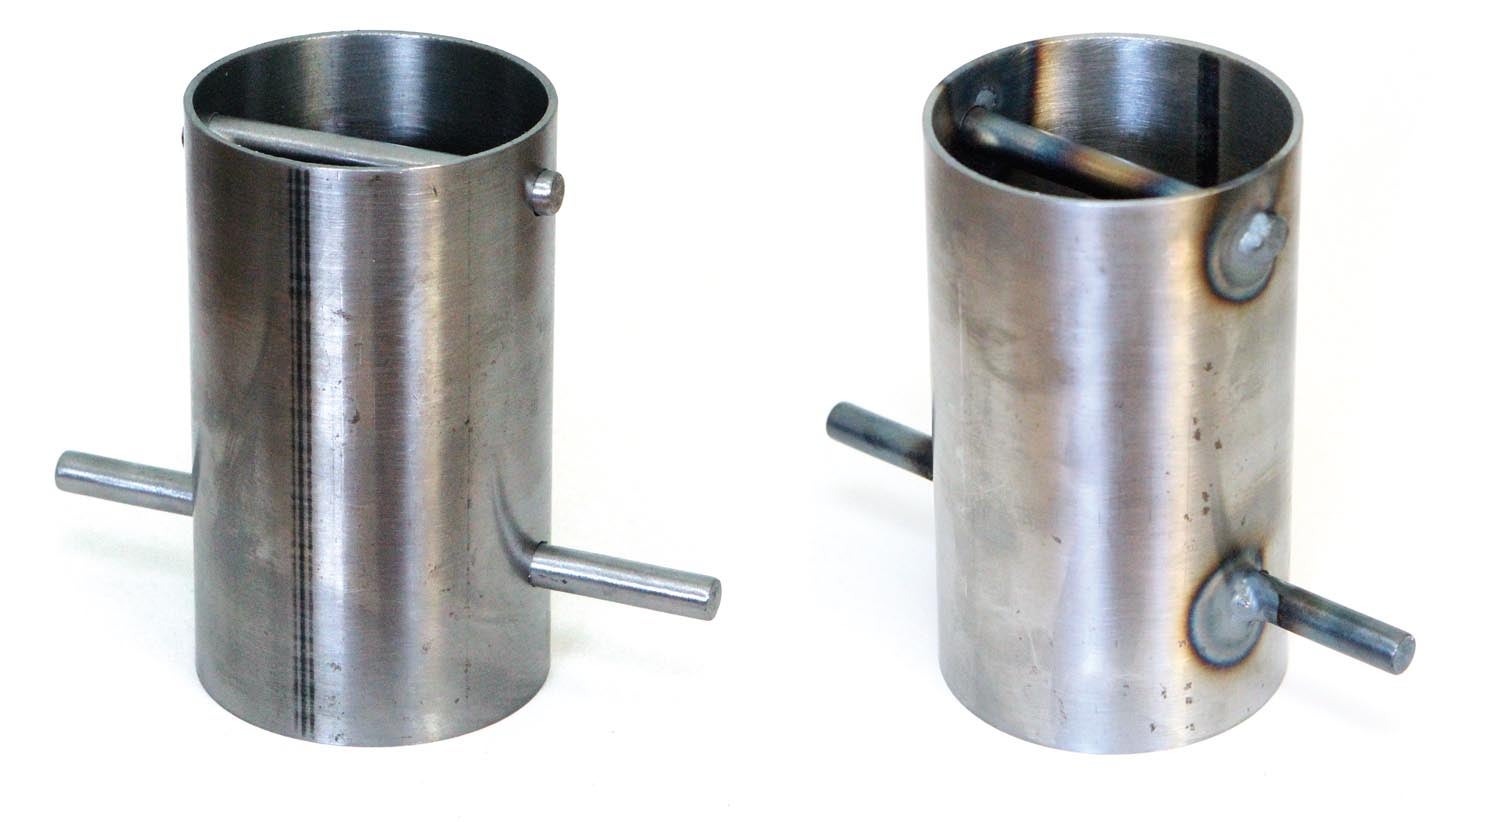
While chains, cables or rebar hoops may get the job done, they were not top-of-the-list choices for the small ramp going in at my soon-to-be dream house at the airpark. Paul Dye, KITPLANES® editor at large and airpark neighbor, solved this problem by embedding tie-down anchors that were flush to the ramp surface. This allows visiting pilots to maneuver unencumbered on the limited ramp space and still have access to two or three tie-down points anywhere in front of the hangar. Even Paul’s SubSonex microjet, which has tires that look like they came off an ultralight (200×50 Aero Classics), rolls over the anchors like they’re not even there.
So, when my new house and hangar project started to spring up at the airpark last year, I asked Paul about those cool tie-down anchors. Turns out they’re pretty simple. I coordinated with the paving crew to let them know where the anchors would go, showed them photos and also took them over to see Paul’s. Since my taxiway was set to be 4-inch-thick concrete, I made the anchors 5 inches so they could be driven into the aggregate (dirt) base to prevent them from tipping over during the pour. (I see no reason why the design wouldn’t work with asphalt, but I’m no expert, so consult with the paving company first.)
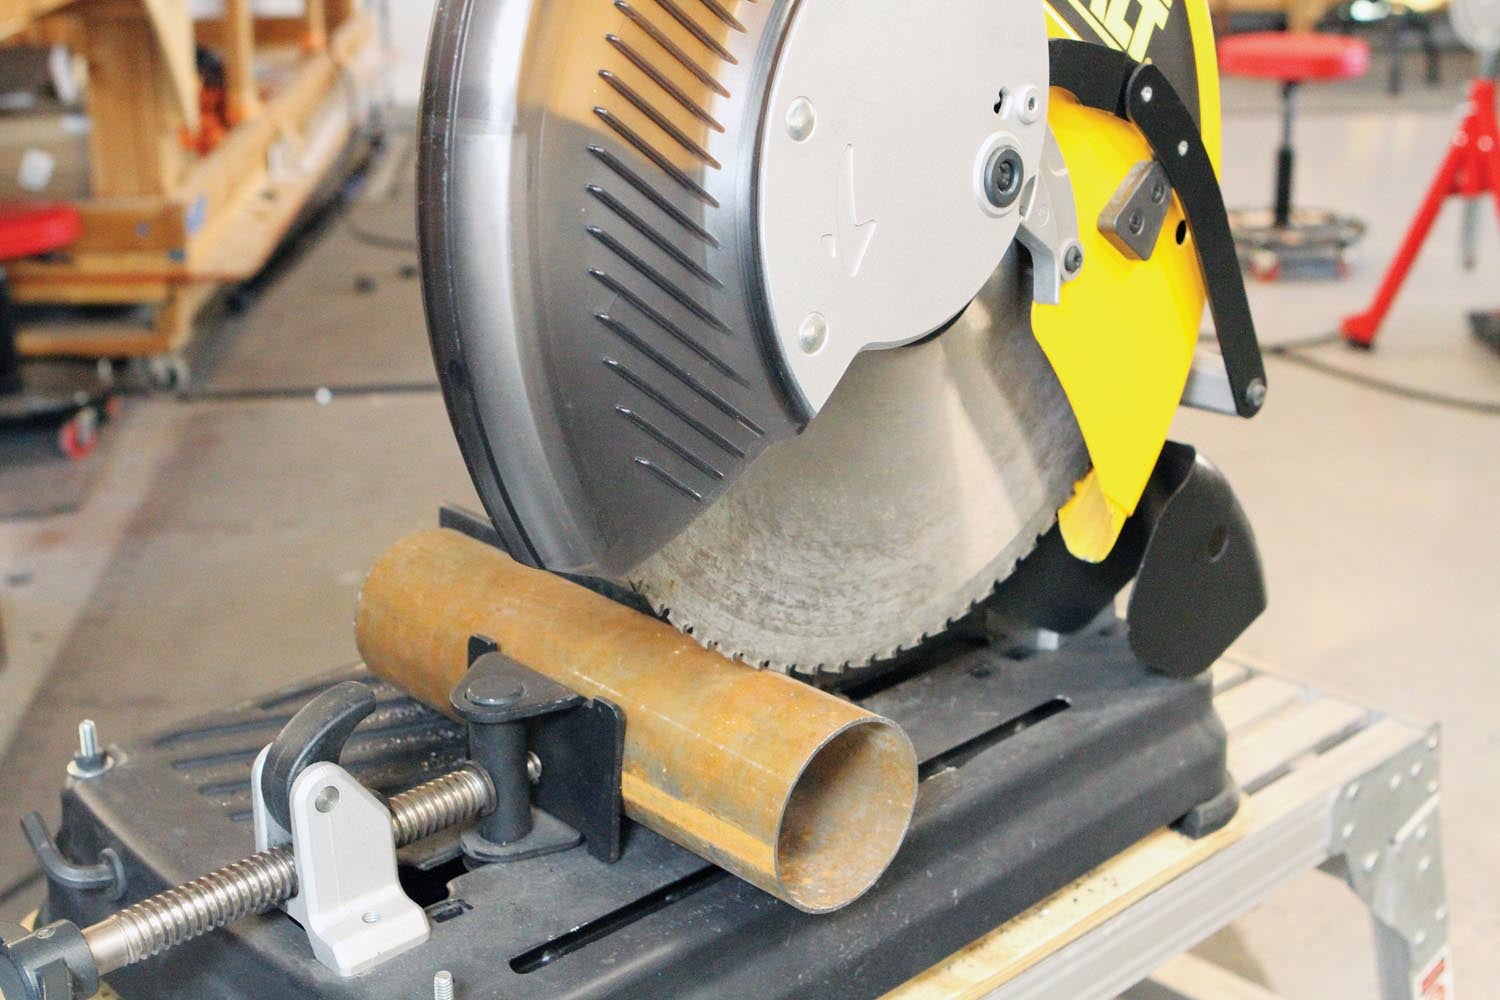
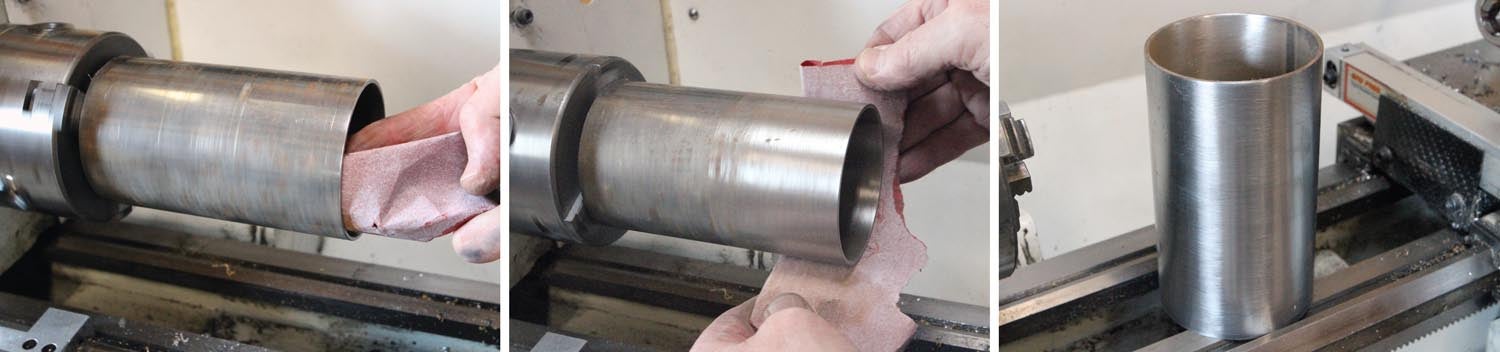
I originally thought these anchors might be too rudimentary to be of interest for a KITPLANES® column, but two things changed my mind. One was using Paul’s DeWalt Model 872 Multi-Cutter Chop Saw and the other was figuring out how to hold the large-diameter tube to safely drill the cross holes.
The DeWalt 872 Multi-Cutter looks like a miter saw for wood. In fact, it has a special 14-inch carbide-topped blade designed to dry-cut steel. All I can say is, it’s amazing! Before the Multi-Cutter, I would’ve used either a horizontal band saw or a cold saw to rough cut steel tubing like this. The Multi-Cutter is much faster and cuts way cleaner than a band saw. The Multi-Cutter wins the speed battle over the cold saw, too. And while a cold saw is hard to beat for clean and straight cuts, they use flood coolant, which can be a bit messy. The Multi-Cutter, which runs at 1300 rpm (a cold saw runs between 80 and 100 rpm), has a cut quality that, if it’s not as good as a cold saw, it is pretty darn close.

The only negative to the Multi-Cutter is that it’s loud. Hearing protection is an absolute must (as well as safety goggles, of course). All in all, for speed and efficiency, it can’t be beat. I had eight lengths of tubing to cut for this project and got them all done in about the same time it would’ve taken to cut two on the band saw. I’m not saying you should throw away your band saw, but if you’re looking for a saw and plan on cutting a lot of steel, be it bar stock, tubing or whatever, I would definitely recommend considering this type of saw. You can find a number of different brands that compete with DeWalt in this category, from $400 to about $700 (which is about the going rate for a home shop size horizontal band saw). Google “metal cutting chop saw” to get an idea of the different models and brands. Ignore any of the abrasive-type chop saws. They make a mess and leave behind nasty burrs.
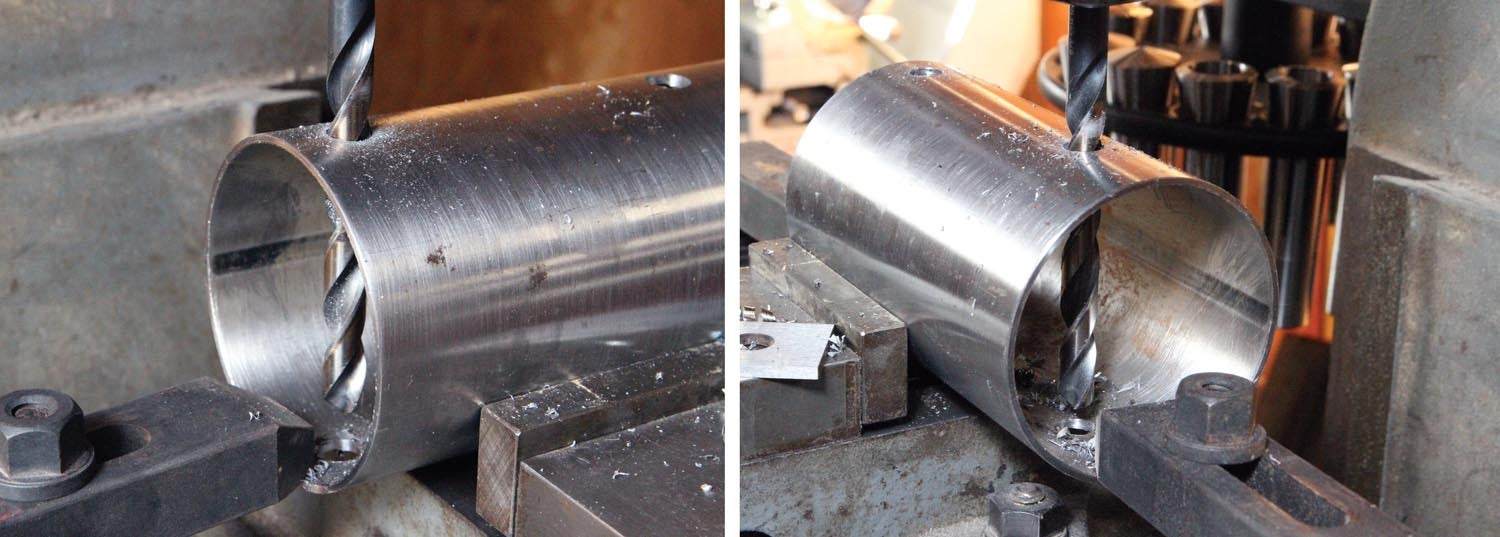
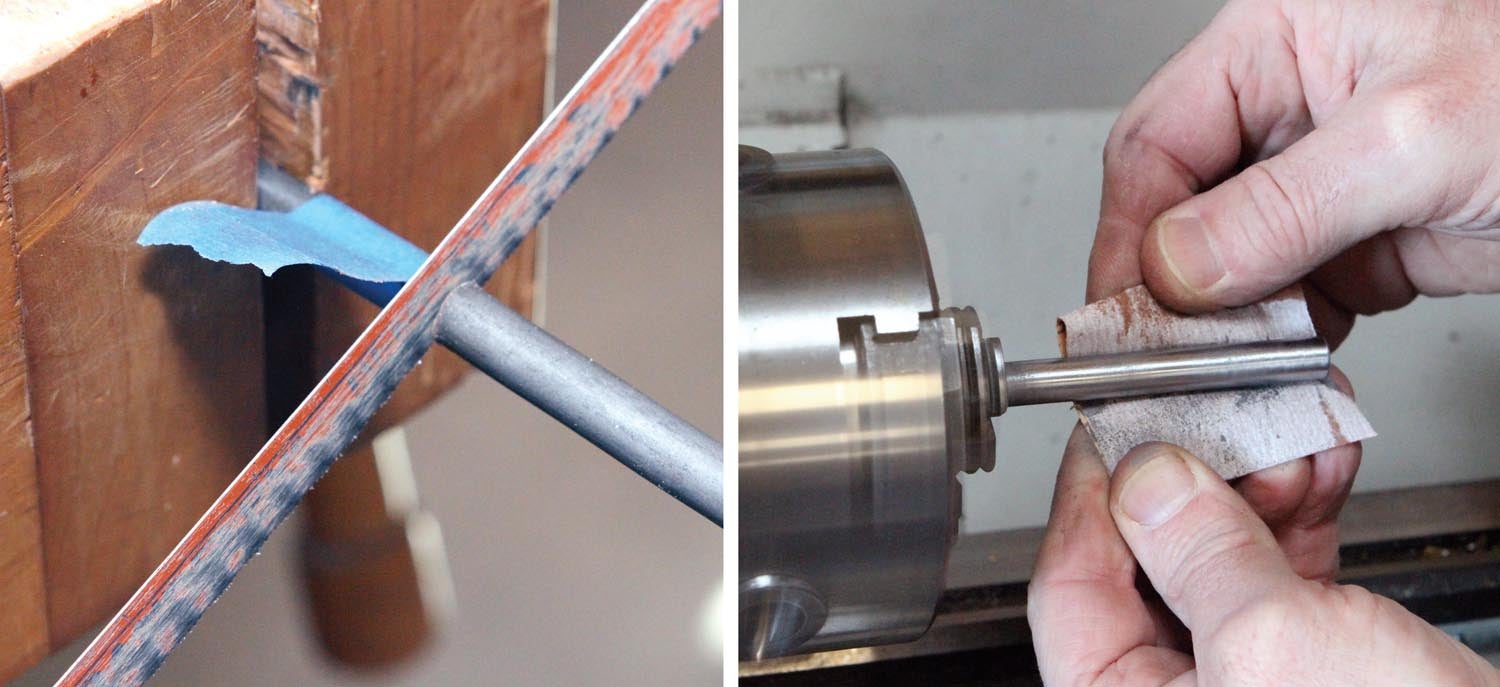
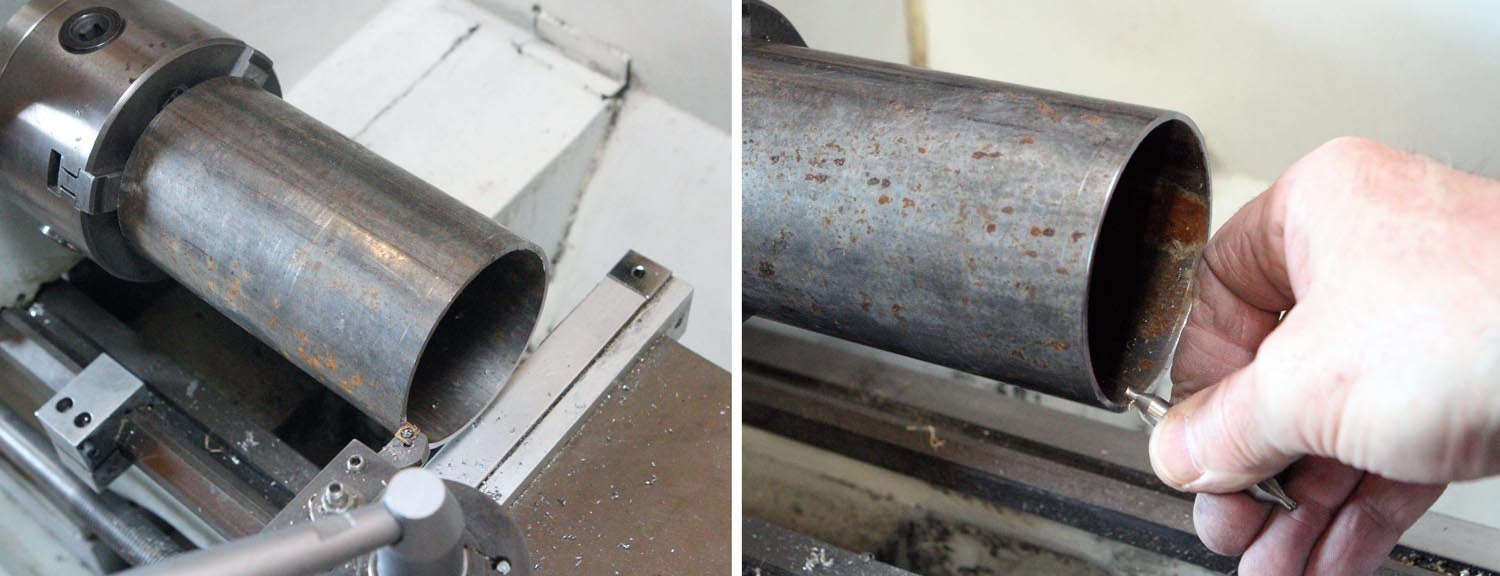
Holding the tubes for cross drilling turned out to be an exercise in compromise. The 3-inch diameter by 5-inch long tubes were too big to clamp in my small mill vise. So I ended up using the vise as more of a saddle and used T-nuts, blocks and arms from my hold-down kit to secure the ends.
That’s it for now. Time to get back in the shop and make some chips!


