
Photos: Jon Bliss, Paul Dye, Louise Hose
Where to put the extra wheel on light airplanes has been a thing since the invention of the triangle. It all started when some flying geometer drew three points and realized putting the tail on the ground meant the pilot could easily flip or ground-loop the airplane—while one of those newfangled nosewheels made most airplanes less likely to become inadvertent lawnmowers. Of course, no engineering alchemy could change the fact that nosewheels are visually challenging while adding a pinch of weight and drag, hence the religious war over where the third wheel goes.

If there is no clear winner in the wheel war what is obvious is that nosewheel airplanes have predominated since Eisenhower, and today tailwheels spring forth only from homebuilder’s workshops or factories producing for specialized jobs.
One of those specialized jobs—flying off rough strips in the backcountry—has traditionally been the domain of airplanes with the little wheel in the back and the pilots that know how to fly them. But times and airplanes do change, and a trip to Idaho will show you factory airplanes with (gasp!) nosewheels surrounded by tents and camping gear.
But the Cub and its derivatives have lived with a tailwheel for nigh on 80 years, until the king of Cubs—CubCrafters—decided to break with tradition and give pilots the nose option. And so, the NXCub was added to CubCrafter’s Builder Assist program. Tough on the traditionalists, yes, but it’s difficult to argue with a company whose first name is “Cub” and which makes nothing else.
When CubCrafters recently announced the NX was available as a kit for homebuilders to fabricate and assemble, KITPLANES decided it was time to have a good long look. We’ve flown the NX before—but this is the first time we have had a go at one with an Experimental/Amateur-Built airworthiness certificate—a milestone in many ways.
The Family Tree
CubCrafters has been around for years, starting out as a Cub restorer and eventually a parts supplier. Eventually founder Jim Richmond had his team design an entirely new airplane based on the Super Cub but considerably lighter. Through clever design and modern materials they were able to shave hundreds of pounds off of the traditional Piper design and came up with their CC-11 line of aircraft. In the Experimental/Amateur-Built market, those airplanes evolved into the EX, EX2, and EX3 models—each subsequent model incorporating improvements in handling, manufacturing, and power.

While improving and producing aircraft and kits for the CC-11 line, CubCrafters was secretly developing a new and improved line of aircraft—new enough that they gave it another designation—the CC-19, better known as the XCub. The XCub is available as a certified airplane or through their Builder Assist program as an E/A-B—and starting this July, it is now available as a kit that can be shipped to your home, workshop, or garage for building as an E/A-B aircraft.
For the many of us who grew up flying traditional Piper Cubs, the only thing a CubCrafters aircraft has in common with the original is the general size and look of the age-old design. All details—and all parts—are unique and not interchangeable with the Pipers. And improved they are! Not only are the airplanes considerably lighter, with considerable gains to both performance and handling, they boast creature comforts far beyond what we grew up with in the 20th century.

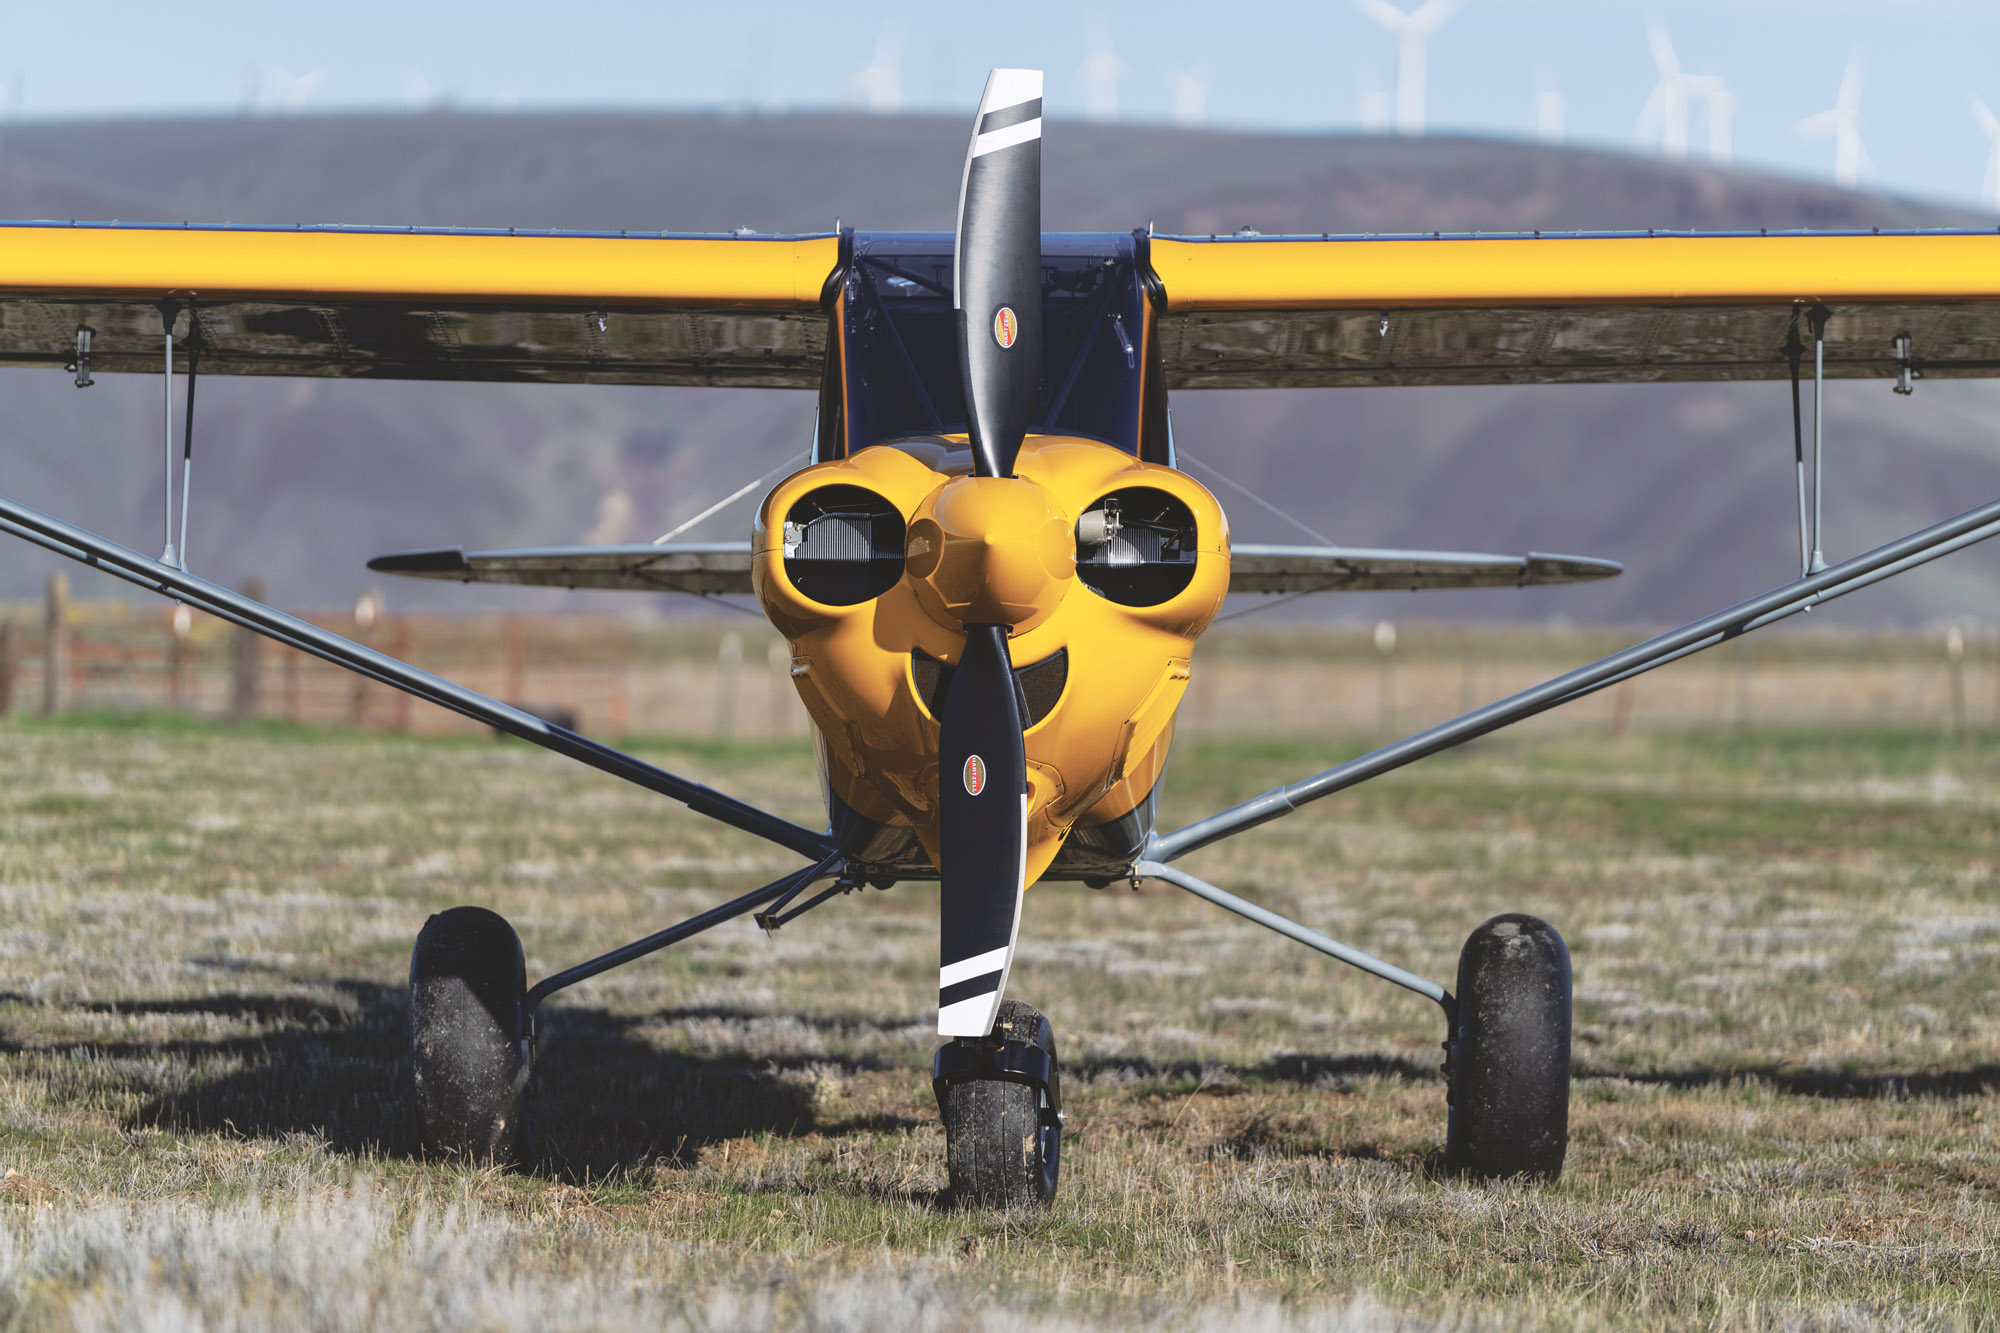
Of course, the most obvious change to the basic Cub design is that big nosewheel—but truth is, the XCub is a nose- or tailwheel airplane, and you can build it either or both ways. All of the airframes come with the attach points for either gear, and you decide to buy the nosewheel set, the tailwheel set, or both just to have the option. The nosewheel configuration is about $10K more than the tailwheel, and if you want both, you’ll spend another $20K—so $30K will give you all the bits for either configuration.
Two Choices for E/A-B
If you choose to go with an E/A-B aircraft (you can of course buy a finished, certified airplane to fly away from Yakima), you have two choices—the factory assist program or having a complete kit delivered to your chosen build site.
If you research the rules for E/A-B aircraft, you’ll find the aircraft must have the “major portion” built by amateurs (more than one is allowed) for the purpose of education and recreation. The major portion is determined not by hours, weight, or parts count, but rather by a checklist that breaks the build into approximately 200 tasks. A task might be “fabricate a wing rib” or “attach a wing.” These tasks are listed, and a percentage is determined for each task as to who performed them—either the amateur builder, commercial assistance, or they are provided in the kit. When all tasks have been assigned to the builder, factory, and commercial assistance, the columns are totaled, and the builder’s percentage must meet or exceed 51 percent. Note that some of the tasks are fabrication, and some of the tasks are assembly.

CubCrafters is well known for their innovative approach to factory assist building. While the majority of “fast build at the factory” programs have the factory providing the majority of parts for the builder to assemble into an airplane, CubCrafters turned this on its head. A builder reports to the factory for a week to fabricate as many parts as they need to achieve their 51 percent. Note that they don’t have to fabricate all of the wing ribs to satisfy that task—fabricating just one wing rib will do. When they have fabricated enough parts to satisfy the rules, all of those parts are put in a box (so to speak), and then CubCrafters assembles the aircraft with those parts. The builder comes back at the end to do some final assembly tasks, and the end result is an Experimental/Amateur-Built aircraft.
Now if you decide to have your kit shipped to your build location, this doesn’t work because many of the parts fabrication tasks involve working with special factory tooling. So the factory has to fabricate, and the builder assembles. Oh, don’t worry—you’ll still be doing some fabrication and lots of fitting—but the end result is a more traditional kit build program. CubCrafters intentionally leaves some carbon fiber parts untrimmed—just make sure your build qualifies under E/A-B rules.
Interestingly, the factory-built aircraft are recorded by the FAA team that scores the checklist as “plansbuilt “ instead of “kitbuilt”—this is because the builder (at the factory) is required to reference the plans and drawings and make determinations while building their parts. This gives them more points on the FAA checklist. The kit builder at home doesn’t have to refer to the drawings in the same way, so their package of parts is listed as a kit in the FAA paperwork.
Ultimately these differences don’t really matter to the builder—if you buy a kit or go to the factory, the CubCrafters plane that you build has been scrutinized by the FAA (there have been numerous audits and evaluations to make sure) and meets the requirements for E/A-B certification. The finished airplanes are generally spectacular as to fit and finish, and many look as if they are factory built—but they do meet the requirements. As an FAA Designated Airworthiness Representative this author has looked them over, and while you have to admire CubCrafters for their clever use of the rules, they do, in fact, meet them.
What’s in the Kit?
CubCrafters’ kit philosophy has always been to deliver as much of everything a builder needs to finish their airplane as soon as possible. They’d rather you build than shop online for missing bits. So, while most kit aircraft tend to omit lights, avionics, antennas—the things builders typically choose as options—CubCrafters tends to include them. They’re not out to inhibit choice—but their accessory choices are good, and including them in the build package means they can be included in the instructions and drawings. It sure enhances the building experience.
CubCrafters kits are organized into fuselage (including the tail feathers), wings, finish, and an optional firewall-forward kit. Most builders tend to choose the factory firewall forward of course, but there are always a few wanting to experiment with different engines, so CubCrafters makes the choice available.

Flying the NX
Brad Damm, CubCrafters vice president, delivered the very first E/A-B built NXCub to our ramp at our airpark in Dayton, Nevada, leaving it for us to play with for a week or ten days…or maybe two weeks! After a quick checkout flight we dropped him off at the airline terminal and drove home, rubbing our hands in glee—this airplane is amazingly fun to fly and very capable as a backcountry machine. That’s the summary—let’s dig in to the details.
Cubs are Cubs in many ways—but precious few require preflighting a nosewheel! You do all of the usual stuff: Make sure the wings and tail are attached, the tail wires are taught (and don’t forget to check the lower ones for nicks from rocks and gravel), and that the fuel is free from water. You’ll want to check the vortex generators atop the wing are in place—but the airplane flies just fine if one or two are missing. If you find a hole in the vortex line, make a note to replace it, but don’t cancel the flight.
The nosewheel is full castering, but a limiter bracket restricts it from turning past 95° right or left. This prevents the nosewheel from rotating into the prop—a very bad thing if you were to land on a steep uphill runway and let the airplane roll backward. But the clever part is the bracket is removable via a quick push-pull pin so that you can fully swivel the wheel to push the airplane around on the ramp. Crafty. But what if you forget to put the limiter back in? There is a switch built into the assembly if the limiter bracket is not installed—it lights a bright red light on the pilot’s panel with a label saying “Do not engage starter!”

With fuel, oil, and airframe checked, it was time to mount up. Even this is made simpler in the XCub—instead of a little foot peg a rock climber might appreciate there’s more like a streamlined running board. It eliminates the risk of skinning an ankle on the end of the peg if you slip.

no both position.
Settling into the comfy seat, you find it can be adjusted fore and aft to optimize distance to the rudder pedals. Everything on the panel is easily in reach, and the fuel selector is down on the left sidewall—left, right, or off—no “both” position. Why no “both” in a high wing? The answer is arcane and relates to how the FAA determined unusable fuel quantity—suffice to say, leaving off a “both” choice in the certified XCub allows an extra gallon of usable fuel on each side, and CubCrafters doesn’t want to stock multiple different types of fuel selectors for certified and E/A-B.
Cockpit setup is simple—switch on the backup battery to power the ignition and then the master to boot up the EFIS. Start the engine, then bring the alternator online and hit the avionics switch —then power up lights as needed.
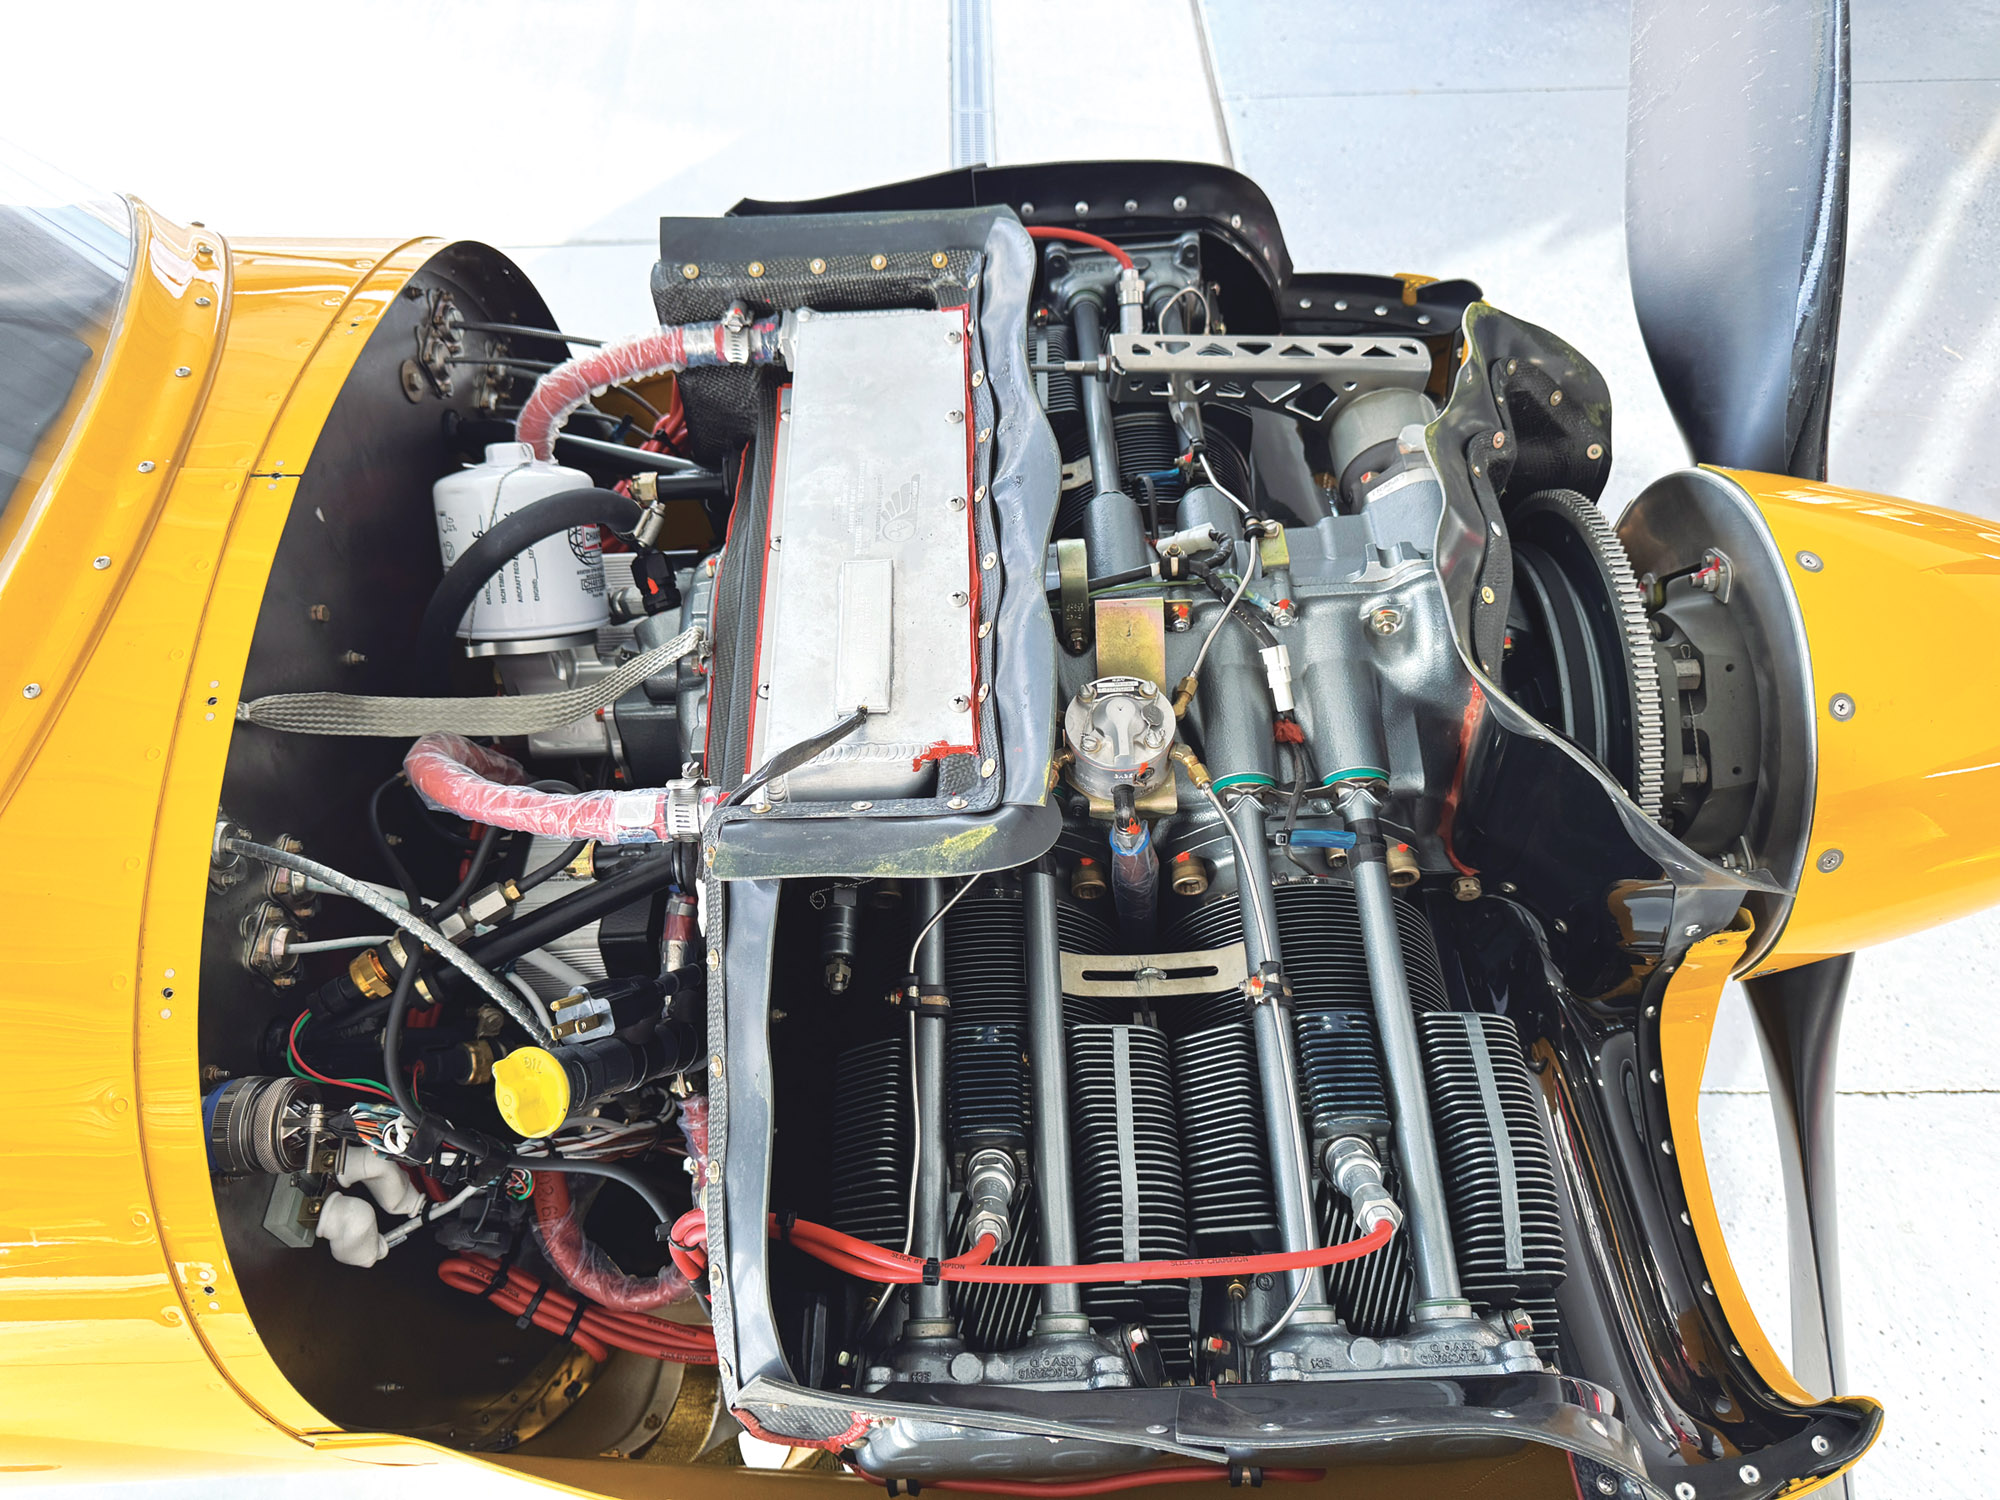
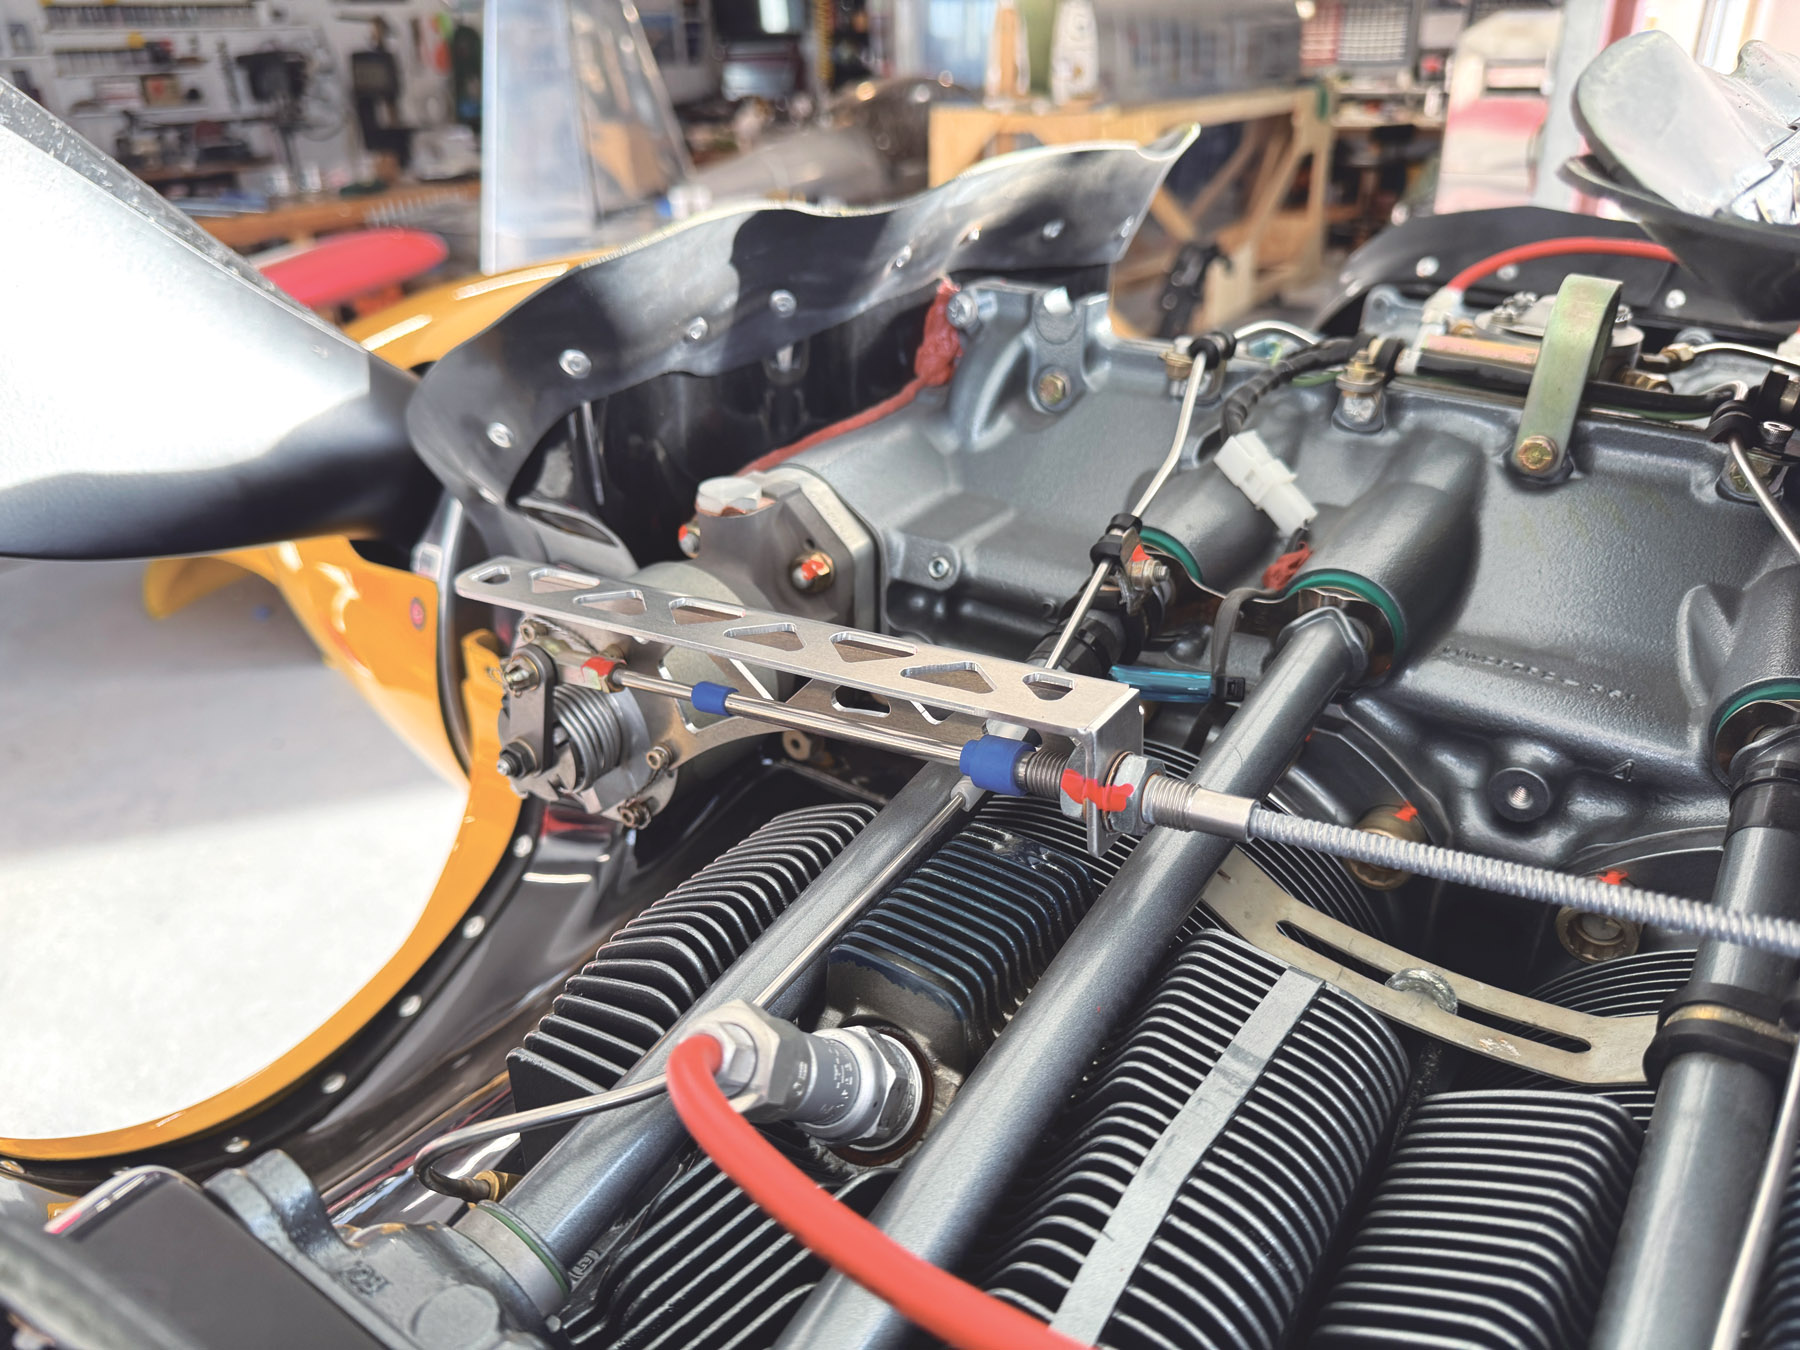
Starting the fuel-injected 390 (OK, it’s actually a 393 cubic inch engine, as are all 390s, but CubCrafters demanded Lycoming give them credit for ALL those cubes, and it sets the logo apart from all other 390-powered airplanes out there) is just like any injected engine: as simple or as hard as you make it. For this airplane, cold start is throttle–cracked, mixture–rich, fuel pump–on until you see pressure, then fuel pump off—then hit the starter and it fires up. Hot starting is like most injected engines as well: Assume it is flooded, throttle open, mixture to idle cutoff, crank until it fires and feed in the mixture. Don’t forget to hold your mouth just right—and it worked great for us!

Taxiing is simple with differential braking and the full-swivel nosewheel. It will feel just a little spongy to those used to a firmer nosewheel, but this big-shock, trailing arm gear allows a hair more motion—but you’ll get used to it after a couple stabs of the brakes. Taxi to the active, smoke the standard CIGAR, and you’re ready to roll. Note the radio is headless (frequencies are controlled from the EFIS) so practice this before getting into a high-intensity radio environment if you haven’t done this before. We had to hunt for the audio volume (also on the EFIS) after takeoff…our mistake for not trying it ahead.
With the airplane lined up, hold a little back pressure, pull on one notch of flaps—the overhead lever on the left side is exactly where you want it—then feed in throttle. The nose will lift after a very short roll—catch it with pitch just off the ground and let the airplane fly away. It will use less runway than its taildragger sibling because it starts in a level flight attitude; you don’t have to lift the tail first. With a positive rate, raise the flaps, and away you go.
Control is positive in all three axes, yet the airplane is wonderfully stable. It stays right pitched where you trimmed it and is completely predictable. Roll is very natural for the weight and size of the airplane—much lighter if you are used to the Piper Cub—but in my mind perfect. The rudder is very effective once you have a little airspeed and nicely blends with aileron in the turns.
After clearing the pattern at 1000 feet, we pulled the prop to 2500 rpm—a comfortable setting, but use whatever works best for you. Damm suggested 2200 gives best economy cruise. With our home airport at 4400 feet MSL we won’t see more than the low 80s for percent power on the EFIS, even at full throttle—but pulling back to about 70 percent gives a nice cruise. Sixty-five percent felt very comfortable, however, and exact cruise numbers aren’t that important to us in backcountry airplanes, to be honest. You get there when you get there; these aren’t go-fast airplanes.
We started our air work with a couple of steep clearing turns, and I was amazed at the visibility out the top of the cockpit through the plexiglass with 45°—almost as good as being in a bubble. With the airspace clear I pulled back the power and flew down around 50 mph, horsing the roll and yaw around, daring it to stall out of the slow flight. It didn’t take the dare so I pulled the power off, and it lazily bobbed its nose a bit, yawning at me and settling into a bit of a descent. “So you don’t want to break? Let’s try this!” I added power, accelerated a bit, pulled the nose up quickly to a 45° attitude, and pulled off the power. That got us a nice break, but still straight ahead. Same technique with 30° bank? It broke and rolled toward level—it is a very nicely mannered airplane.

Stalls were accompanied by a warning horn, but there was no AoA installed on the machine. Brad admitted he really likes AoA, uses it all the time in airplanes where it is installed, and appreciates the progressive tones from the Garmin G3X—but said that CubCrafters is still trying to find a reliable static port position that will satisfy Part 23 certification for the airspeed/altimetry function and also work for AoA. They have considered using a second pitot tube just for AoA but haven’t come up with a solution yet…but they are working on it.

Fun With Landings
So it “flies like a Cub (and tastes like chicken)”—old aviation joke—let’s go have some fun with landings. We started with the pavement at Yerington, Nevada. Slow to flap speed, a notch each of flaps on downwind, base, and final, 60 on the clock until the field was made, then slowing to 50 over the fence. Pitch controls speed, power controls descent, and plop—right on the aim point. Doing this twice in a row gave me confidence to head to the dirt.
So it was off to Smith Valley and a slowly deteriorating runway at Rosaachi, a field with a closed paved runway and two overgrown gavel strips. One of the gravel strips has 1- to 2-foot-tall sagebrush dotting the surface—yes in an emergency, but not (for me) for any other purpose. The other has a narrow strip of clear dirt down the middle, about as wide as a dirt road. “Well, if you can keep it on the centerline, let’s try it,“ Damm said. The stable approach configuration gave me great control, and yup—the brakes make it easy to stay in the single lane. Piece of cake. Landing distance? I didn’t measure it, but I’d be happy with 500 feet of surface and no obstacles.

We next headed for a local lake bed. Because it was early spring I was concerned about the moisture content, but the color was almost white (indicating fairly dry), so we set up an approach to “try out the surface.” This involves a shallow, powered-up approach, rolling on the mains, then keeping enough power on to see if they stay on top of the crust or begin to settle. If they start making ruts, you power up and take off! This technique was famously documented by Armstrong and Yeager in a T-33 back in the X-15 days…but their turbojet power didn’t come in quite that quick and they sunk up to the axles, mired in mud. We fared better, the little Cub skittering atop of the fast-drying crust, so we pulled off power and rolled to a stop, then did a 180 and took off the way we came. I think I’ll take the plane back there in the days to come—it’s a fun place to visit!
Overall, the XCub on tricycle gear is just about the easiest airplane you can find to land. It is stable on approach, the flaps provide lift with one notch, lift plus drag with two, and all drag with three—but there is plenty of power to drag the airplane out of a sinking situation with full flaps, so it’s tough to get in trouble. Touchdown speed is low, and braking gives good steering. Visibility is good over the nose all the way, and it is easy to hold the nose off after touchdown. All in all…it makes one wonder why we’re not all flying with nosewheels!

What Will It Cost?
Ah, the (pre-inflation) $64,000 question—what will it cost to build one? It’s going to be a sight more than $64K, we’re afraid. Damm admitted they hadn’t yet worked out pricing details, but a fair estimate is about $200,000 for the airframe kits, less engine, prop, and avionics. Double that for every last detail. How does this compare to the finished, fly-away versions, or one that you build at the factory? They don’t have numbers for that yet, but you’ll be trading dollars for time.
No, this is not a simple, inexpensive Cub or something cobbled together from parts salvaged from various Pipers. It is a highly engineered, expensively built kit with top-notch finishing, well thought out improvements, and an extensive investment in lightweight materials. It is not a cheap way to get into homebuilding—this is a top-end airplane and CubCrafters is willing to admit it isn’t for everyone. But their order book remains full, and while you can get the first kits for an XCub delivered in about six weeks as of April 2025, we’d expect that lead time might increase a bit once word gets out!
This is more than just a Cub with a nosewheel (or a tailwheel)—this is a Cub refined for the 21st century. You might not win Valdez with it, but you might finish third, and that’s saying a lot. Realistically you can load two people and a week’s camping gear without a blink—and still drop into some very short gaps in the trees, rocks, and mountains. It is an eminently polished version of the bush plane, and many people will want one. Having the kit option allows more people to fulfill that wish.
As for that nosewheel vs. tailwheel debate? Forget about it! Once you’re in the air, you won’t know which one you’ve got—and when you land, that nosewheel makes touching back down on planet earth a nonevent. If we bought both, we’d probably leave the nosewheel on most of the time anyway. Break with convention, and don’t mind what the tailwheel guys say—and that is coming from a lifetime tailwheel pilot! This airplane is just plane fun.


")


