Picking up from last month, the spline broaching tools have been machined. We need to deburr them in a way that won’t blunt the cutting edges. The normal procedure is to remove burrs by dressing with a file or a deburring tool (see “Home Shop Machinist,” June 2015). Typically, on a tool with a cutting edge, a diamond hone or fine-grit slip stone is used to remove burrs and keep the edges keen. But on these particular broaches, especially the serrated V-spline, the cutting faces are so small and pattern so fine there’s no practical way (for the home shop, at least) to hone them. My alternative was to use a wire brush to carefully scrub the burrs off. A close-up inspection with a microscope proved this to be sufficient.
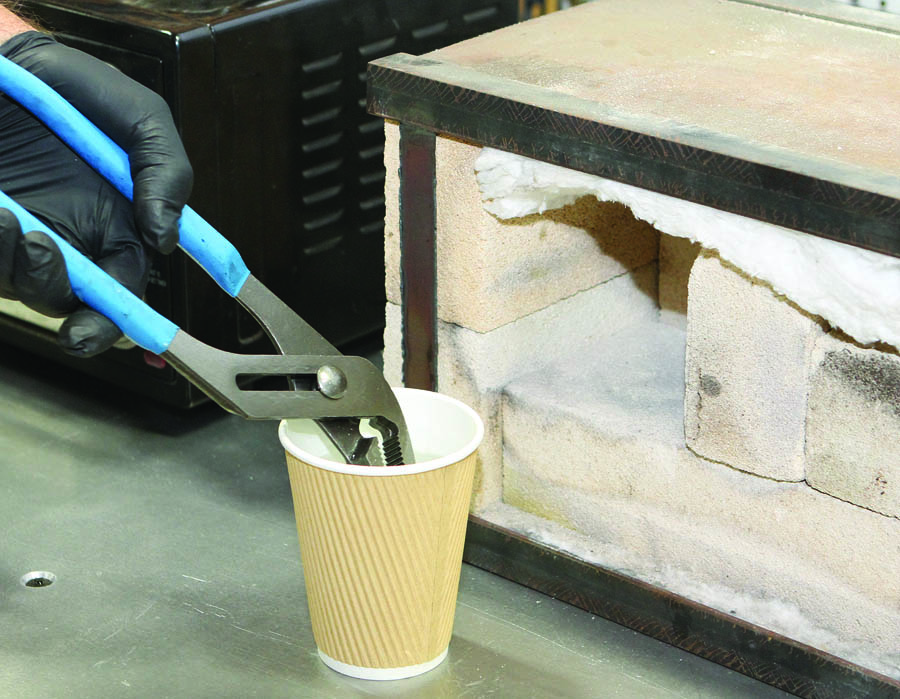
The small torch “oven” is assembled from firebricks and ceramic blanket. In addition to the broach tool, a small section of W1 is being heat treated to verify the results with a hardness tester.
The point of heat treating is to make soft steel hard. Basically, when annealed carbon steel (such as annealed W1 drill rod, which is 1095, or 0.95% carbon content) is heated to a particular temperature (called the upper critical point), the primary constituents—ferrite (elemental iron) and cementite (iron carbide)—completely dissolve together. If allowed to cool slowly, the dissolved components revert, more or less, back to their original state and the steel will be annealed and as “soft” as it was previously. But if rapidly cooled—in water for water-hardened steel or oil for oil-hardened steel—the mixture is, for lack of a better description, “frozen” and the steel becomes incredibly hard. My apologies to all the metallurgists who are no doubt cringing at this gross oversimplification. To be clear, what happens during quenching doesn’t actually freeze the molecular structure. The bottom line is, what was once a soft, malleable steel that could be filed, machined, or bent, is now “glass hard” to the point that a file will not scratch it.
Brushing proved to be a satisfactory method for deburring freshly machined splines on shafts (center) and broaching tools (right). Note the groove for a snap-ring retainer (center).
The key to any heat treating is getting the parts hot enough, for long enough, to achieve this transformation. For small parts in the home shop, a propane torch is adequate. Anything bigger than -inch diameter by a couple inches long may be too big for propane torch heating.
In addition to a propane torch, to heat treat W1 you need a cup or small bucket of water, pliers, a non-flammable surface, and a couple of refractory, or fire, bricks. Don’t forget safety goggles! A toaster oven is convenient for tempering, but you can use a kitchen oven (with spousal approval, of course).
Color is used to estimate temperature: (left) light yellow straw is around 450 F. (Right) After about 10 minutes the color should be deep red to bright orange, around 1400 to 1600 F. This is about the hottest you can expect to achieve with a propane torch in open air. Once max temperature has been achieved, keep the heat on for another three to five minutes.
The broach needs to be heated to around 1500 F. This is where the refractory bricks come in. Years ago, I purchased a half dozen bricks and some ceramic blanket to make a small, five-sided “oven” for torch heating small parts (see photos). Firebricks are brittle and somewhat fragile, but this also makes them easy to cut with a hacksaw or to reshape with a rasp. For heating the occasional small part (like these broach tools), you can gouge out a trough to keep the part from rolling around and use a second brick as a backstop to reflect some of the heat and shield the part from drafts.
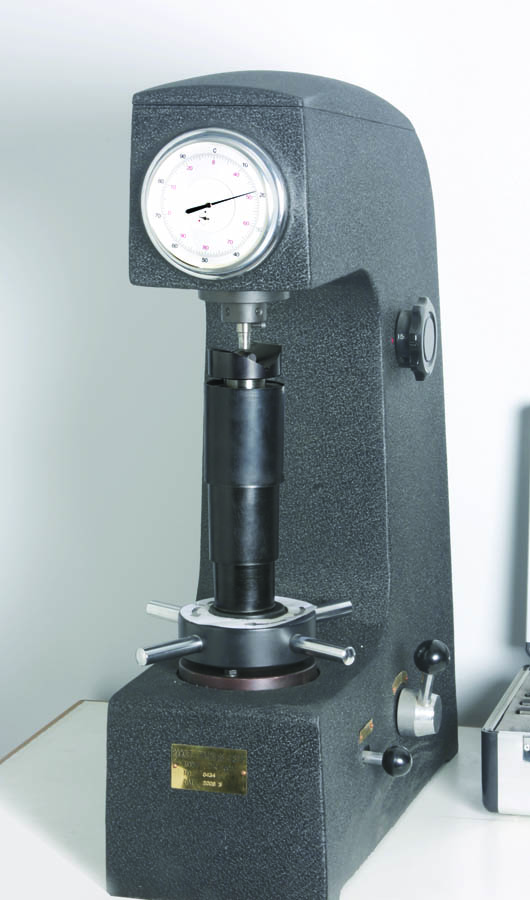
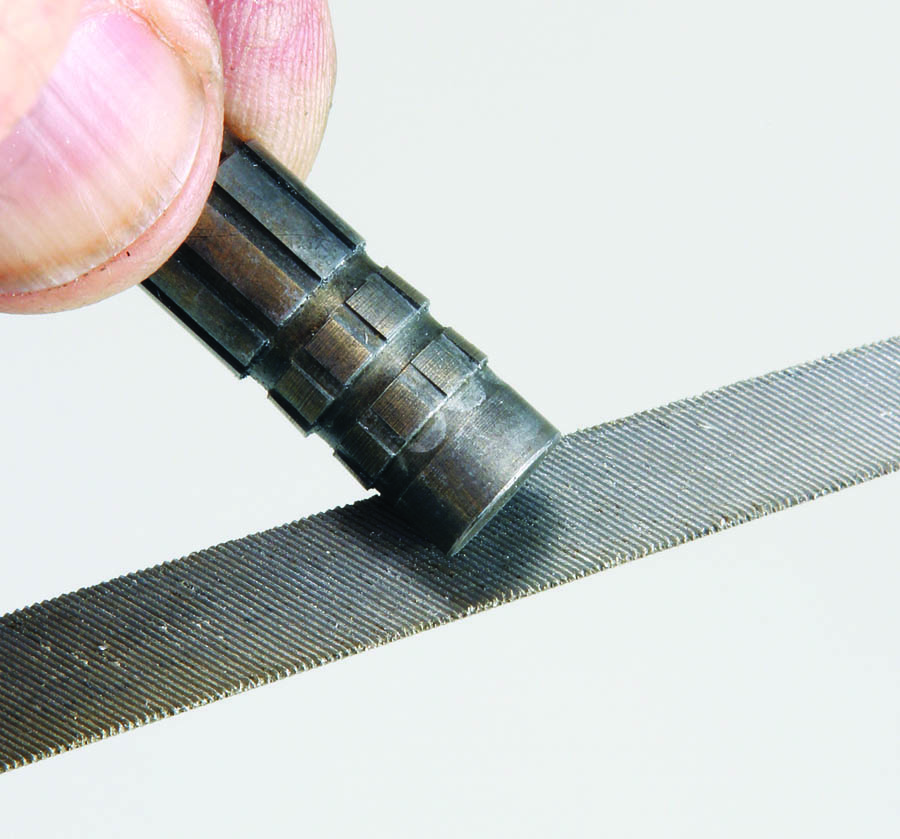
After quenching, wire brush away any scale or residue and check the tool for hardness. The tool should be 60 to 65 on the Rockwell C scale. The best way to measure steel hardness is with a Rockwell-type hardness tester, but since that’s not something you’re likely to find in a typical home shop, you can verify the result with a file. If the heat treat was successful, the tool, or test section if you did one, will be as hard as the file itself.
Most tools are tempered after heat treating. This involves heating to a much lower temperature and gradual cooling. Tempering reduces hardness and improves toughness. Heating to the upper critical point and quenching creates a hard, but also extremely brittle, steel. An impact or shock could cause the tool to break or an edge to fracture. So it’s a good idea, though not absolutely necessary, to temper after quenching. (Tempering or not depends on what the tool will be cutting—for broaching aluminum you could probably get away with not tempering.) Tempering in an oven designed for cooking takes a bit of trial and error. I set my toaster oven ($20 at Walmart) to 400 F and the timer for 30 minutes, and the hardness lowered to 50 C on the Rockwell tester.
After soaking at peak temperature, you’re ready to quench. Use long-reach pliers and immediately quench in water using a swirling motion. Ten to 15 seconds should be sufficient.
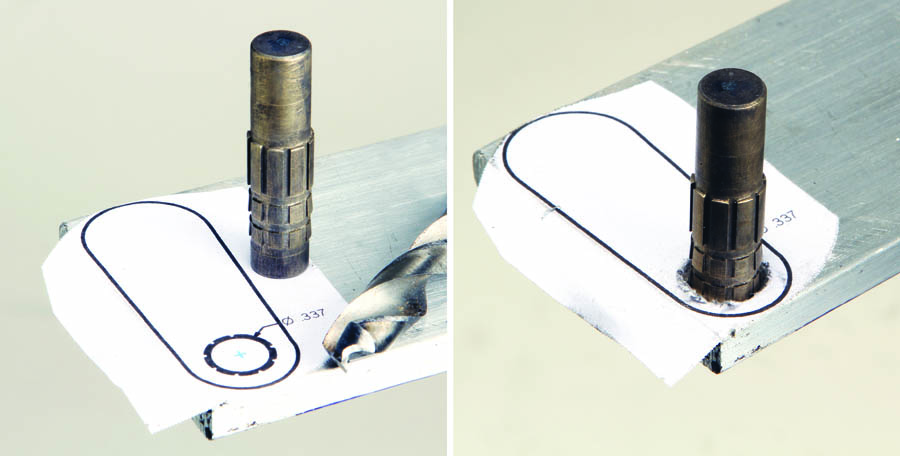
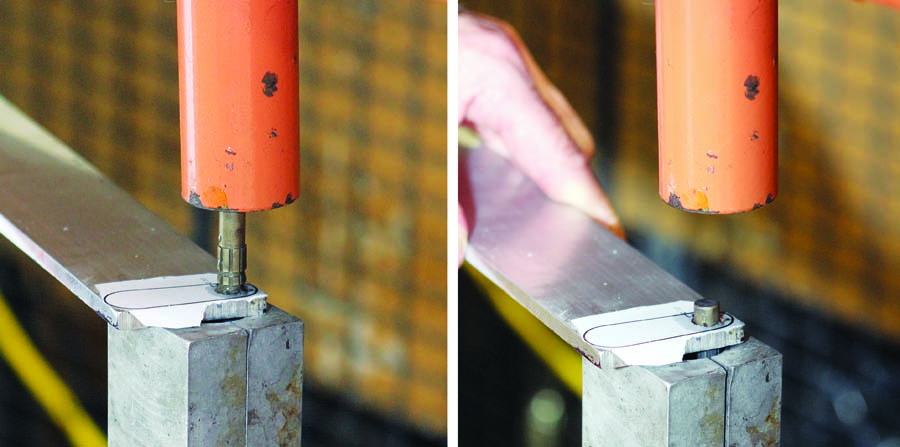
To use the now-complete broach, drill a pilot hole in the material you want broached, apply some cutting oil, and press the broach through the hole with a hydraulic or arbor press. How much pressure? It depends on how much “bite” the tool has in the material. Machinery’s Handbook (Industrial Press) provides a lot of detail on broach making, including material removal rates. It says you can remove up to 0.030 inch per tooth in aluminum. Since we are removing only 0.020 inch total (with three sets of teeth), a small 10-ton hydraulic press barely strained to push the broach through the part.
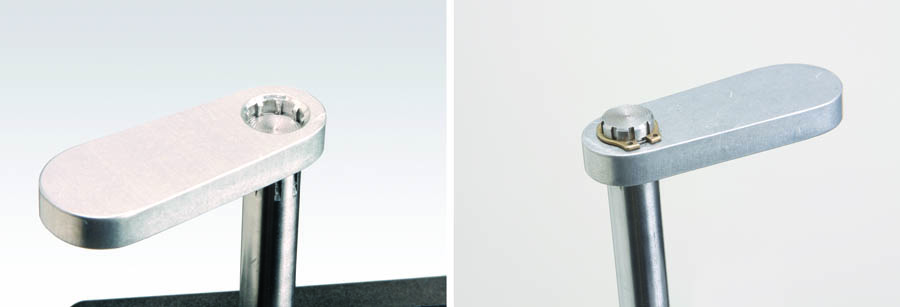
You can expect the initial broaching to render a socket that, due to the elasticity of aluminum, will be too small for the matching splined shaft. To get the socket to fit, put it in the freezer for 15 to 20 minutes, then push the broach tool through the frozen (and slightly shrunk) part.
Freezing and broaching the frozen part should render a precision slip fit. The protruding length allows for a groove for a snap ring.
Why frozen? Freezing slightly shrinks the existing, previously broached, hole. Re-broaching while frozen re-sizes the (temporarily) shrunk hole to the original broach size. There’s still some elasticity in the material, so there’s still a tendency for the broached hole to be slightly smaller. But, when the material warms up to room temperature and expands, voil—the broached hole is resized slightly larger! The fit should be very precise with almost no play. Repeat as needed until everything fits together.
Like a lot of things, the concept behind heat treating is simple: heat, quench, and temper, but the science is complex. Anything bigger or more critical than a simple home shop broach should be processed by a professional heat treating shop.


