When it comes time to remove and replace bearings or bushings that are press fit into tubes or deep recesses, don’t be that mechanic who grabs a screwdriver and starts hammering away. Aside from being against “The Code” to never use a screwdriver as a pry bar or punch, it’s about the worst tool you can use to remove a bearing.
The correct way to remove a bearing, bearing race or bushing is to use a knockout tool or puller. Bearing pullers are available from most aircraft tool suppliers and are a phone call away. Knockout tools tend to be more ad hoc. Case in point is this month’s project: A friend is restoring the nose gear on a ’50s-era Bonanza, which has a large V-shaped magnesium casting fitted with plain bearings. Most people would call them bushings, but since they’re called bearings in the Beechcraft service manual, that’s what we’ll go by. In any case, there’s one at each end to allow the steering cylinder to rotate in the casting. With the plane on jack stands, there was a good ¼ inch of slop in the steering mechanism. After 60-odd years, the original bearings were worn out. Go figure.

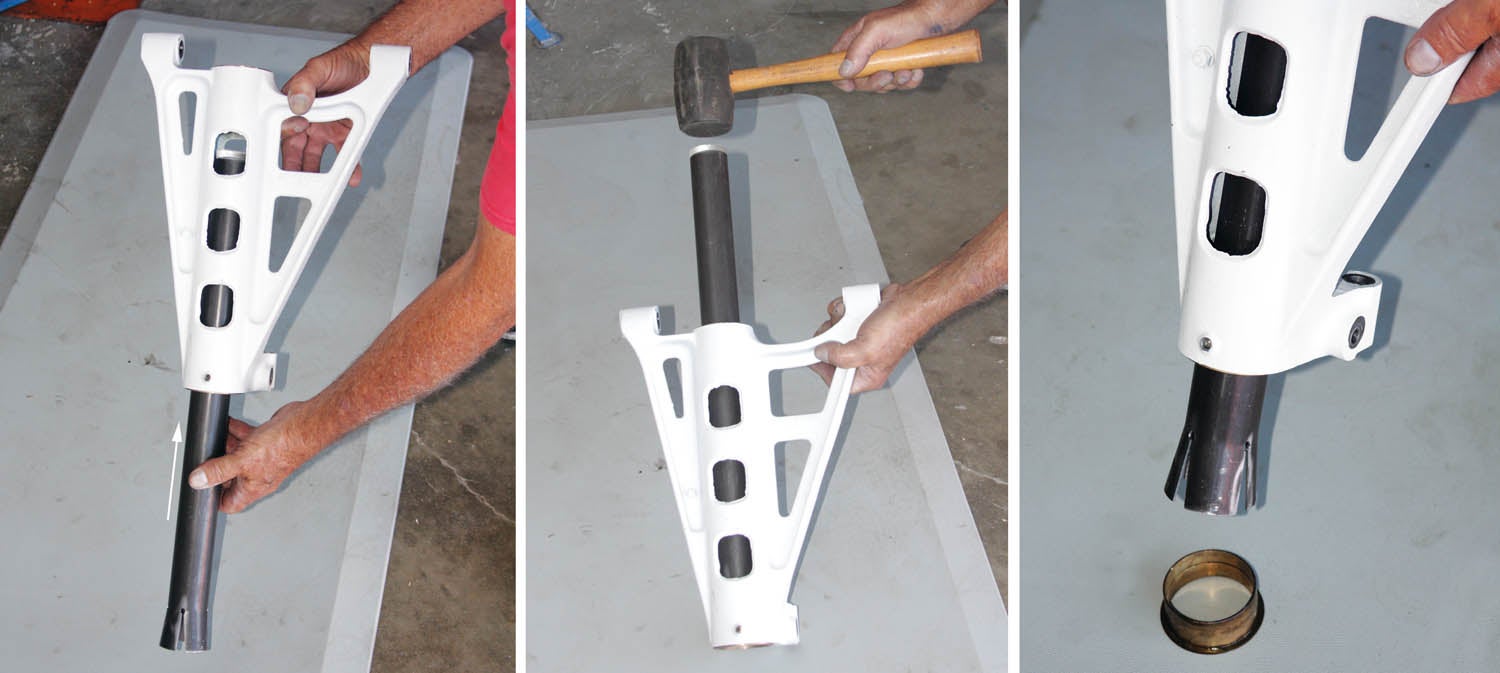
With the nose gear off and disassembled, getting the bearings out of the casting proved to be a challenge. The sleeves were worn so thin that there was hardly any shoulder left to catch the edge of a traditional knockout bar. Using a close-fitting tube proved futile as well. There was simply not enough of an edge to keep the tool from slipping off the shoulder.
As an avid bicyclist, over the years I have collected an abundance of bicycle-specific tools. I instantly realized the Bonanza steering design was basically an oversized bicycle headset—and I knew just the tool for the job: a bicycle head cup remover. The only catch was, the Bonanza steering cylinder is a bit larger than my bicycle tool, so it was out to the shop to make one.
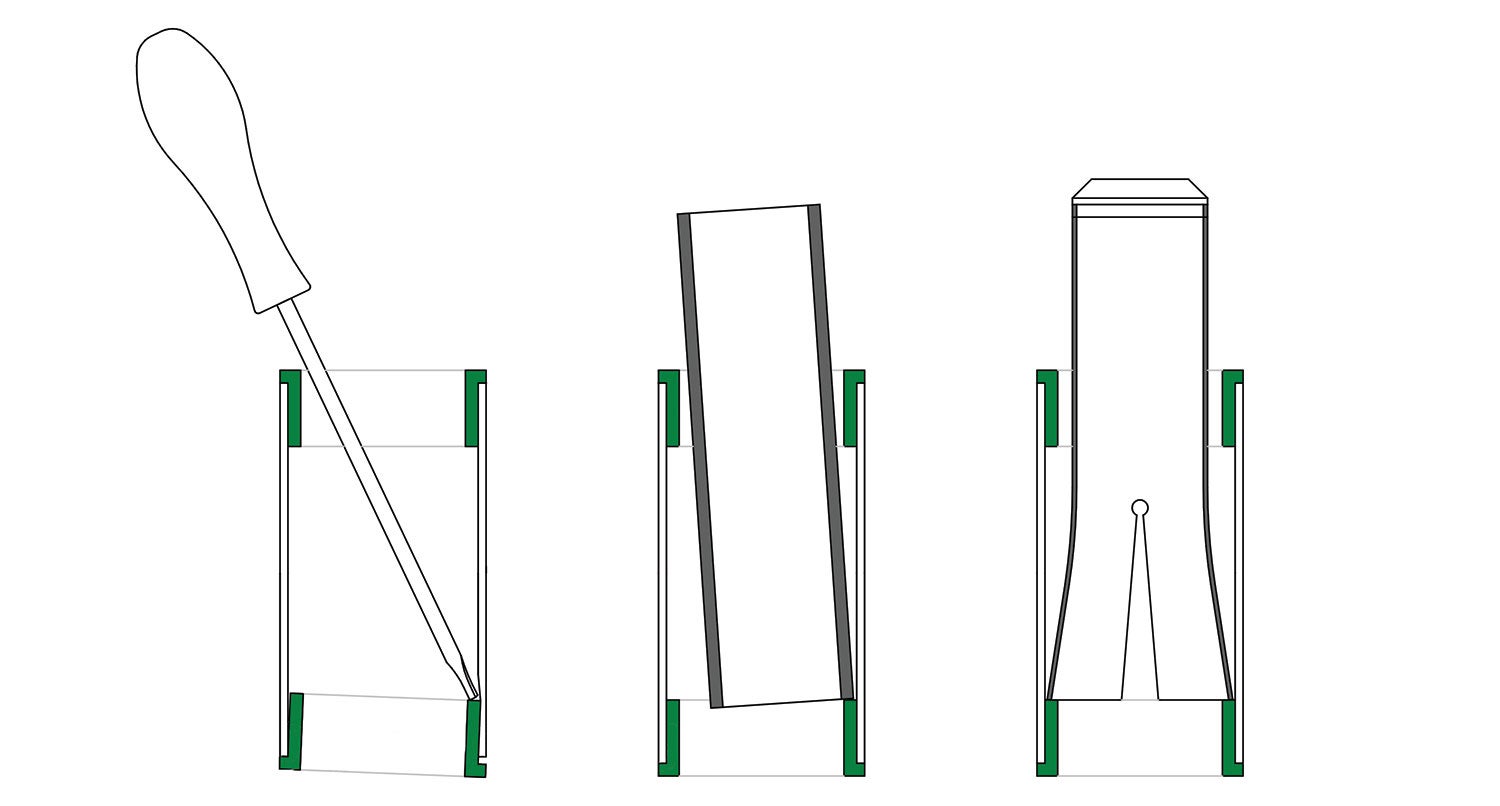
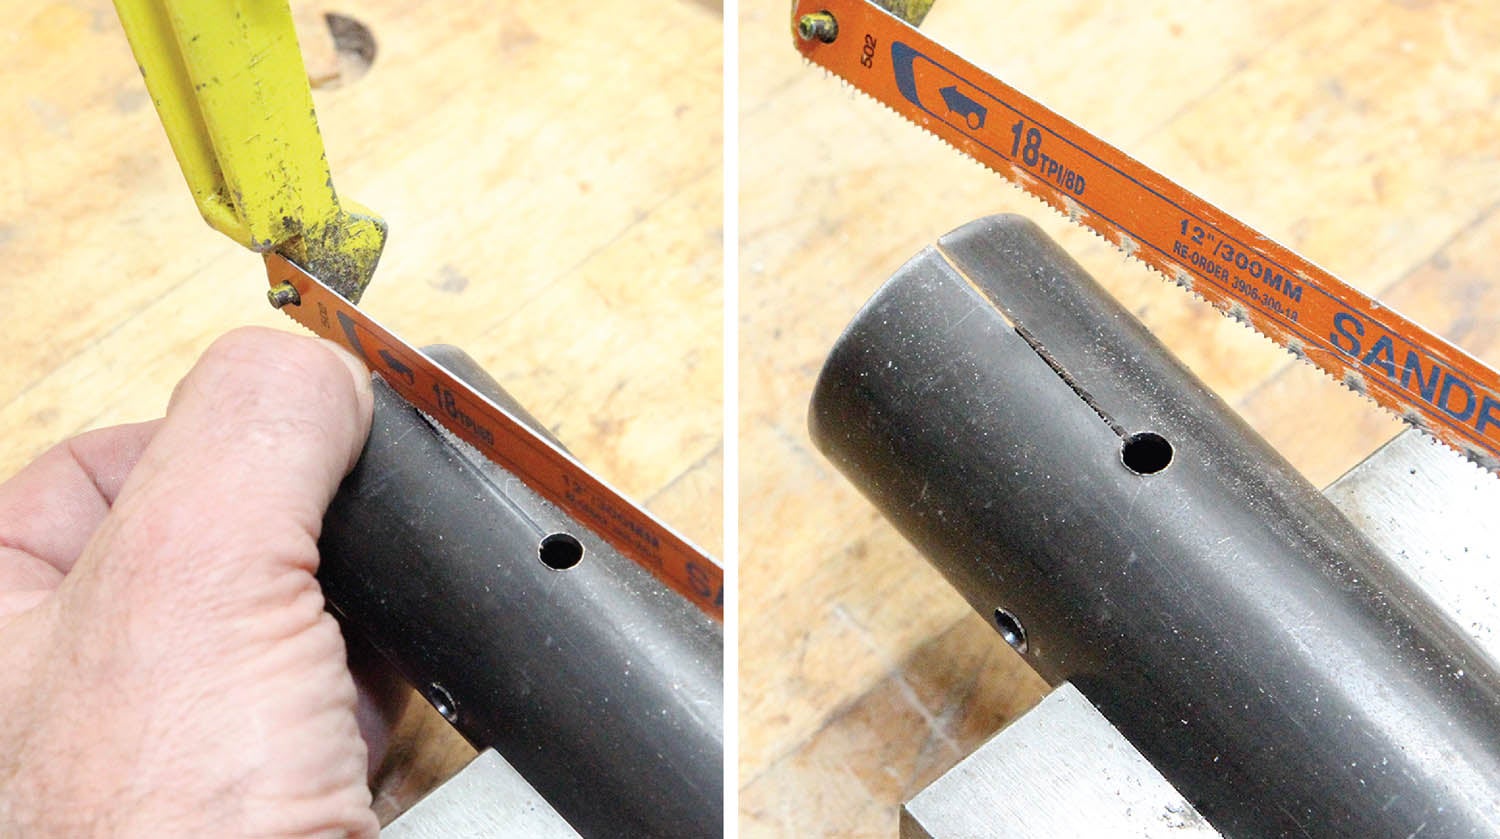
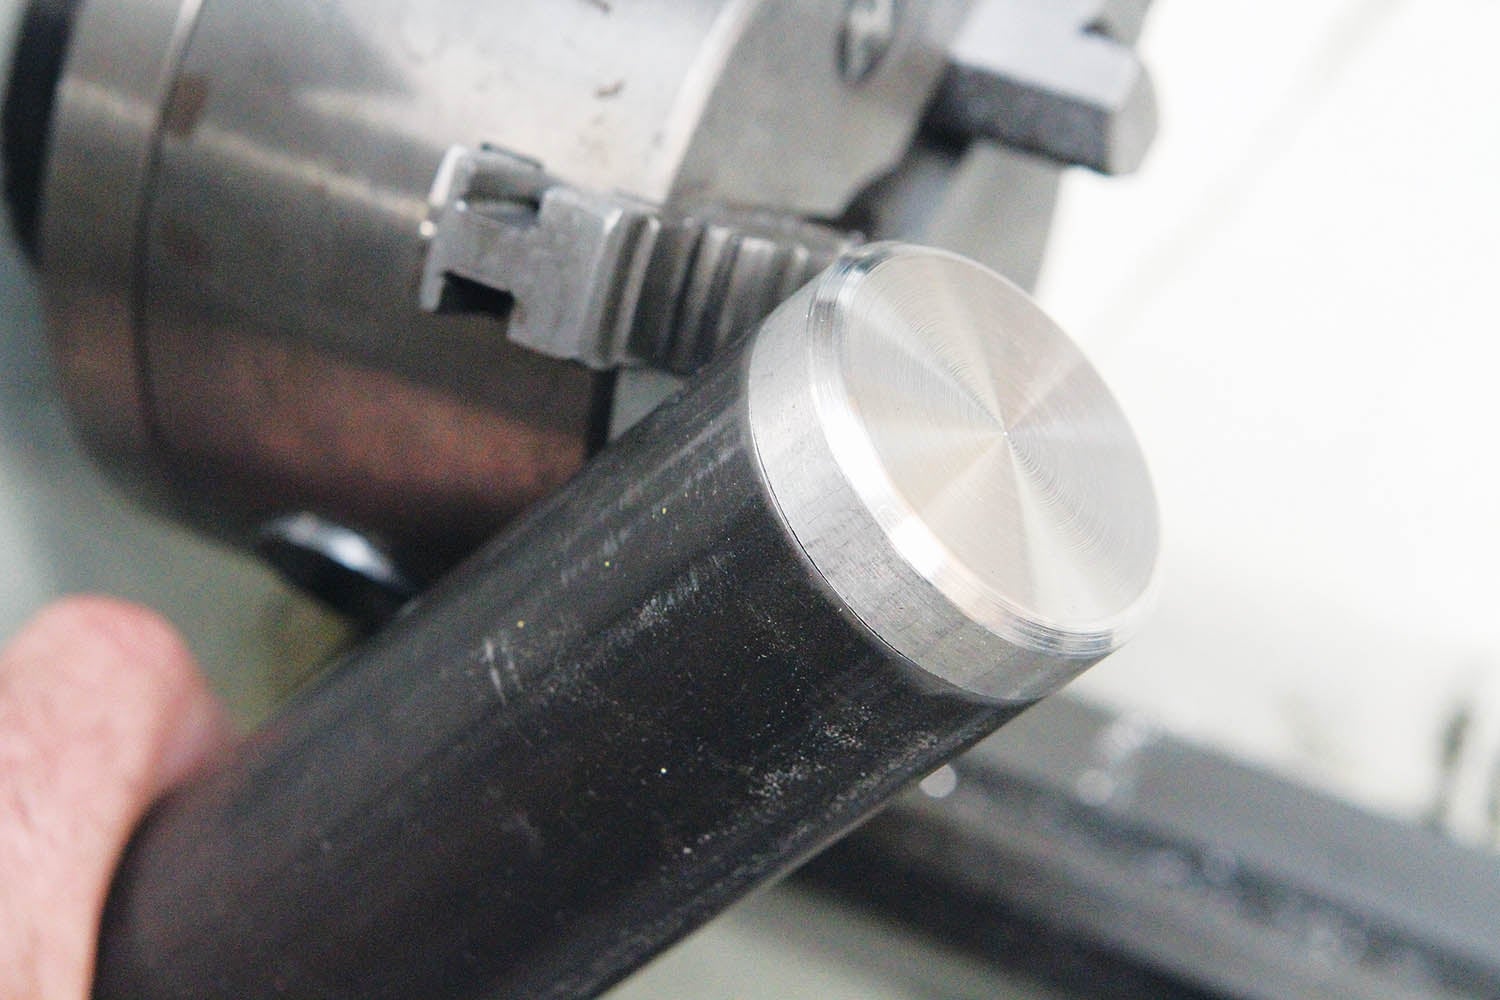
To give credit where credit is due, what I made was a home shop version of a Park Tool RT-1 headset cup remover. It’s basically a long tube with a flared end that gets pulled through the bearing. As the tangs go past the bearing, they spring out against the cylinder walls and seat against the lip of the bearing. A few taps with a hammer and the bearing pops out. It is ingeniously simple.
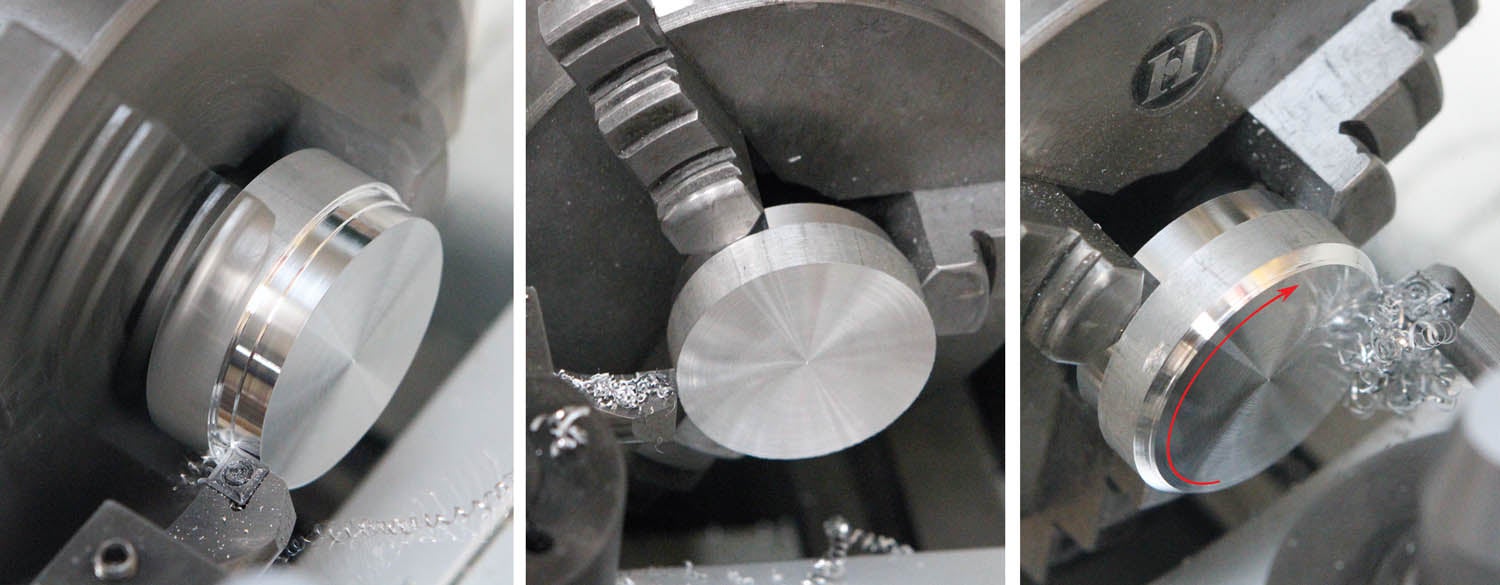
Since the knockout pressure is spread evenly, bearings tend to pop out much easier than tapping back and forth with a knockout bar.
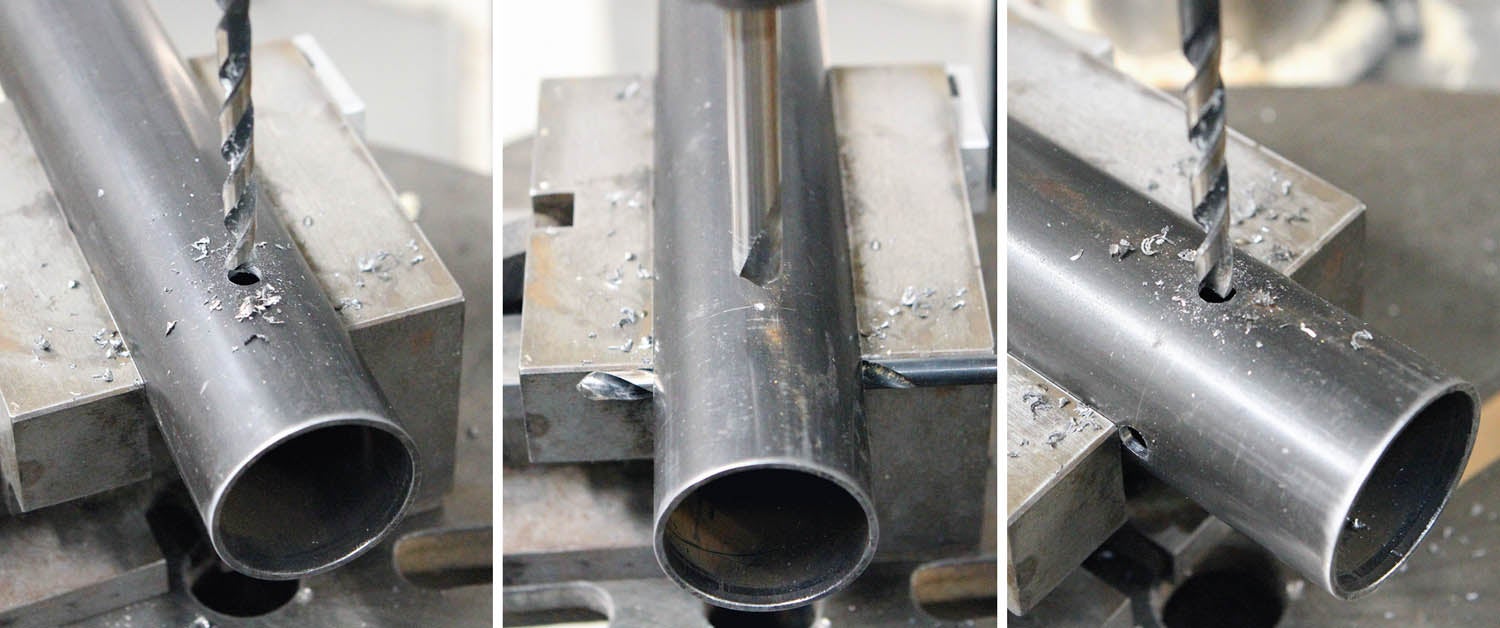
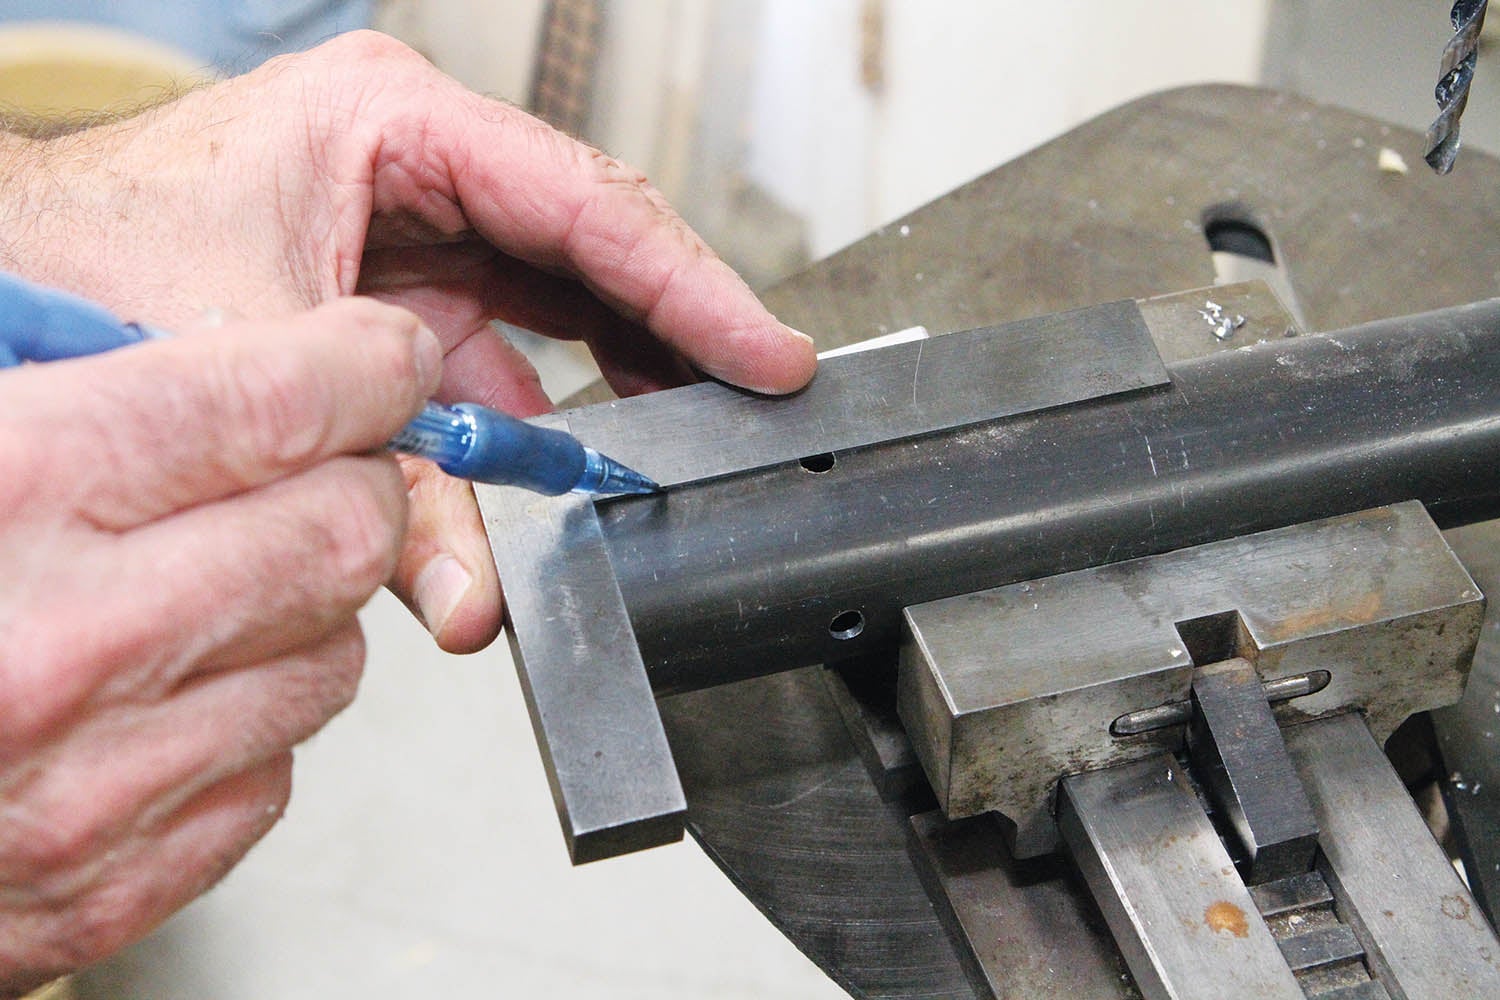
The tubing I used for this project was 1-5/8-inch diameter, 0.065-inch wall, 4130 chrome-moly steel. 4130 is ideal for this type of project. It’s tougher than mild steel and retains good springback characteristics, even after bending the flares.
This is one of those tools that you don’t need until you do. My advice is to tuck this column away for down the road. After all, hardly any Experimental airplanes, and even fewer kitbuilt planes, are as old and worn-out as my friend’s Bonanza. Who knows? If the Bonanza is still flying 60 years from now, someone will no doubt need to use our knockout tool again.
That’s it for now. It’s time to get back out in the shop and make some chips!


Like this tool. Was wondering if the purchase on the bearing might improve if the opened end was given a slight dressing on a sander to bring the flared end edges back to 90 degrees. Otherwise the contact points seem like the center of the opened flange first while the 4 corner points were still inside the diameter, where they would be trying to leverage the flare closed, or else trying to round off the edge where you were trying to get purchase. And mebbe I’m overthinking this.
Comments are closed.