How could my timing change when no one has touched my magnetos for at least a year? Besides external timing, which is what you set with your timing light every year when you do your annual, magnetos have what is called internal timing or E-gap. Normal wear and tear of internal parts, especially the breaker points, can affect internal timing even when the magneto itself has not moved.
Do It Youself?
Adjusting internal timing is more difficult than setting external timing, but you can do it with a little help from a more-experienced friend. The purpose of this article is not to encourage you to attempt this work, but to inform you of the process. If you decide to tackle internal timing adjustment you should do so under the supervision of an experienced aviation mechanic. As with external timing, the process is not so much difficult as it is important to get it right. Magnetos are the essence of simplicity when they are set up correctly, but they can be a major source of trouble with a capital “T” if they aren’t.
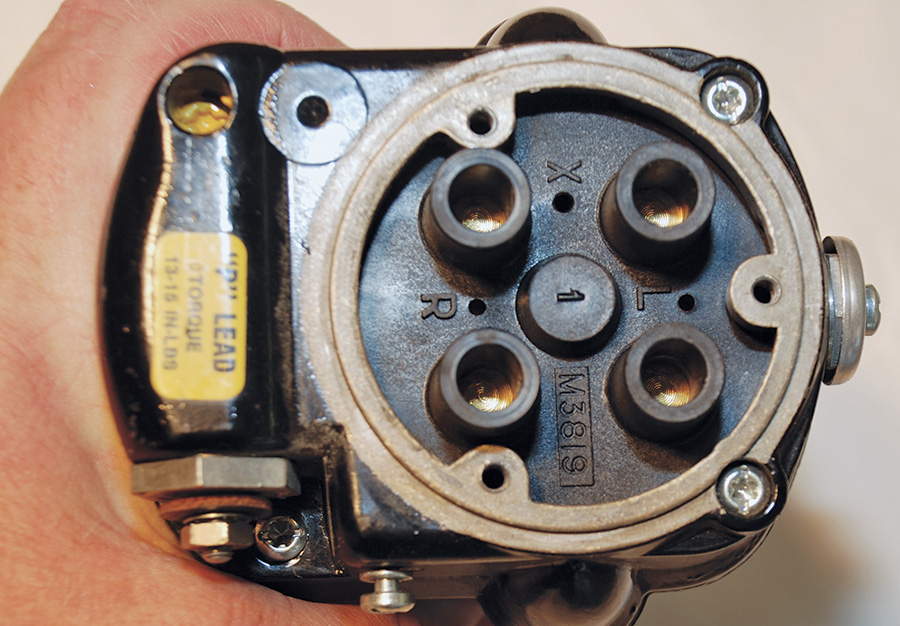
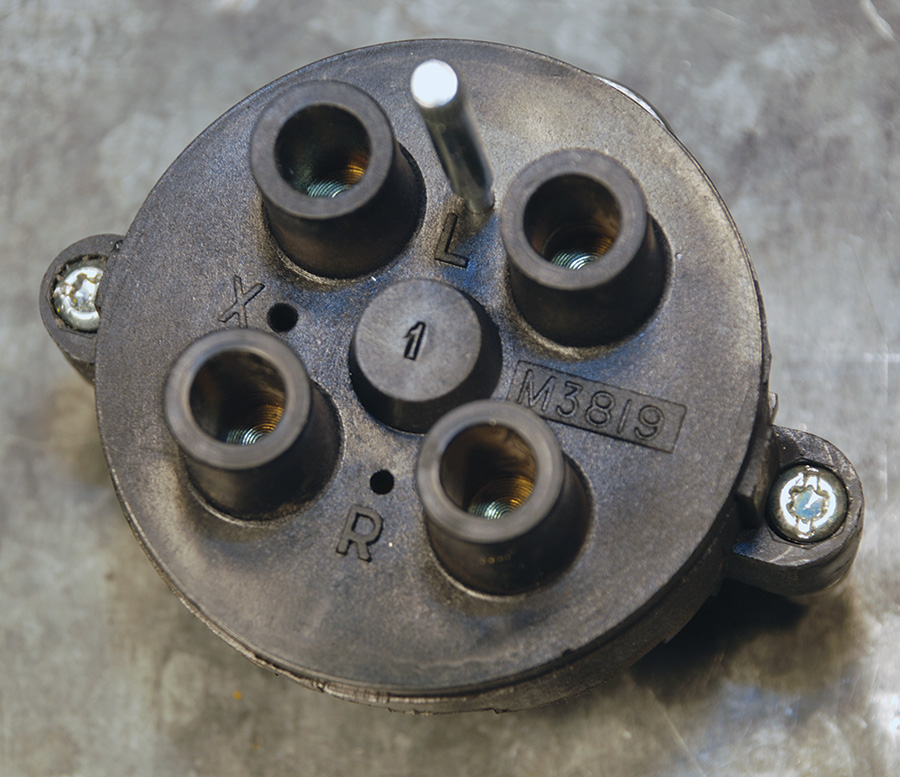
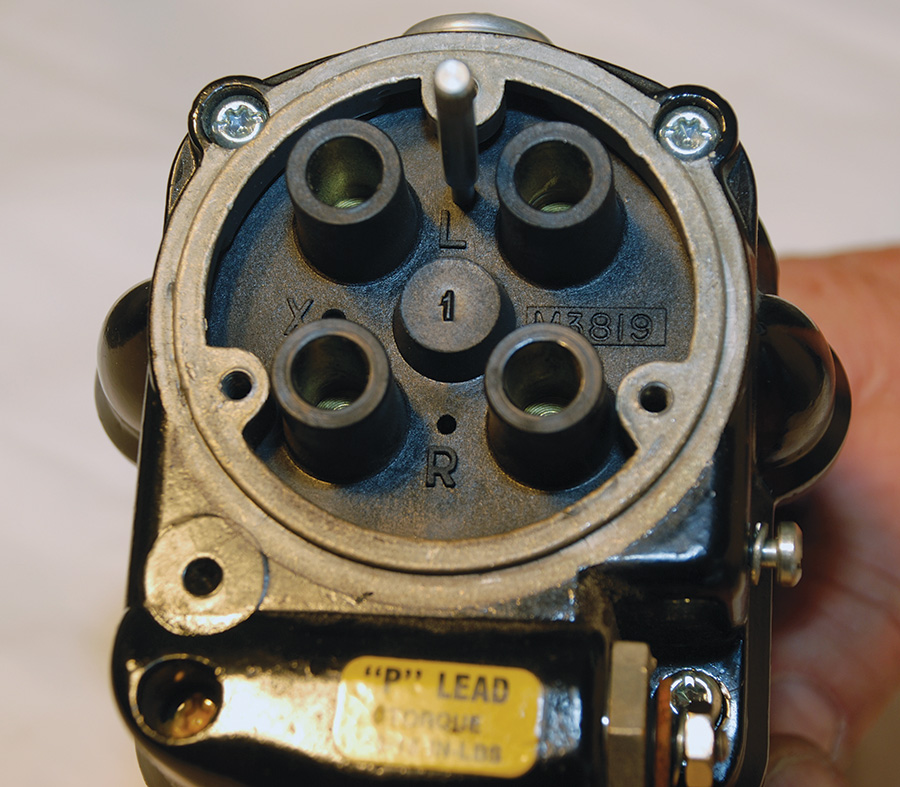
This is what the magneto top looks like with the spark plug wires and cap removed. Four screws hold the top part of the housing in place.
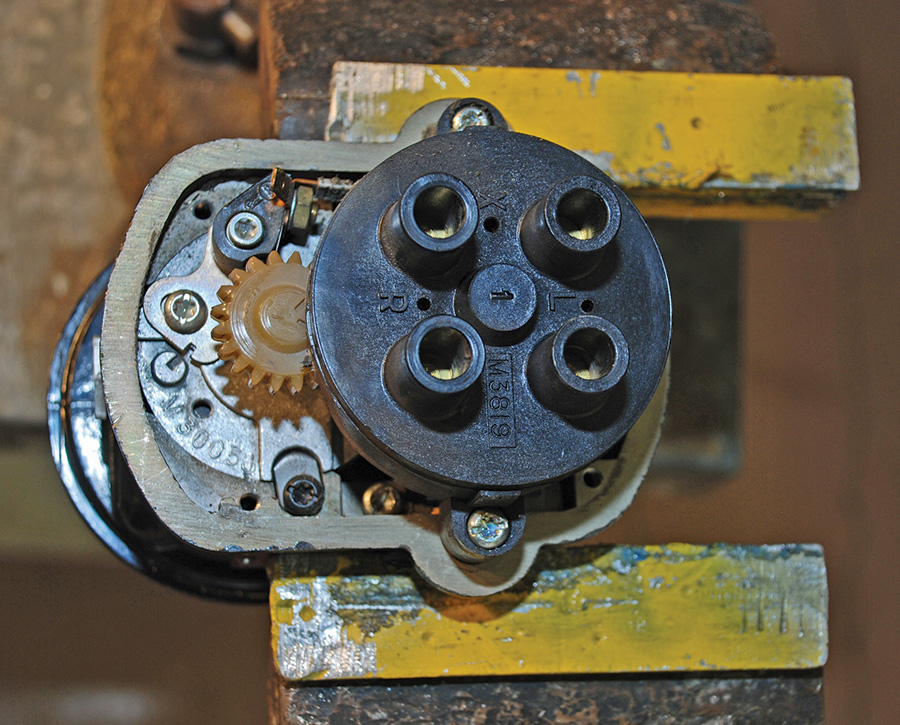
Once you remove the upper part of the magneto housing, you can see the distributor block (round, black) and the drive gear.
It is most likely that you will never need to reset internal timing in between magneto overhauls, but if you feel the need and have the correct tools and expertise, here is how you do it. In all cases, it is strongly recommended that you acquire a copy of the Slick L-1363F 4300/6300 Series Magneto Maintenance and Overhaul Manual. You can view the manual online at various sites or purchase it for $23.50.
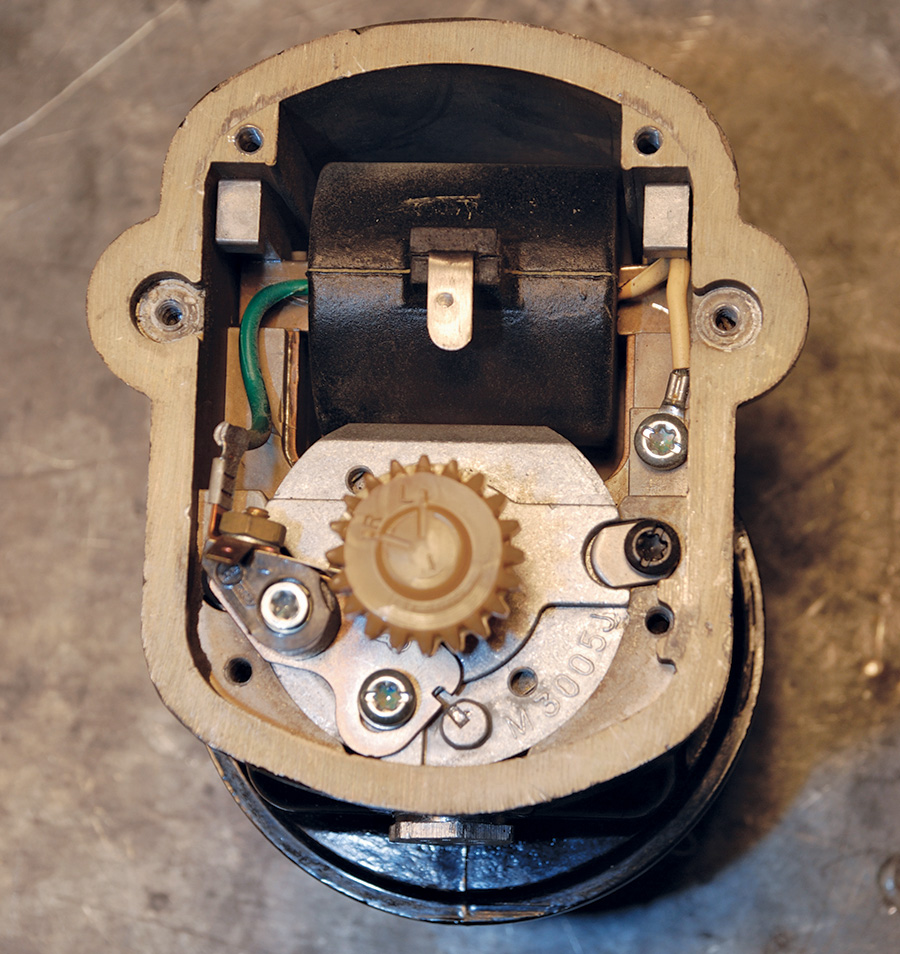
With the distributor block removed you can clearly see the coil and the points. The coil should be positioned so it is at the top.
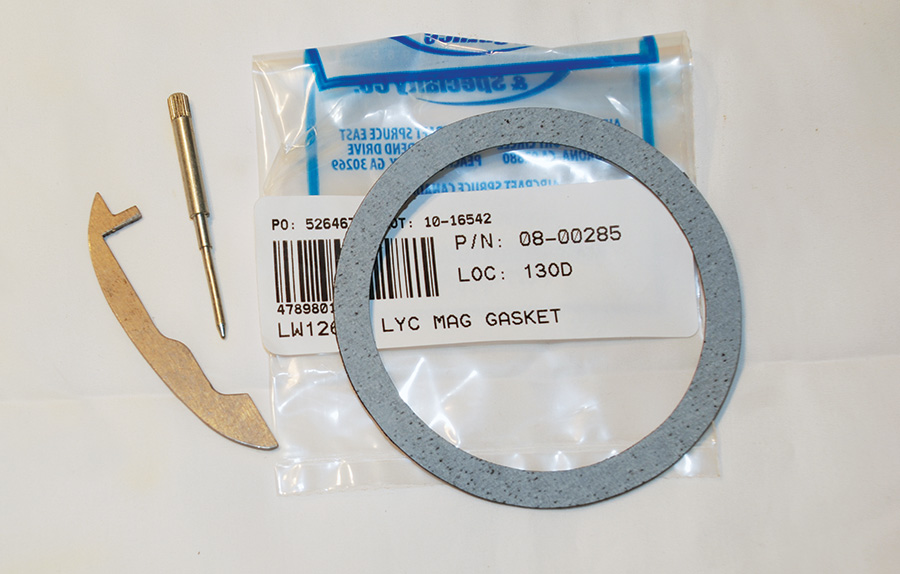
To set the E-gap you will need a T-150 E-gap tool (left), a T-118 locking pin (center), and most likely a new magneto gasket.
To set the E-gap or internal timing on a Slick magneto you will need a Slick T-150 E-gap tool. It is available separately from Sky Geek (www.skygeek.com) for about $15. Other vendors only seem to have it as part of a $500 Slick magneto kit, which contains many extra tools that you don’t need to set internal timing. The tool should come with instructions for its proper use. Here are the basic steps:
1. Remove the magneto from the airplane, including removing the spark plug wires and cap.
2. Remove the distributor block (round, black plastic part) and set it aside. The coil is now clearly visible.
3. Remove the upper part of the magneto housing from the magneto, and hold the magneto so that the coil is at the top (12 o’clock position).
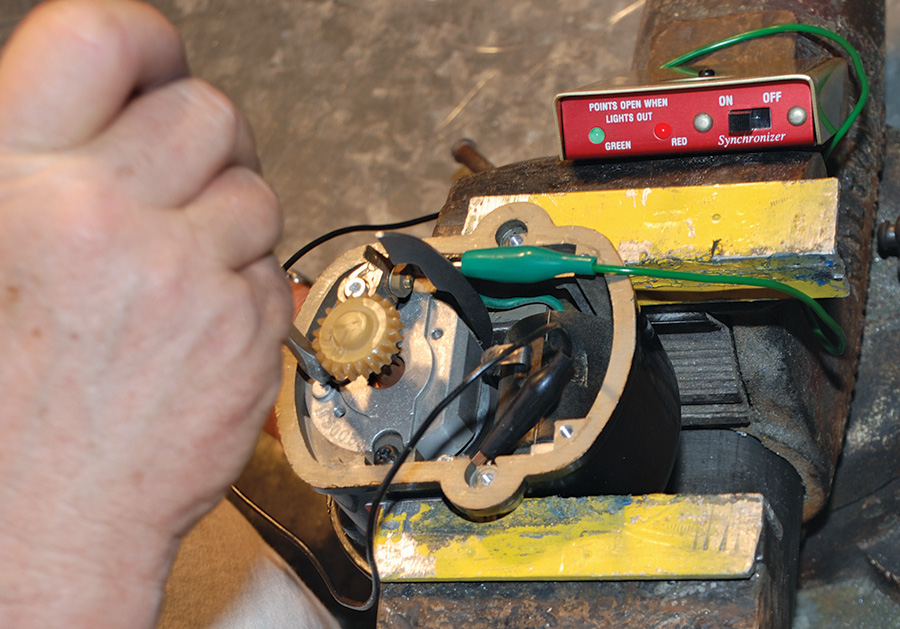
Use your timing light to see exactly when the points open as you adjust them. Note the position of the E-gap tool, which is positioned for a left-hand mag.
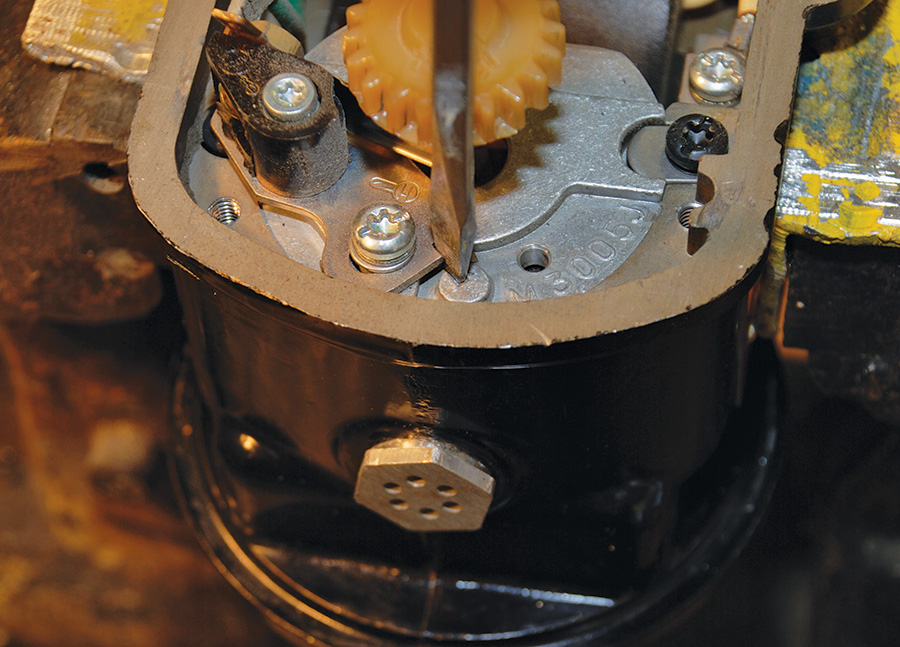
4. Locate the armature. It is below the white nylon gear. There will be two slots cut into the side of the armature. One marked “R” the other marked “L.” Place the T-150 tool into the “L” slot for a left-hand magneto or the “R” slot for a right-hand one. The notched end goes in the slot on newer mags with the slot in the magnet head, but the flat end works best on older mags without the slot in the magnet head. The data plate will tell you if you have a right-hand or a left-hand magneto.
5. Rotate the magneto housing while holding the drive gear in place so that the armature turns in the housing. Turn the housing clockwise for left-hand mags or counterclockwise for right-hand mags. Turn it until the E-gap tool rests against the pole laminations in the magneto frame. You are now in the E-gap position.
6. Loosen the points retaining screw enough so that the points baseplate can move with moderate effort.
7. Connect your magneto timing light so that the ground wire goes to the magneto housing and the green or red wire goes to the points wire connection.
8. Holding the armature steady, adjust the breaker points so the timing light just begins to indicate the points opening. To do this you will need a flat-blade screwdriver. Place it in the slot on the edge of the points baseplate and turn it slightly right or left as needed to make the points move. With the points properly set, tighten the screws that hold them in place.

To reassemble the magneto, first line up the mark on the drive gear so it points towards the coil (up). If the mag has a right-hand rotation, line up the “R” mark, or use the “L” mark for a left-hand magneto.
9. To reassemble the magneto, first align the “L” or “R” mark on the distributor gear (white nylon gear), depending on the magneto, so it points towards the 12 o’clock position.
10. Place the T-118 locking pin in the distributor block and rotate its gear (not the gear on the armature) until the locking pin goes all the way down into its indexing hole, then carefully reinstall the distributor block. Use some Locktite 242 on the screw threads.
11. Reinstall the magneto housing. When you do, be sure the wire from the condenser is connected.
12. Reinstall the magneto on the engine. Don’t forget to remove the pin before you attempt to set the external timing. Please refer to the previous article on external timing to properly reinstall your magneto.
If your magneto has gone 500 hours or more since it was last serviced, it probably makes more sense to have it professionally overhauled than to bother with resetting the internal timing. There are many other things that need to be done to your magneto besides setting the timing to keep it running at its best. Some of these things can only be done by a magneto shop.
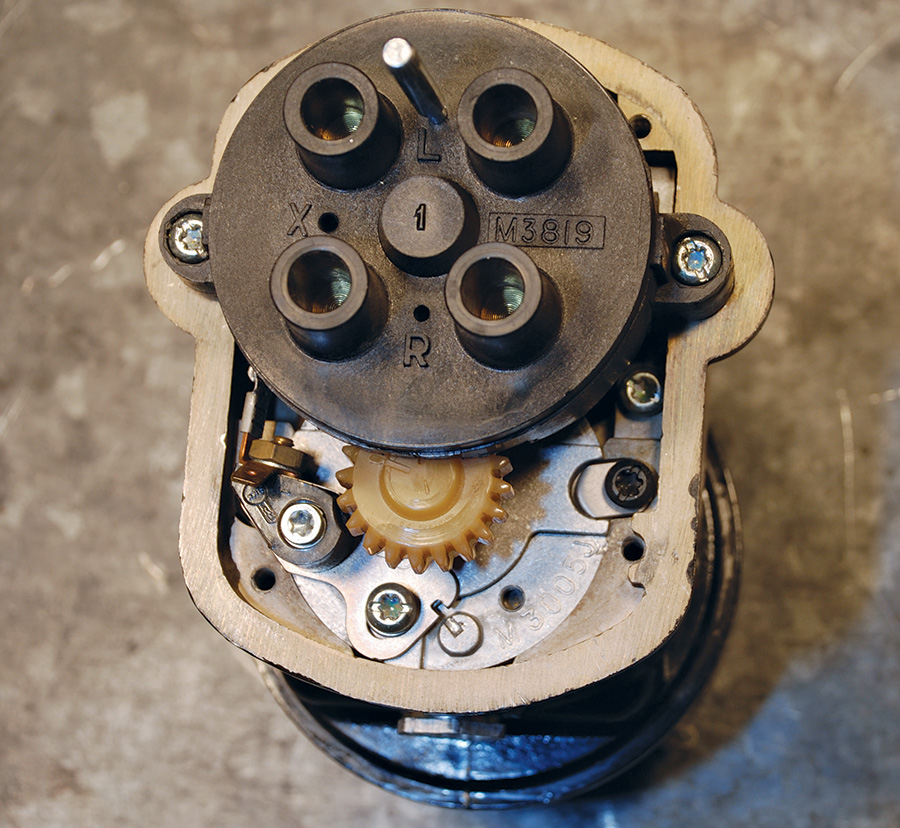
Carefully install the distributor block without disturbing the drive gear. Use some Locktite 242 on the screws.
Again, the point of this article is not so much to encourage you to try your hand at setting internal timing, but to inform you of its existence and the steps required to adjust it. Almost every A&P mechanic had to set the E-gap on a magneto as part of his or her practical exam, but many years may have passed since then. Because of this, it may be harder than you think to find someone to help you perform this task, but if you are really interested, look around until you find someone. Half the fun can often come from meeting new people and trying things others won’t.

![]()
Dave Prizio is a Southern California native who has been plying the skies of the L.A. basin and beyond since 1973. Born into a family of builders, it was only natural that he would make his living as a contractor and spend his leisure time building airplanes. He has so far completed three—a GlaStar, a Glasair Sportsman, and a Texas Sport Cub—and he is helping a friend build a fourth, an RV-8. When he isn’t building something, he likes to share his love of aviation with others by flying Young Eagles or volunteering as an EAA Technical Counselor. He is also a member of the EAA Homebuilt Aircraft Council.





Have learnt alot about mag timing