I never set out to write a hardware trilogy, yet here we are. A little ditty on washer usage begat a column on bolt-length selection and I was to be done there until I realized I’d left things hanging. Here, I address the nuts and bolts of installing nuts and bolts. Specifically, self-locking nuts (stop nuts) on the bolts of permanent, non-rotating assemblies. If you need to pour yourself a drink before we begin, I understand. I did.
Inserting the Bolt
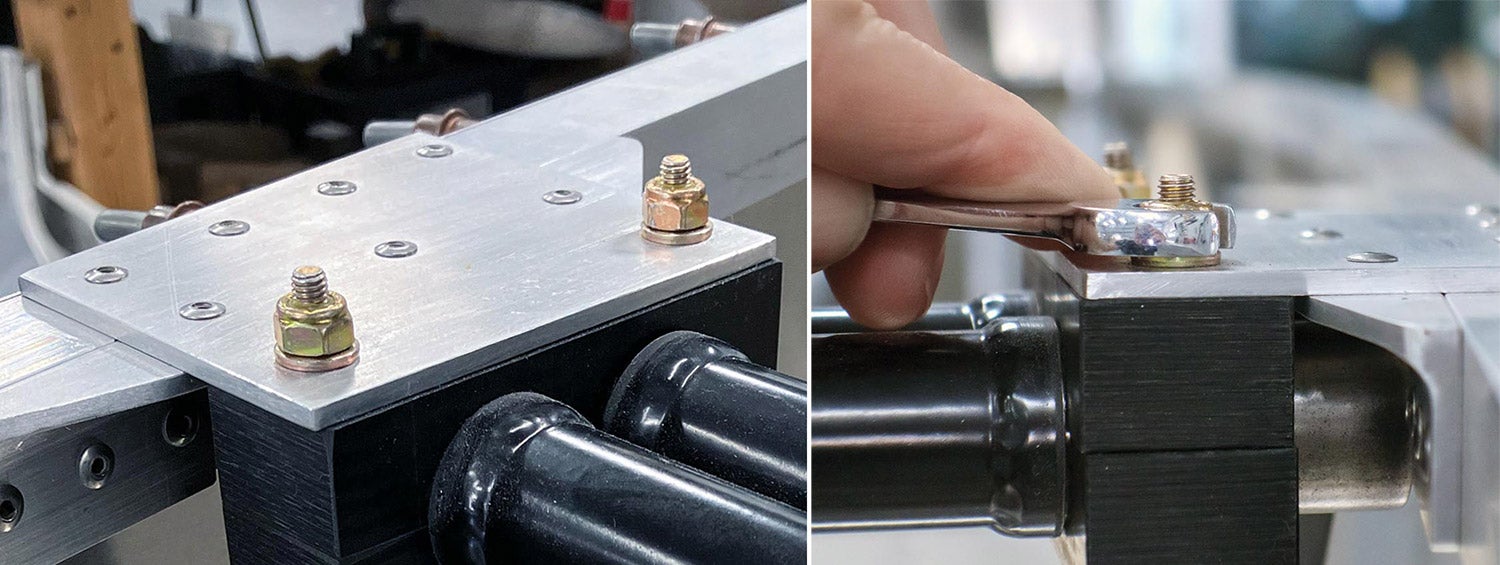
Installing a nut begins by installing the bolt. You didn’t buy this magazine to be told something so obvious, so I’ll tell you some things I’ve found some builders don’t find so obvious. To begin, there’s that pesky rule of thumb that the head of a fastener must face forward or up on an airframe. The thinking, I guess, is if a nut falls off, gravity or something (the airstream?) will hold the fastener in place and critical parts together until the next condition inspection. That rule falls apart when you glance at the bottom of any airplane, where all the bolt heads face down. We want the outside of an airplane to be smooth. Smooth is aerodynamic. Smooth doesn’t remove flesh from your scalp. Smooth doesn’t take chunks out of the sponge you use to wash your airplane. Cockpit safety also informs the direction from which a bolt is installed. Fasteners in the panel break the rule of thumb that the head should face forward. Not only would nuts and the threaded ends of fasteners be unsightly in a panel, they are hazardous to the occupants.
When a fastener can be installed from either side of a hole—not uncommon inside an airframe—common sense dictates the best approach, if there is one. There may be only one option, which may defy the rule of thumb, if access to the bolt’s hole is restricted by structure. If the construction documentation doesn’t specify how a bolt is installed, it probably doesn’t matter. If it directs an approach that doesn’t seem right, it’s probably for good reason. Like real thumbs, rules of thumb sometimes get smashed.
There is also the physical act of inserting a bolt in its hole to consider. Avoid twisting or “screwing” a bolt into its hole. That can cause circumferential scoring on the bolt’s shank, weakening its strength. If you encounter resistance inserting a bolt with your thumb, tap it in with a rubber mallet. Doing so also eliminates an oft-cited reason for placing a washer under the head of a bolt, which is to keep the head of the bolt and the tool from damaging the surface of the airframe.

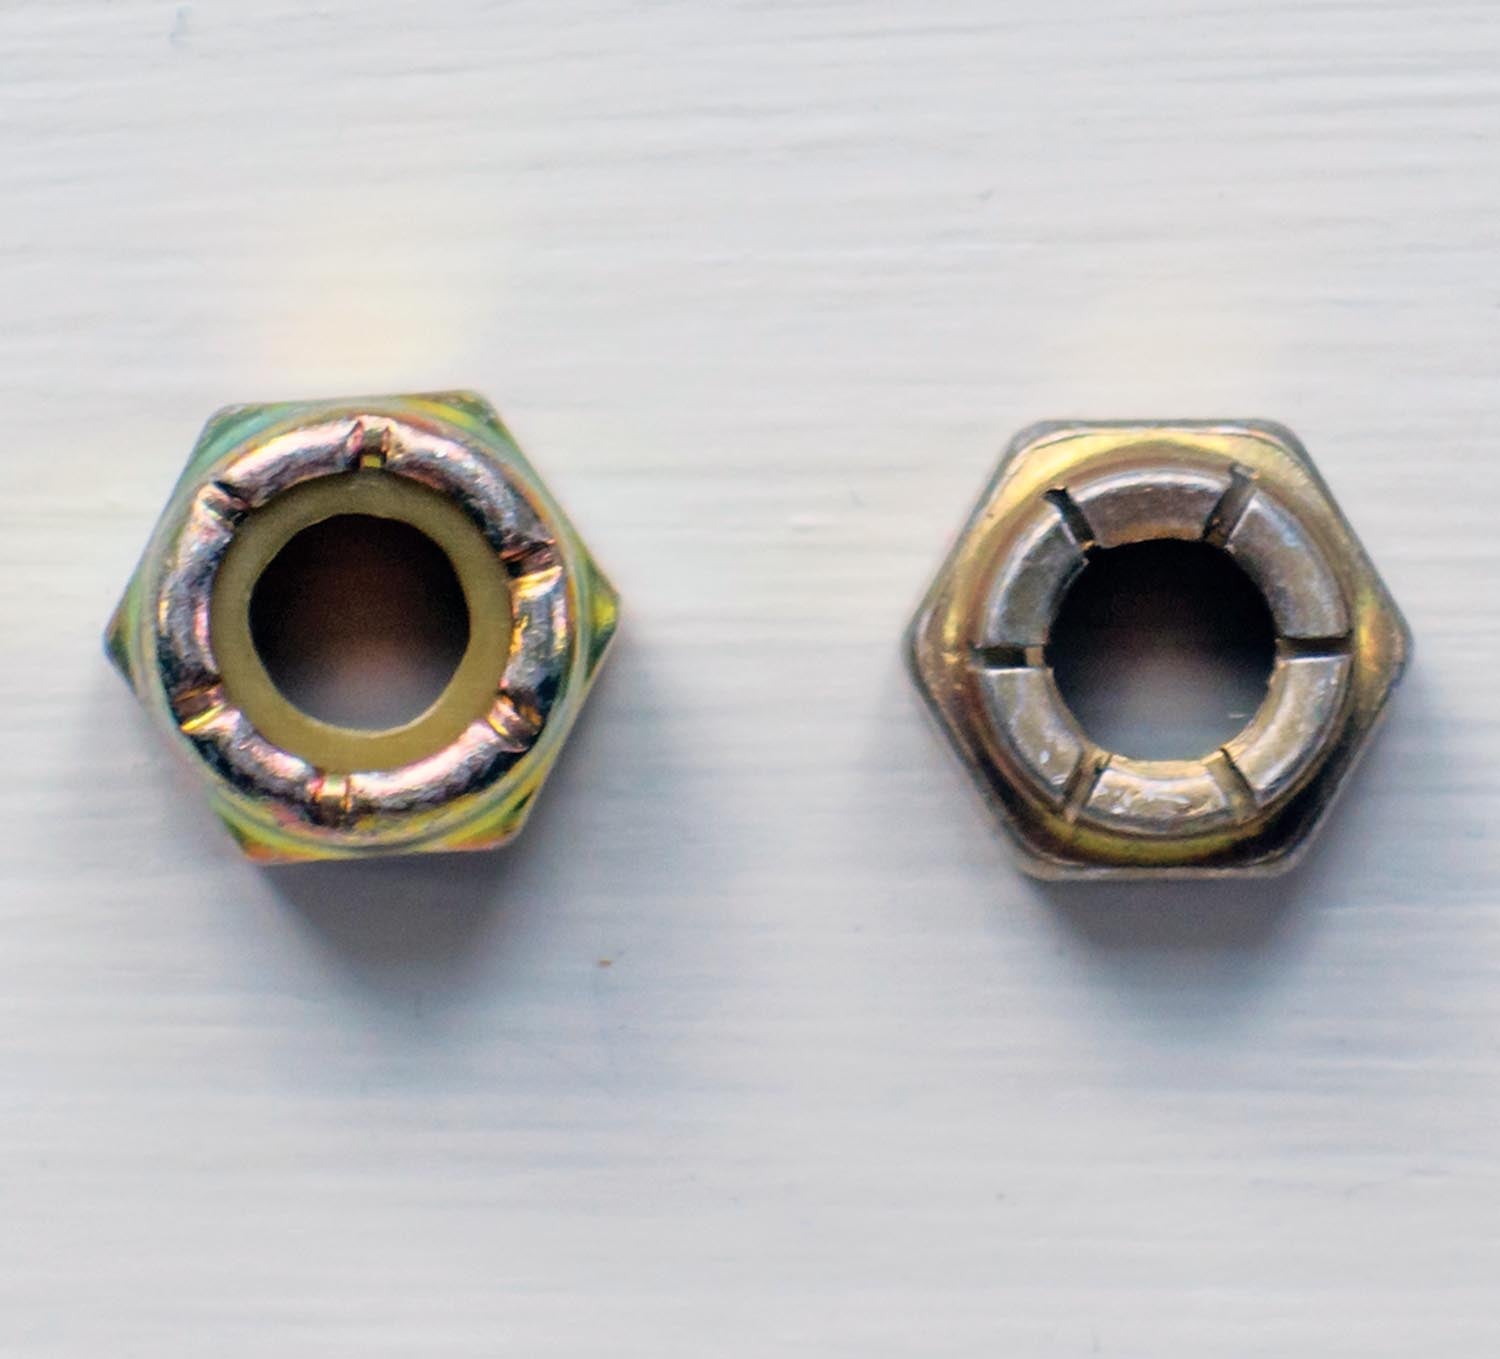
Self-Locking Nuts
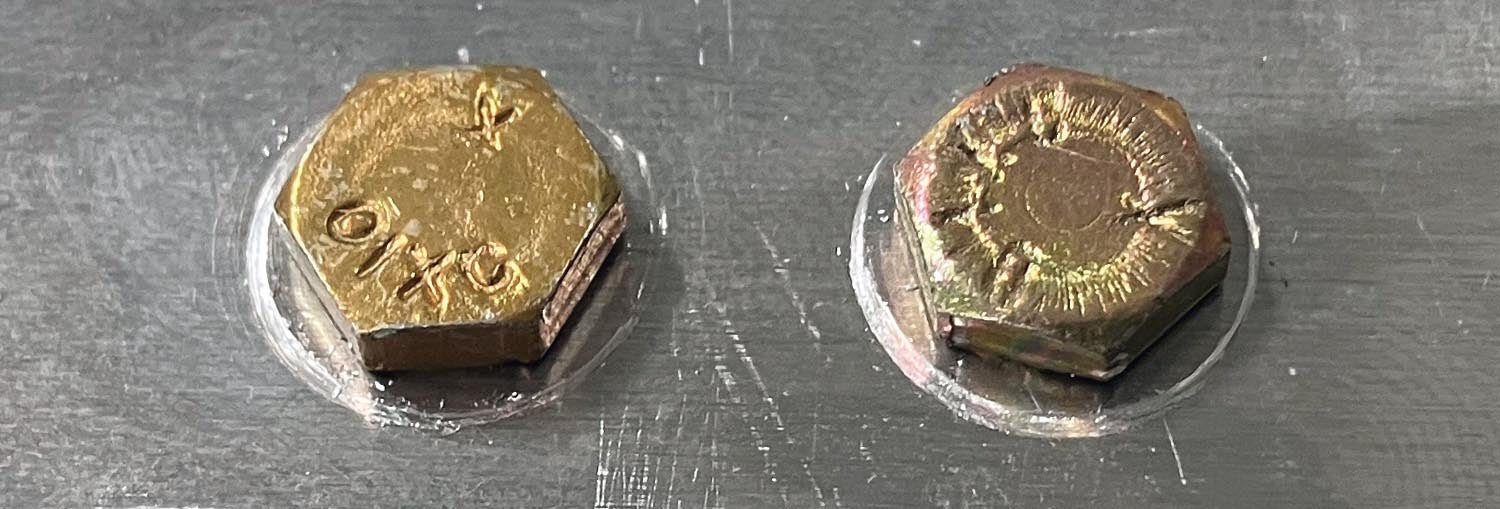
I’m going to say very little about the actual nuts. The two most common self-locking nuts are elastic stop nuts and all-metal stop nuts. The elastic stop nut is the primary style used in many airframes. The all-metal stop nut is most commonly found where temperatures exceed 250° F. Both styles share the characteristic of having a high-friction grip on the fastener. However, they lose some of their grip each time they are used. It is generally accepted that a lock nut can be reused once. If you work on an airplane someone else built, you won’t know if the nuts you remove have already been reused. Always reach for a new one. When putting something together temporarily, use a used nut for the initial assembly and replace it with new for the final assembly. There’s no point in compromising a new nut for a temporary need.
Tightening and Torquing the Nuts
Studies exist on whether it is better to secure a bolt by turning the nut or turning the bolt. The results varied. It may matter if you are building a spacecraft or a satellite, or pursuing a Ph.D. in engineering, but we’re not. I feel the benefits of turning (“tightening”) the nut offset any benefit of turning the bolt. On this, Advisory Circular 43.13-1B and I agree. When a nut is tightened onto a fully seated bolt, the bolt can be held stationary, eliminating circumferential scoring of the bolt’s shank and marring of the airframe’s surface. The inevitable washer under the nut will protect that surface of the airframe from the rotating tool. Most important, however, holding the fastener still allows those of us with OCD to align the flats of bolts and the slots of screws with military precision. Winner, winner, the nut’s the spinner.
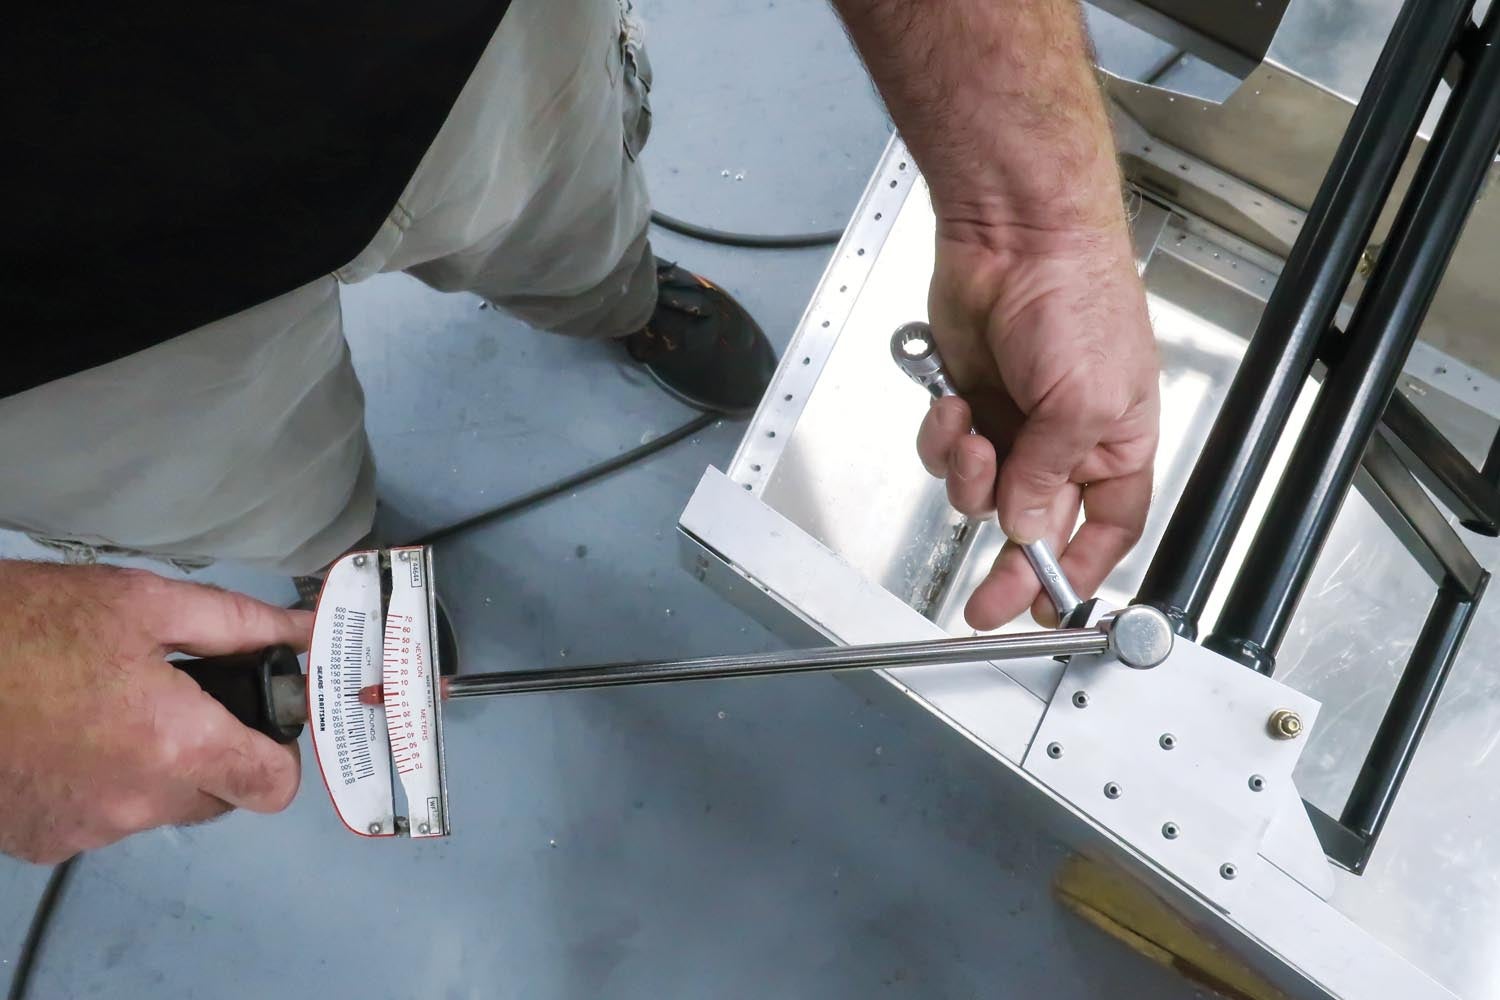
Torquing nuts can be debated for hours without consensus. AC 43.13-1B recommends torquing every nut. I don’t. With two decades of professional experience in homebuilding I’ve dealt with my share of nuts. I snug them by feel, as taught to me by trusted old-timers. When I spot-check my results with a torque wrench I’m spot-on enough to forgo the torque wrench in all but the most critical applications. I’ve seen builders rely on torque wrenches to their detriment. Used improperly, they can provide a false sense of accuracy. It’s more common than you might believe.
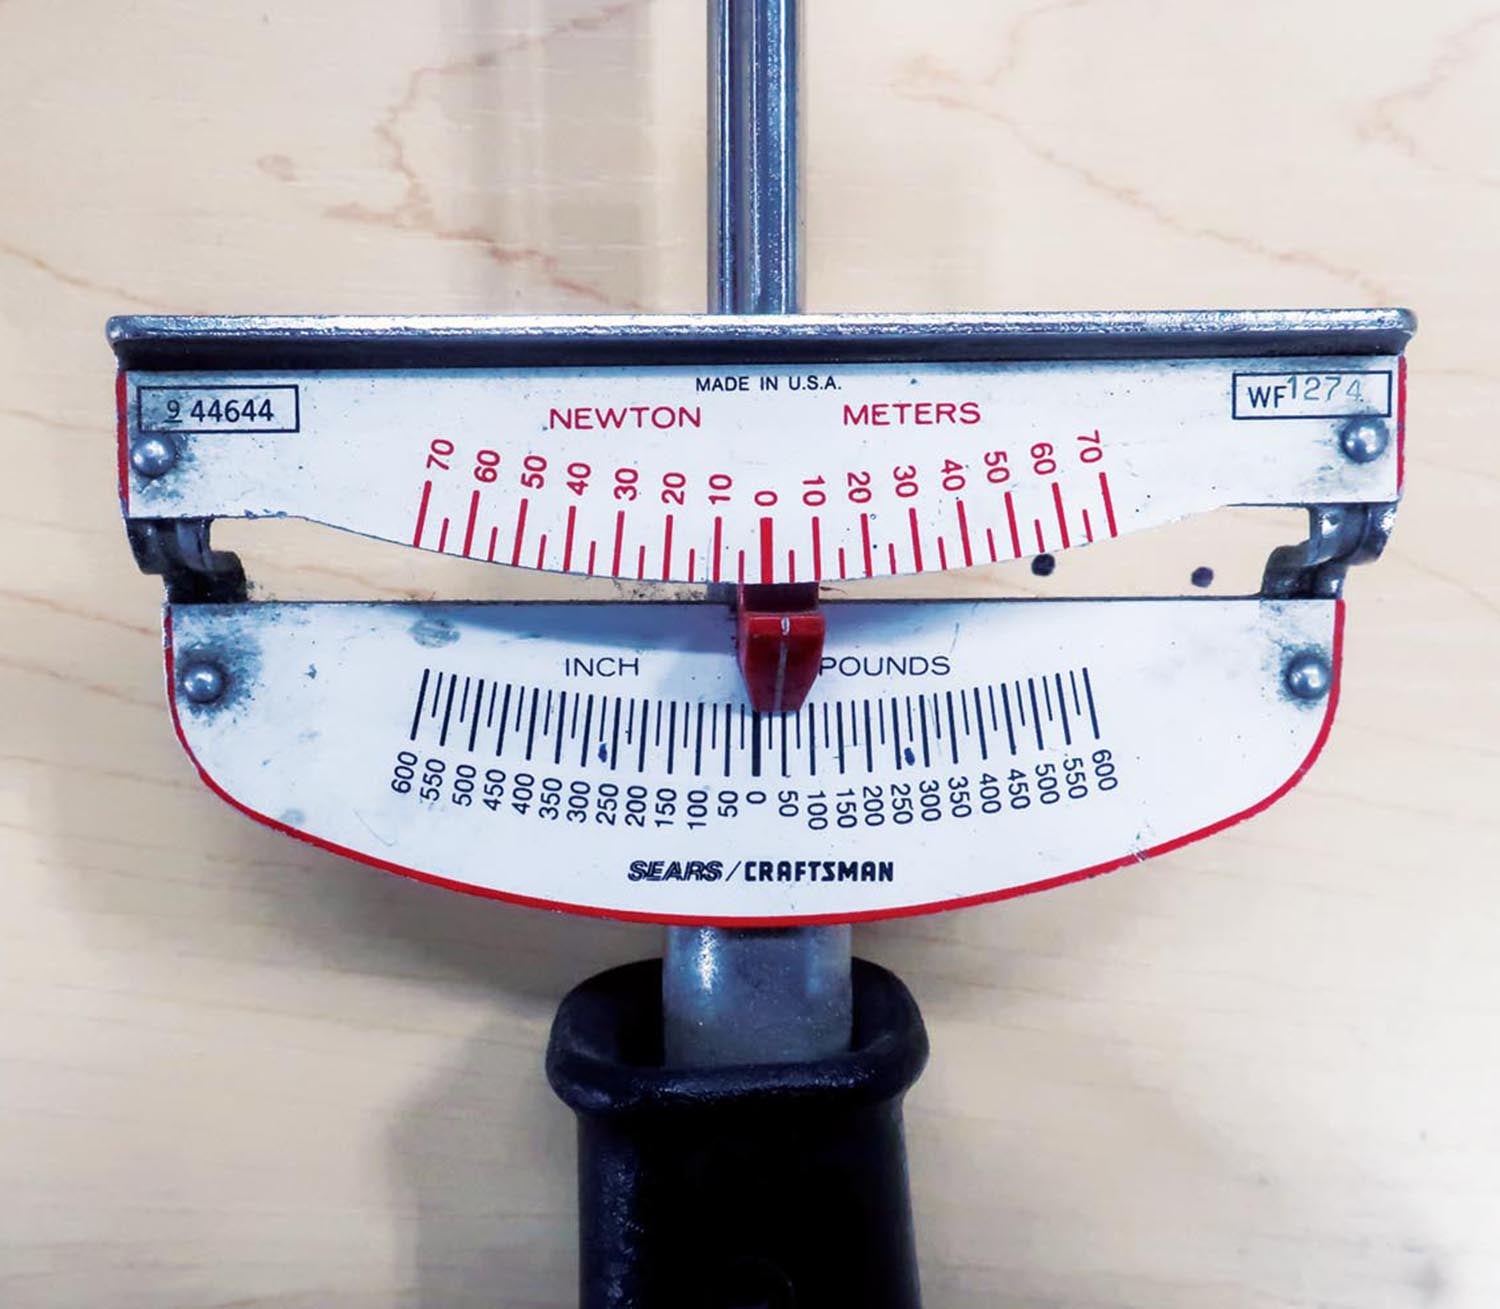
If you use a torque wrench, there is more to it than waiting for the break-away “click” or watching the pointer on a beam-type torque wrench. To begin, torque wrenches must be calibrated at least once a year and after they stand in for a hammer. There is no point in torquing to a very specific value if you aren’t actually achieving that value. You must also make sure the proper value is set. Torque tables reference a bolt’s diameter, not the size of the socket used to tighten the nut. Don’t confuse inch-pounds with foot-pounds. There are different values for fine- and coarse-thread fasteners. Unless the torque wrench is acting directly on the socket—say you’re using a crow-foot adapter or a handle extension—the torque value setting goes out the window and algebra must be deployed to compensate for the change in the tool’s effective length. The torque wrench must be pulled or pushed smoothly until the final torque value is reached; jerking the tool can over-torque the bolt. The threads of the bolt and nut must be clean and dry. Lubricants, sealants or locking agents will reduce friction, resulting in an improper final torque value. Finally, and worthy of its own paragraph, there is the impact friction drag plays on torquing self-locking nuts.
Unlike common nuts, which can be spun onto a threaded fastener by hand, self-locking nuts have a high degree of friction drag when their locking mechanism contacts the threads of the bolt. That drag must be measured and added to a bolt’s specified torque value. For example, if a bolt has a torque value of 50 inch-pounds and the nut has 10 inch-pounds of friction drag, the final torque value must be 60 inch-pounds. The first 10 inch-pounds of effort are serving only to turn the nut on the bolt. If friction drag isn’t added to the final torque value, every bolt will be under-torqued. One last wrinkle: A used self-locking nut will have less drag than a new one. So there’s that.
Who knew so many words could be written about installing bolts and tightening nuts? There’s more I could say, yet I can reduce it to this: Try not to turn the bolt in its hole while tightening the nut and tighten the nut enough so the bolt doesn’t turn when an appropriate degree of effort is applied. If you’re that one builder I encountered who said he never tightened a bolt in his life, you may wish to practice under the watchful eye of an EAA technical counselor, A&P or other trusted individual. The rest of you, go nuts.


I didn’t know any of this when I started building my RV-4 years ago. I learned much of it in the process. I don’t know how we built airplanes before the Internet. Good article.
Too many threads are exposed in the top photo of elastic lock nut
Extra exposed threads hurts nothing. Literally nothing wrong with it.
That was probably done intentionally.. if they used a shorter bolt, the threaded portion would land inside the aluminum hole, and be a potential weak point or act like teeth from a file. By using a longer bolt, the smooth shank is in the clamping stack, however, to remove the possibility of the nut running out of threads and bottoming on the unthreaded portion, they had to use a thick washer.
Hmm … In other critical fastener worlds (high-speed rail, and marine engineering to name two), nuts are to be visible on inspection for looseness. Not sure where the “visible head” rule came from …
Great article. Thanks.
Your zero at 40 in-lbs torque wrench can be adjusted to read correctly. Place the socket boss in vice protected by aluminum angles on each jaw so it is held rigidly. Toing the needle by hand a couple times to see where it lands and if it is consistent, as a baseline. Then ‘over bend’ the needle arm gently, considering spring back, until it consistently lands on zero; The primary arm cross section is actually what bends in torque, while the needle arm remains ‘fixed’ to the fastener.
Comments are closed.