
In the early 1960s, a young Jim Katz was absorbing page after page in Air Progress magazine, and when he saw an article that included three-view drawings of the Bowers Fly Baby, his eyes widened. “Man, I could build that!” he said to himself. That thought never left him. In 1971, when Jim was in high school, he bought a set of Fly Baby plans for about $15. Little did he anticipate that he wouldn’t get around to building it until he was nearing retirement from a 35-year airline career.
Models to Jets
Jim didn’t grow up around general aviation, but he enjoyed listening to his father’s stories of being a P-47 crew chief during WW-II. Jim picked up the modeling bug from his father and has been building model airplanes since he was a boy. “As a kid, I flew free-flight scale models,” said Jim. “I do a lot of pylon racing with models I designed and won three national championships with them.”
Jim started flying lessons in high school and soloed a Cherokee 140 at 16 in October 1969. “Flying was all I ever wanted to do, but when I got out of high school in 1972, the airlines were furloughing. So my dad talked me into studying civil engineering in college,” recounted Jim. “Then in 1974, the airlines were hiring again, and I quit North Carolina State University and went to Guilford Tech’s aviation program in Greensboro. I flew on my own on the side and flight instructed. Then I flew Beechcraft Barons and Navajos for a corporation until I was hired by Piedmont Airlines. I ended up retiring from a 35-year career with American Airlines, flying an Airbus 321.”

Genesis of the Fly Baby
The Fly Baby design has inspired generations of pilots to build their own airplane. It was the late Peter M. Bowers who brought the Fly Baby to life, relying upon his myriad talents as an aeronautical engineer, pilot and aviation writer/historian. The impetus for that project was the 1960 EAA Design Contest. Only two entrants showed up at the EAA meet in Rockford, Illinois, that year—and those aircraft didn’t satisfy the contest requirements, so a two-year extension was granted and the carrot of $5000 prize money was left dangling. As Harry Zeisloft wrote in his article, “EAA Design Competition” (Sport Aviation, October 1960), “The objective of the contest is not to reward an individual for making one aircraft. It is rather to provide all amateur builders with a simple aircraft design which has been proven in flight…[and] to provide [them] with a set of drawings which would permit [them] to duplicate the aircraft.”

The aircraft could be single or multiple seat. It had to fit within the confines of a typical one-car garage and be easily transported on a highway. There were other requirements as well, including economical cost, good performance, a fixed-pitch propeller and airframe components that could be constructed without specialized tooling.
The Fly Baby won EAA’s low-cost, easy-to-build-and-fly design contest in 1962. A color photo of Pete airborne in his Fly Baby adorned the cover of Sport Aviation that December. Pete penned an article for that issue, entitled “The Fly Baby Story,” in which he mused, “Whether it goes on to join such classics of the homebuilt movement as the Corben Baby Aces and the Stits Playboys or slips quietly into oblivion remains to be seen.” The answer, through his lifetime and some 20 years beyond now, is that the Fly Baby design has a faithful—albeit relatively small—following. Its simple fabric-covered wood and wire construction, replete with folding wings for easy trailering—along with its docile flying characteristics—poetically endeared itself to a cadre of stick-and-rudder aviators.

Pete’s building instructions, with plans drawn by James A. Morrow, were published sequentially during the next two years in Sport Aviation. Ultimately, Pete sold more than 5000 sets of plans until his death in 2003. An estimated 500 or so airplanes have actually been built, with a little over 200 still registered—though it isn’t certain how many are still flying. (The Fly Baby Builders Manual is available on The Museum of Flight’s website.)
Fly Baby Construction
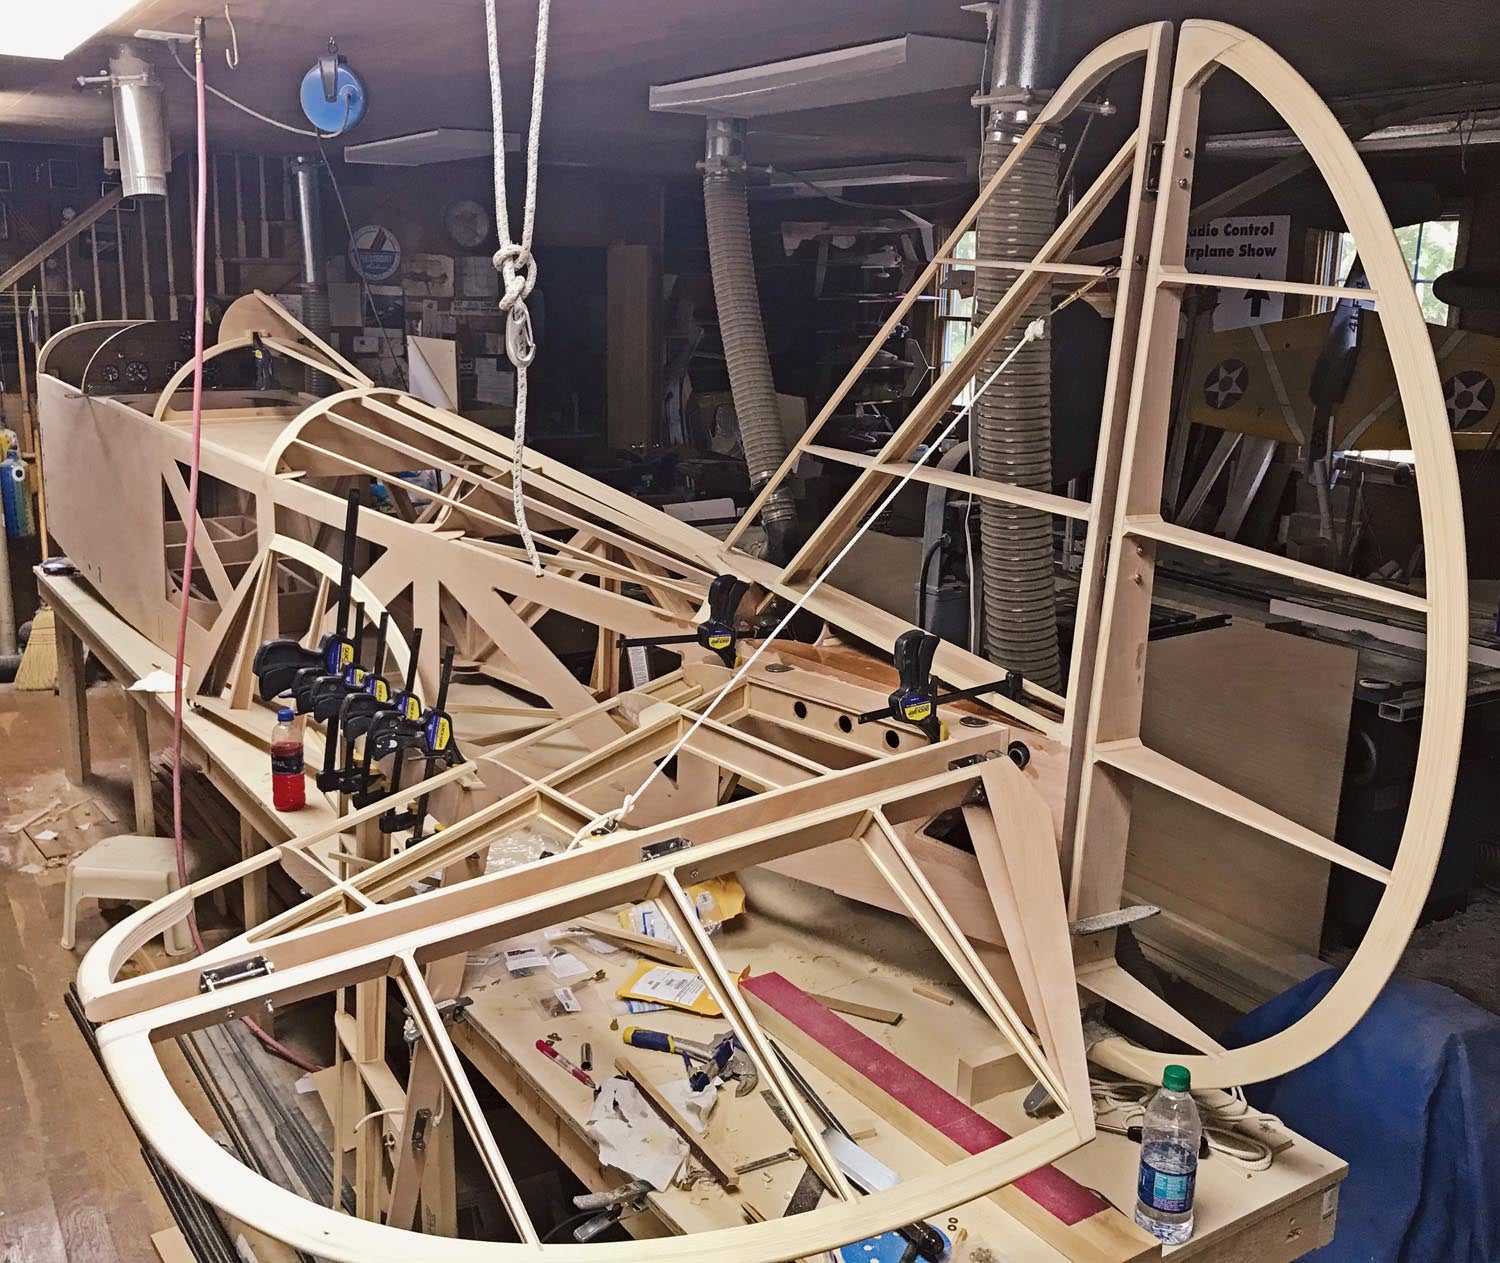
The Fly Baby airframe is built primarily of wood; the fuselage is skinned with wood and covered with fabric. The metal turtledeck is designed to be easily removable and is affixed to the fuselage with a couple of aligning pins and secure latches. The wire-braced empennage components are built sans jigs, and the leading edges are covered with aluminum. Nestled between the wood landing gear legs is something that resembles a bomb; Pete cleverly designed it and described it in his article as “a 10-inch diameter streamlined aluminum suitcase, complete with handle, hinged section and legs.”
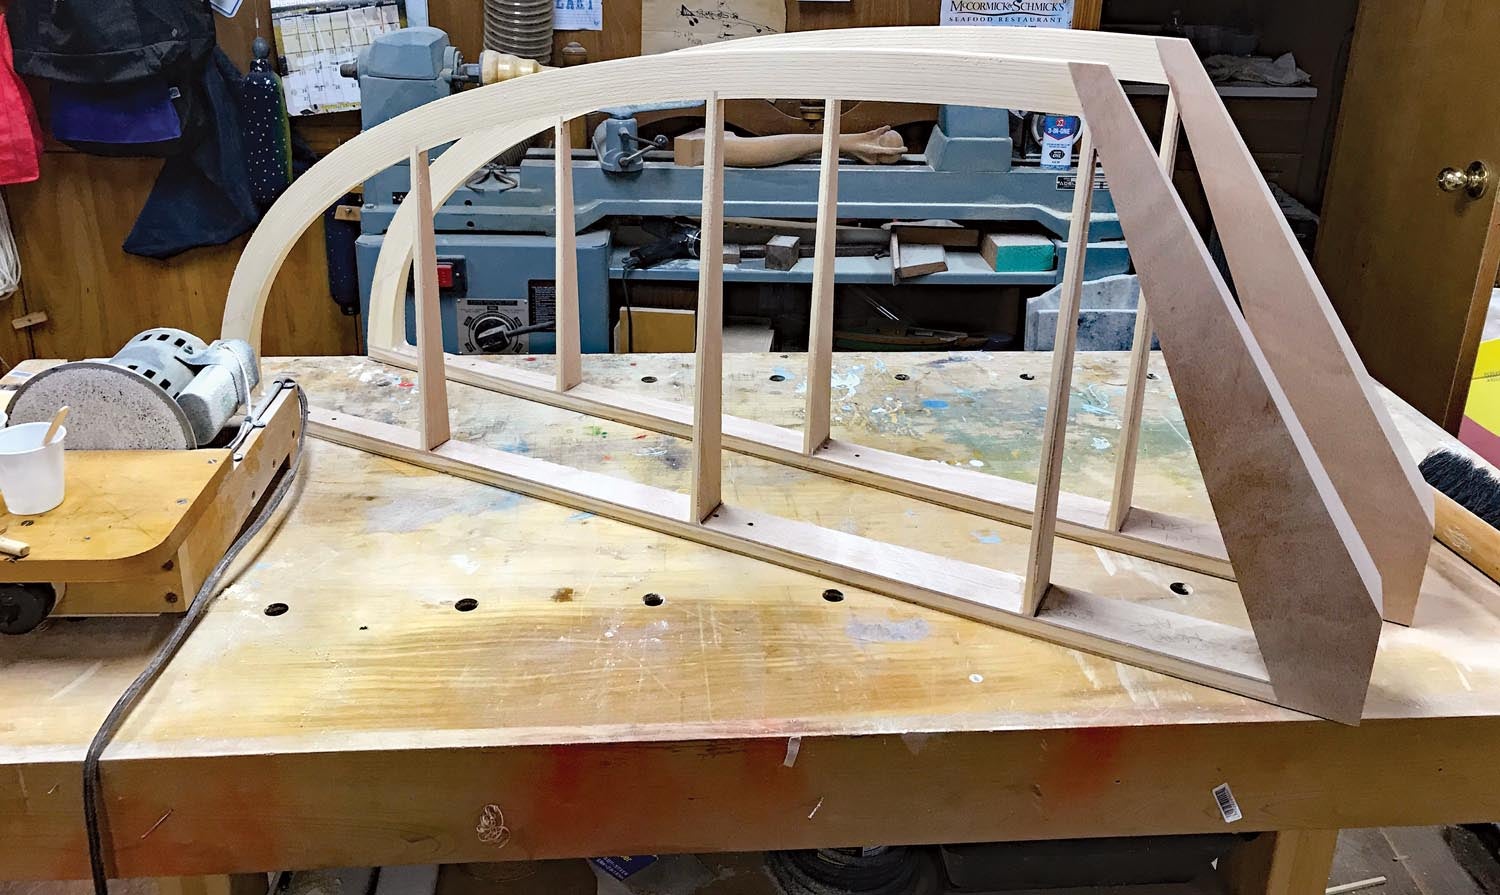
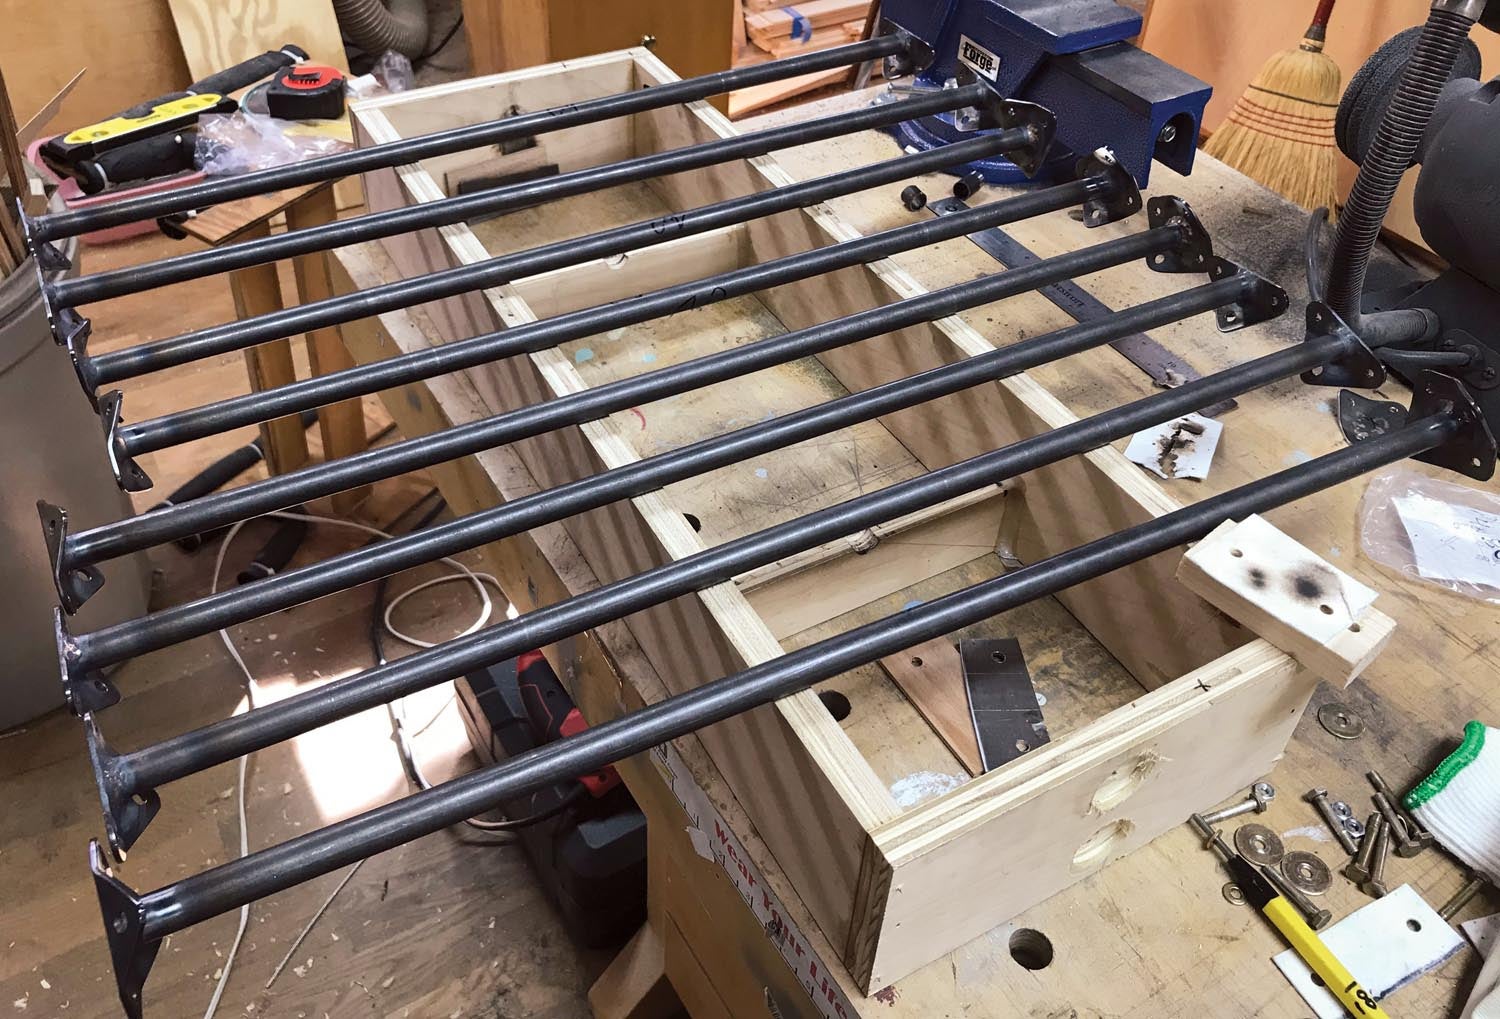
The wings are constructed of wood ribs and spars, with aluminum leading edges. The rounded wingtip bows are built of laminated wood, and the wing has steel tubing compression ribs (there are only a few weldments and steel fittings in the aircraft) and drag wires made of stranded cable. Demonstrating the strength of the ribs, Pete posed for a photograph while standing atop the ribs after the inter-rib bracing tapes were installed in the wing (and prior to fabric covering).

Liberal use of stranded cables (as opposed to rigid, streamlined flying wires) is inherent to the Fly Baby design and facilitates not only construction, but quick assembly/disassembly when folding the wings. Pete hauled his Fly Baby on a trailer to the EAA fly-in in 1962 and described his rapid solo assembly of the Fly Baby in front of the EAA design competition judges as follows: “From getting out of the car, through untieing [sic], off the trailer, set up, and ready for flight was 20 minutes… Incidentally, to explain how all those 16 wires on the wing are slacked off without undoing all the turnbuckles, there is a single turnbuckle running across the top of the main fuselage bulkhead. This is slacked off, and then four pins are pulled where the wires above and below each panel converge.”

Fly Baby Building
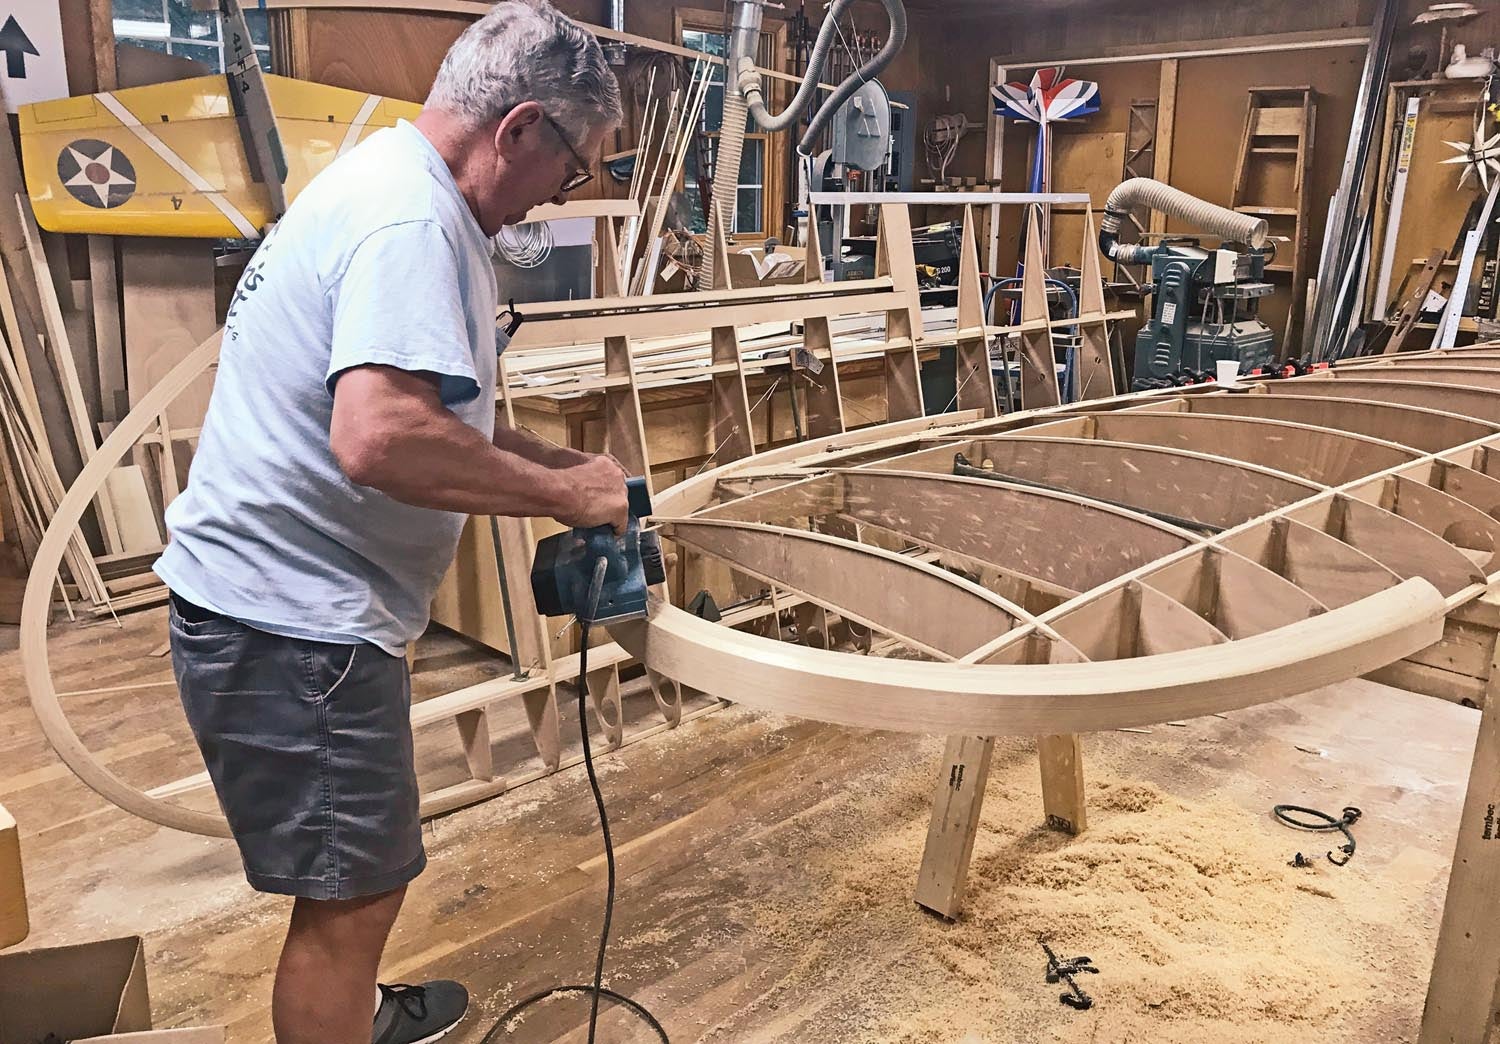
Jim began poring over his vintage set of Fly Baby plans in his workshop at home in Matthews, North Carolina, and commenced the project shortly before he retired. He cheerfully invoked the homebuilder’s built-from-scratch spirit from years gone by, relying upon self-styled ingenuity to facilitate the various phases of building.
“I have a shop at my house, and I’ve been involved with woodworking my whole life—anything from building model airplanes and furniture, to cabinets and a few full-size boats. I’ve basically learned how to do things by osmosis! I’d always admired Pete’s Fly Baby and thought it was beautiful,” said Jim, “so my goal was to make a replica of his airplane. I built it strictly by his plans, though some of the materials have changed since the early 1960s.”
Jim, in his typical “can-do” attitude, learned how to do things he’d never done before. He taught himself how to do TIG welding and welded all of the Fly Baby’s requisite fittings and engine mount. He also figured out how to do metal work.
“I used vinyl sheeting to make patterns for the metal. The vinyl’s about 1/16-inch thick, so it’s fairly flexible and can be cut with a good pair of scissors,” said Jim, “then I traced those patterns onto the aluminum. Whenever I kind of dreaded doing something I wasn’t familiar with, I realized it wasn’t so bad once I got into it. And there’s an online Fly Baby network for support.”
AutoCAD
Jim drew the entire Fly Baby in AutoCAD, so he could have parts cut with water-jet precision. “They’re working drawings, which helps you find errors before you start building,” explained Jim. “About 25 years ago I taught myself how to use AutoCAD, and it just really makes stuff easy to build. I’ve designed a bunch of model airplanes with it.”
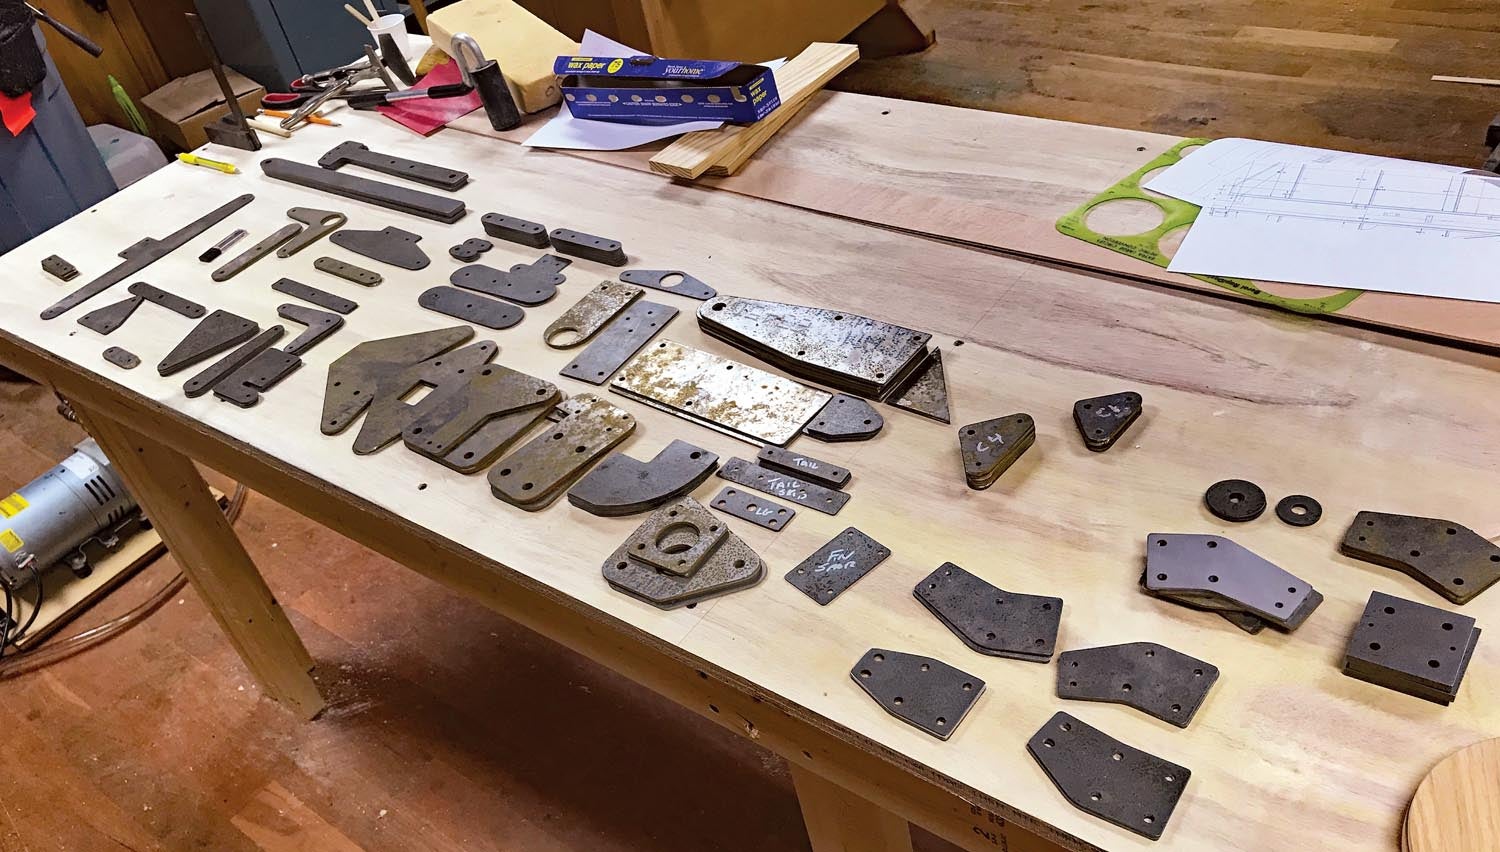
He sent his drawings and raw materials “to a fellow who did water-jet cutting. I had drawn the holes in the parts 0.005 inch undersized, so later I could just clean them with a reamer, which left nice edges on them.”
Being a generous soul, Jim has freely shared his drawings online (www.bowersflybaby.com). “I just enjoy helping people, and if I can save somebody trouble or help another Fly Baby get in the air, I’m happy,” commented Jim.

Woodwork
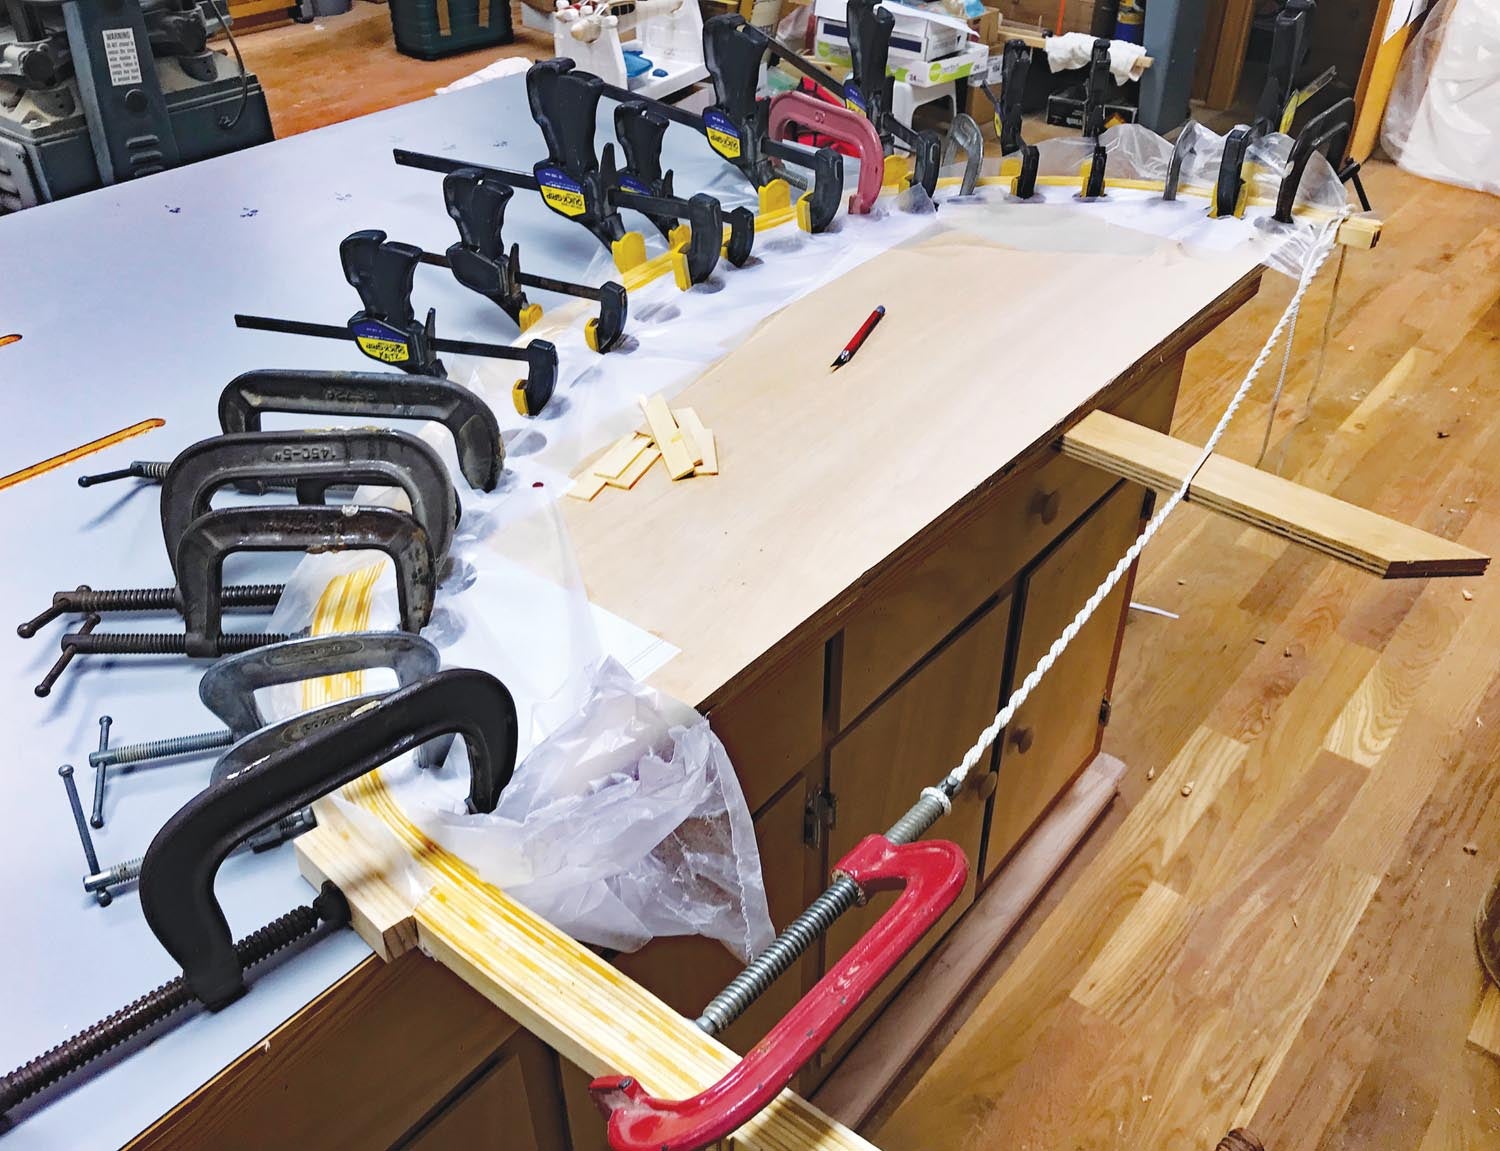
Jim printed his AutoCAD drawings for the Fly Baby’s elevator and rudder trailing edges, attaching them with contact cement to 3/4-inch plywood. He cut the plywood to shape and drilled large holes in the form. One by one, he curved layers of 1/8-inch spruce strips around the edge of the form, using West System epoxy and clamping them in place until they dried.
He built the wingtip bows in place, right on the wingtips. “I laminated those from about 10 layers of very flexible, 2-1/2 x 1/8-inch spruce strips,” recounted Jim, “and after a few days, I had that all built up. It was probably 1-1/4 inch wide and 2 inches high; then I used a wood plane to shape it.”
Jim built the rib cap strips from ½x¼-inch spruce and cut the ribs from a 3mm sheet of okoume marine plywood (purchased from Chesapeake Light Craft of Annapolis, Maryland). “I cut the ribs by making a pattern and putting a caulking-type sealer on it,” said Jim, “then I hooked up my vacuum pump to apply suction between the pattern and the plywood so I could cut around the edge with a router and a flush trim bit.”
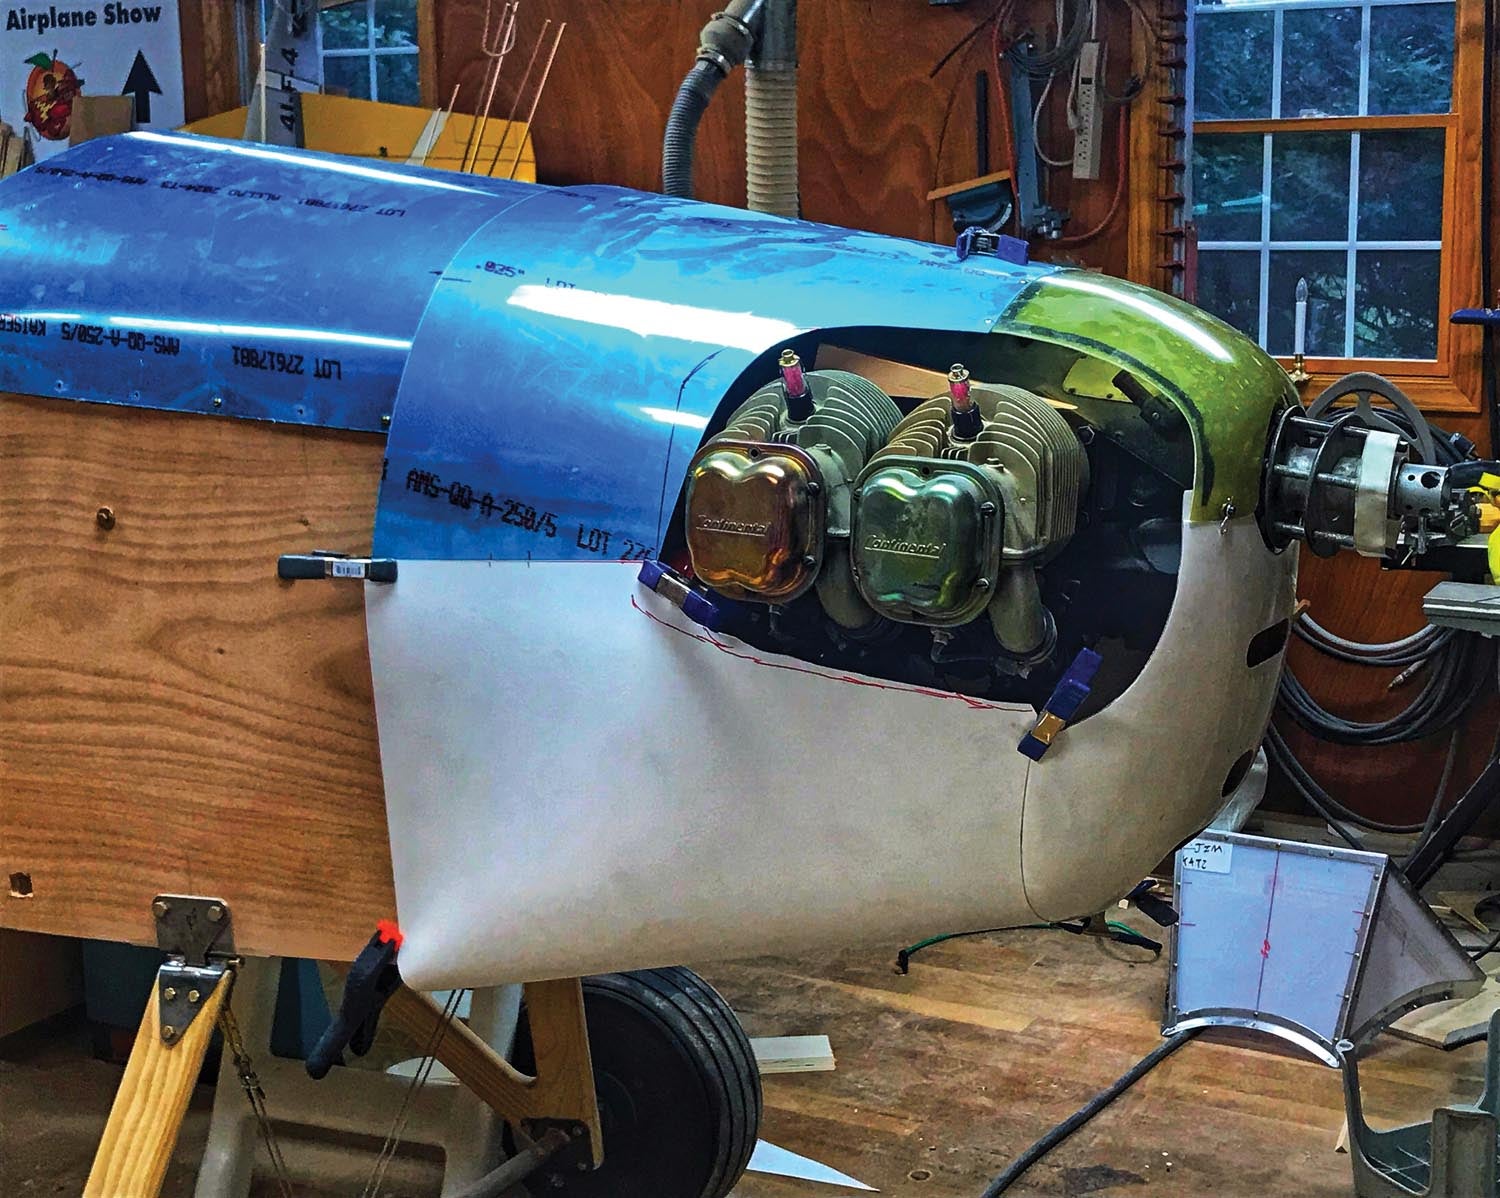
Engine and Prop
Jim bought a Continental A-65-8 core and had it overhauled by Harry Fenton, the small Continental engine guru. A Steve’s Aircraft gascolator was installed and an Aeronca Champ exhaust and heat muff were used. Jim had plans for fabricating the J-3 style “eyebrows” above the cylinders, but opted instead to simply buy them from Aircraft Spruce. The little Continental spins a 72/44 Sensenich wood propeller.
Finishing Touches
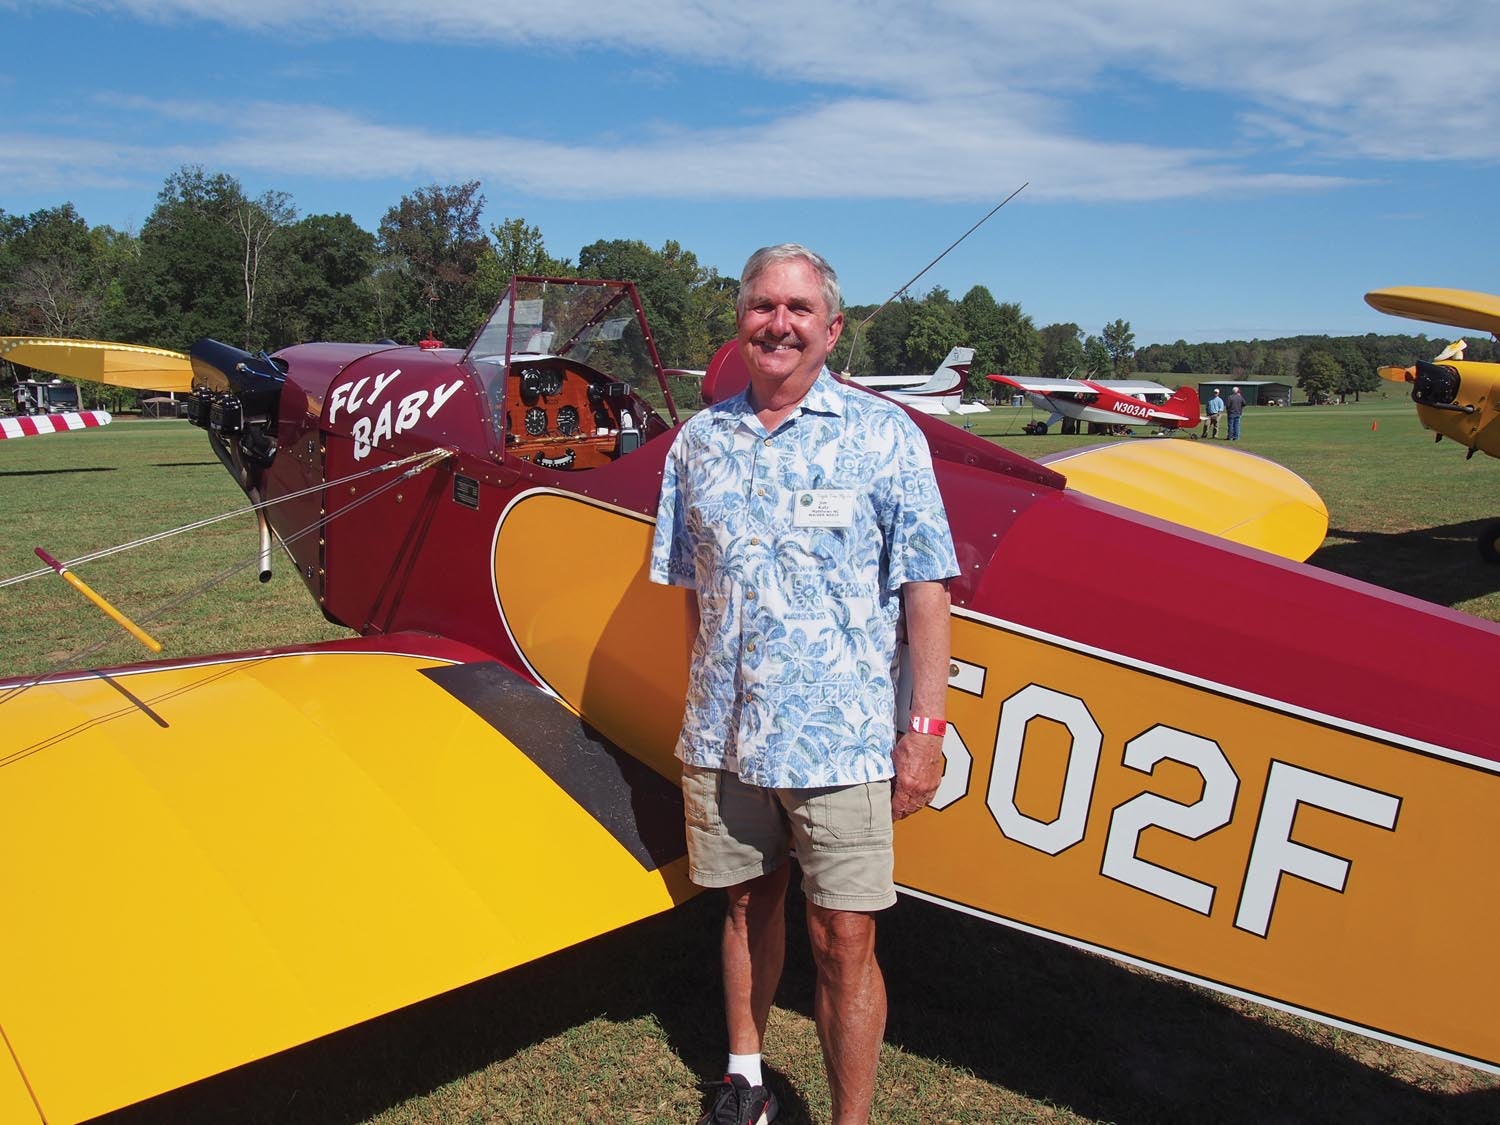
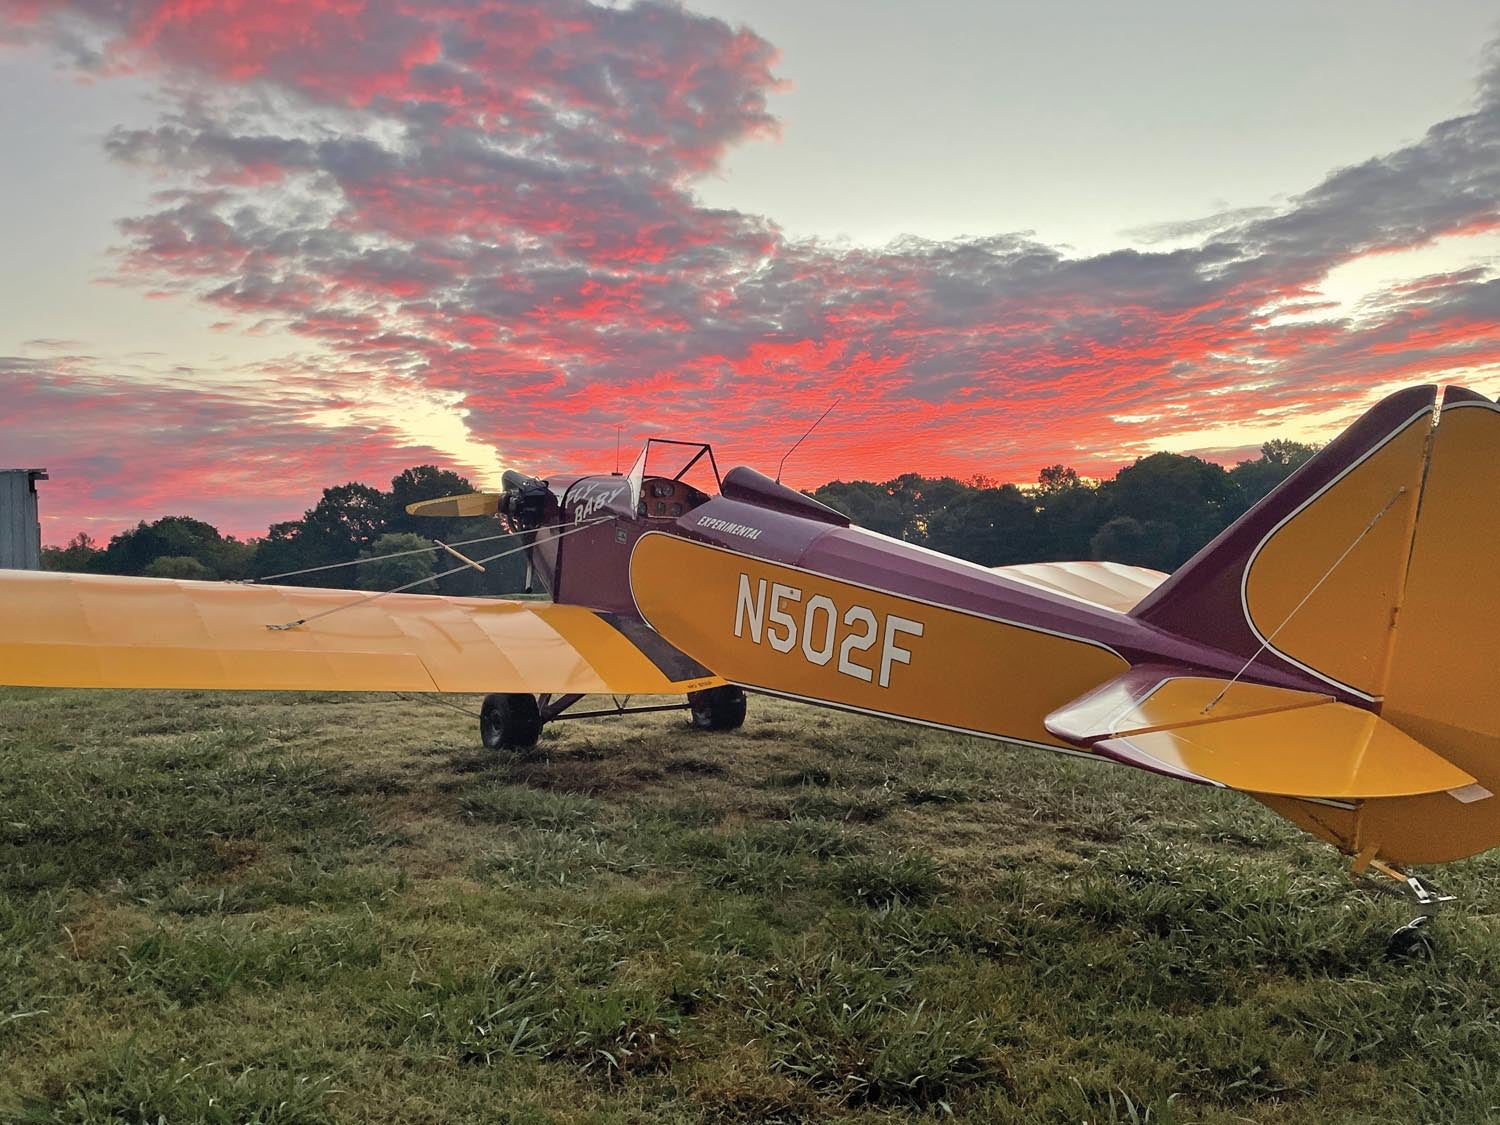
All told, Jim spent two and a half years, working at least six hours a day, on his Fly Baby. Sometimes he’d work longer, simply because he enjoyed being immersed in the project. He covered N502F with Ceconite fabric and used Randolph butyrate dope, with Boston Maroon and Cub Yellow as the primary colors.
“I used a traditional compressed-air painting system, with a Harbor Freight gravity feed spray gun,” said Jim. “I bought several, so I have one for clear dope, one for primer and others for color coats.”
Jim had trouble finding a 10-inch ball to make the mold for the ends of the bomb-style suitcase. “Pete used the ends of a WW-II oxygen tank. I finally spotted a 10-inch gazing ball my wife had and used that,” he said, “and then returned it to its proper place!”
The N-number and paint scheme were selected to match Pete’s Fly Baby (N500F) as closely as possible. “Ron Wanttaja, who started the Fly Baby website and made the companion manuals, has been a real help to the Fly Baby community,” said Jim. “He gave me a swatch of Pete’s original Fly Baby fabric covering so I could get the width of the black and white stripes just right.”
Specs
Jim’s Fly Baby has a 28-foot wingspan, measures 18 feet 10.5 inches from nose to tail and stands 6 feet 11 inches tall with its wings folded. It weighs 631 pounds empty, with a gross weight of 925 pounds. Landings are cushioned only by pudgy Cub tires—the rigid, laminated spruce gear legs have no shock absorbers.
The 65-hp Continental purrs along while sipping 4.5 gallons of avgas from the 16-gallon fuselage tank. The fuel gauge is merely a cork float attached to a wire, which is marked at one-gallon increments.
The wood instrument panel is adorned with all new “steam gauges” for fun flying: airspeed, altimeter, oil temp and pressure, recording tach, vertical speed indicator and compass.
Easy to Fly
The Fly Baby cruises at 80 mph and lands at about 40 mph. A bit tongue-in-cheek, Jim recounted with a smile: “My first flight in it was really disappointing! I pushed the throttle up and got in the air, and almost immediately I could tell it was flying straight without any problems. I thought, ‘man, this isn’t very exciting.’ It’s real benign and easy flying—even in crosswinds, I can easily three-point it and its stall is very docile.”
Pete Bowers offered a succinct and realistic description of the Fly Baby’s characteristics in his 1962 article: “I’ll admit that it’s not an airplane to please everybody, especially those who have had previous experience with homebuilts and have built up their own ideas as to just what they want. I think that those to whom speed and zip aren’t so important will find it ‘the mostest’ airplane that they can produce for the least investment of money and labor.”
Rewards
“Building a project and seeing it finished at the end is rewarding,” said Jim, “but so is the mental aspect of the whole building process—like when you wake up in the morning, you run problems through your head and come up with solutions.”
His impeccable attention to detail has been honed by a lifetime of model building and is evident by even a quick walkaround of his Fly Baby. Though it could well be an award winner at fly-ins across the country, he doesn’t plan on flying it more than an hour or so from his home base at Goose Creek Airport (28A) in Indian Trail, North Carolina. “Just flying 100 miles in a Fly Baby is an accomplishment,” he declared.
Jim laughed heartily when asked how much it cost him to build his Fly Baby and replied, “a trash bag full of receipts!”
He’s logged around 90 hours in N502F since his first flight on August 28, 2020, and has flown to local fly-ins and Triple Tree Aerodrome in South Carolina. His Fly Baby has garnered many admirers, and now there is a half-scale composite look-alike model of Jim’s airplane available from CARF-Models.
As for what’s next, well, Jim is still building models and working in his backyard shop. He cheerfully proclaimed, “I just enjoy getting up and having something to look forward to and piddling with my hands!”
Photos: Jim Katz and Sparky Barnes.


Great story!!
What a great article and an inspiring build of a classic aircraft
I have a C152 and a Late Model Tiger but always wanted to build my own airplane. Just how do you find the airplanes available from what must be a very long list…?
Lamberto, we have a Buyer’s Guide that can help you narrow down your search:
https://www.kitplanes.com/buyers-guide-search/
I’ve known Jim since he was in high school, and I was in elementary school. He is the most accomplished builder and flier I have ever met. I have owned and flown one of his RC pylon racers and it was absolutely perfect in all aspects…he built it from plans, no kit, when he was about 20. I’m not sure I’d be comfortable flying another persons homebuilt airplane but would not hesitate at all in flying anything Jim constructed. He’s truly a one of a kind. Any yes, he was my airplane hero when I was a kid! All my very best Jim, Chuck
Comments are closed.