 When we built our RV-3 back in 2011, Garmin had just introduced its first Experimental EFIS, called the G3X. Garmin had actually teased the G3X with the GPSMAP 696, and the vertical-format system had by then found success with builders. Designed to be fully networked, the first G3X systems could have multiple screens sharing a single AHRS module and a remote engine-monitoring/sensor box.
I have been fairly fortunate to be involved in the developmental testing of numerous EFIS products over the years, and that means I have a lot of display units with two-digit serial numbers. The units we installed in the RV-3 were no exception. Along with the “silver box” GSU 73 (which combines the ADAHRS and engine monitor in one chassis), we had to find a home for the magnetometer in the tail. There was no Garmin autopilot at the time, but TruTrak was building a Garmin-tailored unit designed to talk specifically with the new G3X, called the GX Pilot; it is what we put in the panel. It’s all worked incredibly well for 11 years of flying, with nary a problem.
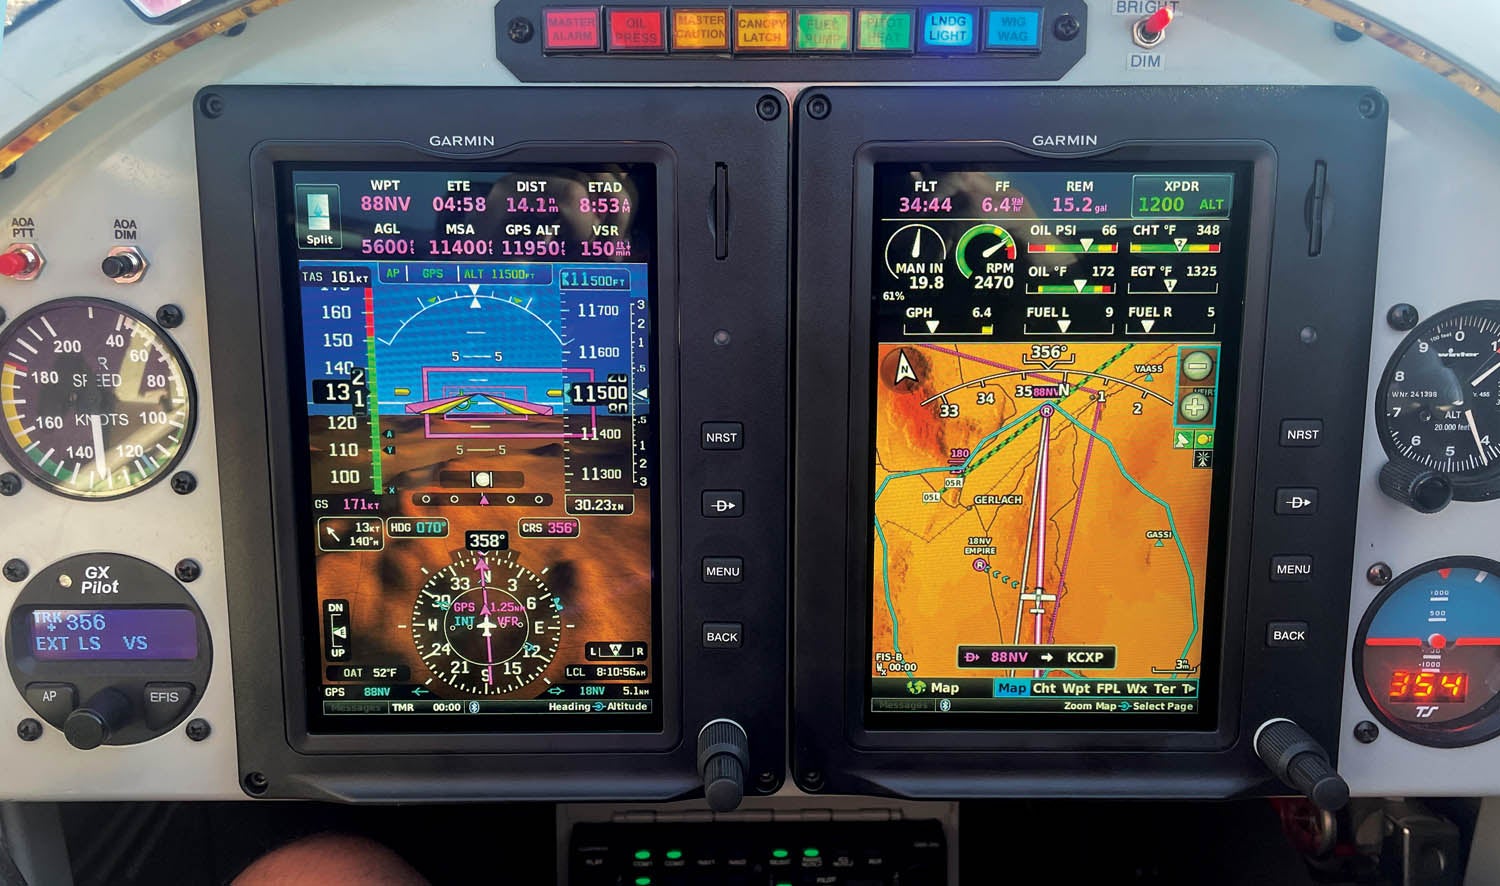
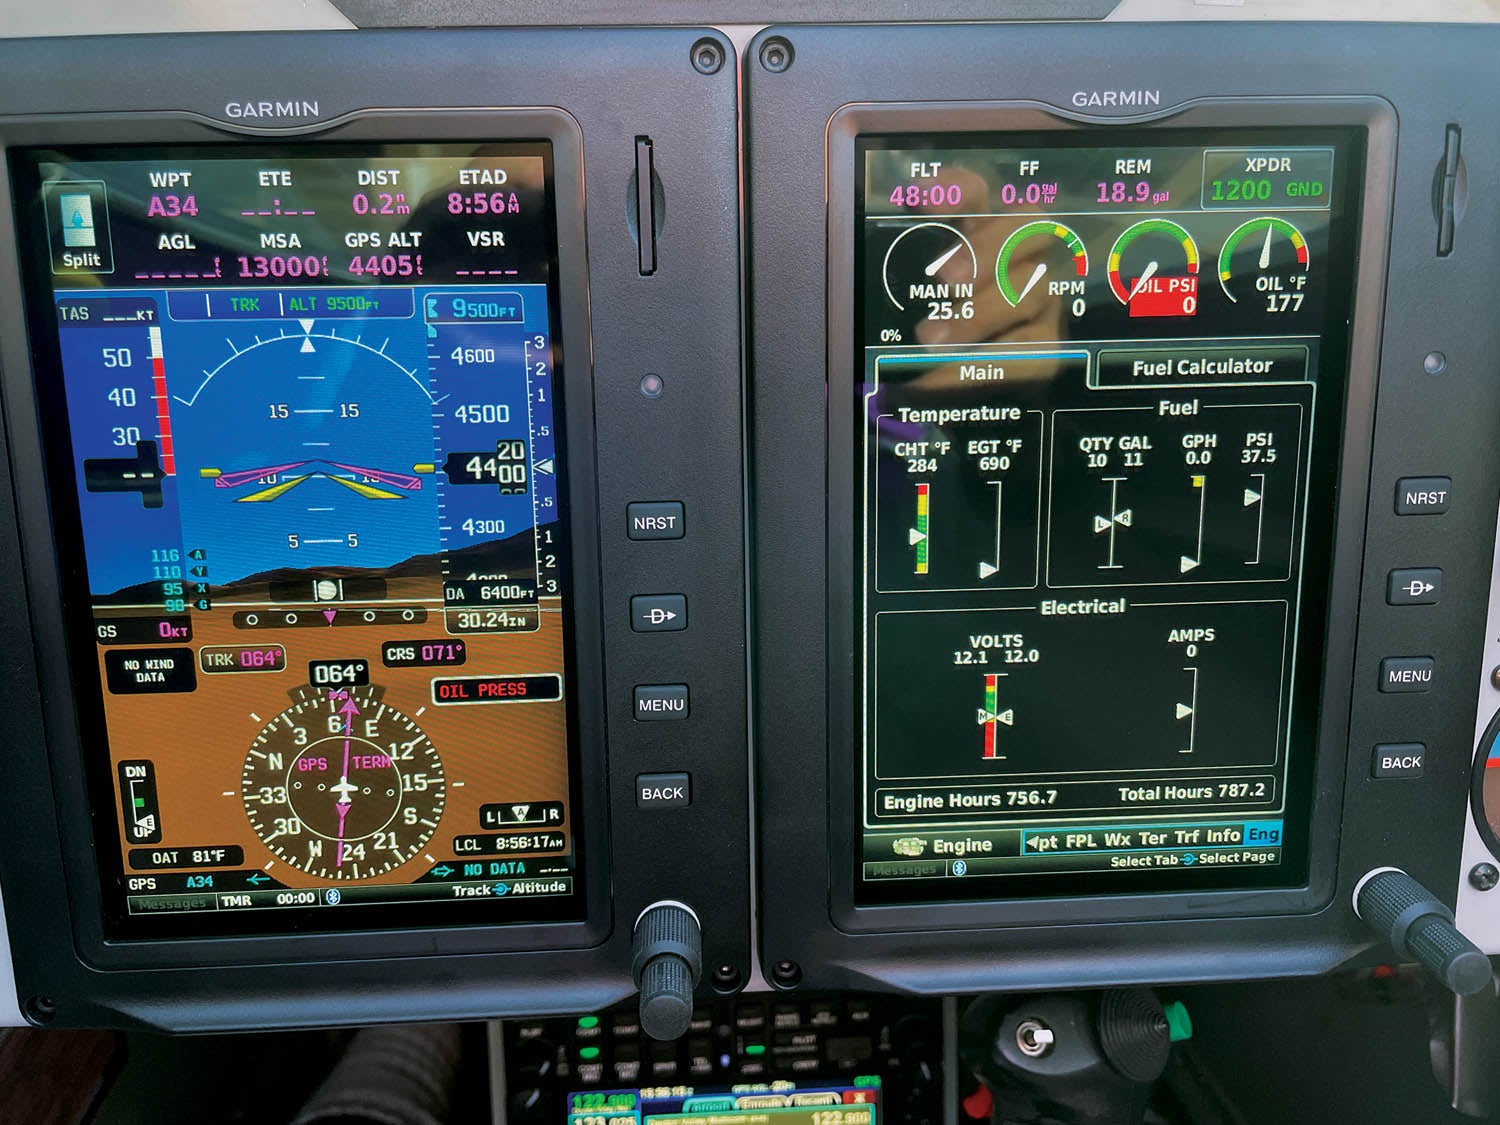
Time does not stand still, especially in avionics. Our RV-6 is equipped with the full G3X Touch system, and we have gotten used to certain features and the continued growth afforded by its beefier processor. Things like the glide circle, the ability to see sectionals and upgrades with emergency functions and envelope protection meant that the writing was on the wall for the early, pre-Touch G3X in the RV-3.
There is something to be said for commonality within the family. Because of the nature of aviation journalism and the desire to test the new stuff for you, every one of our aircraft has a different EFIS. Making two of them the same can certainly cut down on the workload of remembering how to do things in the cockpit when it gets busy. So bringing the RV-3 up to the latest display standards—and user interface—was a net gain and allegedly an easy thing to do. So we set out on the process to prove—or disprove—what we had heard.
Upgrading Made Easy
Before getting started on the hardware installation, hook up external power to your plane and power up the old EFIS. Go to the configuration mode and pull out your cellphone camera. Take pictures of every configuration page you can find—we ended up with 55 pictures! They will make the configuration process of the new units a piece of cake. Without them, you’ll be in for a slog.
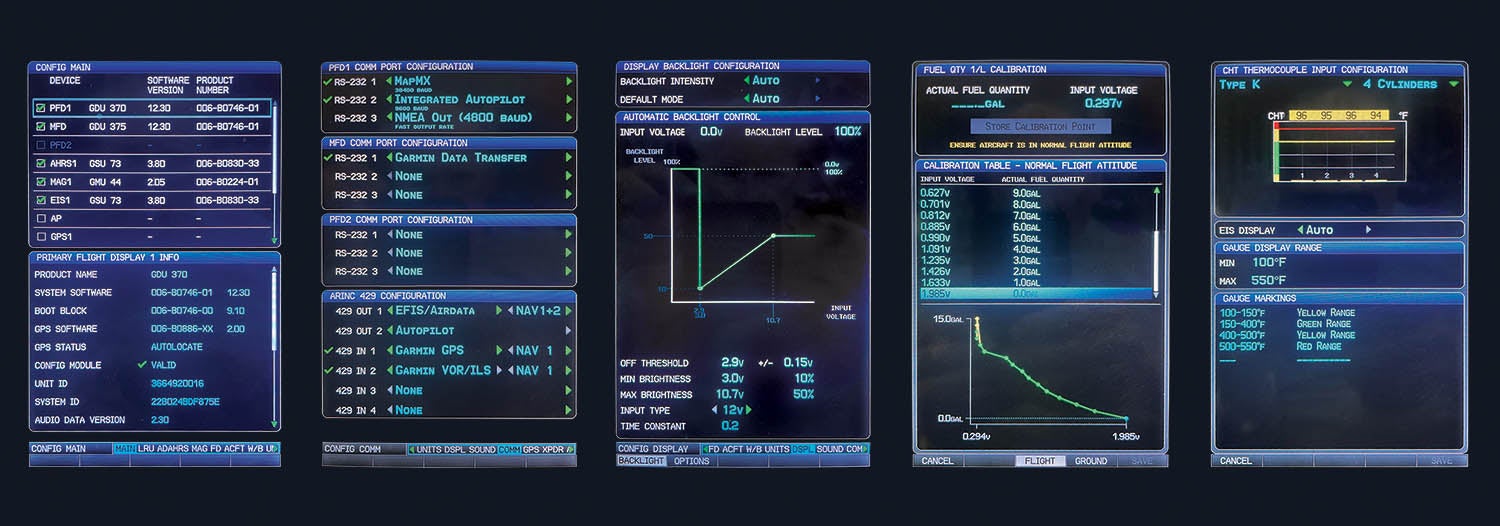
Also, in configuration mode, go to the fuel level calibration page, select Calibrate, then hit the Menu button. You’ll be presented with a dialogue box that asks if you want to save the calibration file to the SD card. You definitely want to do this—and you have to do it for both the left and right tanks. (In case you missed it, the calibration tables equate sensor values for a given amount of fuel in each tank so that the fuel gauges read accurately. If you don’t save the cal data, you’ll have to repeat the add-a-gallon calibration procedure you did originally.) You’ll be able to re-import these from the card into the new units and won’t have to drain and refill your tanks. With all of this saved, you can power off the units and begin the hardware work.

The finished bezel sizes of the original and Touch (portrait) screens are essentially the same, so there is no question that the panel real estate supports the upgrade. Garmin did, however, change the size and shape of the box behind the bezel just enough that the panel opening has to be slightly modified and the locations of the mounting nut plates changed. Fortunately, Garmin provides a mounting “ring” for each unit that includes Nutserts in the corners and also has four rivet holes so that the ring can be riveted to the back of the panel—and these four rivet holes are in exactly the same position on both flavors of ring. That makes it easy to drill off the old one and mount the new one. Thank you, Garmin!
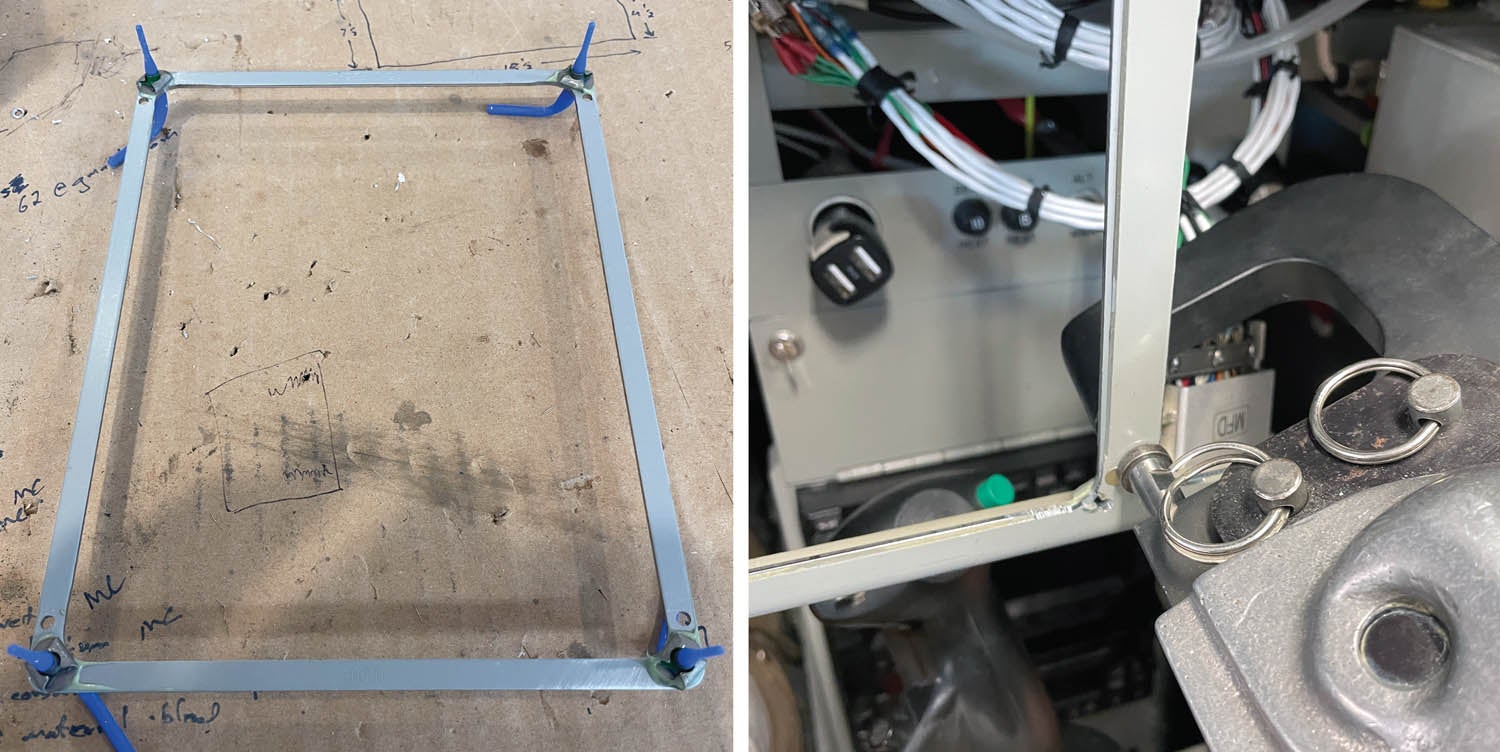
Garmin also supplied us with a steel “drill guide” with the units—essentially the same ring, without the Nutserts, that can be Clecoed in place using the rivet holes and then used to drill the new corner holes for the display mounting screws as well as to deepen the corner cutouts for the new units.
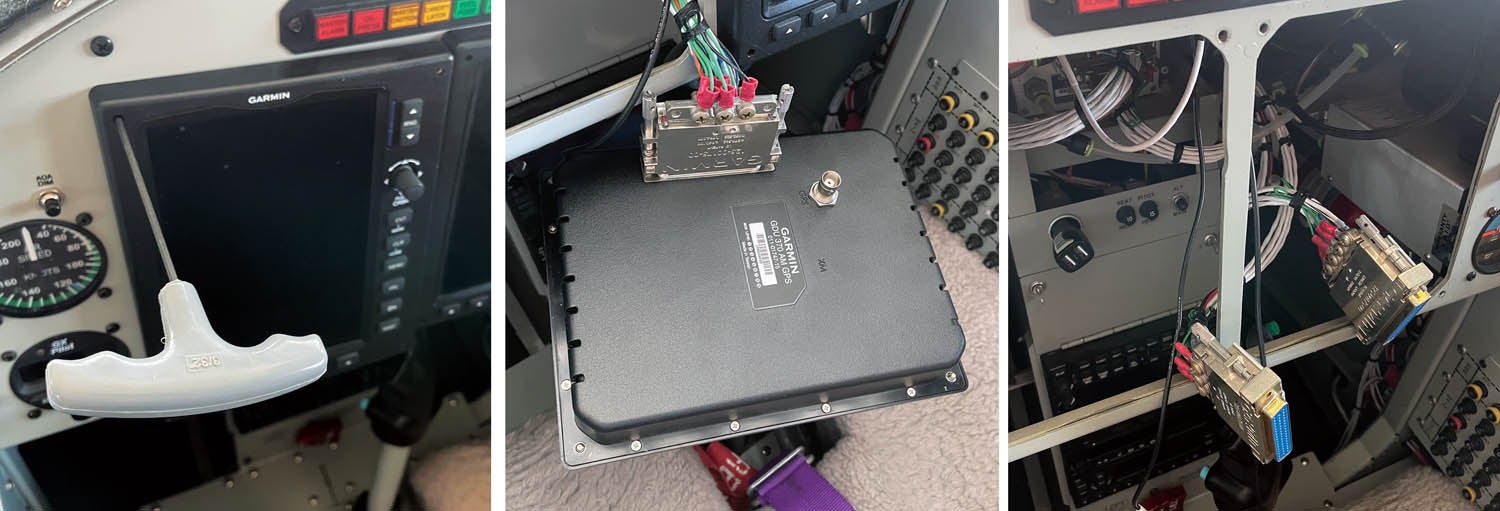
(I should note that because Garmin sent us a couple of demo units for our installation, we got the drill guides, but not the mounting rings with the Nutserts—but this was no problem since we had a handful of small #6 ClickBond nut plates that we could glue to the back of the drill guides and use for our installation. We can easily change to the aluminum rings by drilling out the four rivets at a future time—the total work will take 10 minutes, if that.)
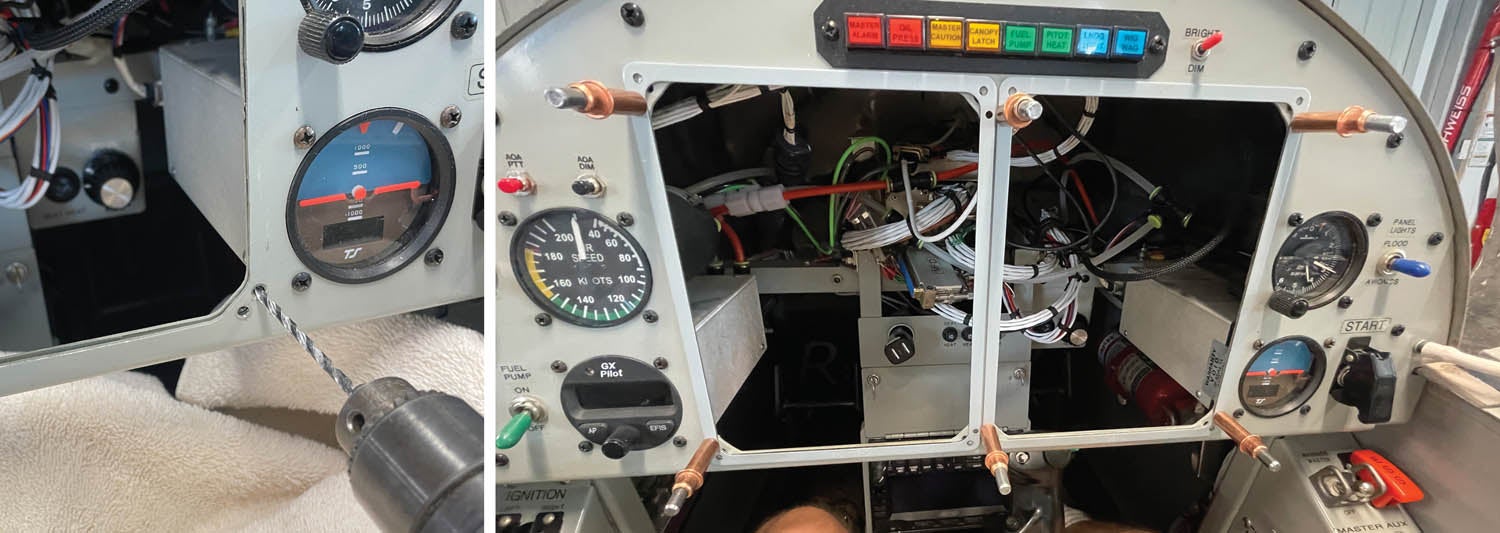
The hardware modifications took us about half an hour of actual work time. We removed the old GDU 37x displays and tucked their connectors up out of the way. We then draped some towels behind the panel and on our legs to collect aluminum shavings and dust. After drilling out the rivets for the old mounting rings, we Clecoed the steel drill guides in place and used a die grinder to enlarge the corner cutouts, finally using a #24 bit to drill the new mounting holes. Note that the old and new mounting holes actually overlap slightly, so you’re going to end up with figure-eight holes in your panel. They will be covered up by the bezels, and the mounting ring is behind the panel, effectively sandwiching the panel between the bezel and the ring, so it’s not a structural issue. If the look bothers you when the displays are removed, you can always build a new panel—but it certainly is more work than necessary. The Oshkosh judges will never see the holes.
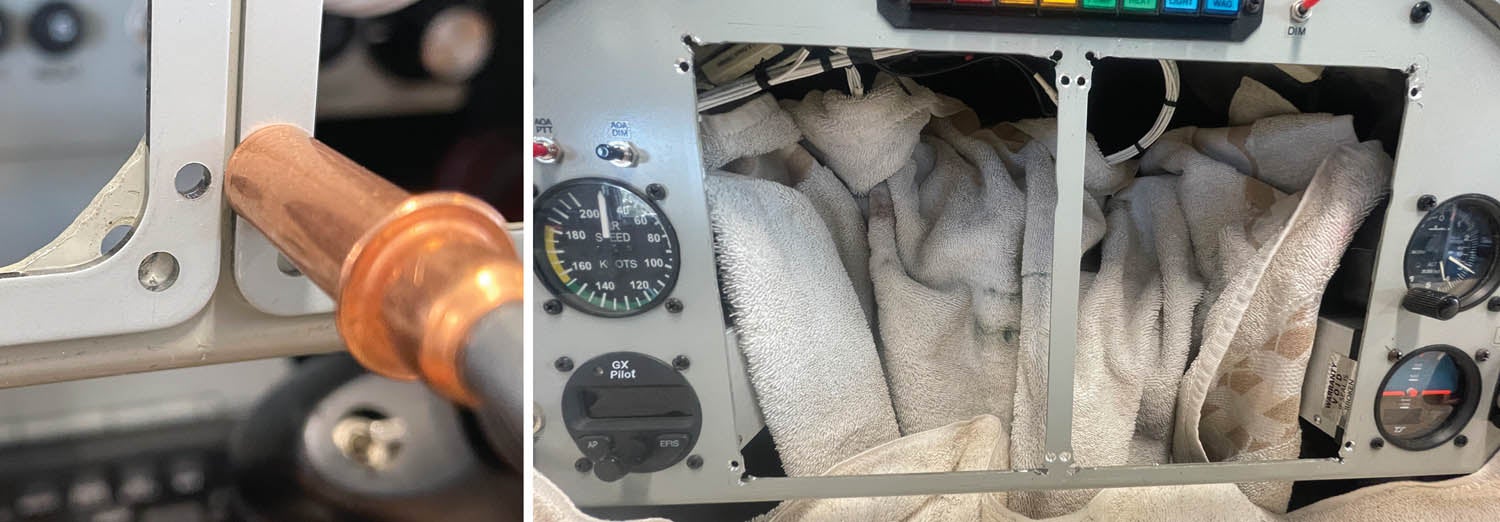
After grinding and drilling, we carefully removed the towels that had captured the shavings and pulled out some short countersunk rivets and our squeezer. After bonding the nutplates to the back of our drill guides, we simply riveted them in place—and we were ready to mount the new displays. The old units have captured corner screws—the new ones use non-captive screws—we like Allen-head cap screws. Since we don’t have a compass in the panel, using steel hardware is not a problem, so we picked up eight 5/8-inch #6 screws and were ready to go. Attach the big connectors from your old units to the new ones, connect the GPS antenna cables and mount the units in the panel. The hardware work is done!
It’s All in the Configuration
It’s important to understand that all of the configuration data for a G3X system (of any flavor) is stored in a chip buried in the big display connector backshell. Unfortunately, the non-Touch and Touch versions of the G3X do not use compatible data formats—so the first thing you’re going to do is erase and reformat your data module—a disquieting thing if you think about it too much. So don’t think about it, just do it. You should reference paragraph 37.2.1.5 in the G3X Installation Manual, which outlines the complete process for the software upgrade. This also references other spots in the 900-page manual—get the PDF online and the links will take you where you need to go. That paragraph also gives you step-by-step instructions to reformat the configuration module—a necessary first step. The opening paragraphs of Section 35 in the G3X installation manual also help describe the process—read and understand it before you begin.
Basically, configuration is easy, if a bit time-consuming—only because this is a very capable system—and it’s more capable if you take the time to set up all the gauge limits and markings. This is where your photos of the previous configuration come in. If you worked your way through the original configuration screens in order, the new system configures in roughly the same order, so you just march on through. Our system found the ADAHRS, EIS and magnetometer, as well as immediately recognizing the TruTrak GX autopilot. From there it was mostly importing the fuel-level calibrations from the SD card and simply touching through the tiles on the configuration page.
I strongly recommend an external power supply when doing the configuration work—it takes away the time pressure you might otherwise feel when working through the voluminous choices that come with the Touch system. And, of course, you should also know that you don’t have to get it all right the first time—you can go back in and fix things if you don’t like the results or you get something wrong. I don’t know of any way that you can “brick” the system (turn it into a useless box that has to go back to Garmin), so don’t be too worried, just press ahead. It’s also useful to know that when you come to a drop-down set of choices and one of them is User Defined, that means the pilot can configure this from the in-flight menus—so it’s not a bad idea to leave things that can be user defined that way. You won’t have to go back into config mode to try different options.

The only thing that threw us—and cost us some time and a little bit of avgas—was that when we went to configure the ADAHRS, the magnetometer options were grayed out. Based on our (incorrect) knowledge from a long time ago, we thought this meant we couldn’t do anything with them until we had done the magnetic interference checks and magnetometer calibration—so we fired up, taxied out and did them, only to learn later from Garmin tech support that they were grayed out because you can’t “disable” the #1 magnetometer. The previous calibrations were safely stored in the ADAHRS box and we hadn’t needed to do anything. Oh well, it’s probably not a bad idea to check the magnetometer calibration once a decade anyway.
Flying the Touch
The next morning, I took the plane up to try out the new EFIS and, wow, it was just like flying with the big G3X Touch screens in our RV-6—only the screens were smaller! It’s nice to have the option of looking at sectional charts, which we didn’t have with the previous version, and simple things like the glide rings that show where you can reach with an engine failure are really nice to have in the mountains. Of course, with the smaller screens, real estate has to be managed a little more carefully, and since the tiny RV-3 cockpit doesn’t have room for the physical autopilot control panel from Garmin, I had to use the virtual panel on the EFIS—which covers up other data while you’re using it. But that’s not really a problem—it’s just something to get used to.
I was very happy with how well the Garmin software integrated with the TruTrak GX Pilot—in fact, I really didn’t notice any real differences in normal operations between it and the Garmin autopilot we have in the RV-6. All the modes are available, and it was smooth and crisp in pitch and roll. Just like with the older G3X, the new Touch can control the autopilot completely, so you never have to touch the TruTrak head. (But the TruTrak is there in case the EFIS goes blank, so there is an extra level of redundancy.) One notable difference: Flying with the Touch panel is much easier than with the older autopilot buttons on the bottom of the original screens—it more easily approximates a real autopilot panel and seems more intuitive.
The new EFIS works great with the RV-3’s IFR navigator as well. While I am not doing a lot of IFR flying these days, I still try to keep my skills up using the navigator instead of the internal flight planning in the EFIS—but perhaps I need to practice a little with the EFIS now that we have the newer version. We don’t have com radios that can be controlled from the EFIS in this airplane, but the transponder (a Garmin GTX 330ES) works great with the EFIS and is controlled from the screen. We do have control of the radios in the RV-6 and are happy with the way that works, especially with the ability to push frequencies from the EFIS navigation database to the radio.
Is It Worth It?
While we have always been happy with the original G3X screens, there is no doubt that the Touch adds new capabilities as well as giving us a common user interface with our RV-6. It also gives us 10-years-newer technology—important in a day when consumer electronics have a finite supportable lifetime due to parts availability. So bringing the airplane up to date with new capability and new hardware is a plus.
The list price of the new screens is currently $3260 (each)—so two of them is going to set you back about 6.5 AMUs. Based on the private notes I received when I mentioned that I had done the upgrade on a popular homebuilder’s internet forum, there are lots of folks looking to buy the older GDU 37x displays—so some of that outlay can likely be recovered. Since you’re upgrading, everything else in the aircraft remains the same, and those figures should reflect your total outlay.
The ease with which the upgrade is done is remarkable. I have installed many new, improved EFISes in our airplanes over the years, and the process usually takes the airplane down for weeks. It generally involves complete rewiring and, oftentimes, an entirely new panel blank to start with. Replacing the older GDU displays with the new GDU 470s is truly plug-and-play from an electrical standpoint, and the mechanical installation is not much harder—especially for someone who has built their airplane and still has their tools. But if you have bought your little machine and want to do the upgrade, it doesn’t take much more than a drill, file and a rivet tool—heck, there is no reason you couldn’t use flush pulled rivets using a tool from Ace Hardware and Aircraft Supply—so don’t let “not being a builder” scare you away from the upgrade.
If you have any computer literacy at all (and really, the level required to configure an iPad or iPhone is all you need) then this upgrade is in reach—and gives you that “new airplane” feeling when you fly away and head into the sky. For us, it was worth it.
![[Credit: JetStream Rider]](https://www.kitplanes.com/wp-content/uploads/2026/04/AdobeStock_345999332.jpg?w=218&h=150&crop=1 "2026 Avionics and Lights Buyer’s Guide")
![[Credit: Radiant Technology]](https://www.kitplanes.com/wp-content/uploads/2026/04/550095_5165745cc27748a598699799d796fd94mv2.jpg?w=218&h=150&crop=1 "Radiant Technology Unveils SafeGyro")
![[Credit: Dynon]](https://www.kitplanes.com/wp-content/uploads/2026/04/EMS-stand-alone_HDX.png?w=218&h=150&crop=1 "Dynon Unveils Scalable Engine Monitoring for Kitbuilders")


