 Bad habits are hard to break. Sometimes we are in denial, hoping the problem will fix itself and we don’t want to admit that we must take some corrective action.
Last month I completed the annual condition inspection on my RV-9, which was uneventful except for one minor issue. When washing the plane, I noticed four rivets on the right side of the vertical stabilizer (VS) were smoking. In aircraft parlance, a “smoking rivet” is one that is “working” the aluminum rivet and structure, thus leaving a trail of very fine aluminum dust that appears similar to a small wisp of smoke. The other telltale clue was that the paint around the four rivet heads had come off, due to the relative movement between the rivet and the surrounding structure.
Smoking rivets can be caused by either rivets that are not set correctly or by stressing a structure, causing the rivets to move (loosen) ever so slightly.
My first action was to clean the aluminum dust trail off the VS and put a few more hours on the plane to see if the smoke trails would return. Sure enough, after four hours, the smoke trails were back. Since hope and prayers didn’t magically fix the smoking rivets, replacing them was my next option.
The Fix
Fixing smoking rivets is fairly straight forward: remove the old rivets and replace them. Getting access to the back of a rivet to drive or squeeze them, however, can be a challenge in a completed structure. In my case, replacing the rivets was would be as simple as removing the rudder, drilling out the old rivets, squeezing new rivets, and re-installing the rudder.
Removing the rudder on my RV-9 was easy enough. First remove the tail springs, remove the rudder cables, unscrew the rudder bottom, unplug the wires for the tail light, unbolt the three nuts holding the rudder in place, call the wife over to push the bolts out while I hold the rudder, and finally pull the rudder free.
A couple of tips with regard to removing or installing flight surfaces, especially painted ones. Use two layers of painter’s tape to protect the finish from sustaining damage from your tools. Keep a backpacker’s bedroll handy for setting nicely finished parts on and to protect your knees when working on or in the plane. Finally, take your wife out to dinner when finished.
Drilling Out the Rivets
With the rudder removed, it is time to drill out the rivets. The rivets needing to be replaced are all AN426AD3-3.5s. These are small rivets that are set in .098-inch / 2.4892mm holes, commonly drilled with a #40 drill bit. To drill out existing rivets, start by using a spring-loaded center punch to dimple the rivet heads. Yes, the rivets come with a dimple but on a painted aircraft, the dimples can be filled with paint. Even without paint, the punch increases the size of the dimple and helps keep the drill bit from wandering.
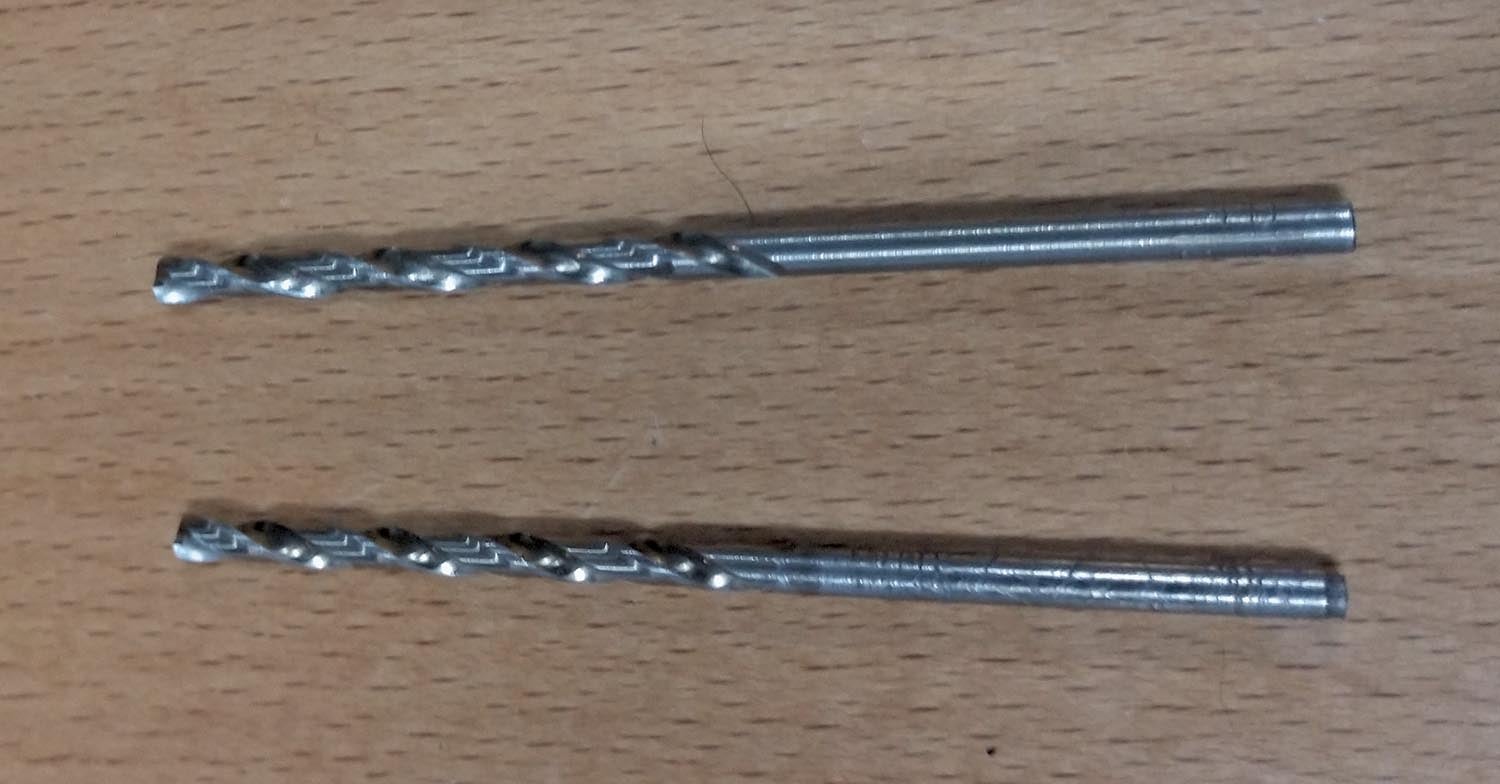
Once the rivets are dimpled, select the appropriate drill bit. My preference is to use a slightly smaller drill size than the rivet diameter. In this case, I used a #42 drill bit (.093-inch / 2.3749mm). By using a smaller drill bit, the risk of enlarging the rivet hole is reduced.
With the #42 bit chucked in the drill, slowly drill into the rivet head. The desired depth is a bit of a “trial and error” affair. The depth of the hole is correct when you can remove the bit from the drill, turn it around, and put the shank of the bit in the hole. Once the shank is in the hole, move the drill bit up, down, left, and right, leveraging the head of the rivet until it snaps off. The final step in removing the rivets is to put the bit back in the drill and drill out the rivet tail.

Replacing the Rivets
Since there must have been a reason for these rivets to start smoking (besides peer pressure), cleaning out the dimple with one turn of a deburring tool helps prepare the hole for the replacement rivet. Very light pressure and no more than one revolution should be sufficient.
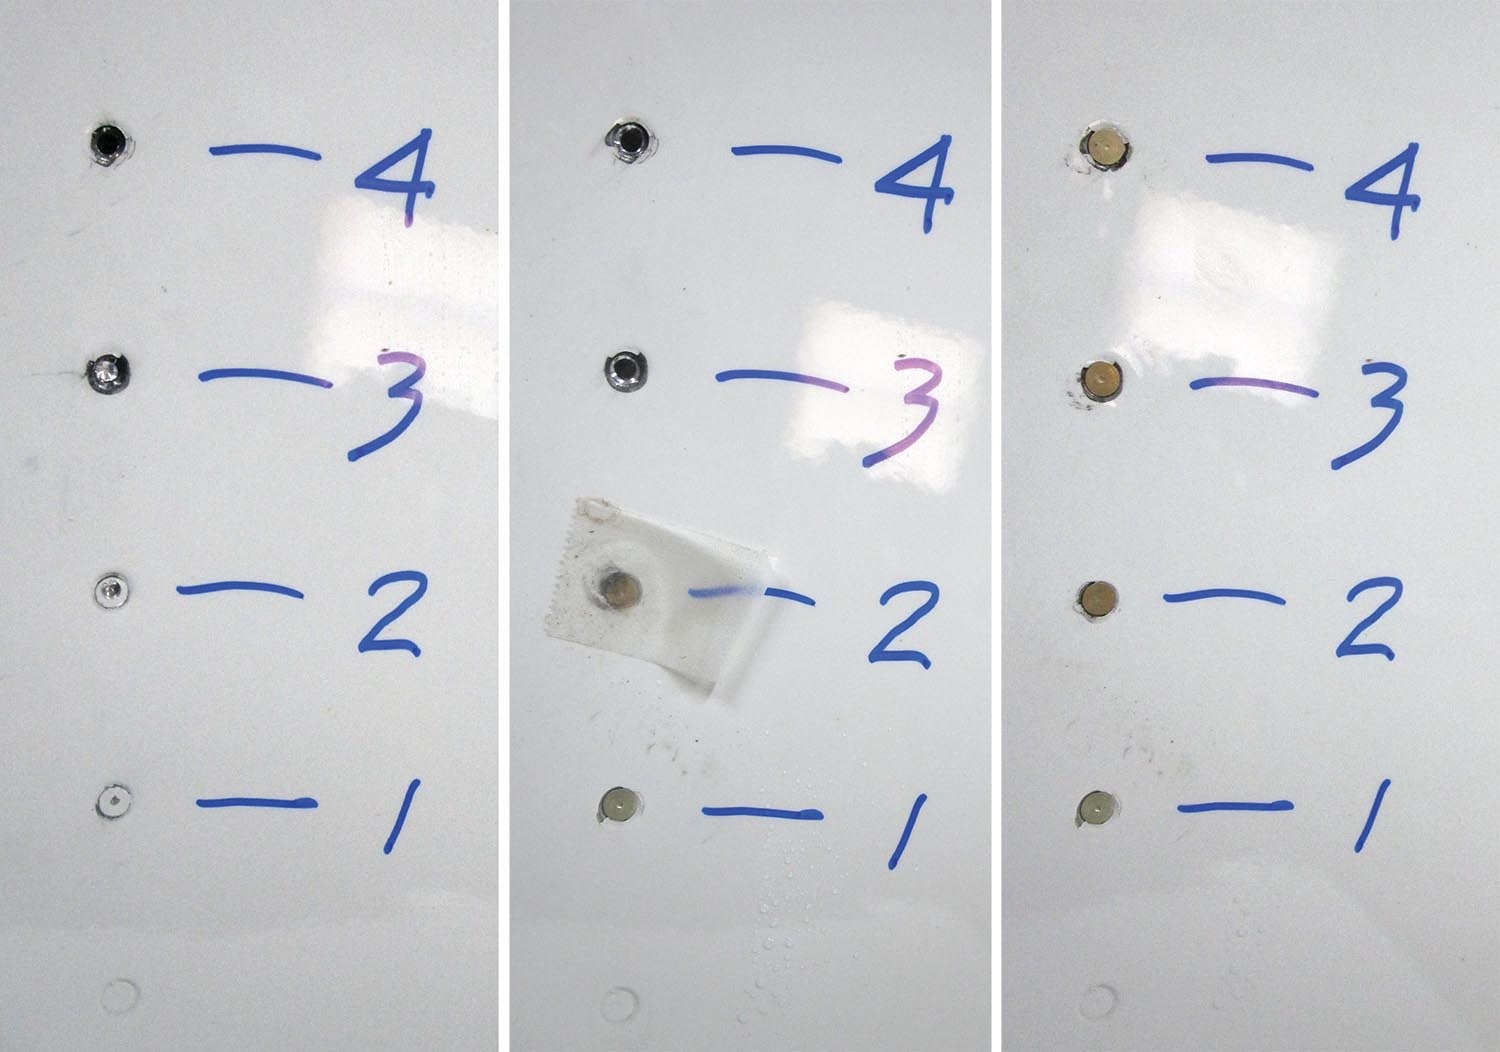
An aircraft restorer recommended to always use rivet tape, even when the rivets are installed from above in a horizontal surface. This helps keep the rivets from backing out of the hole as they are being set. It was his desired method, even when using a rivet squeezer. In the accompanying images, you can see that rivet #1 has been set and rivet #2 is being held in place with a small piece of rivet tape. Note how one end of the tape is folded over on itself for easy removal.
With all four rivets set, it is time to call in the painter before calling my wife to help reinstall the rudder. Sorry, I am not a painter, which makes me even more cautious when performing maintenance that may require a spray gun.
After I completed this article and submitted it to KITPLANES’ international headquarters, I realized this repair was not complete. Like everything in aviation, the work is not complete until the paperwork is finished. Adding an entry into the logbook is critical to keep track of when the repair was performed, just in case those same four rivets start smoking again. The logbook entry included both the airframe time, the date of the repair and the following, “Replaced four adjacent smoking rivets on the right side of the VS’s trailing edge. The topmost of the four rivets was adjacent the upper rudder hinge bracket, followed by the remaining three rivets.” Maybe a little wordy but a future owner should be able to decipher which rivets were replaced. (Besides, a copy of this article will be placed in the logbooks.)
![[Credit: Lisa Turner]](https://www.kitplanes.com/wp-content/uploads/2026/02/Fuel-Selector.jpg?w=218&h=150&crop=1 "Fuel Follies")


