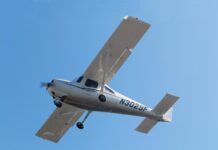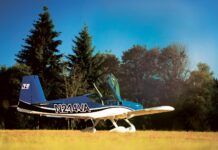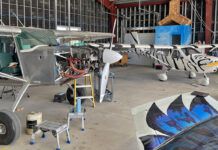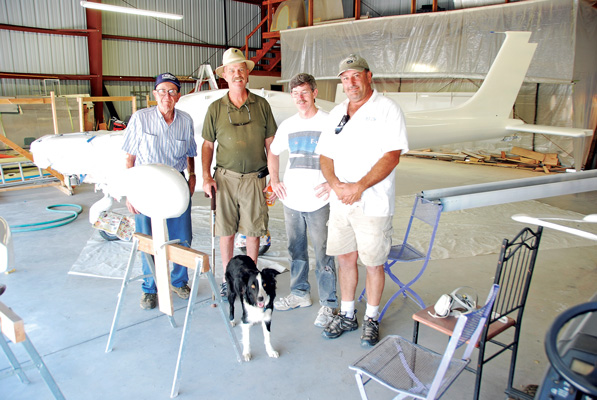
The paint crew (left to right): Buzz, the author, Mark and Joe. You might recognize Joe from an earlier article on painting. Tess, of course, supervised.
I got to the point of painting the Jabiru and was in a quandary. I had an expensive HVLP gun, but my friend Joe offered to trade me hangar space (for his Cessna 140) for a spray job on the Jabiru using his HVLP turbine. It seemed an opportunity to compare the systems, so I went for it.
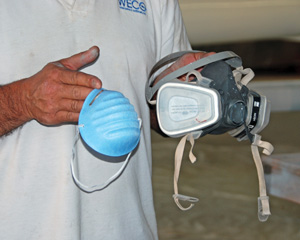
The mask on the left will keep paint off your nose, but the fumes will come through. The blue mask is not even remotely adequate for this project. Allow no one in the shop without a charcoal-filtering mask with fresh filters.
HVLP stands for high volume, low pressure—the gun uses a high volume of air at low pressure as a way of conserving paint by not blowing it all over the shop like you’re used to seeing with older spray guns. It’s not a new technology. Back in the mid-20th century, when you bought a household vacuum cleaner and got the usual accessories like a crevice tool and a dusting brush, you also got a spray gun. You could plug the hoses and the gun into the exhaust of the vacuum cleaner, thin the paint, and go take a shot at the fence, the walls, even the car and get acceptable results. Commercial shops scorned HVLP, of course. Anyone who wanted professional results imitated the pros and HVLP disappeared.
Economics Dictate
The reason for the renaissance of HVLP is obvious when you go to the paint supplier and see $300 per gallon for ordinary white paint. With this in mind, anything that reduces waste is a good idea, and you might suspect that HVLP could pay for itself in one application. You might be right. When I started this project I bought a top-of-the-line HVLP gun with visions of avoiding clouds of paint applied to surfaces other than the aircraft, but I still choked when I priced that nice frost-green paint you see on the Toyota Prius—try $1000 per gallon.
There are two vastly different versions of HVLP. Both of them use a gun that looks like, well, a spray gun, but one is hooked up to your compressor using ordinary hose; the other is a small box containing a turbine that uses ¾-inch diameter hoses to connect to the HVLP gun that’s included. Do they both give the same results? Let’s find out!
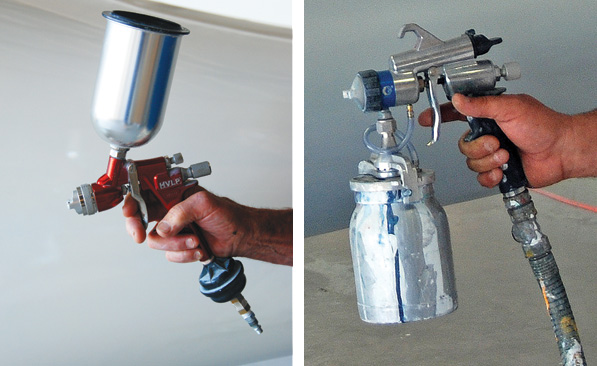
Left: The top of the line for a compressor-based HVLP. With the paint cup on top, all the paint gets used, but you can’t set it down except in a wall rack. Right: The turbine gun. Note the size of the hose at 3⁄4 inch inner diameter. With the paint pot on the bottom, you still cannot set the gun down because of the hose. Also, it’s a siphon, so there’s always something left in the pot.
Education time for me. My own $400 HVLP gun is really pretty, but not being an expert with it, I did some research on setting it up. First, let’s examine that “low pressure” part of the name. My gun has the maximum inlet pressure stamped on the nozzle, so all I have to do is turn the regulator down to that value and start shooting. With that low pressure at the regulator on the wall, I shot some primer and all I got was an anemic pbbbst of paint droplets.
I tried using a little pressure gauge right at the handle, but still didn’t get the expected result. So, scratching my head, I went to the paint supply store for some advice. To properly set inlet pressure, you must consider:
- The total length of hose. Clearly, the longer the hose, the greater the pressure drop. You might have noticed that when there’s no flow in a line, the pressure is the same throughout the line. But with flow, there’s a drop proportional to the length of the line.
- The diameter of the hose. This is more important for HVLP than conventional guns because that high volume of air is achieved by dropping the pressure within the gun, and a larger-diameter hose will deliver more molecules of air measured in cubic feet per minute (cfm) when it comes time to make the trade within the gun handle.
- The number of quick disconnects (QDs) in the system.
CFM | 1/4 inch ID | 3/8 inch ID |
|---|---|---|
10 | 1 | 0.7 |
20 | 10 | 4 |
30 | 17 | 9 |
40 | 44 | 18 |
50 | 60 | 30 |
My friendly paint supply guy then sketched out some surprising numbers regarding the pressure drop I would suffer with various hardware (see Figure 1). What this means is that if you had a tool that needed 20 cfm and it was supplied with 100 feet of 3⁄8-inch hose at 100 psi, you would expect a pressure drop of 4 psi. Because this is due to friction inside the hose, with half the length you would see half the drop.
But that’s for continuous hose. How many quick disconnects are between the pressure gauge on the dryer/filter and the handle of the gun? This was a shocker when I found out that each QD can generate up to a 40-psi drop with 8 psi being the published typical. There are QDs with very low drop, I was told, but they’re bulky.
This is all of little consequence to the guy with a big compressor and one gun as long as the diameter of the hose will allow the required cfm; just crank up the regulator. Well, there’s a second little gauge that can be attached at the exhaust end between the spray nozzle and the gun handle, but that’s another part to buy. These are required in the big shops when the EPA comes knocking. HVLP is a good-neighbor device because it cuts down on the pollution via overspray. If you put a higher percentage of paint on the target, you need to use less paint; hence, you are spraying a lower amount of volatiles as well. When I got it going I was running about 35 psi at the regulator for an acceptable result on the airplane.
The next question from my friends at the painting supply shop was, “You do have a good dryer/filter don’t you?” They advised against using one of those bargain units that’s the size of two or three fingers, and said I’d find that they’re not a bargain when they don’t dry or filter well and a lot of paint gets wasted. This sounded plausible, so I stuck my head in a commercial paint shop and sure enough, they rely on a wall-mounted unit about a foot high and 6 inches in diameter to extract water and particulate. There’s always a bit of dust floating around unless you’re working in a top-notch paint booth, and there’s no point in spraying on more. Worse, entrained water will play hob with the finish. A good dryer/filter is about $75 and worth it—especially for the nice pressure regulator that comes with it. This has another use in that the air going to my pneumatic tools is now cleaner.
The Terpsichorean Turbine
Having checked out the traditional-appearing HVLP gun, I oiled on over to the turbine setup. Self contained, all in one box when shipped, minimum QDs, all the parts are matched for air flow, and it has a kit of nozzle and needles for every viscosity of paint. What’s not to like? Well, the hose is really large, and the gun looks like it was bought at a garage sale. At a system cost of $800 to $1000, I want pretty. But let’s answer the performance question by shooting some paint with both guns.
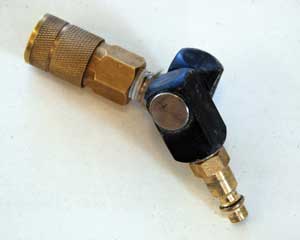
This flexible elbow (above) has been fitted with two quick disconnects and is invaluable for use in all air tools. Don’t forget to compensate for the psi drop as well as the loss of air flow. Better still, don’t use it with HVLP.
First, however, pay close attention to the cautions when you buy your paint. Buy the right mask, and don’t let anyone in who doesn’t have one or they’ll pay for it with a big headache and sore throat at the minimum. Remember, you’re putting out the same amount of paint and volatiles you would with any cheap gun; more of the paint goes where you want it, but the volatiles still go into the air.
There are some water-based paints such as those from Stewart that may be, I’m told, used in your condo garage without causing the termites to look for another home.
Another factor is that along with the right cfm flow and pressure, each gun must have a nozzle and needle matched to the viscosity of the paint. It’s sounding like a lot of effort, but there’s no simple answer if you’re going to tackle this last part of the project. So let’s wrap up by just comparing the two HVLP systems.
And the Winner…
The winner by a 3-0 vote for easy use is the turbine. The goal is painting, and it’s simple to really sort it out with the turbine. For versatility, the compressor system gets the nod 3-0. You can blow up a tire with it, but note that some of the turbines come with a fresh air supply to a mask. The drawback here is that the turbine must then be placed well away from where you’re spraying, or you will get the fumes directly supplied to you.
For smoothness of paint finish, it’s a draw. Mark did the wings, Joe did the fuselage, and I can’t see a difference. For ease of use when shooting, we again have a draw. Both guns were nicely balanced.
While all this research sounds like a lot of work, it’s no more trouble than building the airplane. The whole exercise is a hobby to the builder, a way to make a living for the kit manufacturer, and a contribution to national defense for the FAA. You probably didn’t know much about fiberglass or riveting when you started, and now you could easily do a boat, but it would need to be painted and, well, there’s another skill under your belt.
Now that the compressor gun is set up, I’m glad I bought it. But if I were starting from scratch, I’d go with the turbine. However, had I done that, I’d have a $1000 tool that’s seldom used instead of a $400 tool. Either way, it’s cheaper than sending the job out for $5000 to $8000. And as for the Jabiru? With the base color done, we’ve loaded it up to move to an airport with a longer runway and fewer obstructions. First flight is on the near horizon.
For more information, call 559/431-1701 or visit www.jabirupacific.com.


