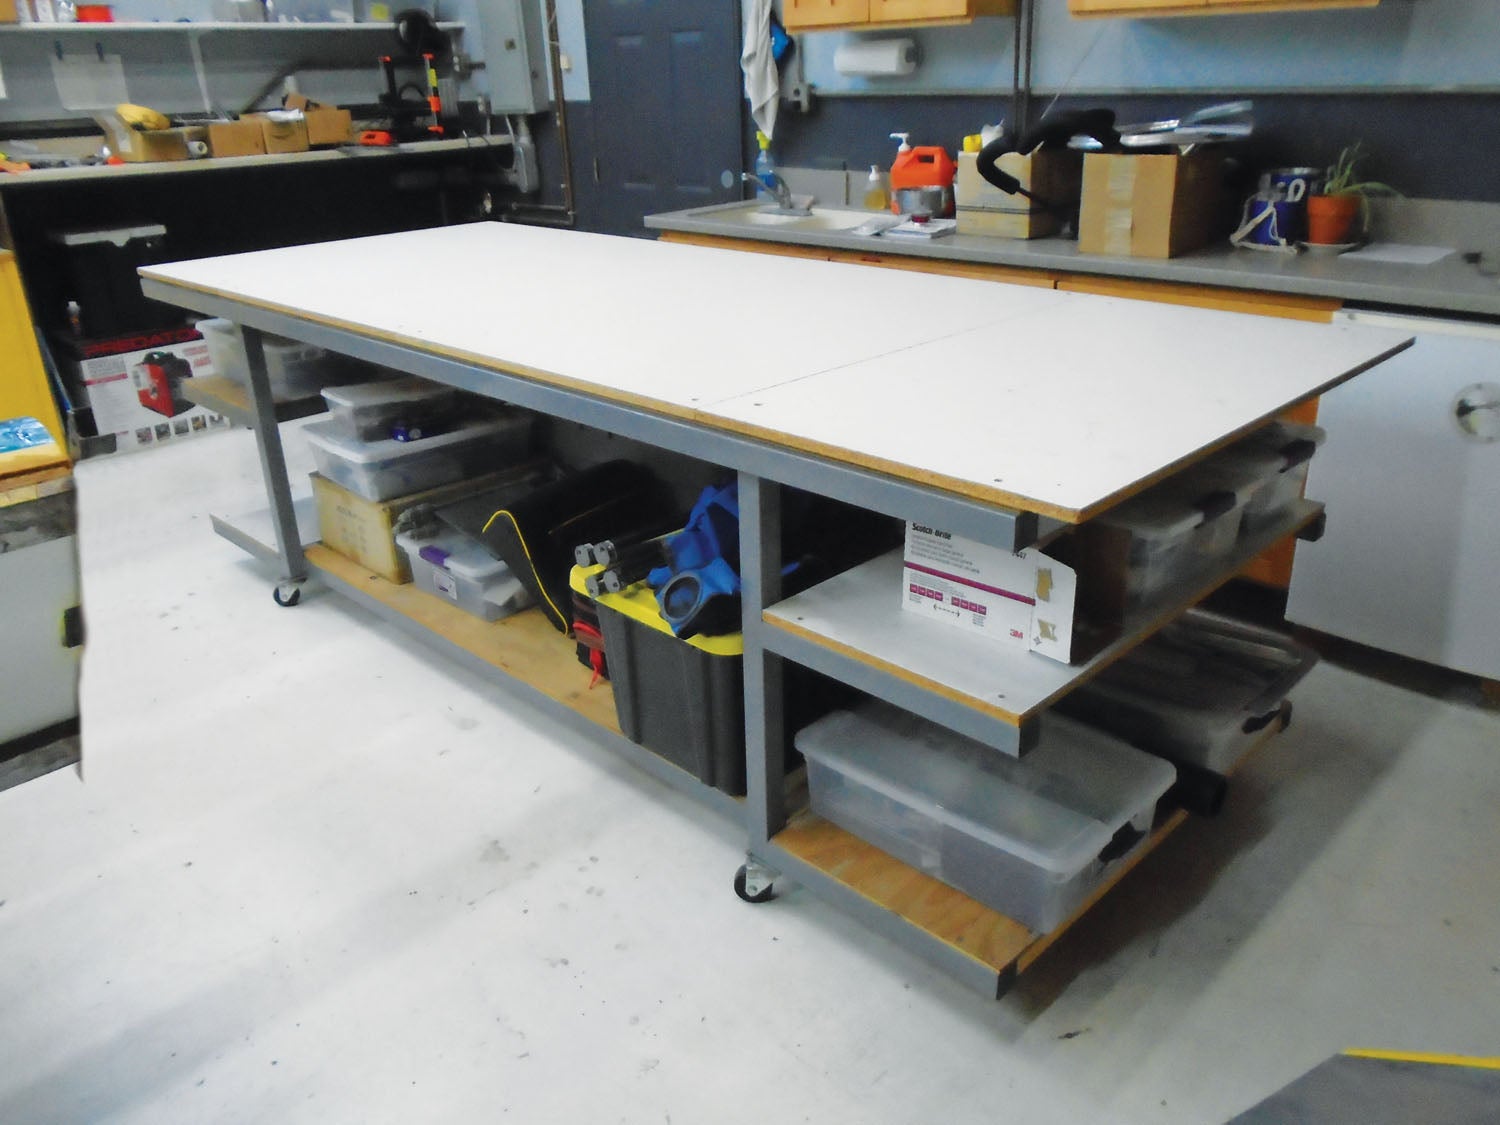
 You can never have enough shop space, and you can never have enough tables in that shop. While the former is fixed, the latter can actually create space for you: Well-designed tables can double or triple the horizontal space of their footprint (think worktable on top, one or two storage shelves beneath). In addition, I’m a firm believer in putting everything in my shop on wheels, including the tables, of course. Being able to easily reconfigure the shop layout as the build progresses (or cars come inside for winter, etc.) will help you efficiently use space. In this article, I’ll document building a typical steel table and lay out some general guidelines for table construction.
First off, I regularly see articles on wood table construction—EAA even has a standardized worktable (Google “EAA 1000 table” for a set of plans). Having built wood tables for my RV-4 and subsequently welded steel tables when I started the SR-1 race plane, I doubt I’ll ever build another wood shop table. Here’s why:
1. Steel tables don’t take any longer to fabricate than wood—in fact, I’m pretty sure I can build one in steel faster than wood. They look more professional and are nicer to work on.
2. Steel tables have a solid, stable feel compared to wood, which eventually seems to grow squeaky and warp with temperature and humidity changes.
3. Steel tables are lighter and stronger.
4. If you need to get rid of the tables when you are finished building, steel tables have value and can easily be sold on Craigslist, etc. That’s less the case for wood tables.
Now for the disadvantages—I can only think of a few. First, you’ll need a welder and a chop saw. Second, steel for a table will be a bit more expensive than lumber. And finally, while not strictly necessary, if you’ve gone to the trouble of welding up a nice table, you really ought to go the final step and paint it. That means you’ll need more equipment (air compressor, paint gun, etc.), but most builders have these items anyway if they are using air tools or priming parts as they build.

Tabletop Size
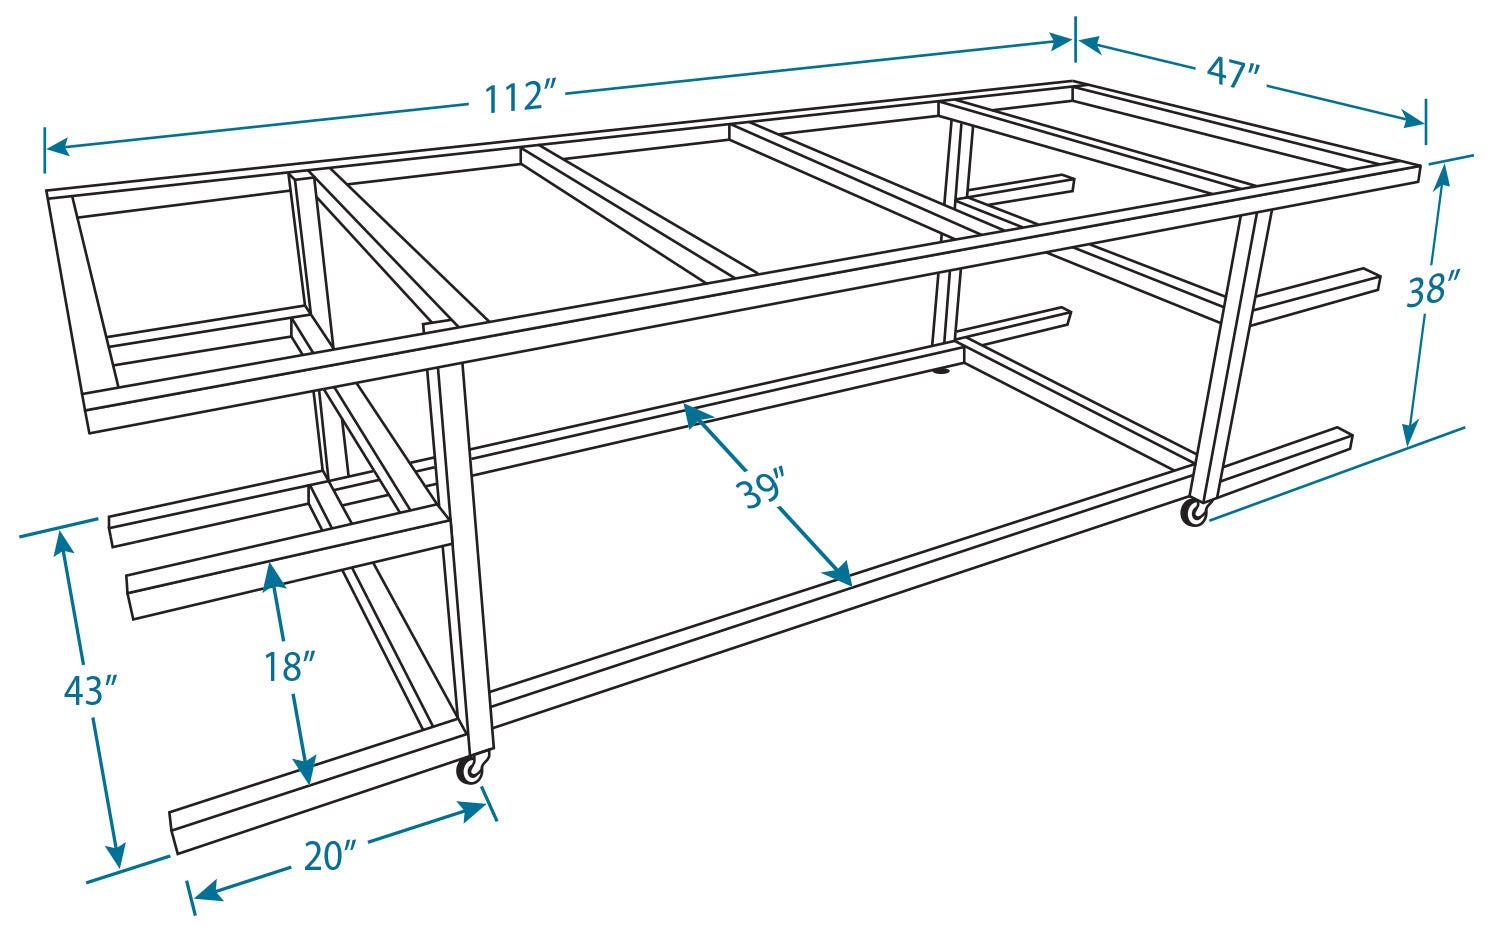
I like big tables. The 2×4-foot EAA tables look downright miniature in my eyes. My tables for composites are 5×10 feet. (Many composites come in 50-inch-wide rolls, so a 60-inch-wide table works well.) I have another assembly table that is 4×10 feet and a couple of smaller 2.5×6-foot tables that I use for staging and materials storage. One of the nice things about the wider tables is that you can work on both sides—I often have different projects going on different sides of the table. Obviously, this size of a table doesn’t make sense if you are planning to shove it up against a wall. Note that the 5-foot-wide tables can be a bit of a reach to grab something on the other side, so unless you are pretty tall, it might be better to stick with 4-foot-wide tables.
Since you’ll be spending many hours standing at your table, get the height right. The EAA tables are 33.75 inches, floor to tabletop, but for tall folks this may be uncomfortably low. I’m 6 feet 2 inches and my tables are 38–39 inches high, which feels perfect for me.
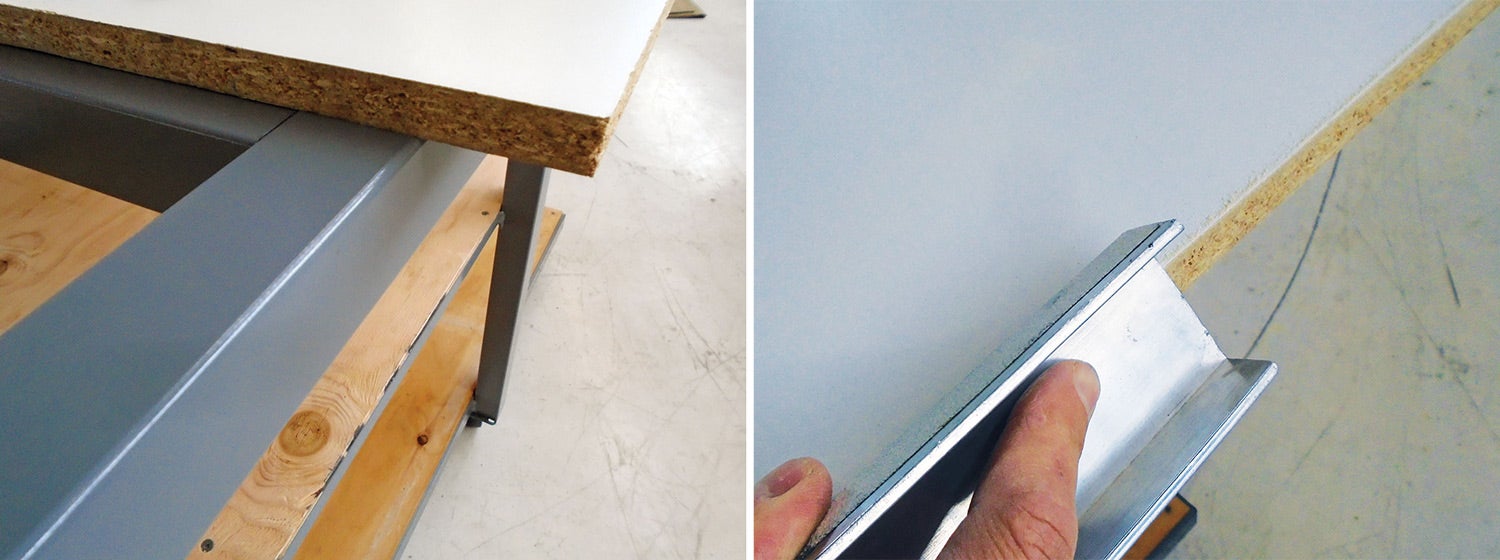
The steel frame itself should also be a few inches inset from the work surface dimensions. For example, a 4×8-foot table might have a frame made of 2-inch square tubing, with outside dimensions of 44×92 inches and inside dimensions of 40×88 inches. The reason to inset the frame is to provide a handy edge to clamp workpieces to. If you run the frame flush with the upper work surface, you’ll be limited to using deep C-clamps or bar clamps rather than spring clamps, which are often more convenient.
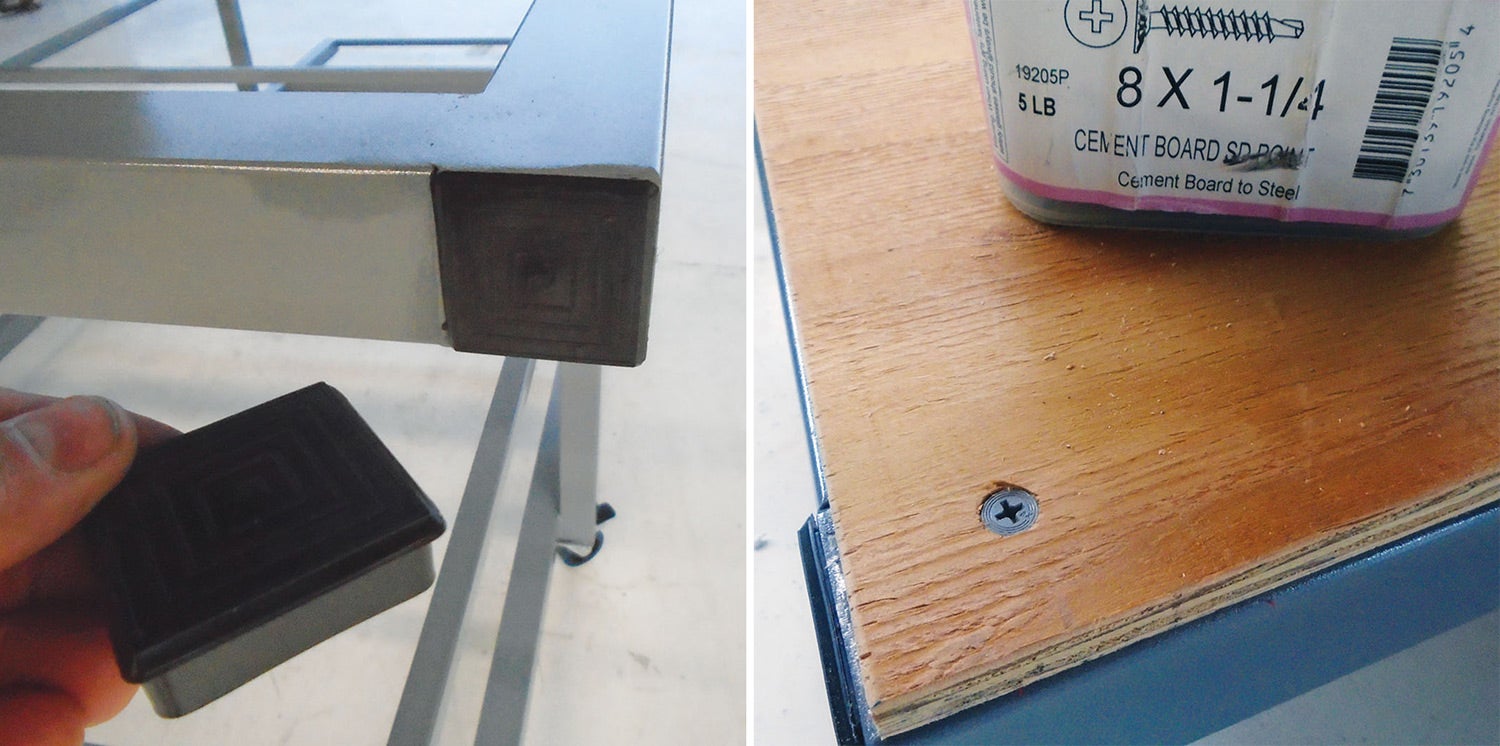
For the first steel table I built six years ago, I attached the work surface and shelves with construction glue. It worked fine for a few years but then began to let loose. I now attach the wood top to the steel with self-tapping screws. I countersink these so they will not catch on my work.
One final note: Consider designing your tables to maximize material usage and minimize labor. For example, melamine board comes in 49×96-inch sheets. So my 4×10-foot table is actually 49 inches wide. Likewise, I designed the legs on my 5×10-foot tables to be 48.25 inches wide as measured inside to inside. This allows me to slip a 4×8-foot sheet of plywood between the legs for a shelf without having to do any cutting. The legs are 52.25 inches outside to outside, which gives me about 4 inches of table surface overhang to clamp to.
Shelves and Wheels
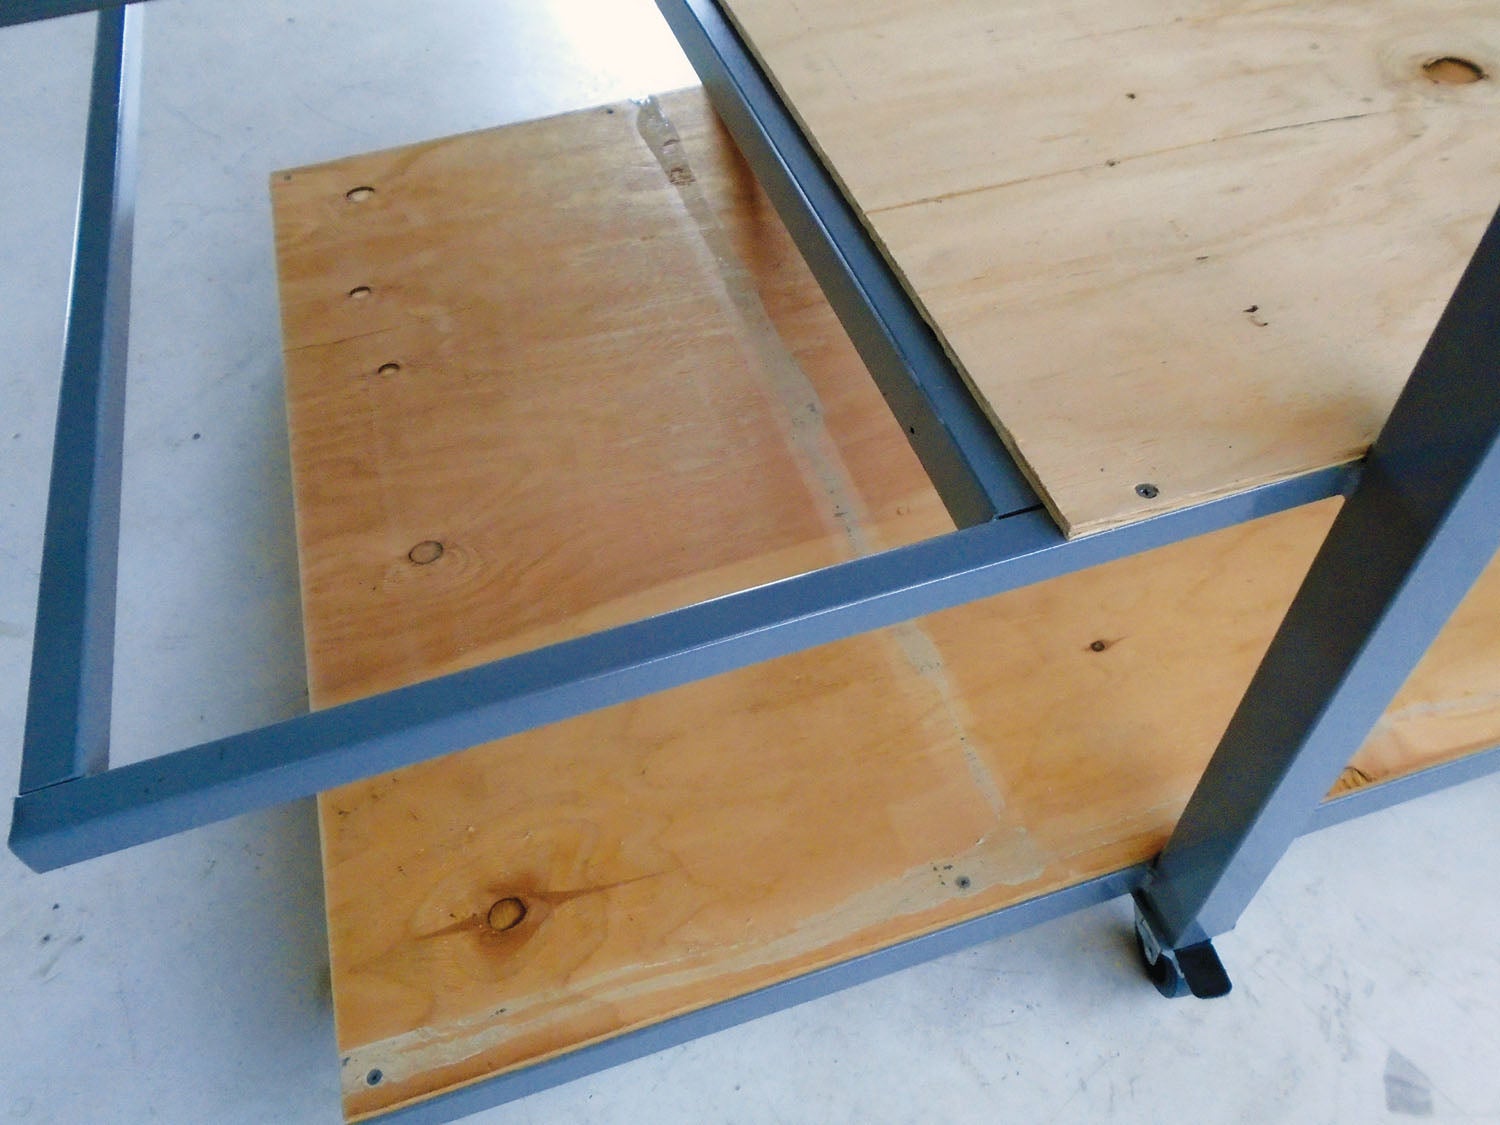
Shelves under the work surface are a great place to store parts or supplies. This frees up shop floor space and adds weight to the table, giving it a more solid feel. I suggest offsetting the shelf edges a few inches inward from the upper table edge. For example, if the upper work surface is 48×96 inches, the lower shelves can be 40×90 inches. This of course reduces the useful shelf space but makes cleaning easier since chips and other debris can fall straight down to the floor, rather than onto the shelf below.
For shelves I typically use 3/8-inch ply. For the work surface, I use melamine-faced particleboard. The white surface is easy on the eyes and nice to work on. After a few years of abuse, I flip it over and voilà, a nice white surface again. (This is another reason to use screws and not glue.)
For those of you doing composites, a cutting mat is a nice addition. You can get very nice self-healing Rhino cutting mats from www.speedpress.com. These are not wimpy hobby store mats—they are 3/16-inch thick and will last for years.
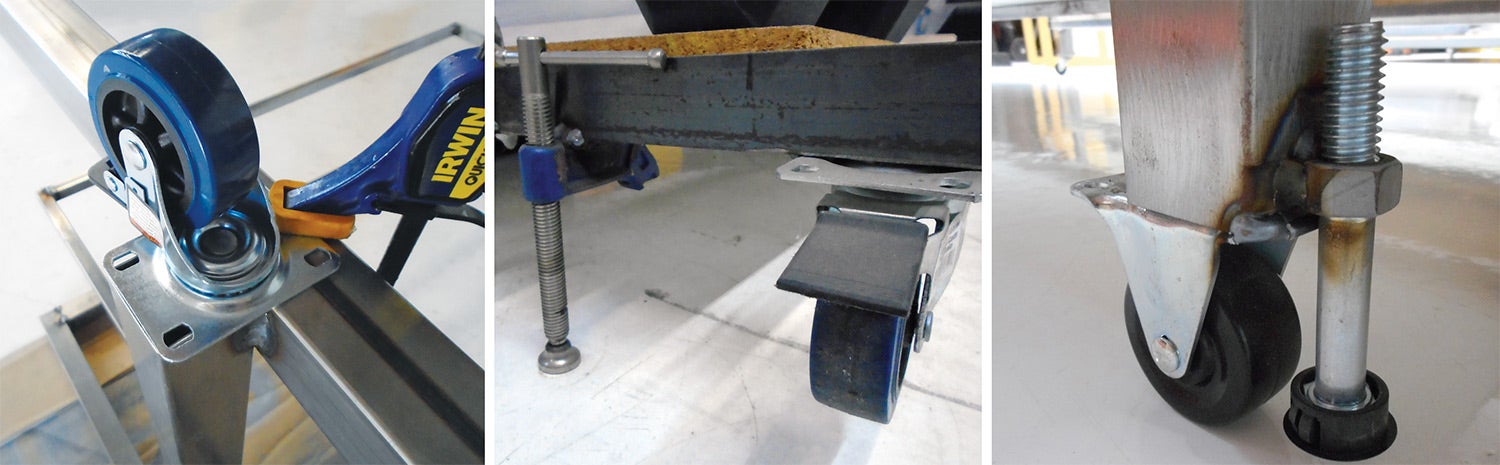
Your tables should also have wheels. At a minimum I’d suggest 3-inch wheels for a smaller table, but 4-inch wheels are better. My 5×10-foot tables get heavy once I have the storage shelves full, so 3-inch wheels are the minimum for this size, but 4-inch wheels are preferable. In addition, think about floor clearance for cleaning: A push broom needs at least five inches, and a Roomba needs three inches.
I suggest swivel wheels on all corners. Having experimented with two swivel and two fixed wheels versus four swivel wheels, I greatly prefer the latter. Just make sure the wheels lock. If tables on wheels bother you or leveling the table is a concern, you can modify C-clamps and weld them on the leg next to the wheel. Screw them down to level the table.
Shopping for Tools and Steel
If you don’t have a welder and a chop saw, you can pick these up used on Craigslist for a few hundred dollars. I buy a lot of my tools used, but I’ll admit I purchased my welder new and have no regrets. I use it a ton and it is a pleasure to weld with. As you’ve no doubt realized, using quality tools makes building an airplane a more pleasurable experience. And once you weld up a table, you’ll start seeing all sorts of other uses for a welder as well (hint: justification to significant other as to why you need one). Hands down, the money I spent on my Miller 211 was one of the best investments I’ve made in my shop.
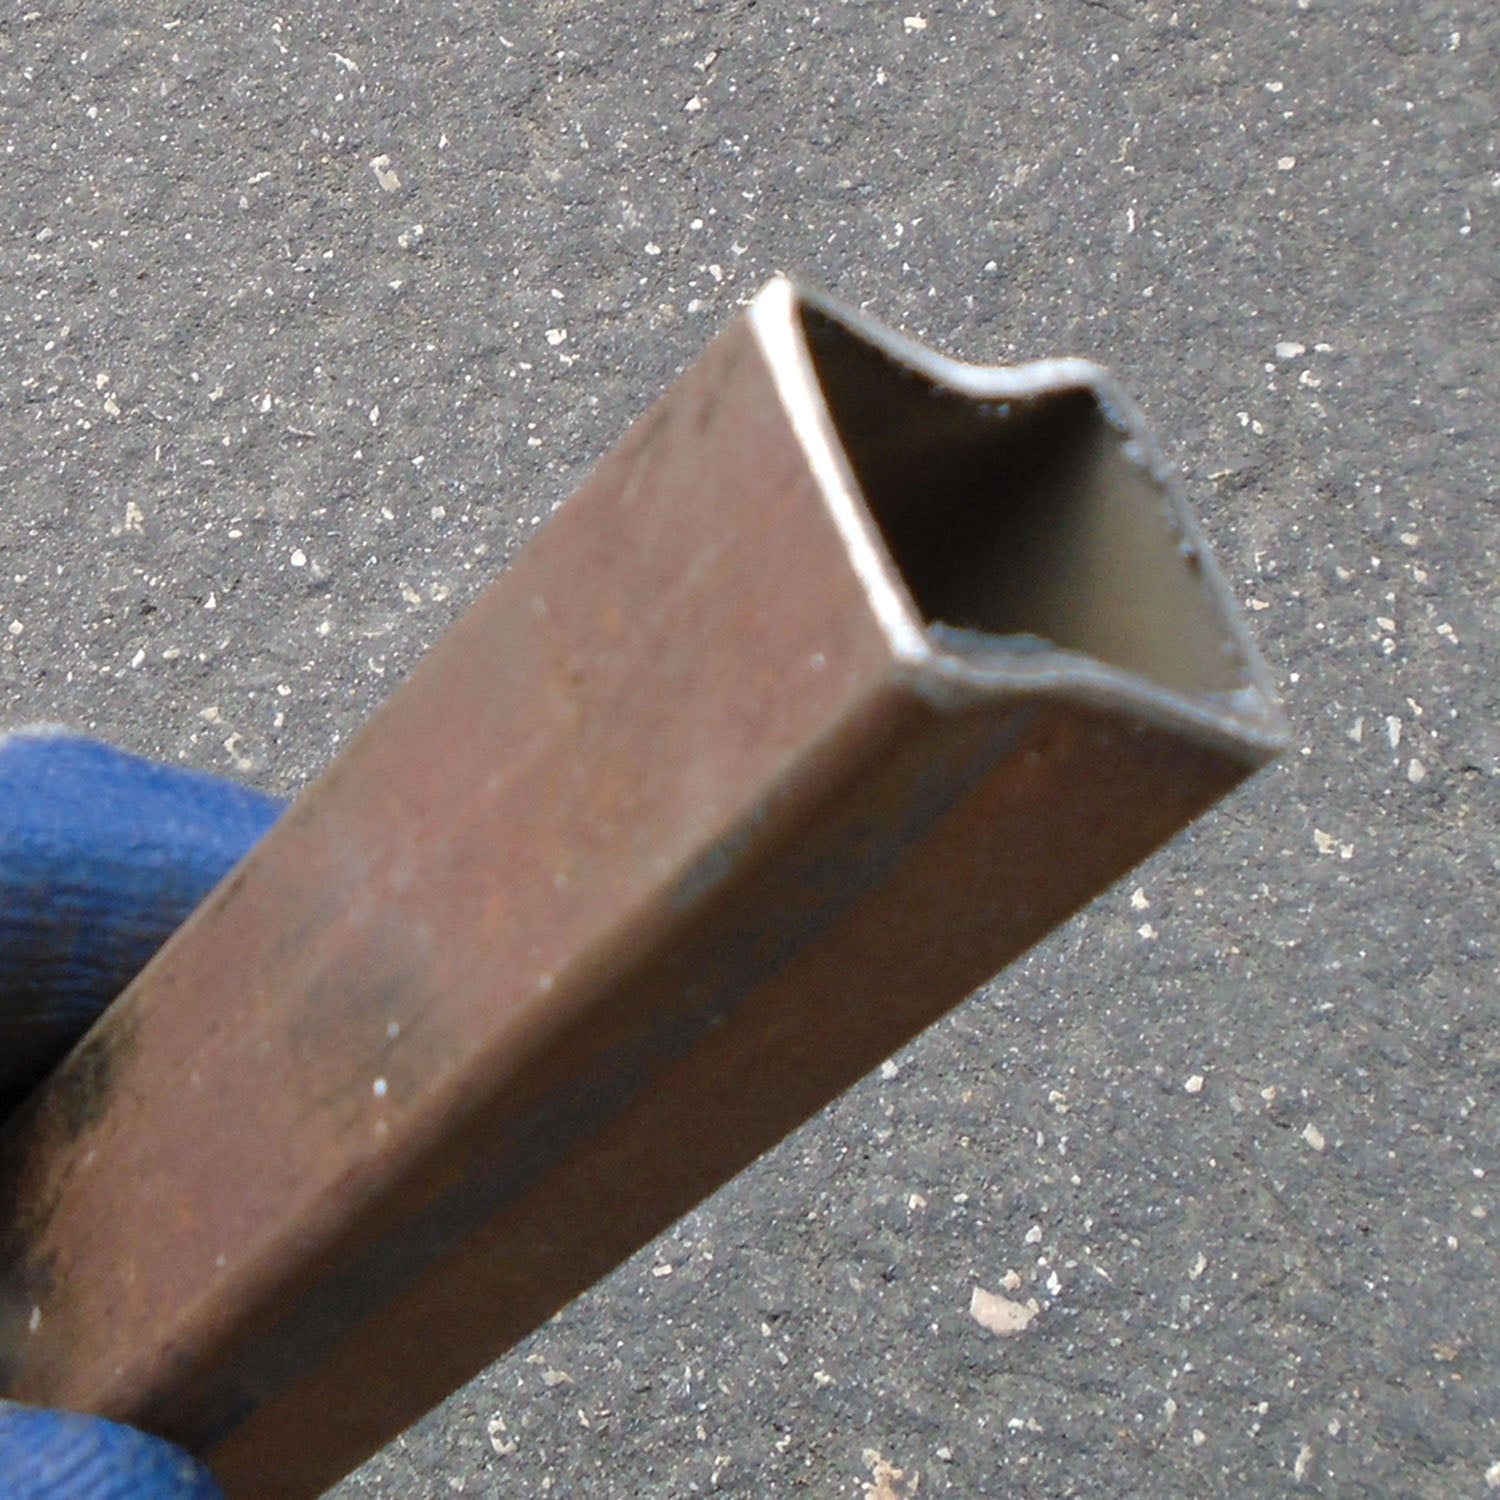
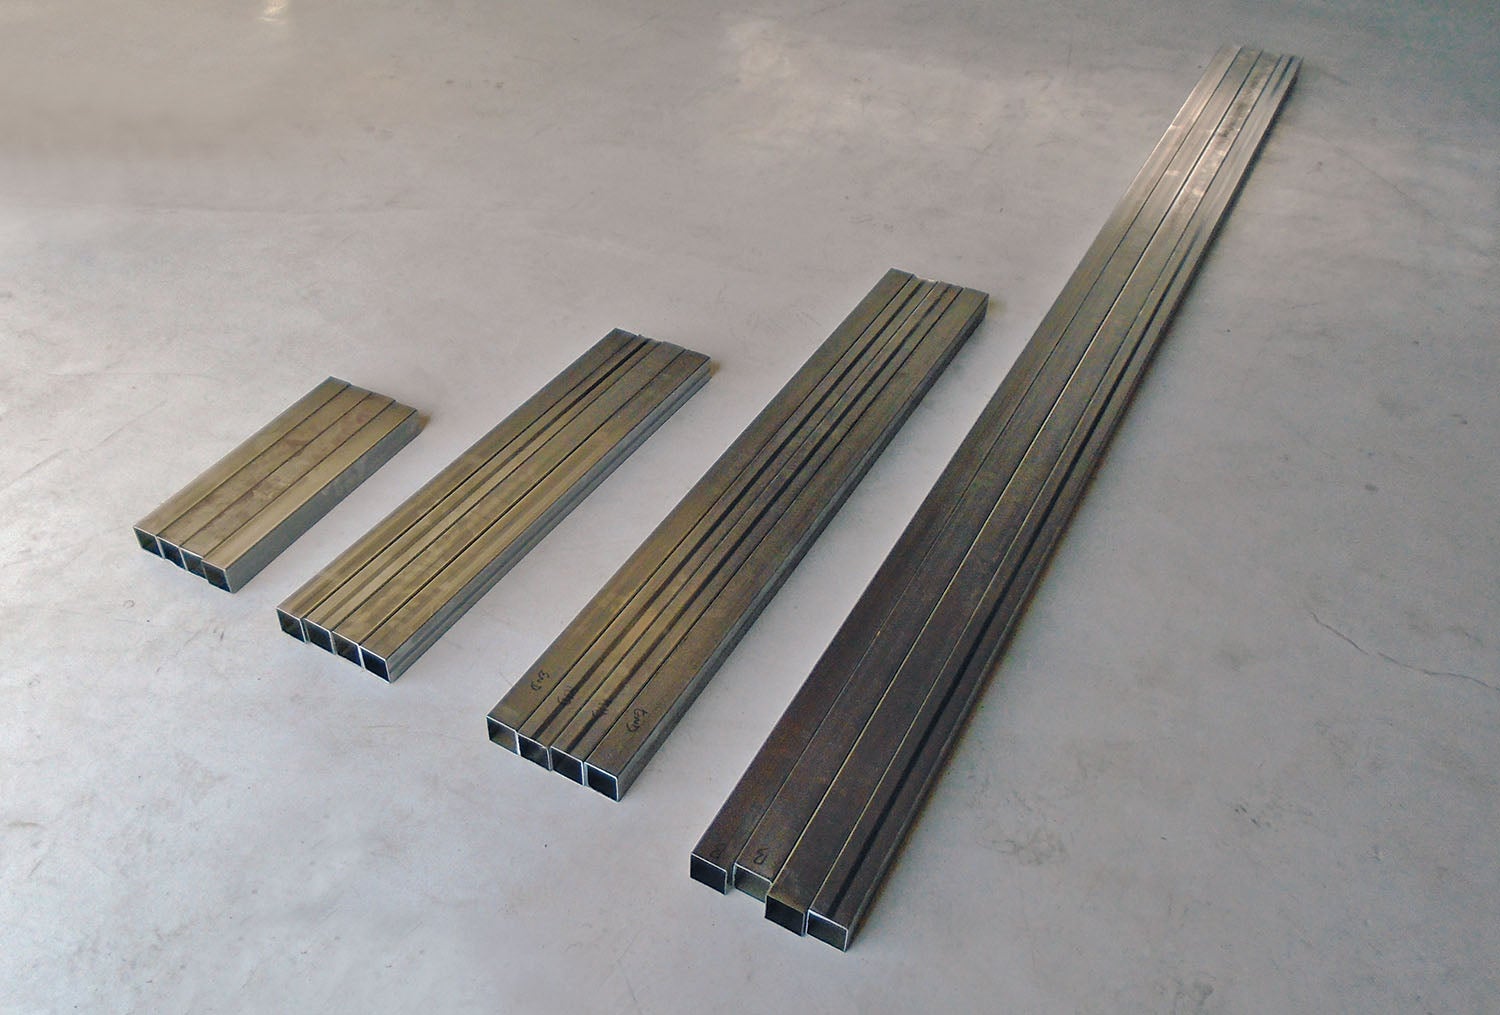
Most metal suppliers sell steel in 20-foot sticks, though they’ll be happy to cut it to length for you (for a fee). Some suppliers also deliver. When buying steel, try to get sticks that have been kept under cover and are still covered with a fresh coat of oil—starting a project with rusty steel is no fun.
You’ll use the chop saw to cut the steel to the exact length for your table, so I suggest getting 20-foot sticks. This will minimize leftover cutoffs. Sixteen-gauge (1/16-inch wall thickness) is plenty strong. Unless you plan on parking a tank on the table, avoid 1/8-inch.
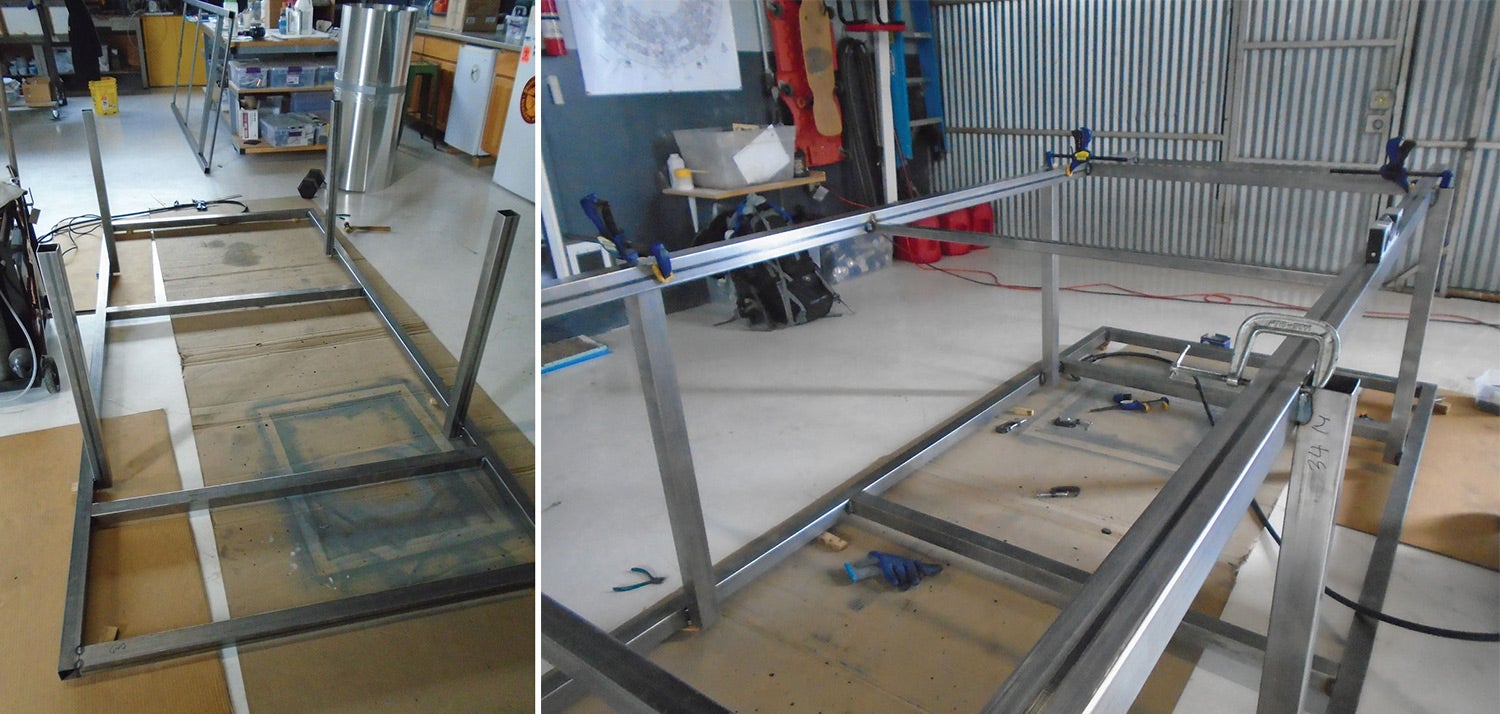
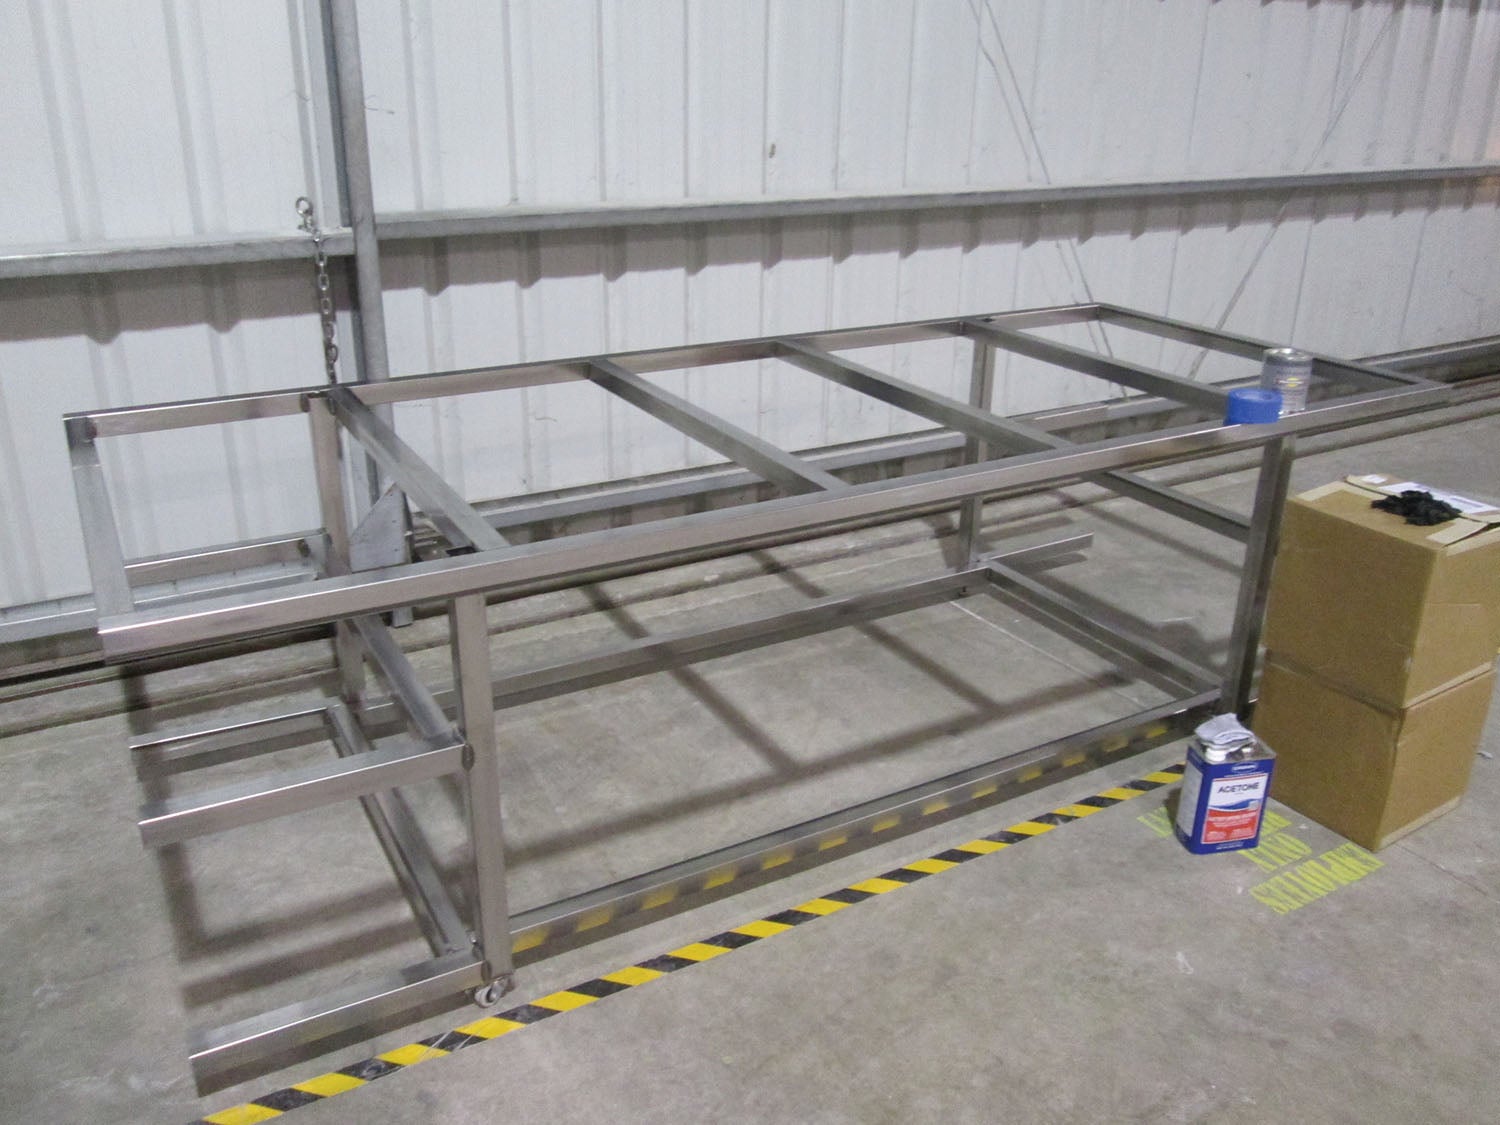
Building the Upper and Lower Frames
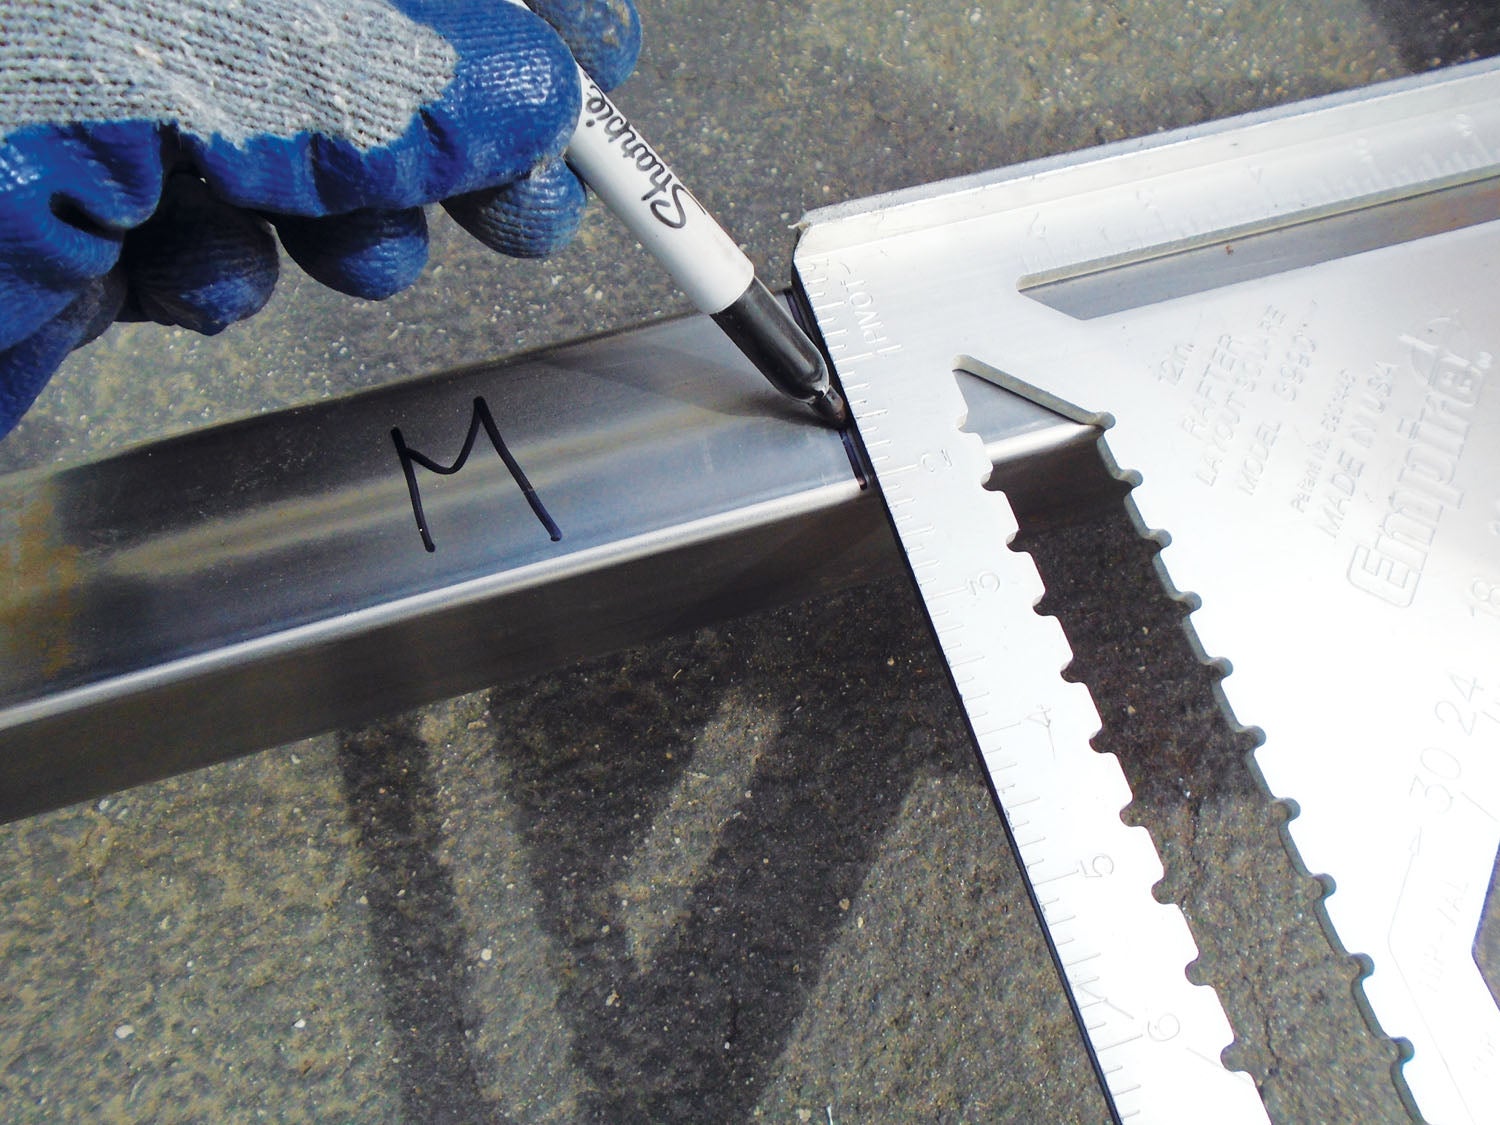
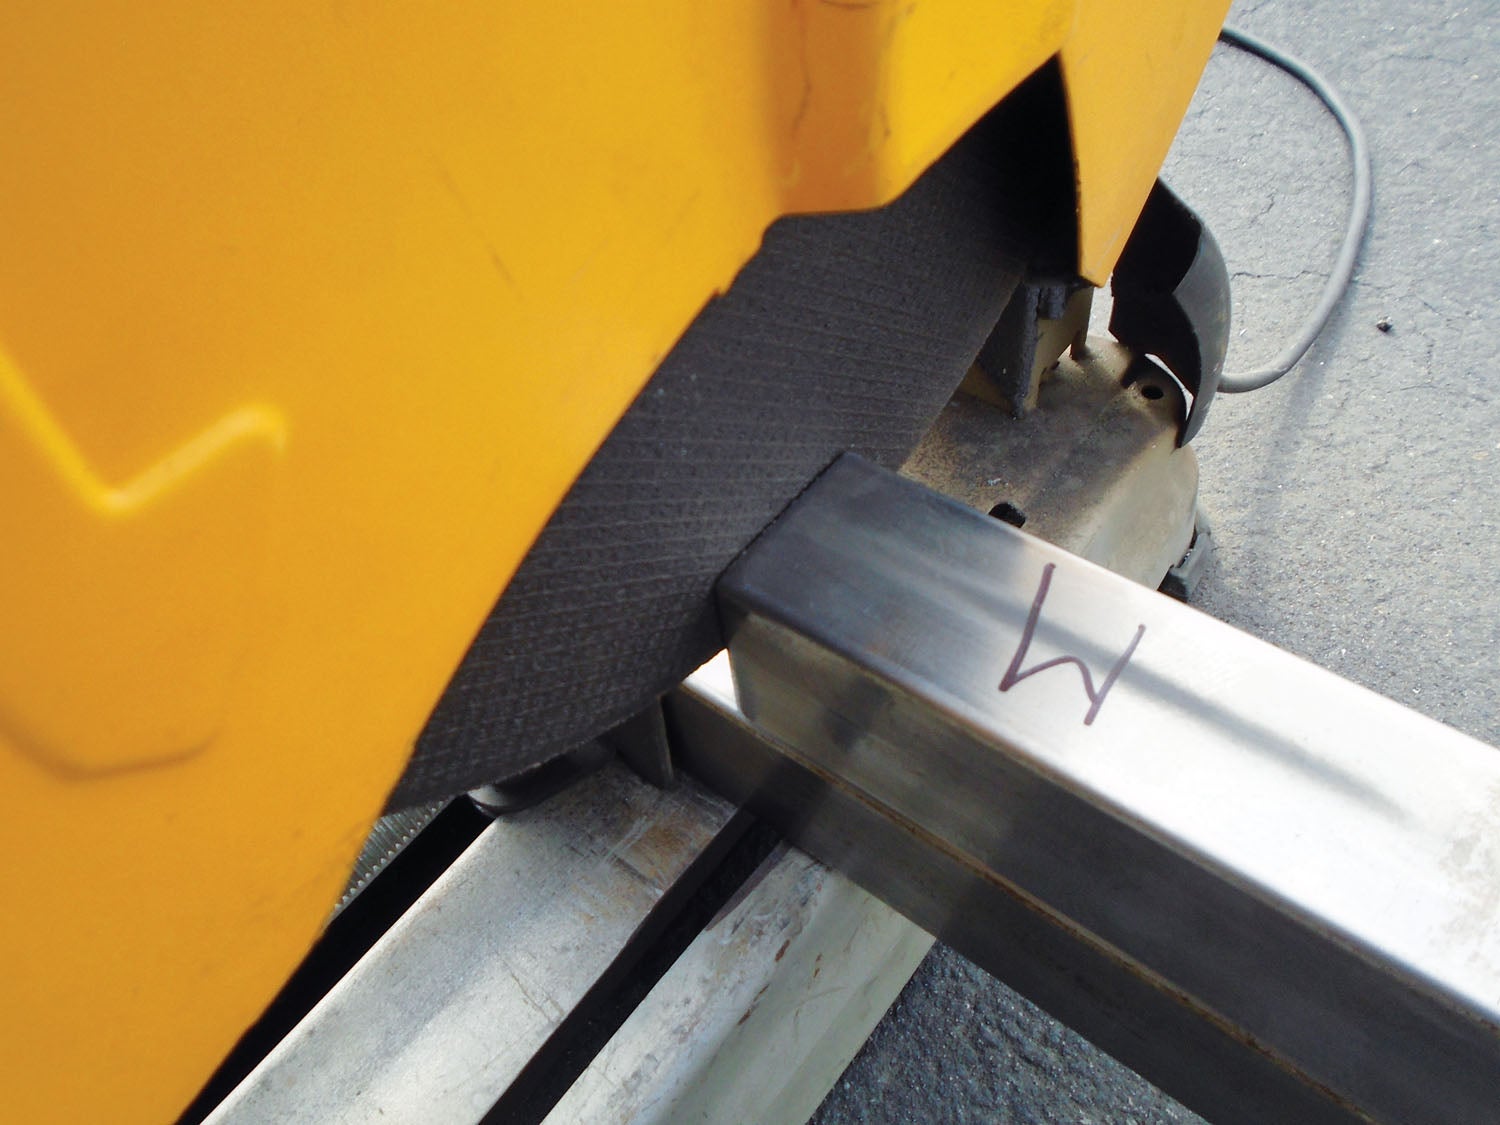
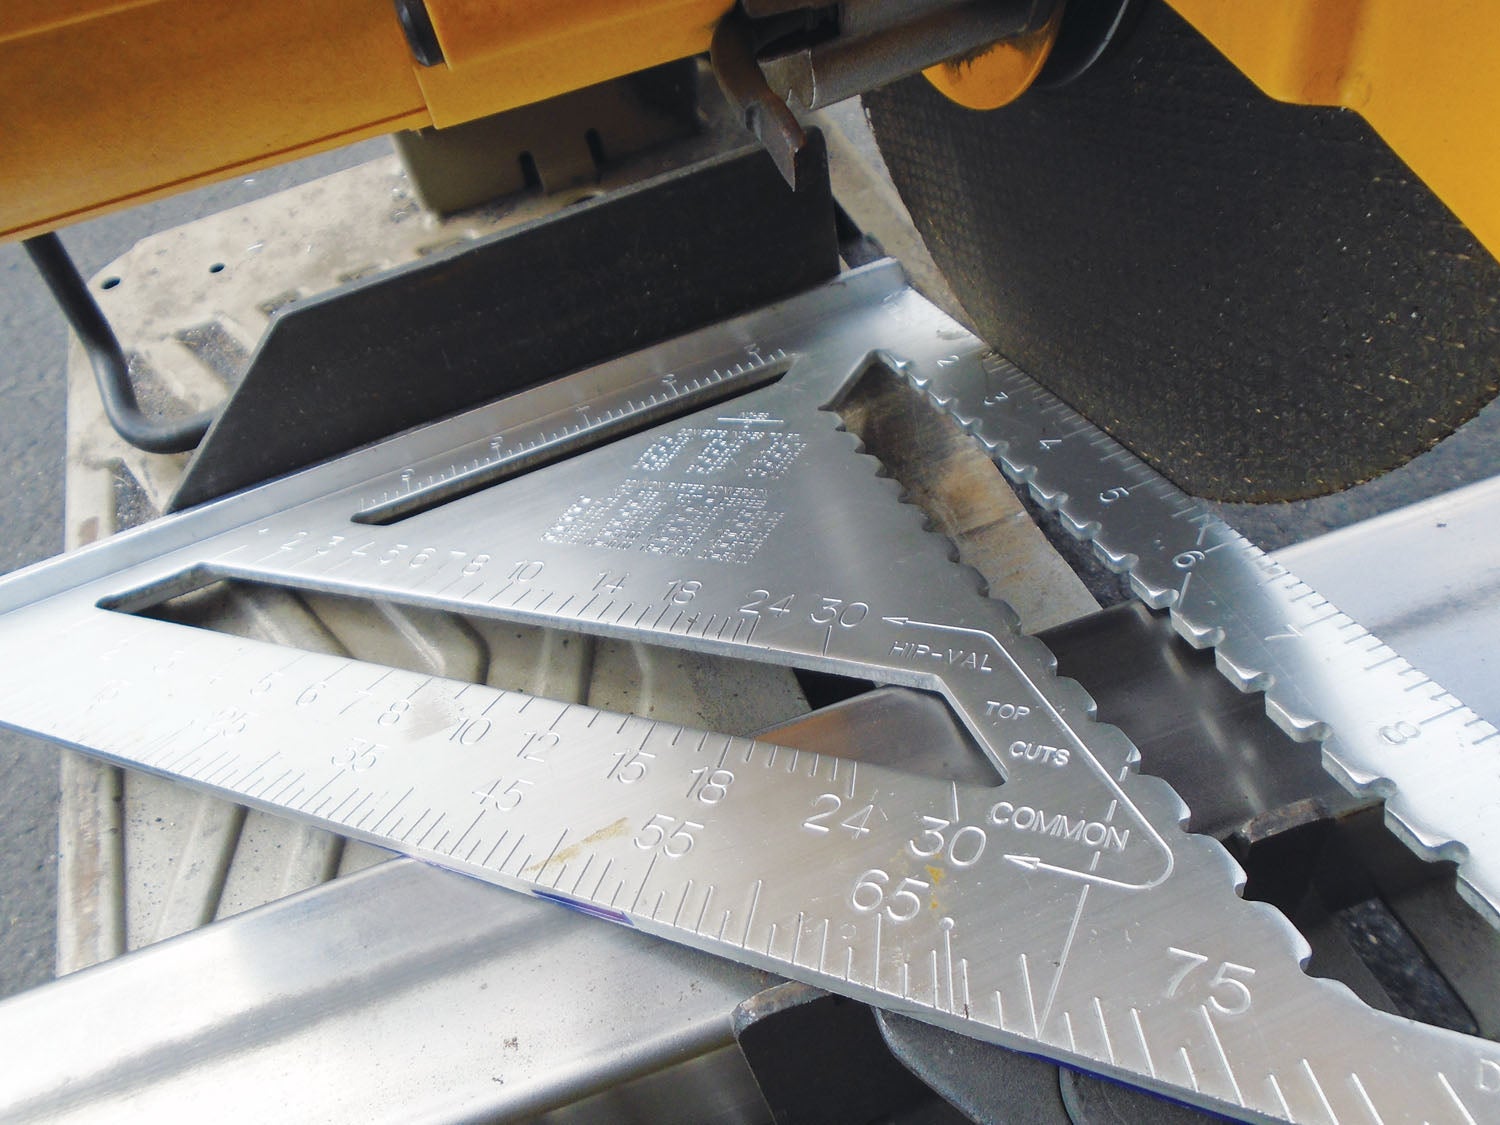
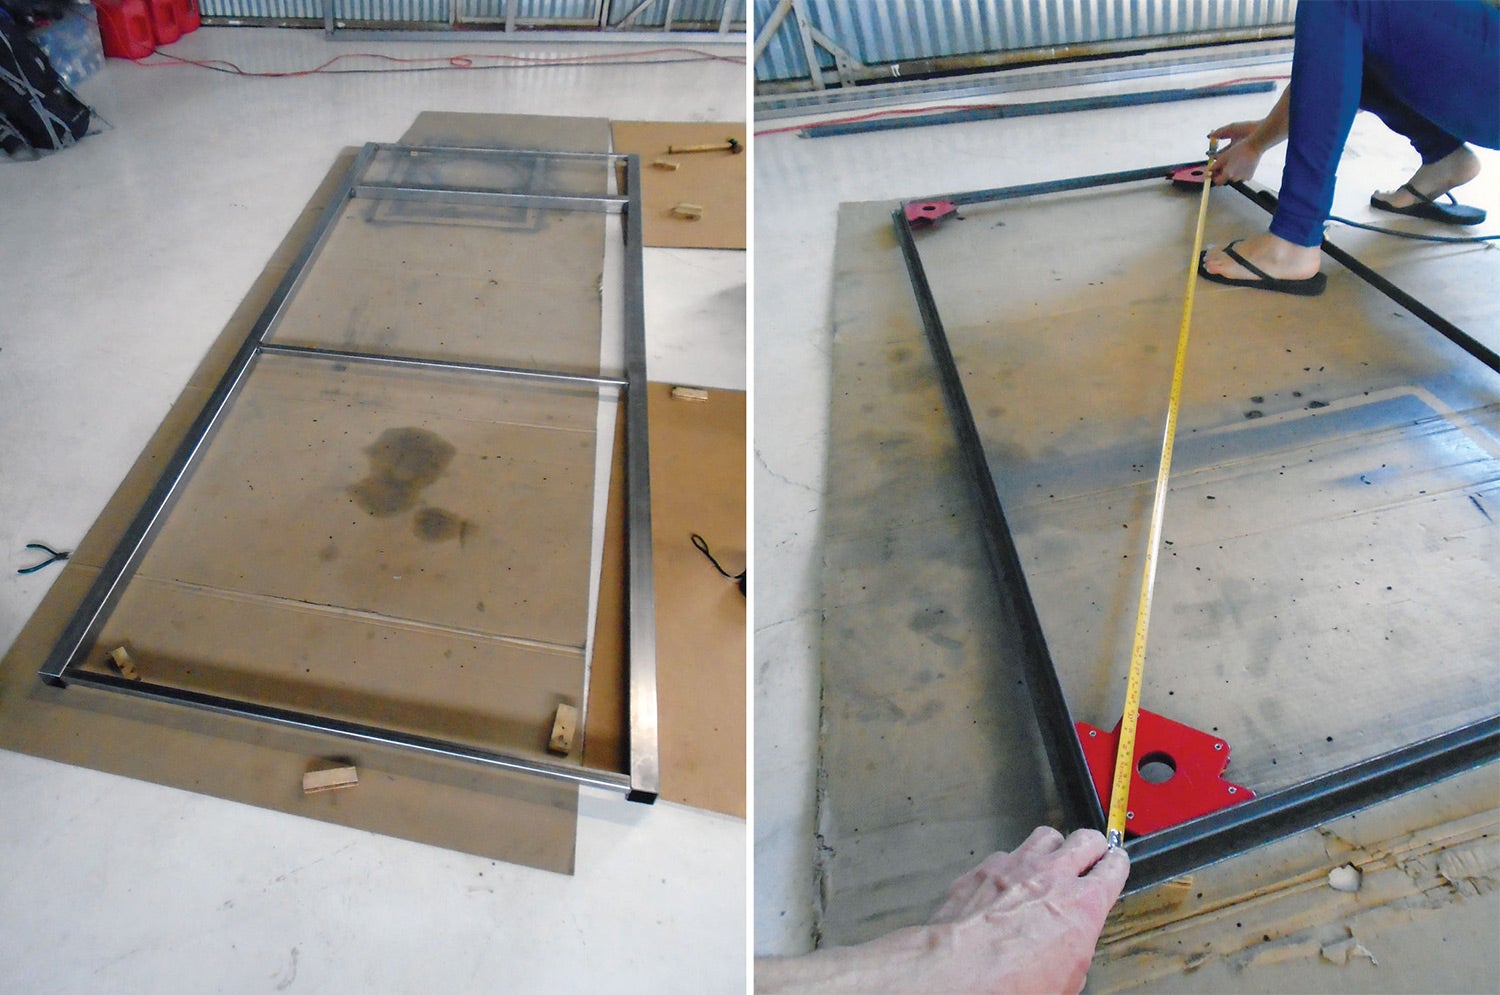
Before cutting the sticks to the required length, chop off any crushed ends. Next, mark your cut lines with a carpenter’s square. Since you’ll be cutting multiples of each piece, mark your first one with an “M” to indicate it’s the master, then use this piece to size the rest. Place the master on the next piece to be cut, flush the ends, then slide the piece to be cut toward the chop saw blade until the blade is flush with the master. I find this faster and more accurate than measuring and marking each piece individually. Also use the carpenter’s square to confirm the saw’s fence is square to the blade. Nice square cuts make the subsequent welding much easier.
Add Legs and the Lower Frame
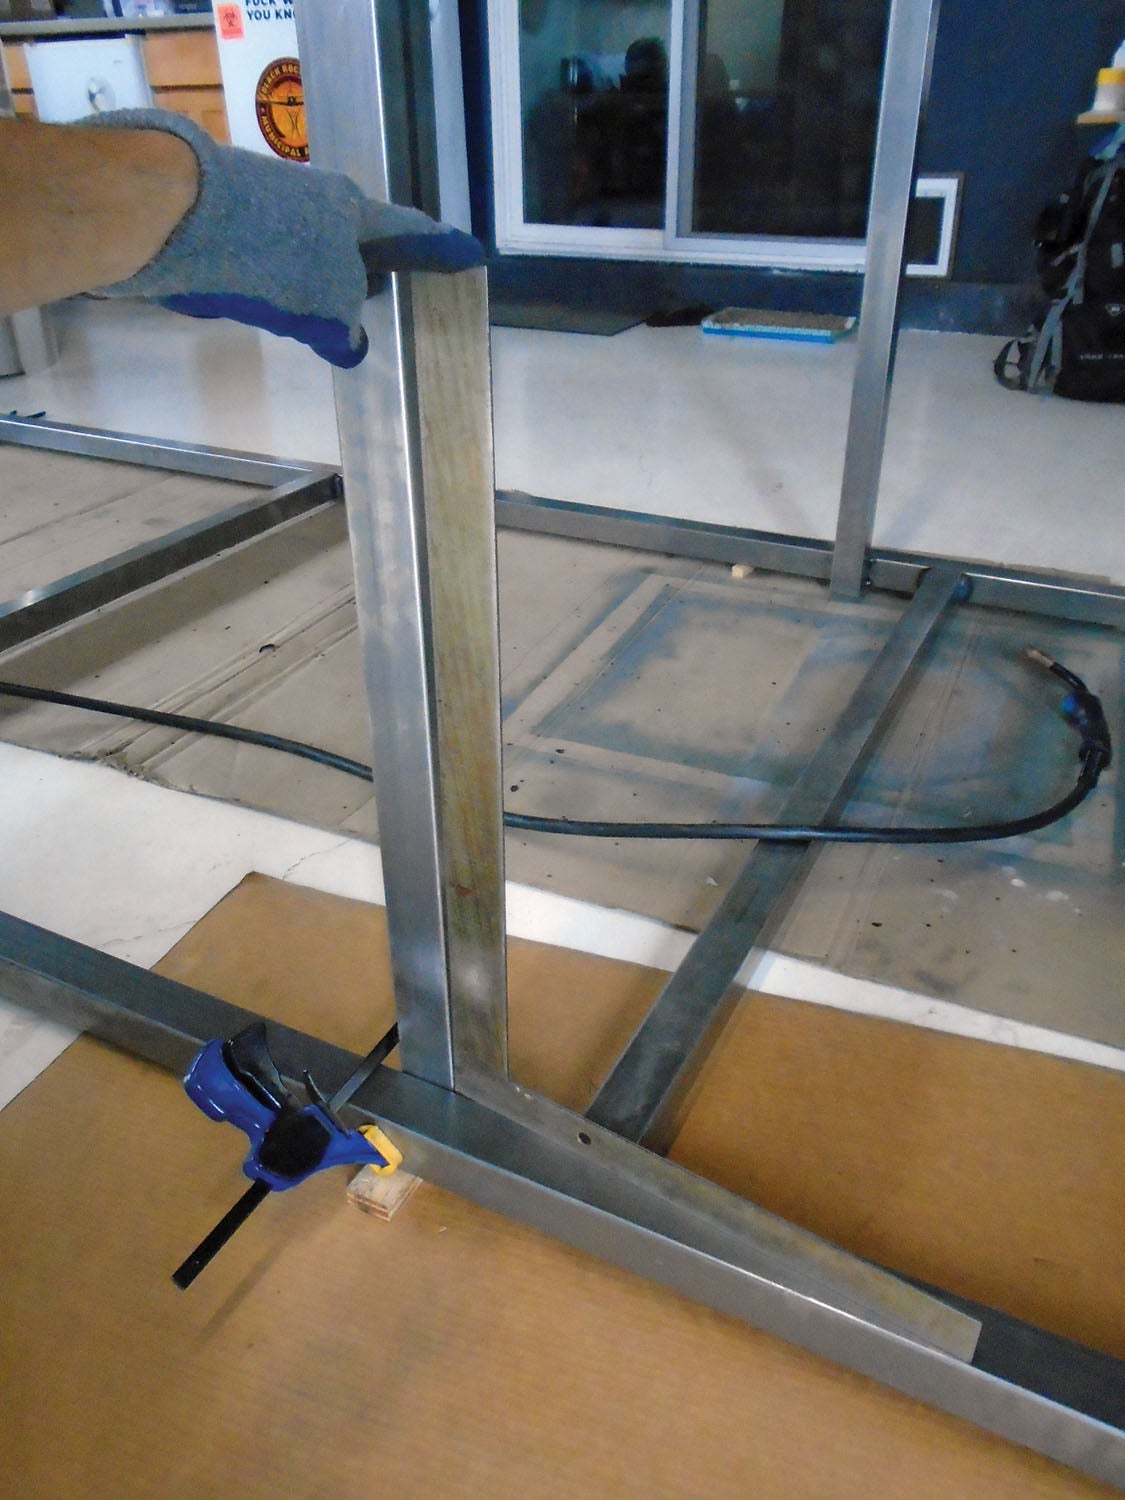
Once you’ve welded the upper and lower frame, it’s time to add legs to the upper frame. Use a bar clamp or C-clamp and a square to position each leg in place, then tack weld. Because the upper frame has been final welded at this point, it should be square and level. You’ll want to use it as a reference for the legs and shelves, but from here on out I suggest tack welding. Good tack welds will hold the table together but allow for adjustment with a mallet if necessary.
With all four legs tack welded in place, clamp the lower frame to the legs and tack weld it into place. Before final welding the legs to the upper and lower frames, check to be sure that everything is square.
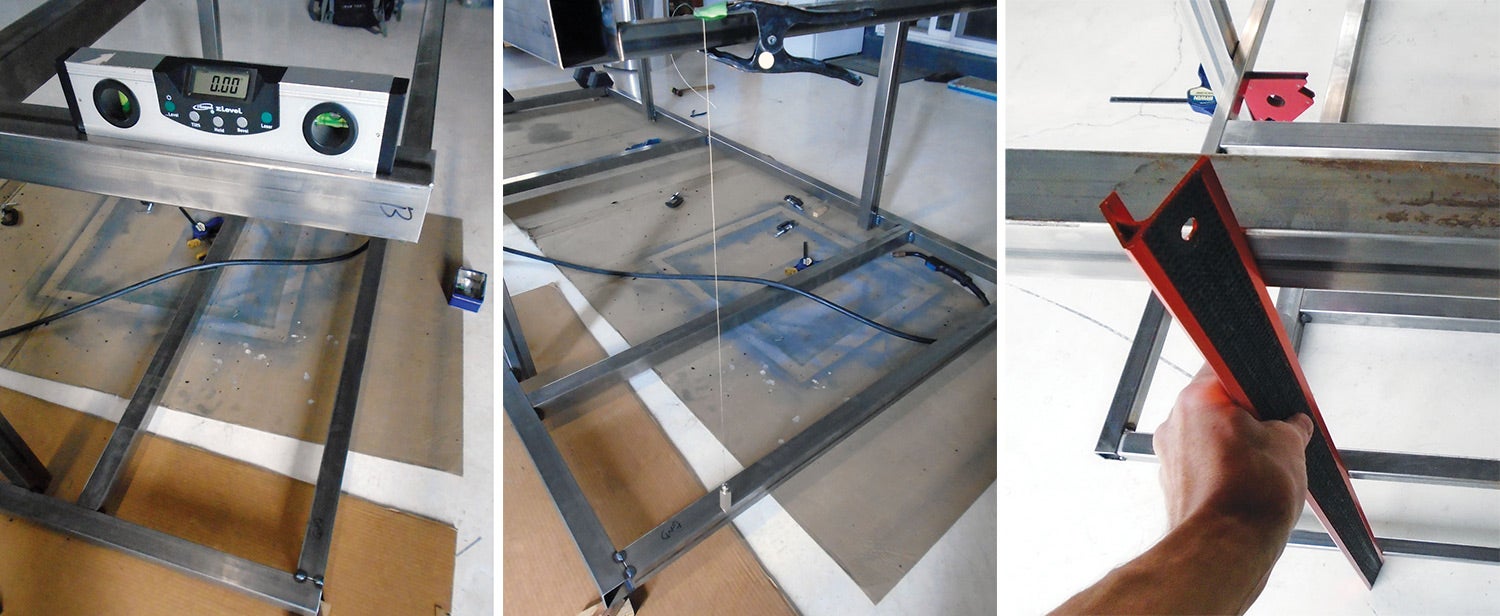
There are a variety of ways to check/crosscheck for square in addition to a square itself. I like to level the frame that is resting on the floor, then check the upper frame for level. Of course, if your legs form a parallelogram, both frames could be parallel but the legs not necessarily vertical. However, this can be checked with a plumb bob. Finally, if you have middle shelves, assuming that the top and bottom shelf are vertical, you can use a straightedge and ruler to determine if the middle shelf is also square and level.
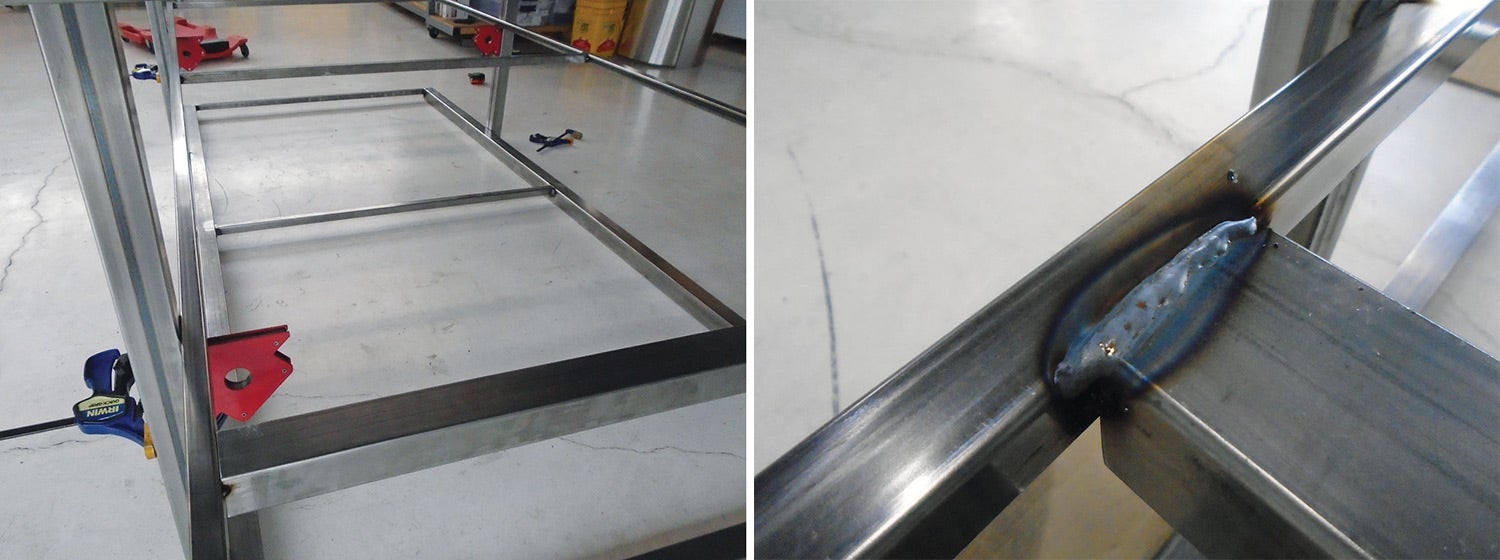
Add the Middle Shelf Frame
The middle shelf frame is set up with magnets and clamps for tack welding to the legs. Since the top and bottom shelves are already in place, the table is quite rigid and should be square at this point. Rather than weld up the middle frame separately (as we did with the top and bottom frames), I find it easier to weld this frame in place on the table.
You’ll notice that while the rest of the middle frame is 1 inch square, the center cross member is 2 inches. The reason is that if you’re building a 4×10-foot table, you’ll need to use a 4×8 sheet of plywood with an additional section at the end. The 2-inch tubing gives you enough tube to provide 1 inch of support to each sheet and have plenty of edge margin for screws.
Since the sheet will be resting flat on top of the middle tube, don’t weld the top seam as was done in the photo—the shelf won’t sit flush! Just weld the vertical sides of the tube.
Almost Done!
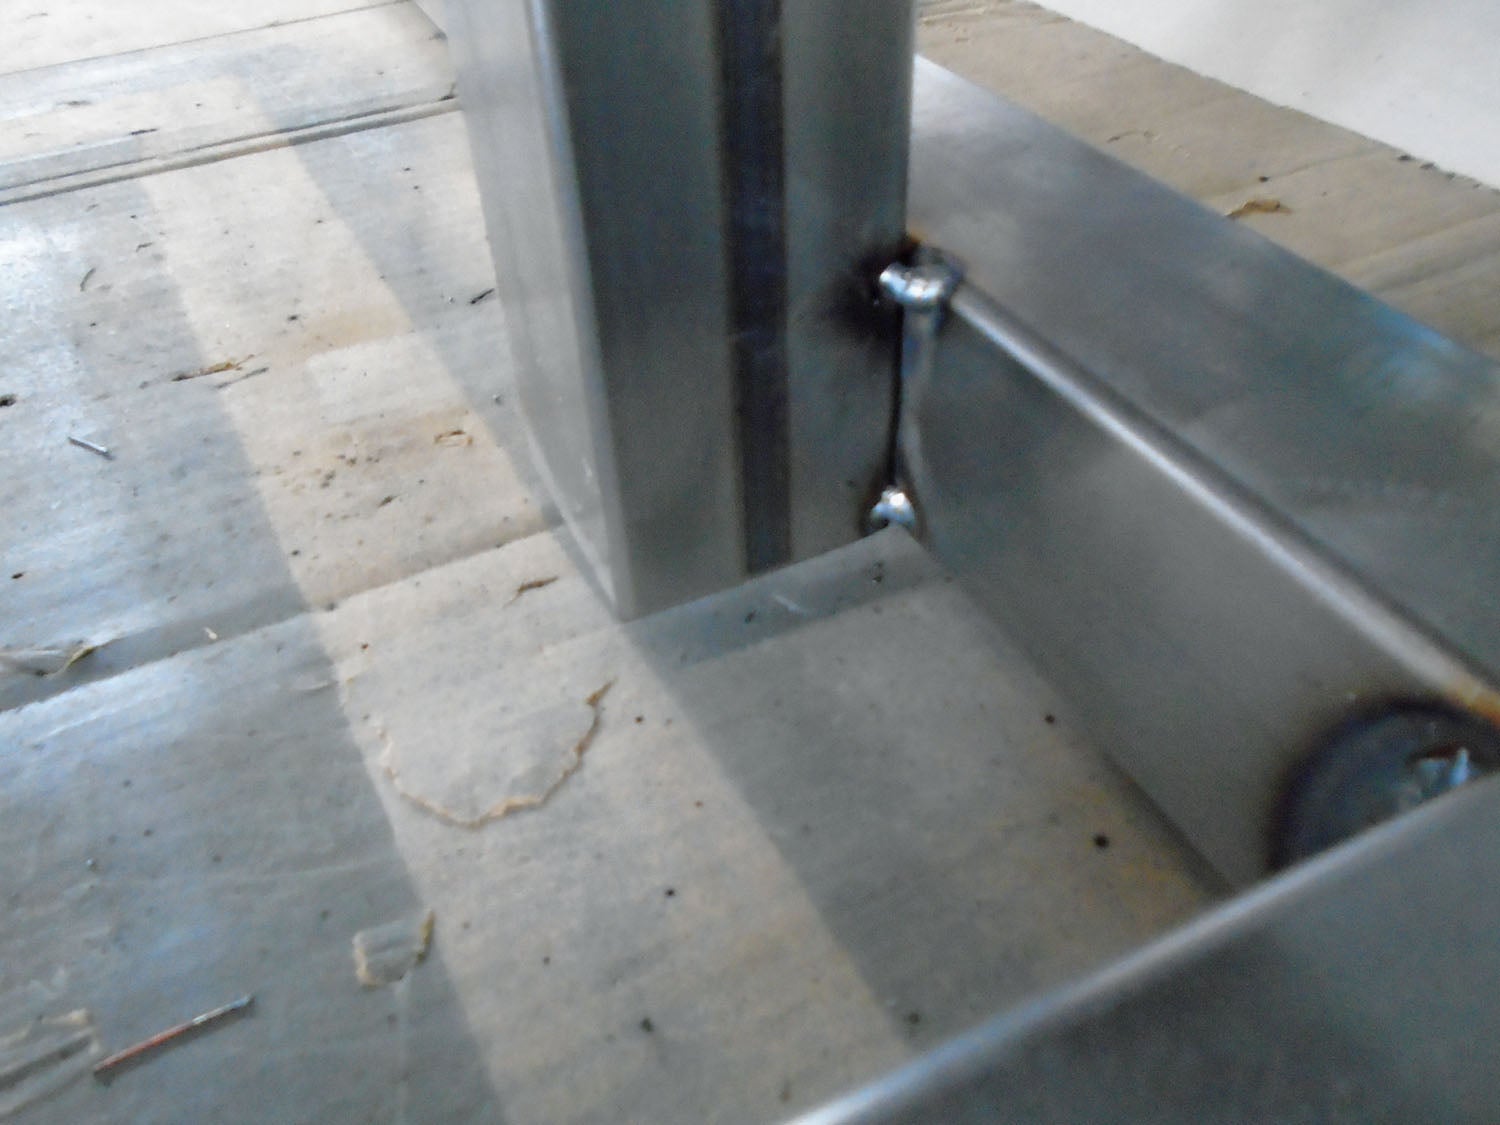
The next step is to weld the wheels in place. You might also want to have a way to level the table or otherwise get it up off of the wheels. I usually cut the top off a C-clamp and weld it to the frame. This works great! I’ve also used a more basic approach that consists of a bolt/nut combo. This is cheaper but more difficult to adjust, which is why I prefer the C-clamp approach.
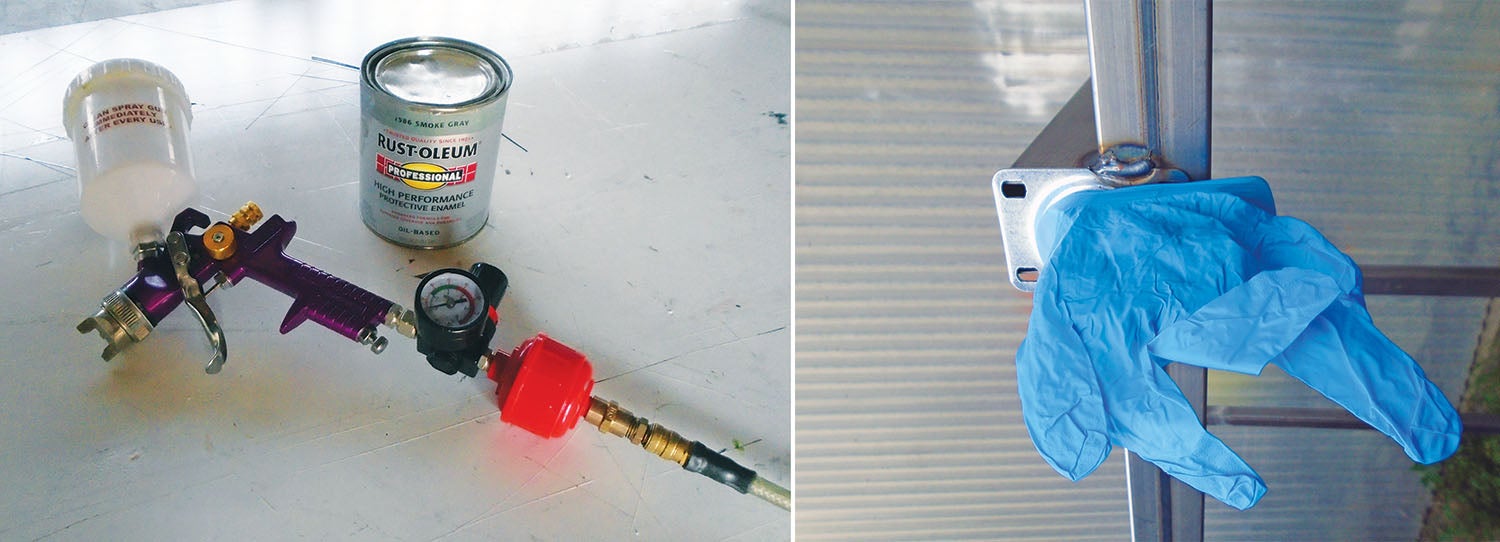
Last, but not least, it’s time to paint. On my tables, I used Rust-Oleum High Performance Enamel and a cheap Harbor Fright HVLP gun with an inline pressure regulator and air drier. (I have a nice inline drier at the pump, but a cheapo drier at the gun is good insurance.) No primer is used, just a thorough wipe-down with a rag and acetone. Since I paint my tables immediately after I finish welding them, it’s easiest to clean the steel parts for paint while they are still uncut.
My oldest table has been in service for six years and still looks great. I’ve used rattle can paint for small projects, but for something this big, be nice to yourself and use a gun.
Steel tables are a great way to learn welding. If you screw up, the worst that happens is you go cut another piece of steel. No one gets hurt! These tables are self-reinforcing enough that even mediocre beginner welds are most likely structurally sufficient. Assuming you have all tools and materials at the ready, a large table such as the one in the photos should be possible to build in a long day. Good luck!
![Trimming composites gets the full PPE job. [Credit: Eric Stewart]](https://www.kitplanes.com/wp-content/uploads/2026/07/7-2.jpg?w=218&h=150&crop=1 "A Few of My Favorite Tools")


That’s a good bench plan. My only concern would be the size of those casters. I’d get bigger and beefier ones. Considering the weight that bench could eventually hold, small casters can fail, or bend. I’ve been through that castor change on several roll around items I own. Even on my creeper modified for aircraft. Once I got large casters it rolled around so much easier.
Comments are closed.