Alternators for Experimental aircraft have progressed from the heavy, low-output certified boat anchors that came with used motors in the early days. Most builders in the past 20 years have used a lightweight solution based on the ubiquitous casings from Denso (the auto-electric company previously known as Nippondenso). They are either using automotive alternators as built—at the NAPA counter, they fake the sincerity and say, “Yes sir, this is for my beloved ’98 Suzuki Samurai.” Or they’ve been purchasing units that have been built up specifically for Experimental aircraft use from small companies started by homebuilders. Other Experimental-only solutions have come along, of course, so it’s really a nice problem to have, all this freedom of choice.
Much has changed on the other side of the firewall. First of all, most (or is it now safe to say “virtually all”?) new homebuilts are forgoing air-driven instruments, so there’s no need for a vacuum pump. That opens one pad on the traditional Lycoming or Continental engine. At the same time, everything from radios to lights have become much more energy efficient. Where a 60-amp alternator might just be enough, it’s often overkill (at least in terms of pure capacity) for modern Experimentals. For some, especially minimally equipped VFR aircraft, there may be no need for the big, nose-mounted alternator at all.
Blame B&C
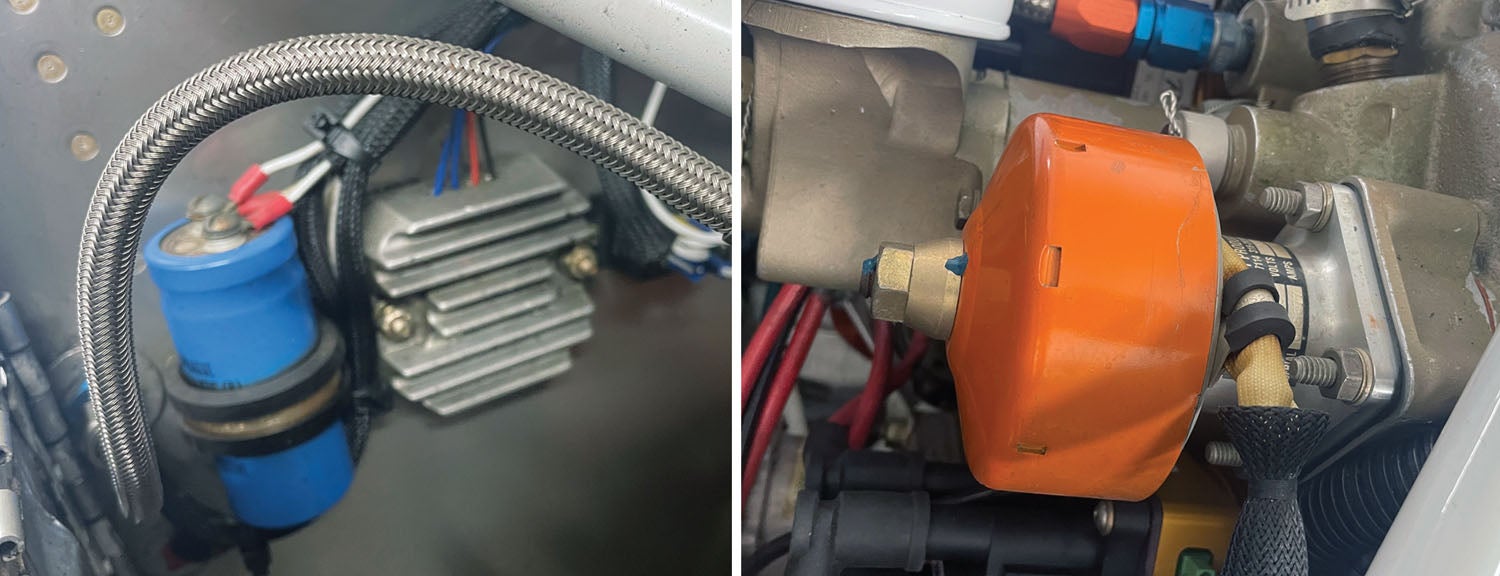
Some two decades ago, B&C Specialty developed the SD-8 alternator, known affectionately as the “orange mushroom,” that added charging capacity and electrical redundancy in one compact package perched on that no-longer-used vacuum-pump pad. B&C followed that up with the SD-20 (a 20-amp unit). The SD-8 served most people as a backup, while some (especially those with very simple electrical systems) found that they could get by with no other alternator than the SD-20. And those who had nothing but a battery for the starter that needed recharging during flight got by with the SD-8 alone.
If the B&C SD-8 had a shortcoming, it was that it didn’t “come in” until higher engine speeds, despite running 30% over crank speed at the drive pad. Meaning, these alternators aren’t particularly strong at lower engine speeds and often aren’t even charging at idle.
Enter the Monk
What was needed was a small unit with higher output that could mount on the vacuum-pump pad. Welcome to the scene, Bill Judge, and the Monkworkz MZ-30L generator. Bill is an electrical engineer as well as an RV-8 builder and pilot with several thousand hours of flight time. He’s been involved with instrumenting Reno racers, developing and operating their data-acquisition and telemetry systems. In other words, he knows what he’s doing when it comes to organizing and controlling electrons.
Judge decided that it was time to apply modern technology to the problem of Experimental alternators, and the MZ-30L is the result. Interestingly enough, the MZ-30L is not an alternator—it is a generator. (So, too, is the SD-8, while the SD-20 is a small alternator.) The generator needs no outside source of electrical power; turning the windings near a set of permanent magnets does the trick. The alternator, on the other hand, needs an external source of excitation, but it’s also lighter and can be more efficient than a generator, which is why general aviation moved toward alternators over the years. (Rotax is the notable exception here.)
Judge knows all about the pros and cons of generators but has put the latest technology to use in making it a better device. In fact, the MZ-30L is using enough cutting-edge technology that Judge has applied for a patent on his design concepts.
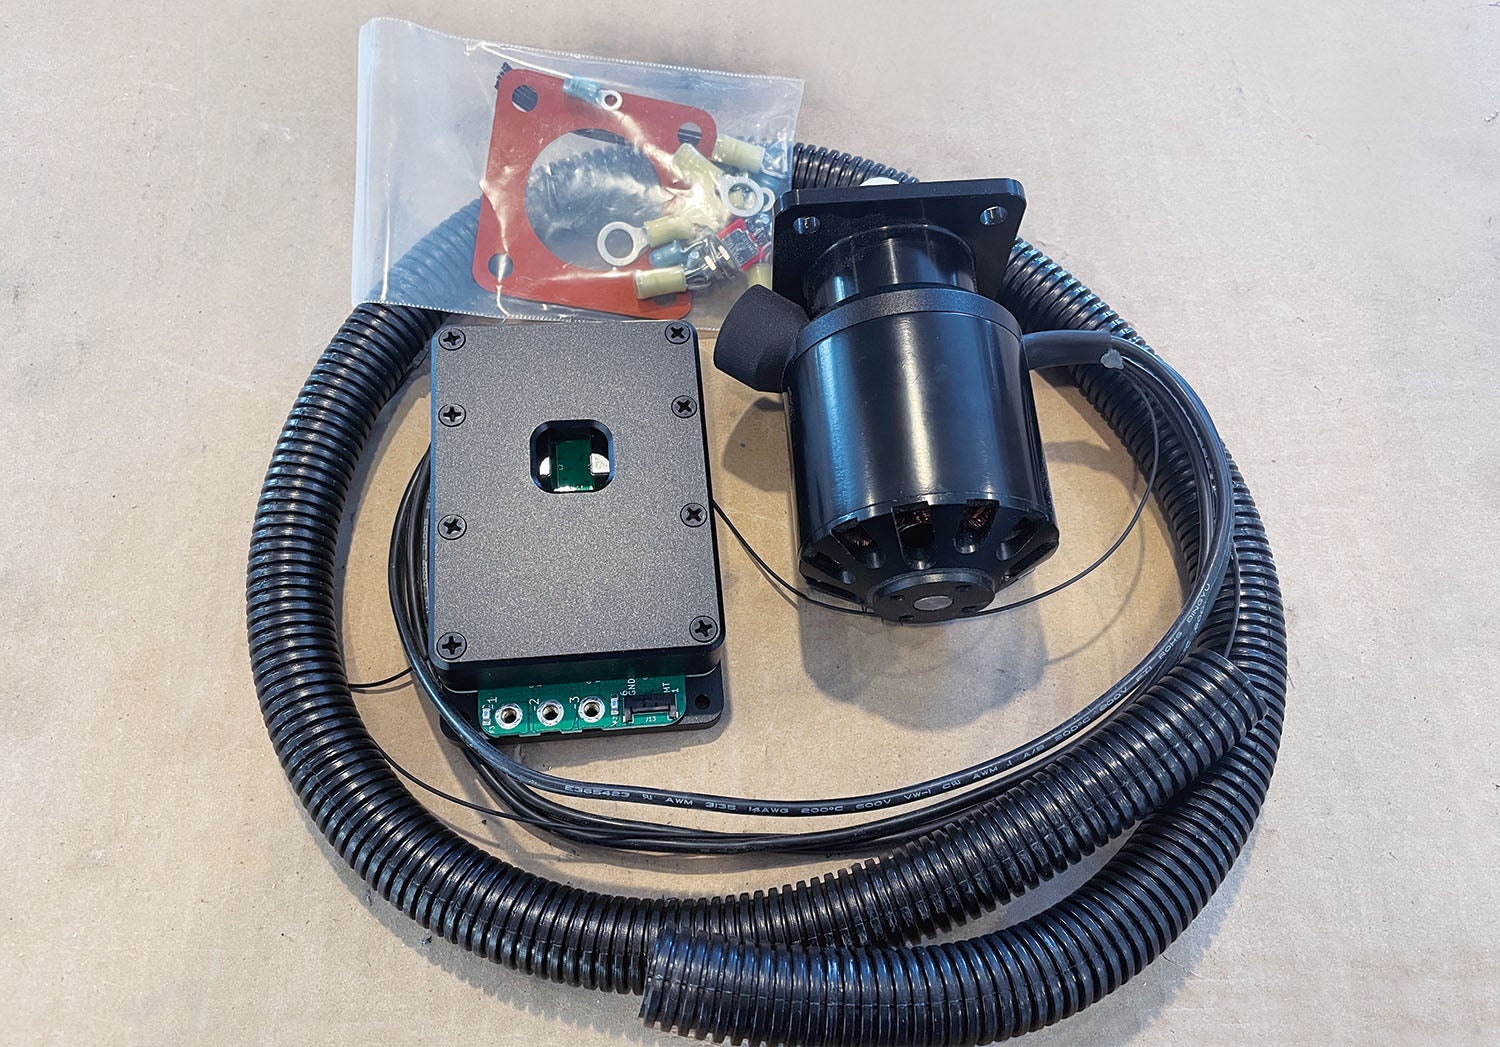
What’s in the Box
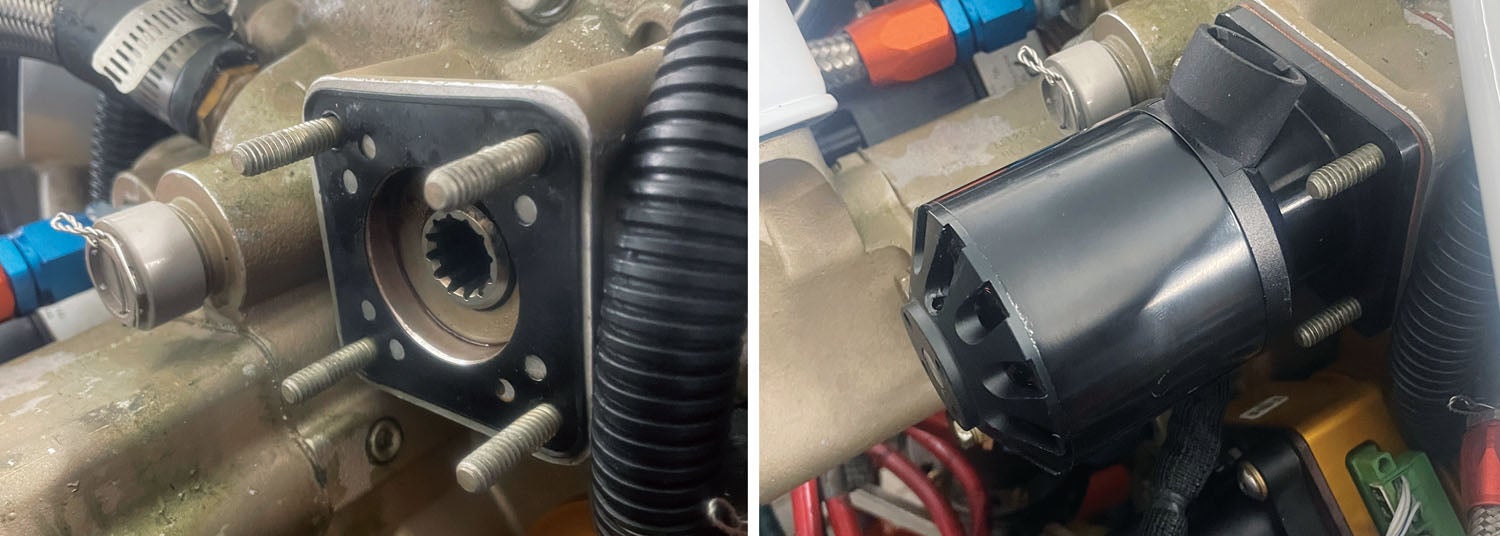
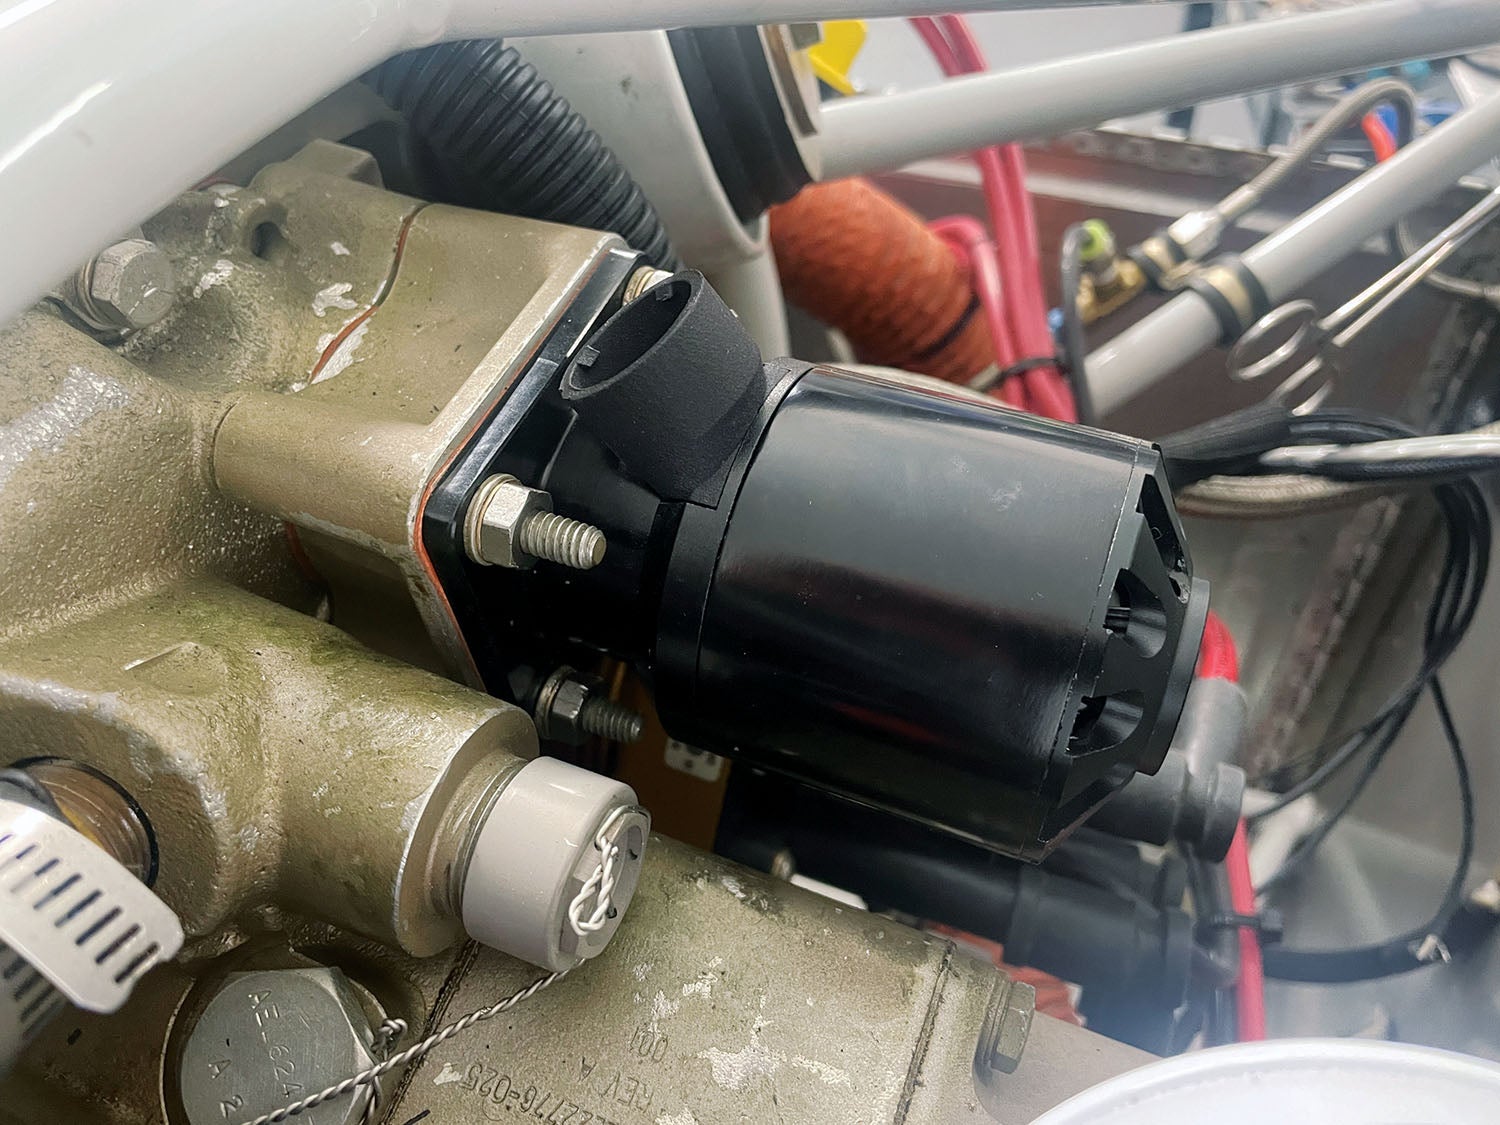
The new tiny generator from Monkworkz is smaller than the orange SD-8 that many of us know—yet puts out 30 amps at regular cruise rpm. It generates significant current any time the engine is above 1000 rpm, which is pretty much any time it is running for most pilots. Yes, we usually set the idle down around 650 on a typical Lycoming, but then we push the throttle in to get a smooth idle (and prevent spark-plug fouling) at something around 1000 rpm. The tiny black alternator is provided with a standard vacuum pump interface drive and flange, and is equipped with a spot to attach a ¾-inch cooling duct to provide airflow for the windings.
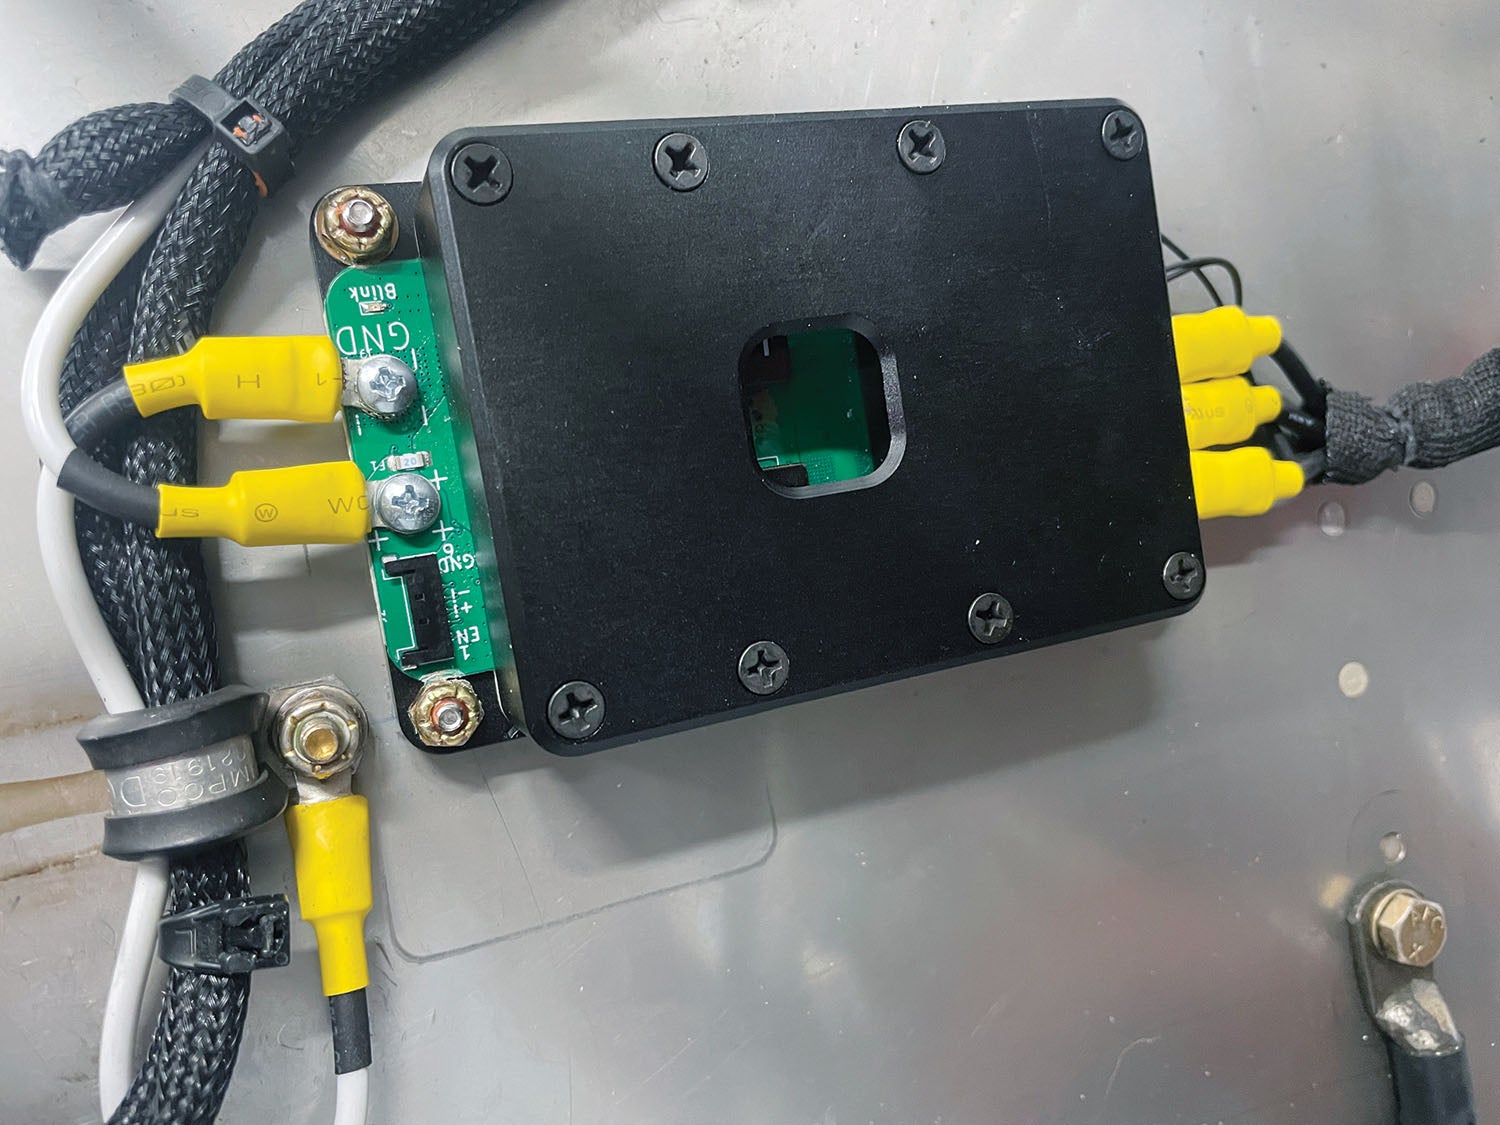
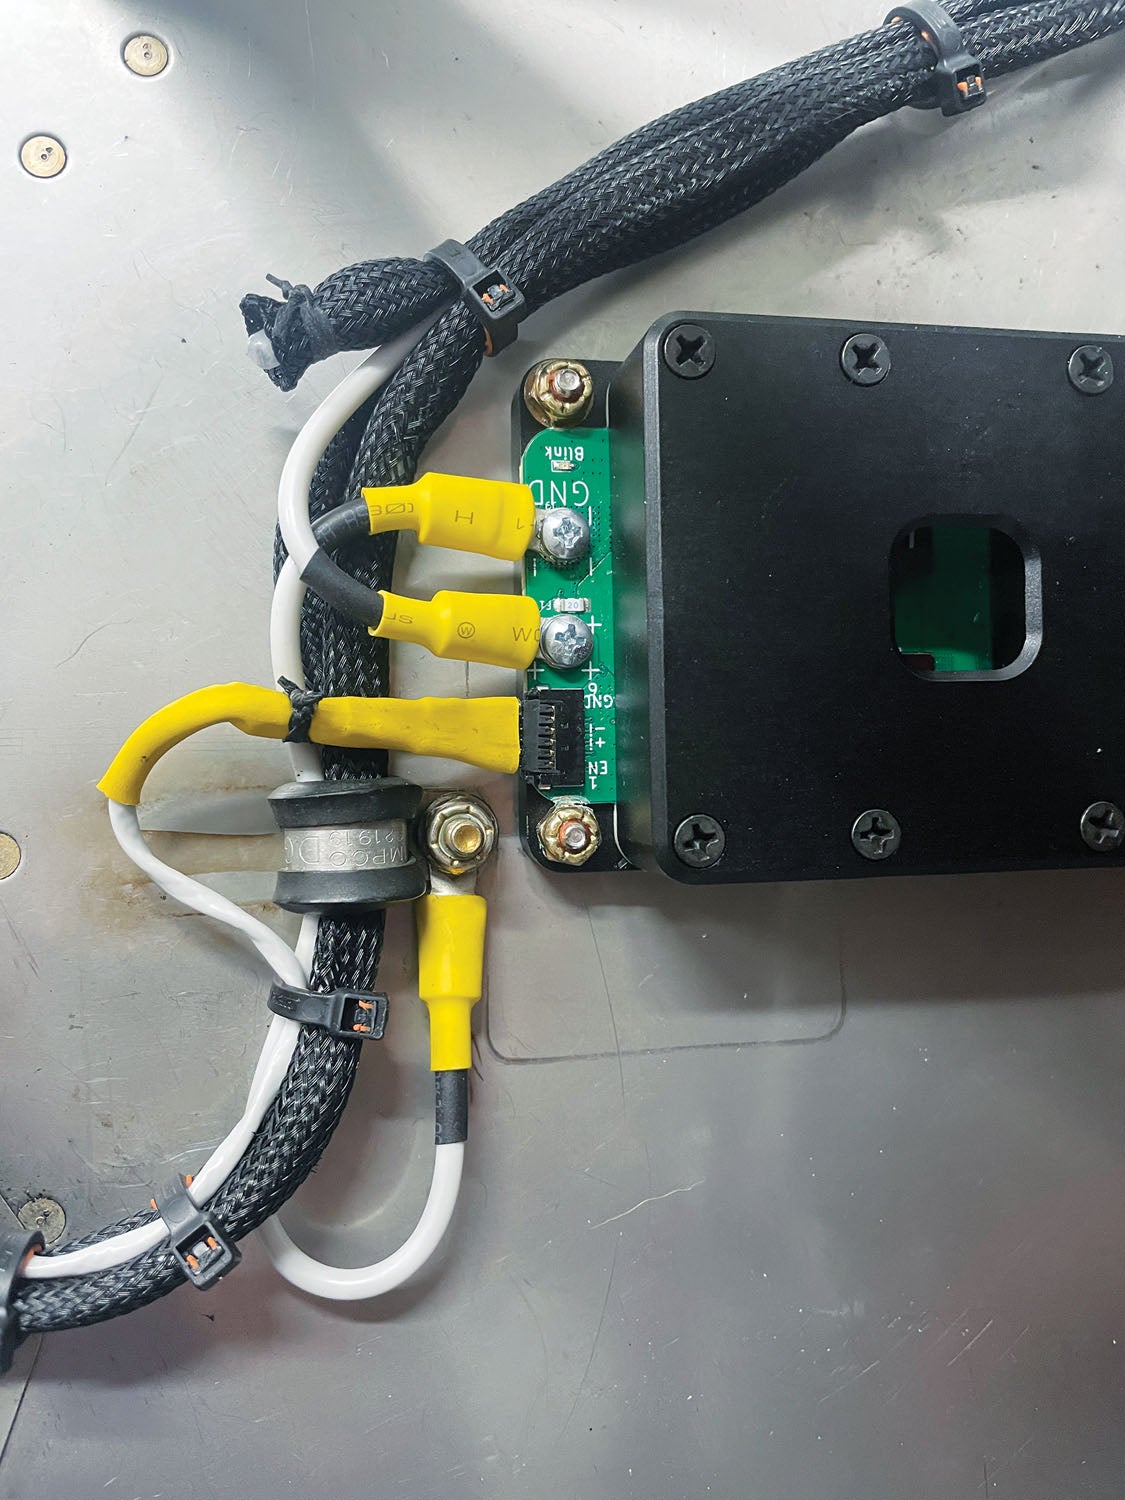
The unit comes with its own dedicated controller/regulator, custom-made by Monkworkz and designed to mount forward of the firewall. It also has a spot to attach a cooling duct because anytime you build compact electronic devices, you need to plan to carry away excess heat. The regulator mounts very nicely to the firewall with four #6 screws and has labeled attachment points for the necessary wires to make the system work. The regulator is far more than the old firewall-mounted Ford regulator that many Experimental aircraft use—it includes overvoltage protection that can shut the unit down in nanoseconds if a high-voltage event threatens your valuable avionics. It also provides accurately controlled output voltage throughout the speed range at which the generator can produce power.
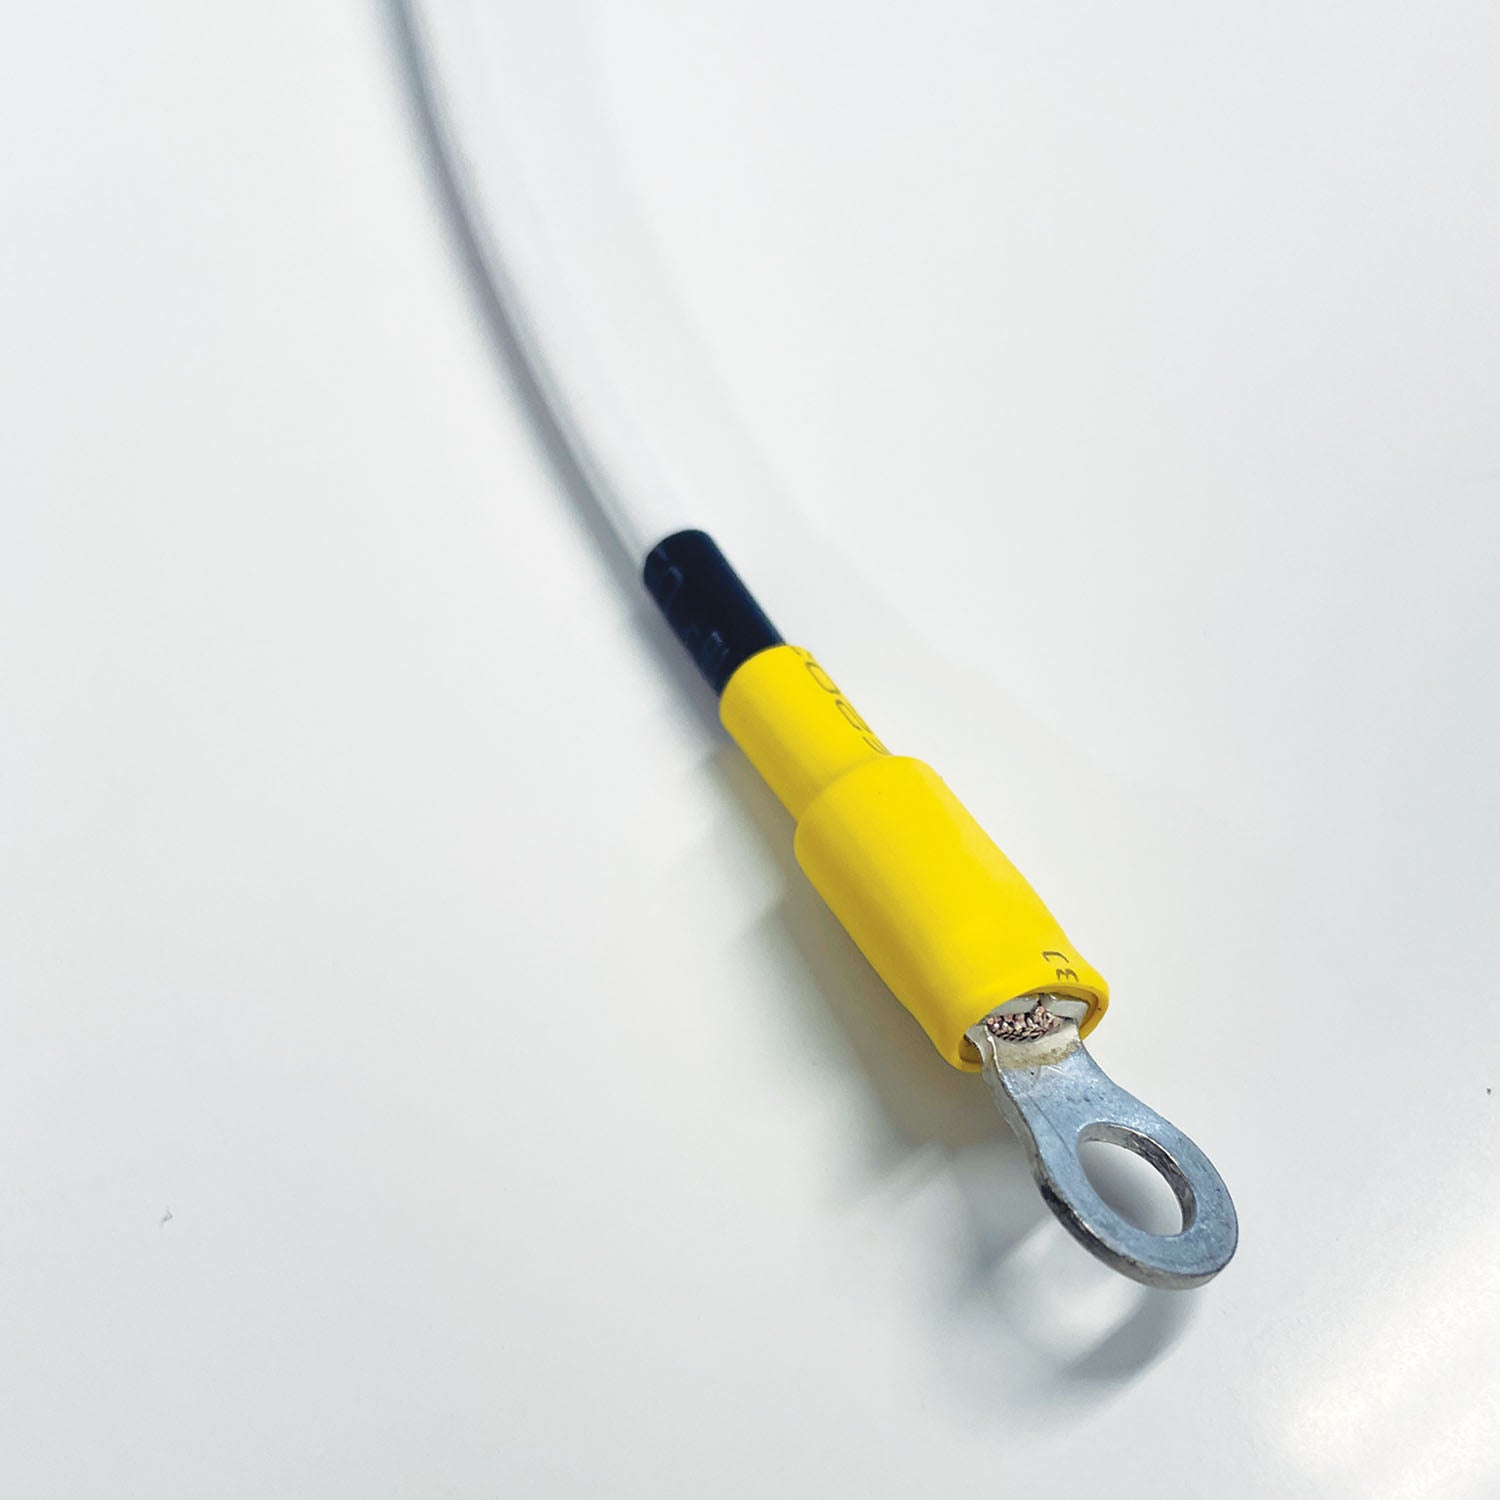
Also in the box are a complete set of crimp-on wiring ends to fit the needed wiring and the necessary screws to attach them to the regulator. The alternator itself has wiring without ends, so they can be cut to necessary length for a neat installation. Monkworkz also provides a generous length of 3/4-inch convoluted cooling duct, just in case you were looking for an excuse not to install blast cooling—they are serious about the need for it! As with many electronics today, there are no instructions in the package, as they are maintained on the website in a very detailed document that can be updated by the company at a moment’s notice. We’ve found that it is helpful to print out the page with electrical drawings so that we can tape it to the airplane as we wire—but otherwise, we just use the online manual on the iPad in the shop.
Installation
Installing the -30L was simple, especially since I was replacing my old SD-8. This meant that I already had control wiring and a bus feed routed to the front right side of the firewall, so all I had to do was remove the old SD-8 regulator, capacitor and relay from the firewall and unbolt the SD-8 itself to be ready to get started installing the MZ-30. The removal and cleanup only took an hour—and 30 minutes of that was trying to find my special vacuum pump wrench to get the lower left bolt off. This bolt is notorious for hiding in a spot where wrenches just won’t go, but search for “vacuum pump wrench” on your favorite aviation tool site and you’ll find what you need. In my case, I couldn’t find it, so I reverted to the method of using a sharp screwdriver and a hammer to loosen the nut by catching the edge of a flat. It sounds brutal, but is a matter of providing just the right “tap” at just the right angle to make it work.
With the old alternator system removed, I checked for things like wire length and space to fit the generator and regulator without interference. Because the generator is smaller than anything else (including a vacuum pump) that might go there, clearance is not an issue. (It’s less than 3.9 inches from the pad face to the rear of the unit and no larger around than a standard drive-pad flange.) It comes with enough wire sticking out to reach the regulator if it is mounted on the right side of the firewall—so long as your firewall isn’t too big or too far away from the engine. If additional wire is needed, splicing some in wouldn’t be an insurmountable problem.
The regulator was easy to install on the RV-8 because I could open the front baggage door to get at the back of the firewall directly—this meant that with a little planning on exact location, I could situate the top two screws of the regulator on an angle that crosses the back of the firewall, and the two lower screws were simply on the firewall face. All four screws were easy to install with nuts because I had access to both sides.
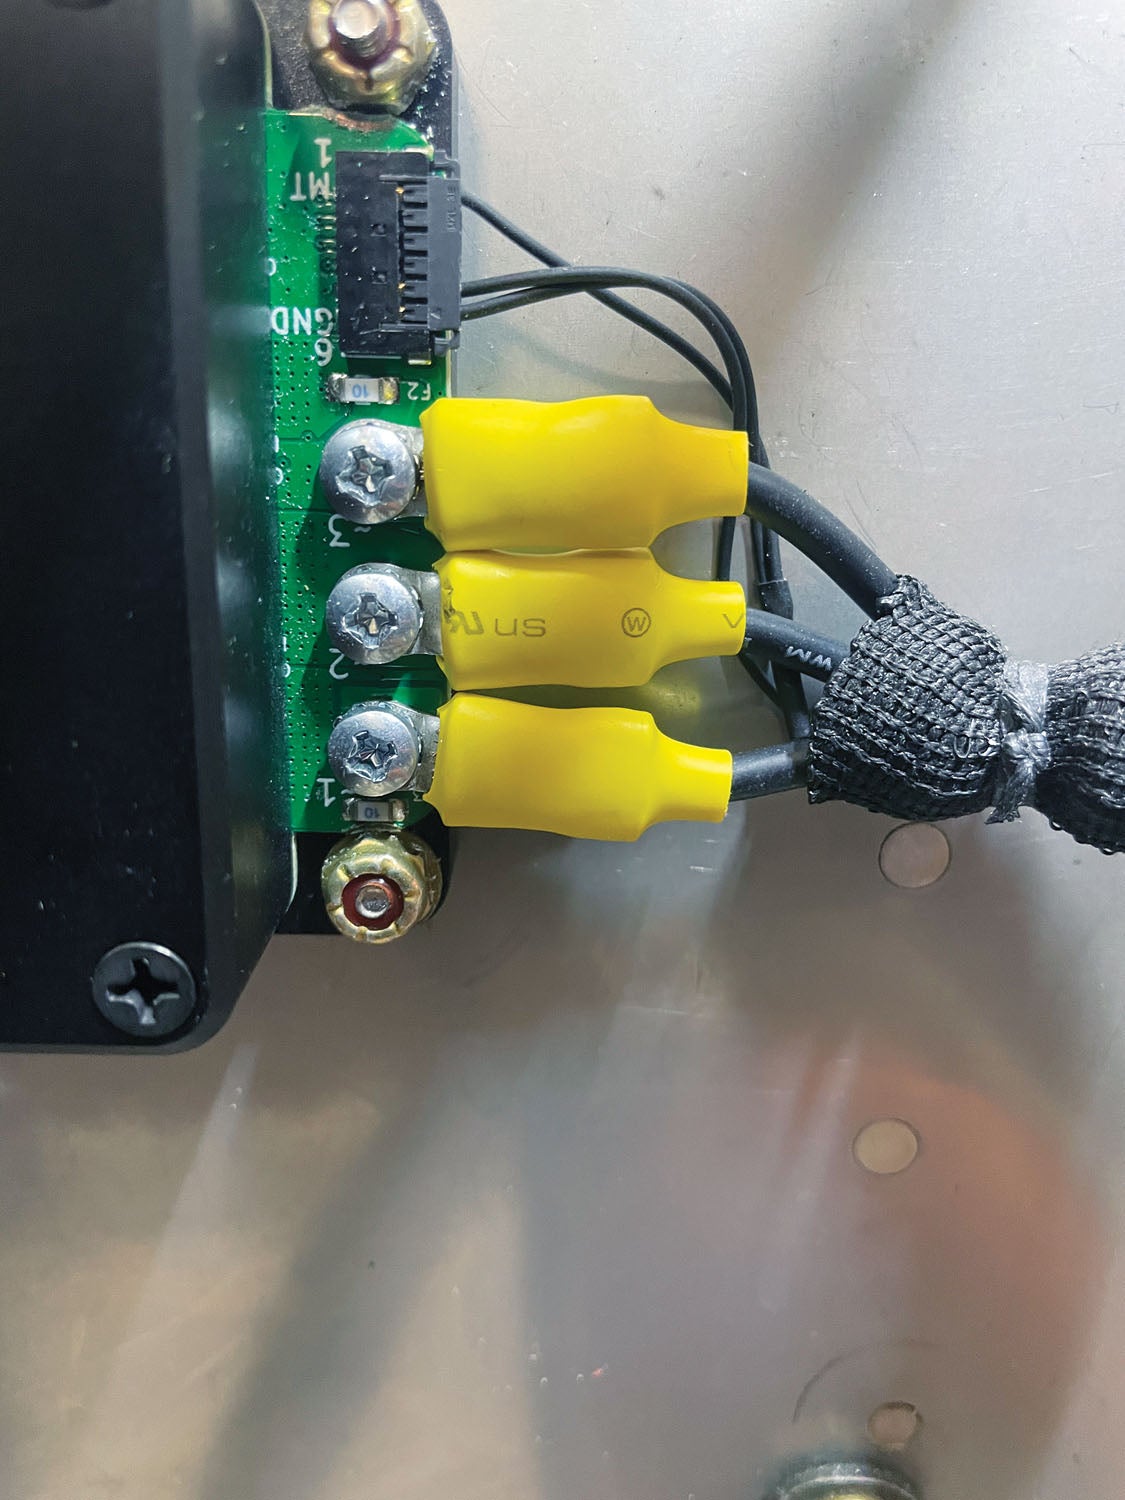
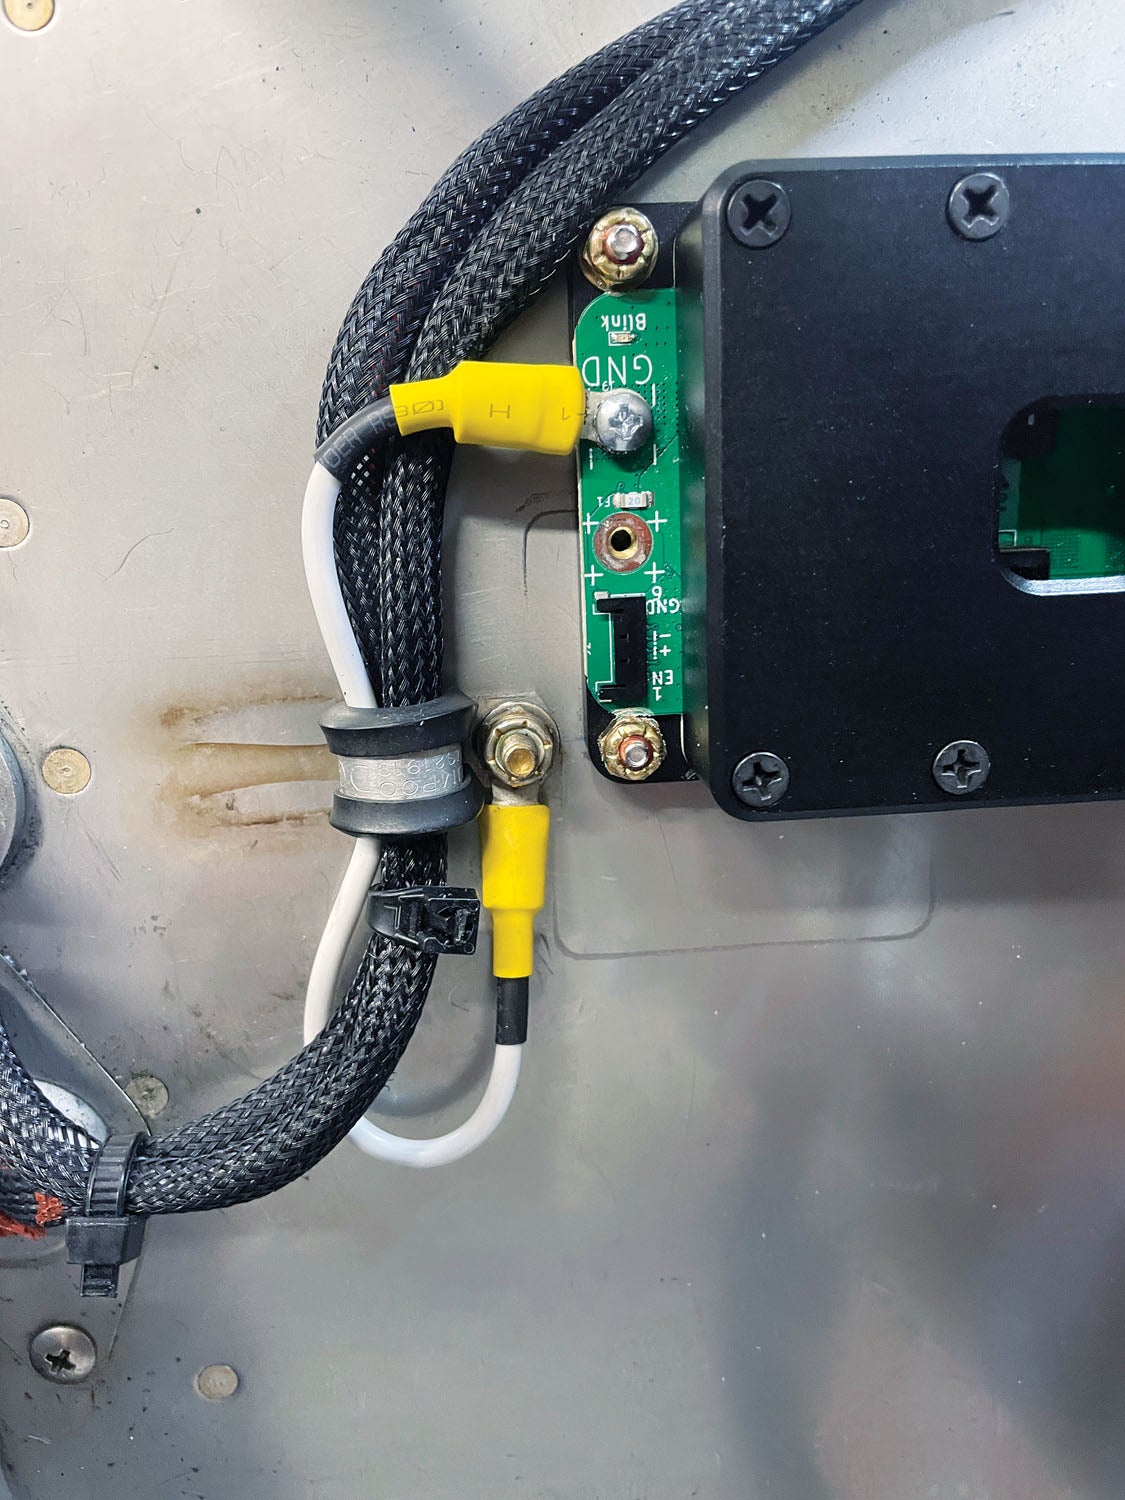
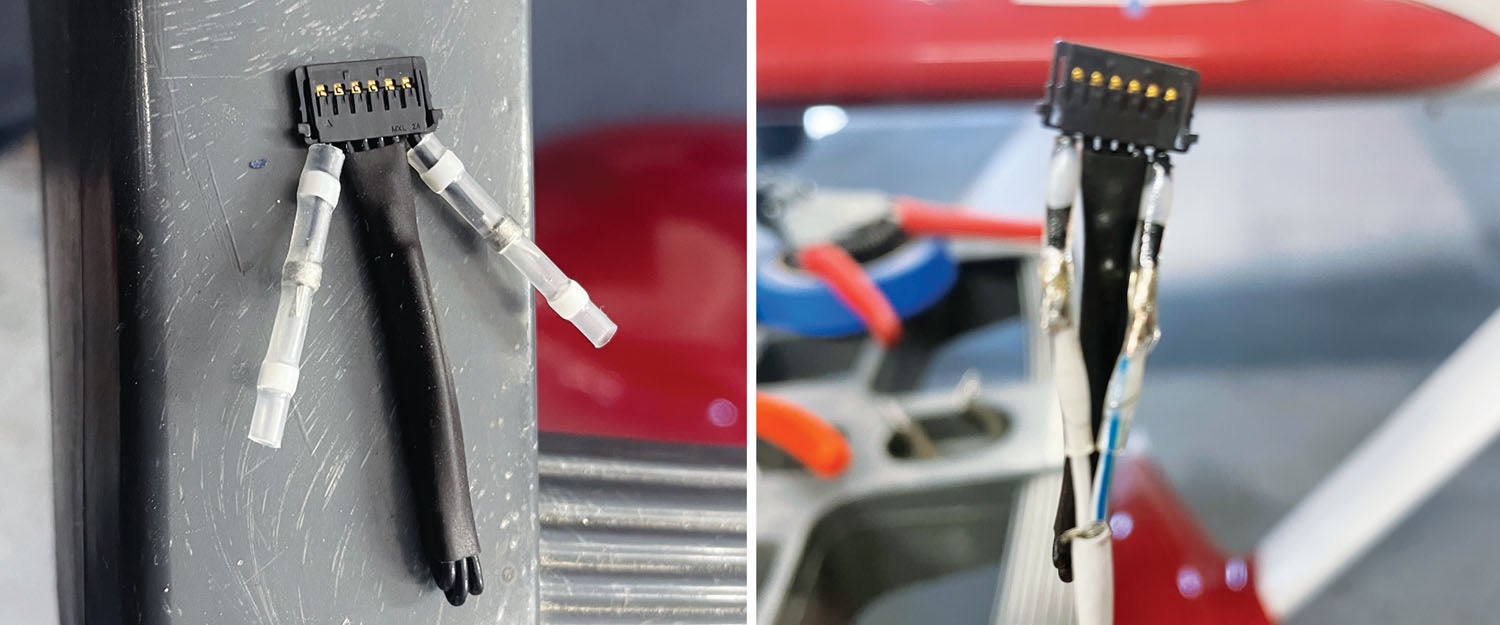
With the units mounted, I slipped some snakeskin over the wires between the generator and regulator to make the job neat, did a little securing with wire ties and lacing cord and crimped the ends onto the three power wires from the generator. They then screwed directly to the inputs on the regulator. The control wires from the generator were already terminated in a micro-connector that simply plugged into the receptacle on the regulator’s board, right next to the power inputs.
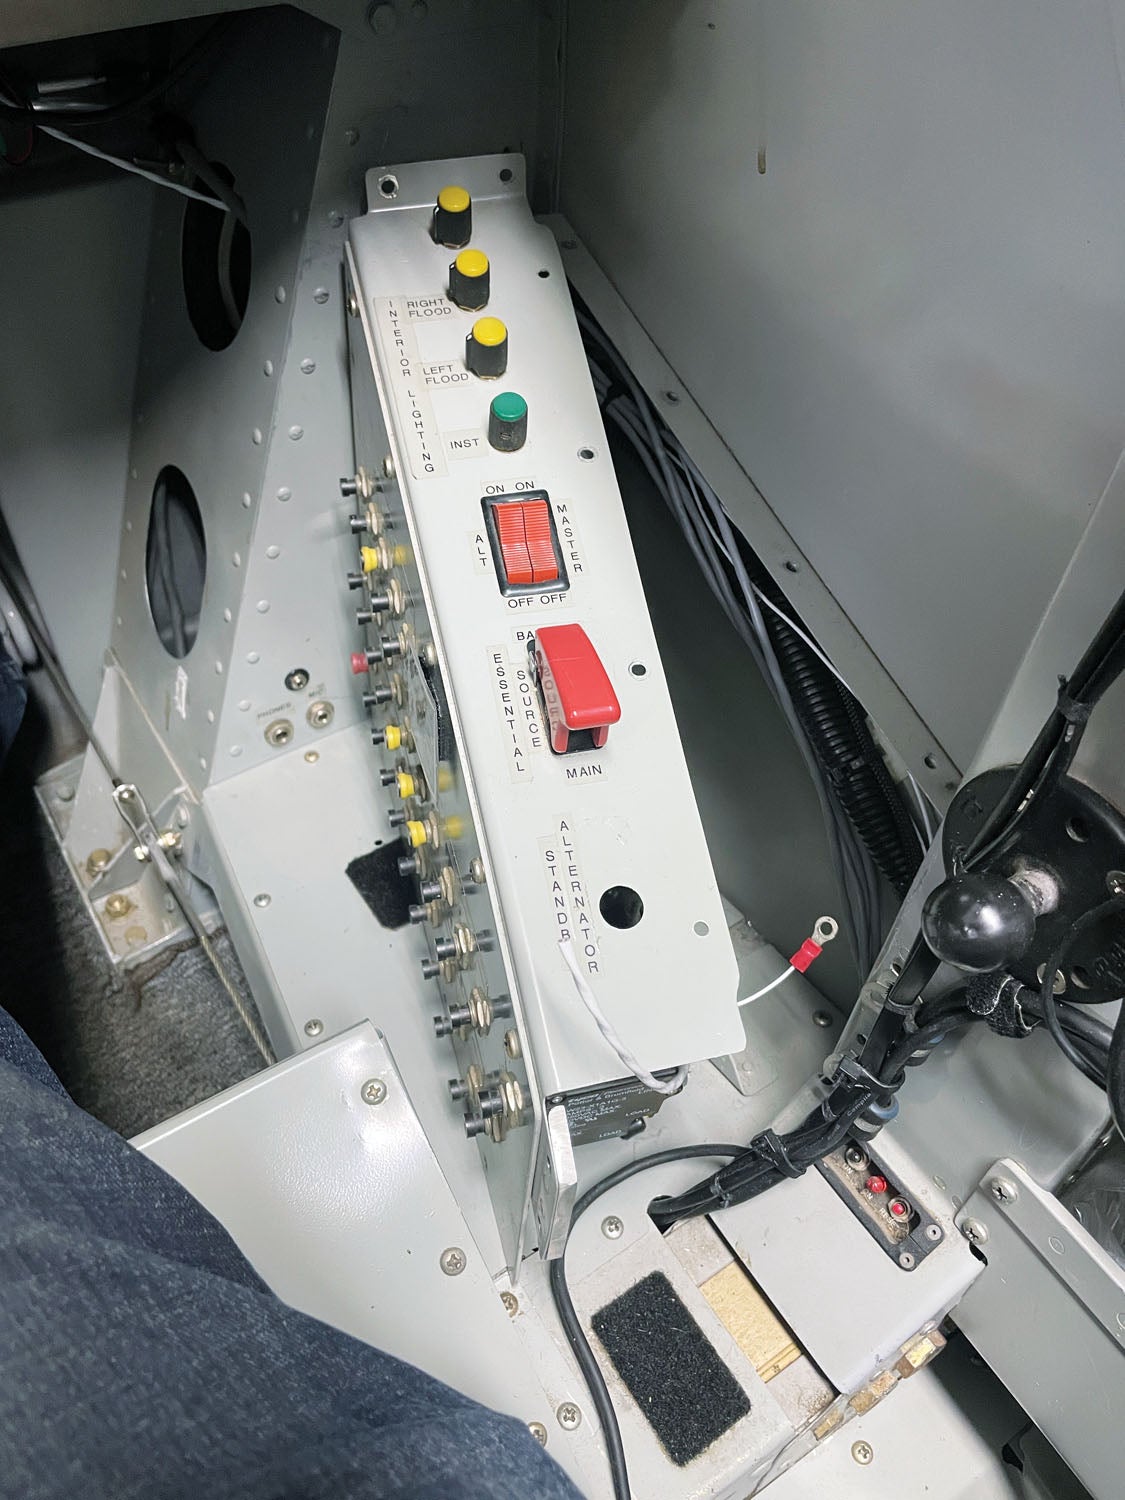
On the other side of the regulator, I attached a #10 wire to the ground terminal, then ran it to a firewall ground. I then attached the feed to the main bus (that I had detached from the old regulator) and attached it to the output terminal of the new regulator. Finally, I took the two wires from the control switch in the cockpit and spliced them to the micro-connector that plugs into the control side of the regulator—and it was done! (Note that I already had circuit protection downstream of the SD-8, but that’s not strictly necessary with the MZ-30L, which is fused on both input and output sides.)
There was only one decision to make, and that was if I wanted the new system to be in parallel with the main alternator, with the voltage set at about the same value, or if I wanted the -30L to run as a backup, with its voltage set about half a volt lower. In this configuration, it “sits” on the bus in standby mode until the bus sags (due to an alternator failure) and then comes online. The voltage configuration is done by cutting a wire jumper on the control plug—and I decided to leave it intact and simply parallel the generator with the alternator, based on advice from Judge.
Making the Current Flow
With the airplane back together, we rolled it out on the ramp to start it up and see how the new unit would work. Since the airplane has a split master switch, it was easy to leave the regular alternator turned off so that we could baseline the new generator. With just the battery turned on, we cranked the airplane up and set the idle at 1000 rpm. The EFIS was, of course, unhappy operating at only battery voltage (about 11.5 indicated).
With the engine still clanking over at 1000 rpm, we switched on the -30L, and the voltage instantly jumped up to 14.1 volts (indicated) on the main and secondary buses. In other words, the generator picked up the load and did just fine. We couldn’t sample amperage because of the way the bus feed is wired on this airplane—the standby alternator bus not being routed through the Hall effect current sensor. But the fact that the bus voltage remained stable with all avionics—and the LED strobes—powered was a good indication.
Taking the airplane into the air, we saw a happy electrical system with either the primary alternator or the generator online, and the engine turning a comfortable 2400 rpm. The bottom line is that operating the -30L is almost disappointing—it just works. The pilot is superfluous in the management of the system.
In fact, 30 amps from a compact package is very impressive. In today’s world, even a well-equipped IFR airplane—for example, our RV-8 is equipped with a dual-screen GRT HX EFIS, Avidyne 440 navigator, a second com, transponder and LED lighting all around, which totals less than 30 amps—could potentially use the Monkworkz as a primary source. But add pitot heat, plug in a heated vest (or two) and key both transmitters, then, yes, you need a bigger alternator (or a robust battery). I suppose the next technological hurdle is a heated pitot tube that uses just a couple of amps.
Department of Redundancy Department
While the debate over dual alternators and dual batteries will rage on—likely influenced by the presence of electronic injection and ignition that is not self-sustaining—there’s definitely a place for the MZ-30L. At $995 plus shipping, the Monkworkz product sits just above the SD-8 in terms of cost, but has much greater output. So when and if you decide to go light and simple, take a look at this as an option—many builders of simple machines, race planes or backcountry aircraft will do just fine with 30 amps and will benefit from getting rid of the belt-driven alternator and its associated weight. Those who feel a real need for a backup power generator should take a hard look at this simple and elegant solution, which seems to work well right out of the box.
For more information: Monkworkz, call 619-353-7006 or visit monkworkz.com.


")


I wonder how this would work with a lithium battery, such as EarthX?
It appears to me that mechanical devices using electromotive force to turn motion into electrical power (P=IE, current generation requiring a conductor, a magnetic field, and relative motion) are at least internally alternators, the difference between those electromechanical devices commonly called “generators” and “alternators” being the means by which they rectify their inevitably internally generated alternating current from AC to DC. With “generators” the armature is connected to a mechanical commutator that successively connects the armature windings so as to output pulsating DC. This is considerably less efficient than the use of electronic silicon rectifiers arranged so connected to the armature, as in “alternators”, to accomplish the same thing.
I remember from my vocational training as an Air Force AGE mechanic that a DC generator can fail if its field iron pole pieces become sufficiently demagnitized. Correction of that defect was called “repolarizing the generator” and was accomplished by briefly running a DC current through the field coils to remagnetize the field poles. I have read, but not experienced, that the same fault can befall an automotive brushed alternator but that there is often enough residual magnetism remaining in the alternator’s iron field poles to initially excite the alternator’s armature even when bus battery voltage is low.
There are also available brushless automotive alternators which employ permanent magnets to supply the EMF to excite the alternator’s field coils. While only comparatively recently become available for automobiles, brushless alternators have been used for decades in aircraft. They employ moving permanent magnets on the unit’s shaft to excite a fixed stationary armature the output of which is rectified, modulated, and applied to adjacent fixed field coils that excite an armature on the rotating shaft the output of which is connected to the shaft mounted rotating field windings which finally excites the fixed power output armature of the alternator. The AGE units I worked on (ah, 50 years ago) output 220 volts AC at 400 Hz. In my four year enlistment I never saw one of the hundreds of USAF AGE brushless alternators around me fail.
It appears to me that the terms “alternator” and “generator” are often used somewhat indiscriminately as are also the names of electrical power devices’ “field” and “armature” windings. While I admit to being perhaps excessively pedantic here, nevertheless it seems to me that definition of terms is seldom completely out of place.
Thanks for the excellent comments Jay. Most modern homebuilders have only worked with Alternators, having never had the pleasure of lugging around the old generators from the 1950’s that appeared when light aircraft actually got electrical systems. So there is a tendency to call everything that makes electrical power an Alternator… which is actually what we were calling the Monkworkz until reading their documentation. Our policy is to use the same terminology as the manufacturer, so that’s what we went with.
Interested in installing your unit on a Rotax 914,
What is the price of the kit?
Thank You
Comments are closed.