 By Jon Humberd with Kate O’Connor
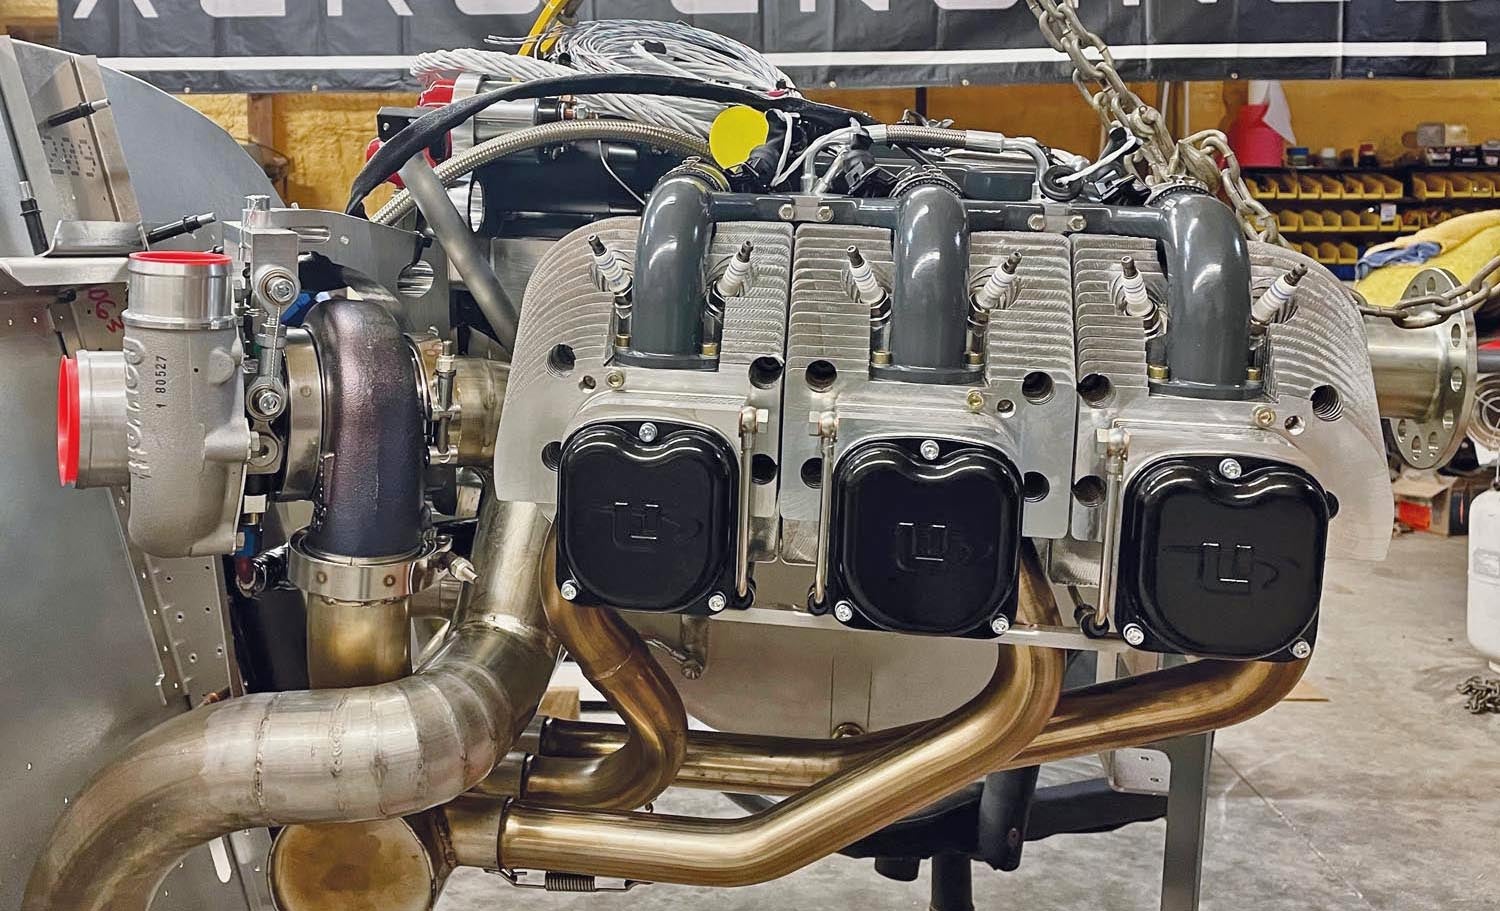
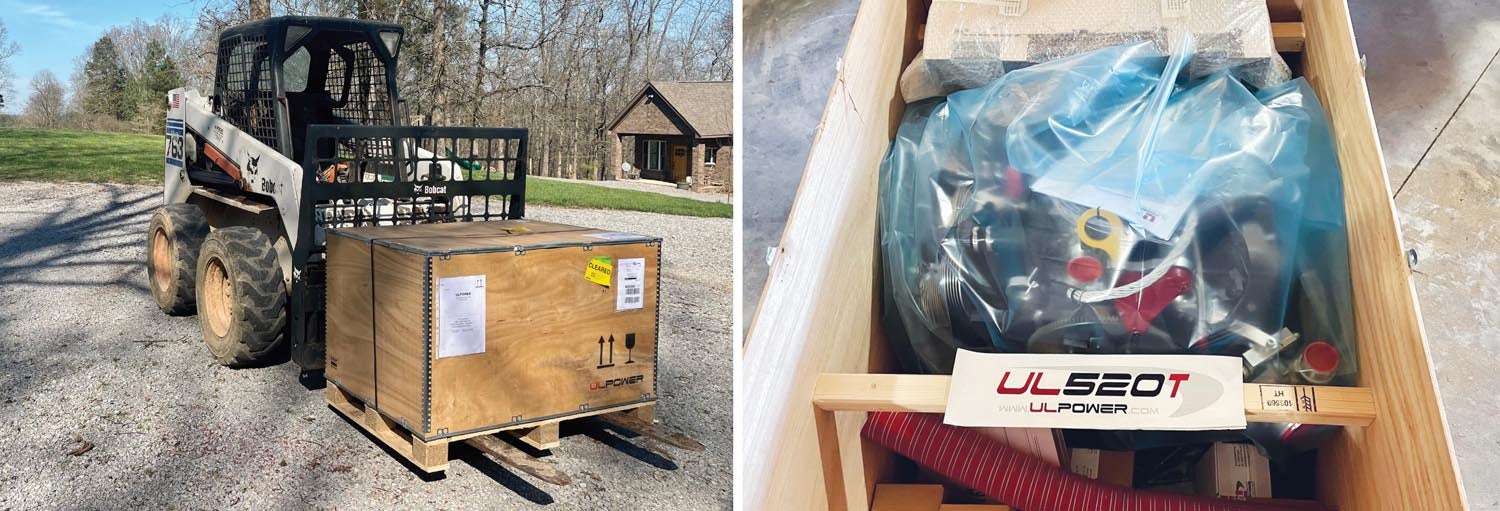
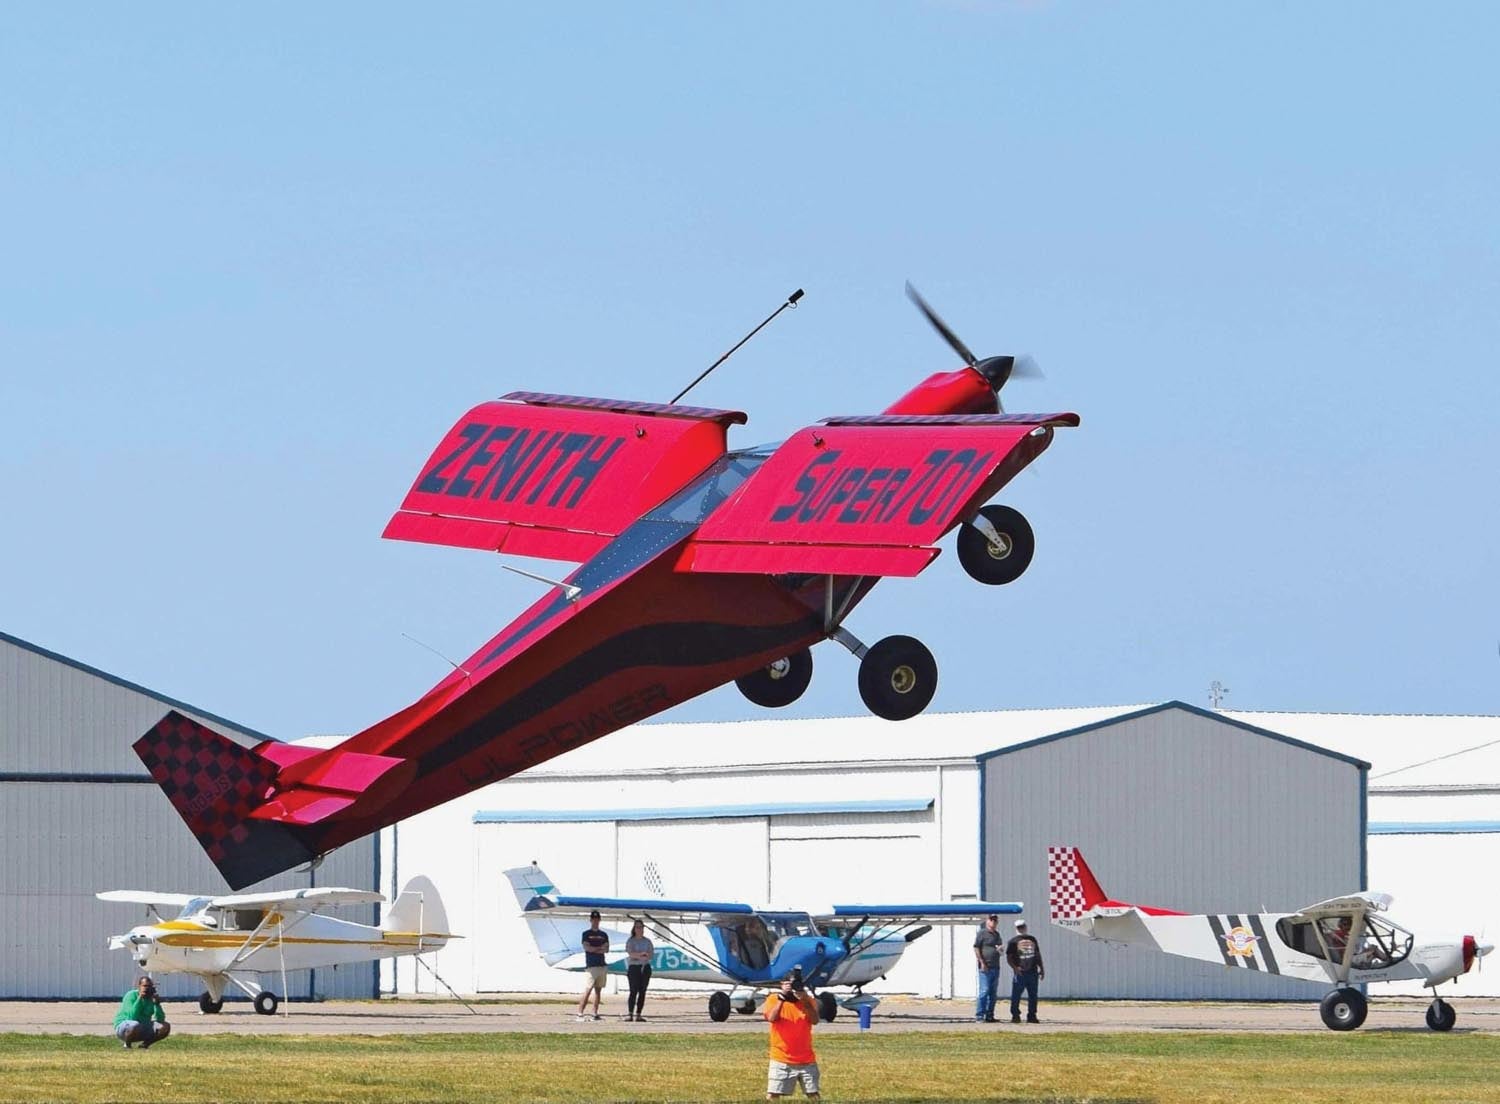
The 2023 airshow season has begun and life has been busy since the last article, but there has been one particularly big moment for the 750SDX build. The week before Sun ’n Fun, I took delivery of a nicely packed crate full of components intended to turn the big fan up front and move lots and lots of air. Yes, the ULPower 520T engine has arrived!
Those who follow my Super701 know that it was built with the 130-hp ULPower 350iS engine, which now has 700 hours. The powerful, quiet and flawless performance of the Super701 has been turning heads—my own included—ever since I completed it in 2018. As I’ve talked about previously, these are the main reasons I also decided to go with a ULPower engine on my second build, the 750SDX.
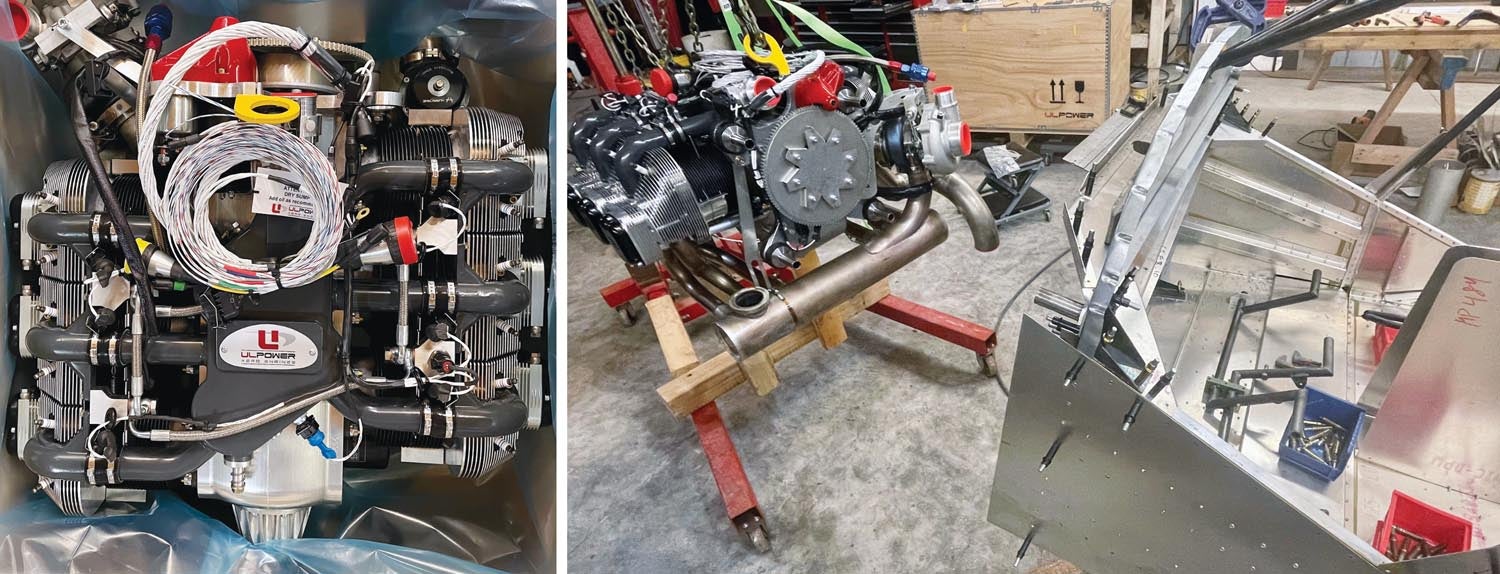
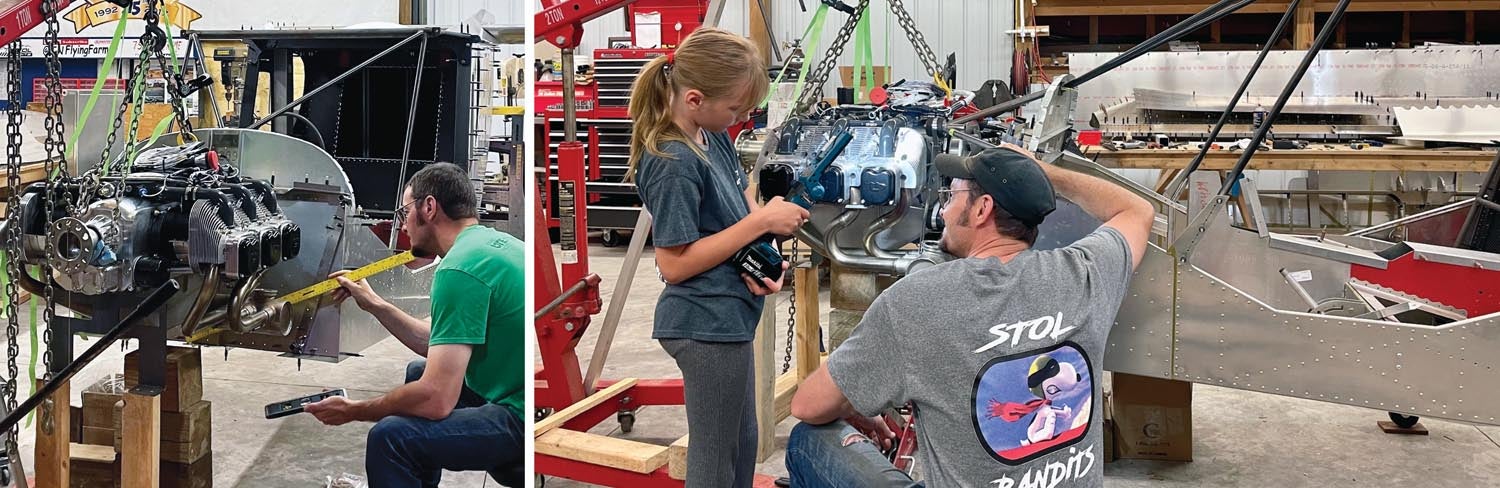
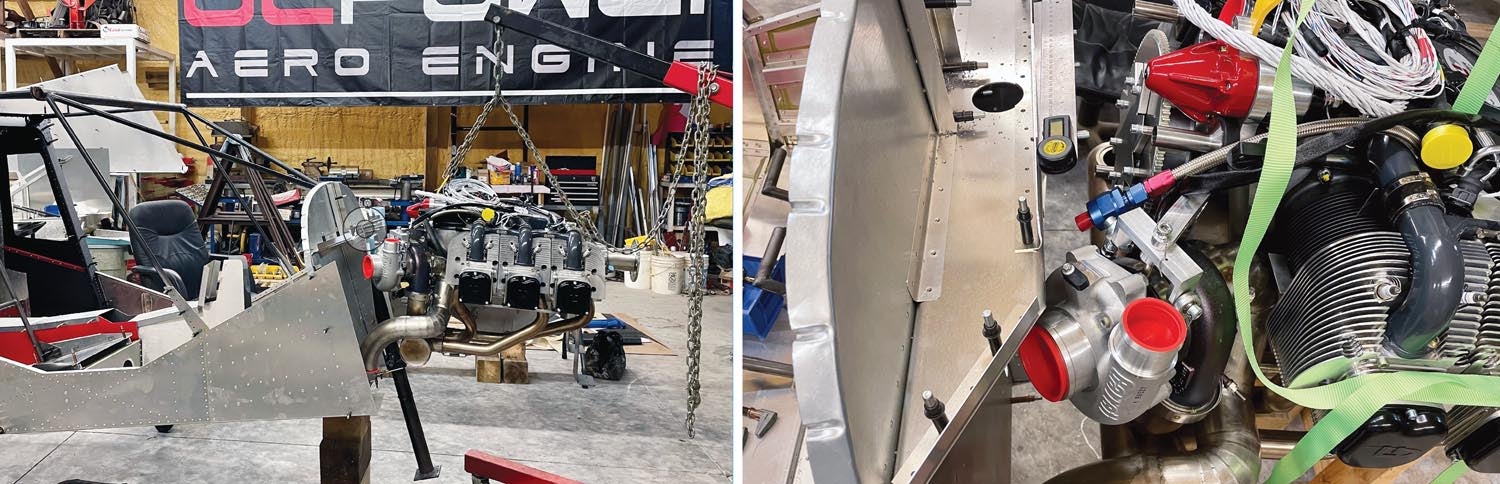
Now that I have the engine uncrated and hanging on a hoist in front of the firewall, I can really begin to visualize the possibilities and make calculations on how to proceed. One of the biggest choices I am having to make is whether or not to go with a totally custom firewall-forward build. I got into a debate with myself because there is now an engine mount available for this engine/airframe combination that should work very well. That said, I still find myself wanting to take this project one step further and build a shorter engine mount in order to get the center of gravity farther back to help with STOL missions and performance.
I have been thinking about this for quite some time. In addition, I had an advantage at Sun ’n Fun this year because Herman Eshuis, a ULPower dealer who also provides builder assist programs and owns Wheels and Wings in Lake City, Florida, brought a 750SD fuselage joined with a ULPower 520T using the new ULPower engine mount to be displayed in the Zenith booth. This gave me an opportunity to closely examine the “bolt up and go” solution. The entire setup is nicely designed and put together! It would, no doubt, save me considerable time and effort—and it would be the best solution for someone whose build isn’t intended for the specialized performance I’m seeking.
Allure of the Custom Mount
In spite of that, and against common wisdom that says “just buy the components, bolt them together, and fly,” I am almost determined at this point to build my own mount and do some more custom work around joining the airframe and engine. It will be a lot of extra work, but I think it will ultimately be a noticeable gain in performance for my very specific STOL missions. While, to be totally honest, the modifications that I am planning to undertake will most likely never be worth the effort for the average builder, sometimes I like a challenge and I can be a bit of a perfectionist when it comes to certain things.
In reality, most of the extra time so far has been spent sitting in my shop chair looking everything over and contemplating how to proceed. I have run tons and tons of numbers through my weight and balance spreadsheet and already spent countless hours thinking about this during my off hours, while driving and while I’m awake at night. The performance gains might be minimal but when you look at all the internal metal pieces where I have shaped, trimmed and cut a few grams here and there, you begin to realize that I’m not trying to build “just another SD.” Sometimes these minimal benefits can win competitions or narrowly get you out of a potentially dangerous situation.
My goal is to build an engine mount that is more than 5 inches shorter than the currently available mount. I’m pretty sure this is possible, but it is going to take several modifications around the mount area of the engine bay to make it work. Things are also going to get tricky with the amount of available space left for everything else, like the intake, intercooler, exhaust, etc. Space underneath the cowl became very tight with the Super701 as well, but it has worked as flawlessly as anyone could ever hope for, so I am optimistic. I have a basic plan, several mount pins from ULPower, an engine backplate to use as a jig and am about ready to start cutting some chrome-moly tubing.
Of Seats and Unicycles
Since my building focus has mostly switched back to the fuselage (from the wings), I am again working on the firewall and inside the cabin area. This involves getting several engine mount brackets positioned and ready to drill for the engine mount pins so I can prepare to mock up the engine mount tubing. Before receiving the engine and while working inside the cabin, I was also thinking about the seats and trying to come up with different ways to make them adjustable, removable and lighter.
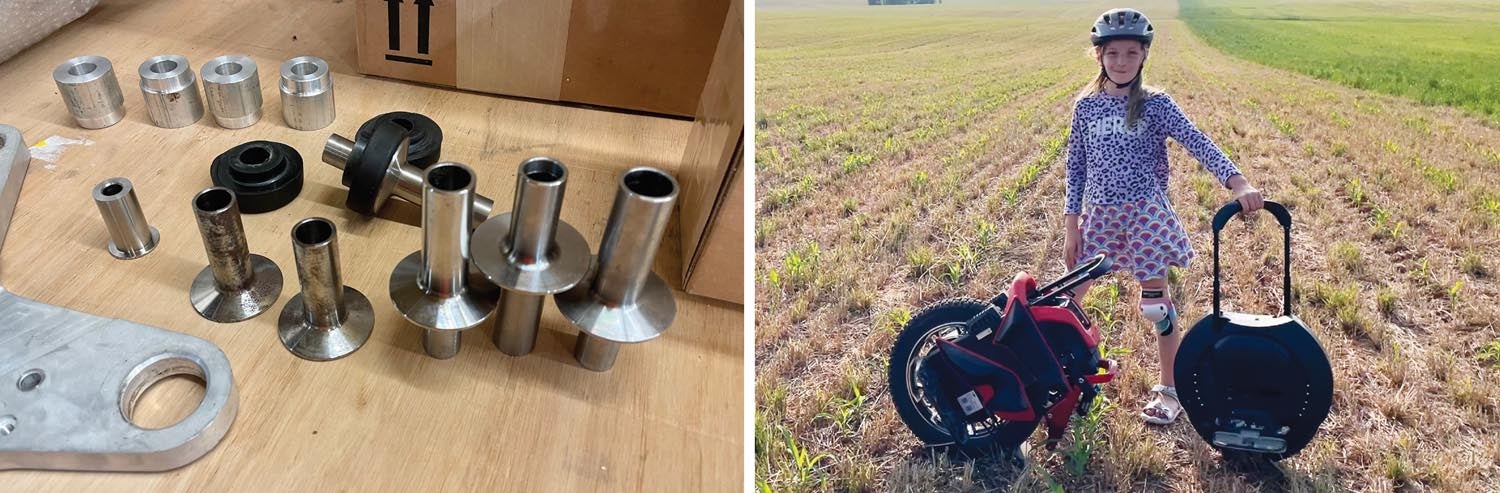
You can purchase sliding seat rails for 750-series airplanes, but they come with a bit of a weight penalty and still do not offer an easily removable solution. For the SDX, I want to be able to quickly remove the seats for rear jump seat/baggage area access. The factory seatbacks do fold forward for reasonably easy access, but my daughter and I are going to want even more room as we are really looking forward to packing our electric unicycles and taking them with us on many of our upcoming flying adventures. Our unicycles are rugged, plenty off-road capable with speeds over 30 mph and weigh 40–70 pounds each, so we will need to make loading/unloading them as easy as possible.
I have researched and looked at all kinds of possible seat-mount solutions, exploring everything from quick-release fasteners to aluminum rails and even boating seat options. The option I’ve come up with to resolve my access concerns is to use piano hinges. These will offer easy removal (just pull two hinge pins) and also give a reasonable amount of seat-position adjustment while on the ground.
Another advantage of this design is that when I travel by myself, I will be able to remove the passenger seat and secure my electric unicycle beside me instead of having to go all the way to the rear area with it. At some point, I also plan to build a custom frame to fit the piano hinges and act as a cradle/tie-down for my unicycle. An extra advantage of a quickly removable passenger seat is that I can take it completely out of the plane while I am trying to reduce weight for STOL competitions.
I’m a pretty big fan of utilizing piano hinges for lots of things. They are simple, relatively lightweight, strong and easily customizable for many unique applications. I have used them on my previous build to attach the engine cowl, access panels and doors, among other things, and you will see several of them on this build as well.
Hinge Differences
One thing to note here is that there are big differences in the available aviation-grade piano hinges. Bare stock aircraft piano hinges do not come with holes already drilled. (Be careful if you are looking at hardware store hinges because the quality is rarely the same.) The notable difference in aircraft-grade hinges are the style and strength (how they are made). The common hinge starts as a flat piece of aluminum and the loops are rolled/formed, leaving a very small gap that can potentially be pulled apart during high loading. It is not nearly as strong as an extruded hinge. The extruded piano hinges are manufactured and machined in one solid piece and the loop is entirely closed. These hinges are structurally much stronger and should be used in higher load areas. I use the extruded hinges in places like the seat and cowl attachments and other structural places on the airplane as needed.
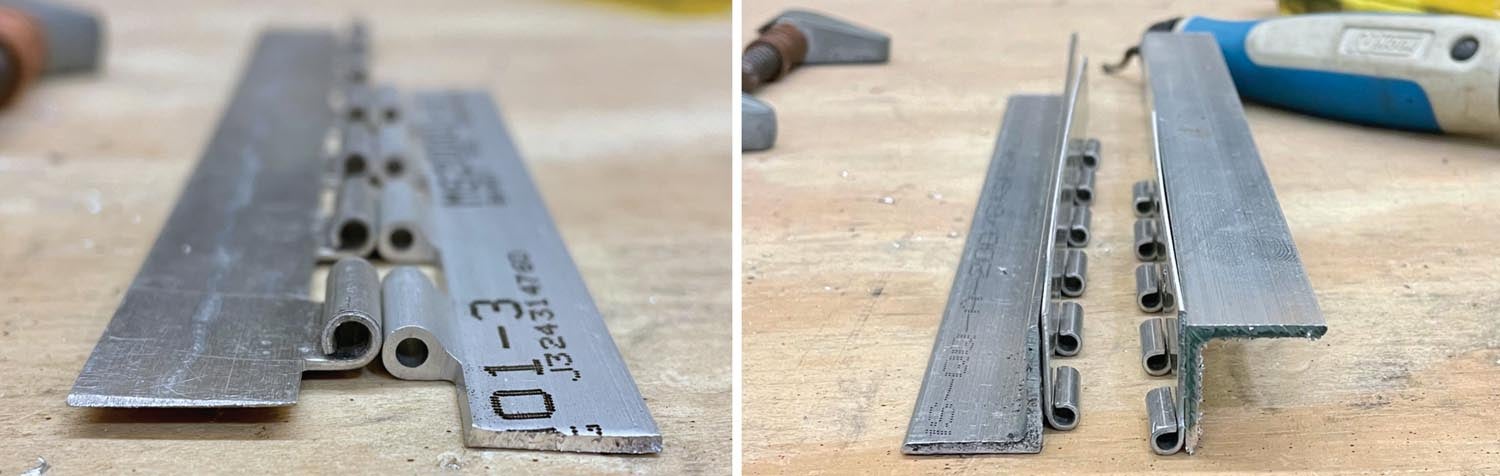
From an installation standpoint for the 750SDX, I was not content with just mounting the hinges flat. Done that way, they would be springy, relatively easy to bend and more prone to break or tear loose. After messing around with scrap pieces of hinge and aluminum extrusion, I found a system that I think is structurally sound enough to handle a heavy pilot/passenger in off-airport situations, yet still much lighter than most of the other options I have looked at. Basically, if I put the hinge flat on the seat base and bottom of the seat, it puts the load on the attachment rivets in tension and the hinges are pulling against each other in their weakest position. However, if the hinges are mounted vertically, the rivets are put in shear load (stronger) and the piano hinges are also working in their strongest configuration.

Lighting Plans
Although progress has felt a bit slow lately due to all my traveling and the spring harvest season on our farm, plenty of other things are in the works with the build. I have been in contact with AeroLEDs a few times regarding the possibility of adding extra landing lights to the leading-edge slats and developing custom wig-wag patterns. Although this may not be necessary, any extra light during night landings on our farm or at off-airport landing sites is always a benefit. The unique wig-wag pattern should be fun and entertaining at STOL competitions and airshows/events. There are several more things happening with this 750SDX that I am excited about but cannot yet disclose.
Looking Back
When I first started writing this series, I talked a little about why I’d gone with the Zenith CH750 Super Duty for my second build. What I didn’t really mention was how my experiences with the SD played into that decision. It probably goes without saying, but nothing beats spending time in a model, not only for deciding what you want to build but also for keeping you excited about a project while it’s coming together.
My first experience in a Zenith 750 Super Duty was in one of the first customer-built SDs, a beautifully constructed desert-tan military-paint-scheme airplane built by Randy Shannon, which KITPLANES® readers may recognize from the March 2021 article, “Twelve Months to Takeoff.” When I flew Randy’s amazing SD, I hadn’t even considered building an SD for myself, but it was an excellent example for getting my first impressions of being in a 750SD. The comfort and amount of extra space were very noticeable compared to my much smaller 701. This was quite possibly the moment I had my first serious thought about building a Zenith 750SD of my own.
For my second SD flight, I flew my Super701 over to Shelbyville, Tennessee, with several of our STOL Bandits flying group, where I had the opportunity to catch a ride in a very nice 750 Super Duty with a 200-hp ULPower engine. It was built by Nick Otterback, who does builder assist with his crew at Arion Aircraft in Shelbyville. I have been told by quite a few people that my Super701, with the 130-hp ULPower four-cylinder engine, is the smoothest running airplane they have ever been in. Well, I was genuinely amazed at how smooth the 200-hp six-cylinder was in this 750SD. I was also impressed with the performance of the Super Duty, even with plenty of fuel and two pilots on board. I had also visited Nick one time earlier, when this particular SD was being built, so I could check out the SD kit during construction and was impressed by the evolving CNC technology and ease of assembly.
My most recent SD experience was at the Zenith factory where I flew with demo pilot Roger Dubbert, who demonstrated a short takeoff and landing. I had been flying my Super701 for several years before this flight and even though the 750SD is quite a bit heavier and bigger, I have to say that the STOL performance of the factory demo plane was also impressive!
Oshkosh!
By the time you see this in print, AirVenture will be just around the corner. If you are following this Super Duty build and/or the Zenith airplanes in general, I highly encourage you to swing by the Zenith Aircraft display. I’ll be there and happy to answer questions about the basic airplane and discuss some of the details of my project that might not be in these articles. Hope to see you there!
Videos of Humberd’s builds—and some of the fun that can be had with flying a STOL airplane—can be found at www.youtube.com/@TNFlyingFarmer.
![Coming in for a landing at Humberd’s Farm [All Images Credited to Jon Humberd]](https://www.kitplanes.com/wp-content/uploads/2026/07/9-1.jpg?w=218&h=150&crop=1 "Overcoming Setbacks on the Zenith 750SD Xtreme")
![[Credit: Zenith Aircraft Company]](https://www.kitplanes.com/wp-content/uploads/2026/06/31142685469.jpg?w=218&h=150&crop=1 "Zenith Throws Open Its Doors for “Fly-In to Summer”")
![Members of the North Idaho High School Aerospace Program gathered at KSZT [Credit: North Idaho High School Aerospace Program]](https://www.kitplanes.com/wp-content/uploads/2026/02/IMG_3499.jpg?w=218&h=150&crop=1 "North Idaho High School Student ACES Fly the Aircraft They Built")


