 I really like the building process during the winter months, especially this past one. The weather has not been as nice as I remember it being during past years in Atlanta. We’ve had lots of rainy days and sometimes five to seven days at a time of low ceilings and crud. So why do I like it? Well, I don’t feel so guilty about not flying. Yep, aircraft building can really take away from flying and proficiency, and time can get away from you quickly. I’m constantly telling Carol that in my whole life I have never seen time go by as fast as it does when I am building aircraft. The days are just way too short! I’m sure many of you have the same experience.
The good news is that the dreary weather has made for some consistently long days in the hangar making great progress on the Hummingbird. I am beginning to get optimistic about an early spring 2023 completion—if I don’t cause any more problems for myself. Did I tell you I cracked the left windshield while installing it? A new set cost $1800! I realized why when I saw the part number was for a Bell helicopter. I like the idea that the Hummingbird is stout and made with a lot of FAA/PMA parts, but I did forget about the pricing that comes with that. I was very careful cutting and installing the new ones and managed to get them completed without any problems, except for a lot of stress!
Engine and Avionics Update
Lycoming completed my Thunderbolt engine in December, as promised. I will detail all of that in a future update, but suffice it to say that I had it completely installed and ready to run and decided to remove the exhaust system and have it ceramic coated to help get rid of some heat. I saw a picture of a recently completed Hummingbird in flight at dusk and the exhaust system was glowing red! I’ve seen turbocharged engines do that in a test cell, but not normally aspirated engines. Perhaps it is due to the engine running at 3200 rpm in the helicopter, as well as there not being the same amount of cooling air going over the exhaust system as in a more tightly cowled aircraft installation. I don’t really know, but I do know it is best to have the exhaust ceramic coated before it is used.
Speaking of heat, there weren’t any provisions for cabin heat. So, I sent the mufflers off to Vetterman Exhaust and Clint Busenitz welded some fittings on the muffler and installed a heat muff.
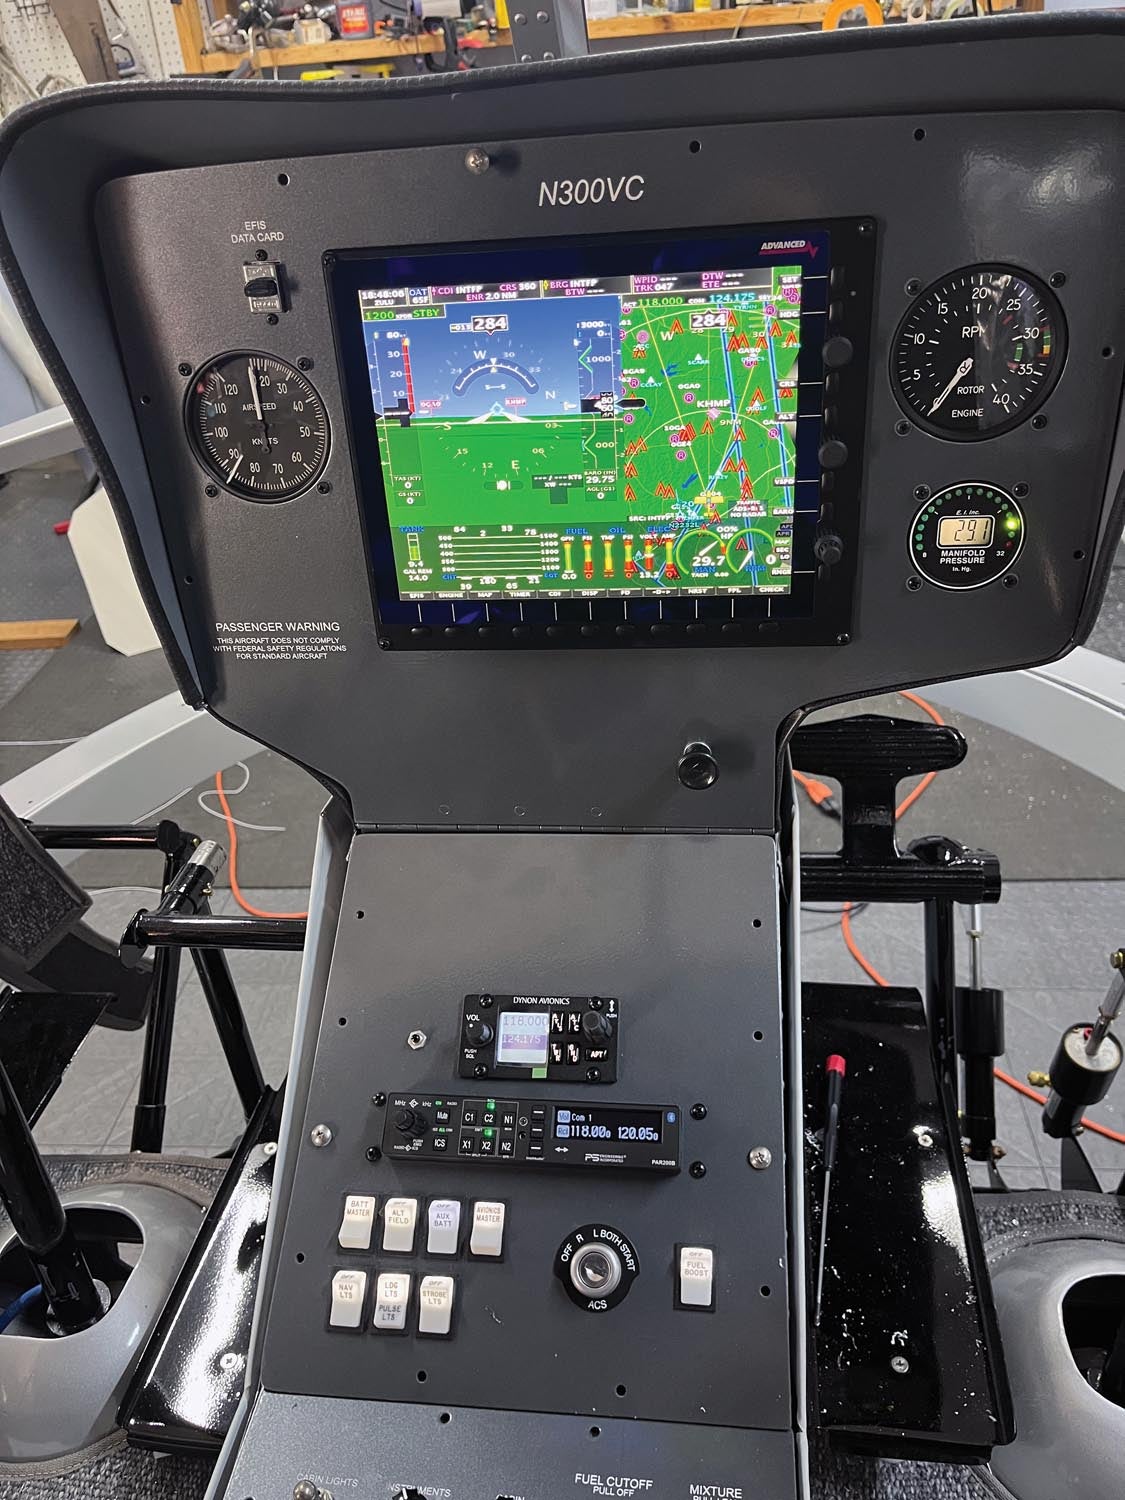
The other good thing is that Advanced Flight Systems delivered on the promise to code some software to display the transmission oil pressure on the EFIS. I really didn’t want an analog oil pressure gauge on the panel.
I also managed to get all the electrical completed. The Advanced Control Module and associated components were all installed, and then the instrument panels were sent off to AFS for powder coating and labeling. They came back looking beautiful, were accompanied with the long-awaited AF-6600 EFIS and now are completely installed. Everything powered up without any smoke, and I even have traffic displaying on the screen in the hangar! Seeing everything working was quite motivational, especially since I ran many individual wires, such as the intercom and engine sensors. I must admit I did install the wrong wire from the EMS to the manifold pressure sensor but realized that as soon as I powered it up, as there was no value displayed. It was a quick fix, and I sure felt relieved.
Fuel System and Interior
Toward the end of any aircraft I’ve built, it seems like the need for project management and forward thinking increases dramatically. Some things need to get done in an order such that they don’t cause delays in other areas. Paint and interior seem to cause a lot of consternation. The interior certainly needs to be built and then taken completely apart to paint those pieces that aren’t covered. Even the painting process for the outside of the aircraft seems to take some planning.
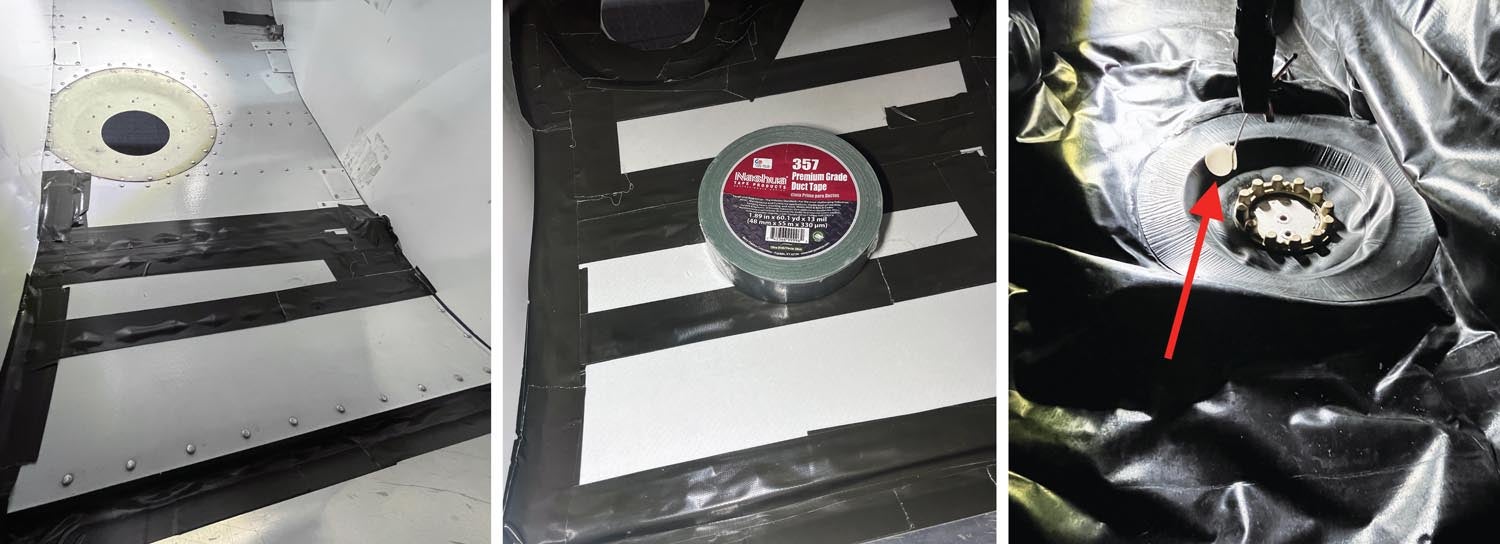
To start the interior required completing the fuel cell. On the Hummingbird, the fuel tank is a large 57-gallon bladder underneath the rear seats. It is protected by sheets of Conolite on the bottom and sides to help prevent a puncture in the event of an accident. Once all of that was installed, the fuel cell area was cleaned, vacuumed and wiped multiple times. You don’t want any metal shavings or rivet stems abrading the rubber bladder. Then, all seams and protrusions, such as rivet heads, bolt heads and nuts, were generously covered in multiple layers with very high-quality duct tape. I used almost two complete very large rolls. Then, some very strong Velcro pieces were added to the tops and sides of the cell that matched the Velcro on the bladder. The Velcro holds the fuel bladder in place and keeps it from collapsing when it is empty.
Next, it was time to close out the fuel cell. I installed the float-type quantity sensor and adjusted it for the best low-quantity reading. The instructions called for cork gaskets and Permatex for all of the access panels to the fuel cells, including the sensor, but I used Pro-Seal without gaskets instead. My experience is that the cork and Pro-Seal seem to dry out over time and leak. I haven’t put any fuel in it yet, as I plan to calibrate the sensor when I do that.
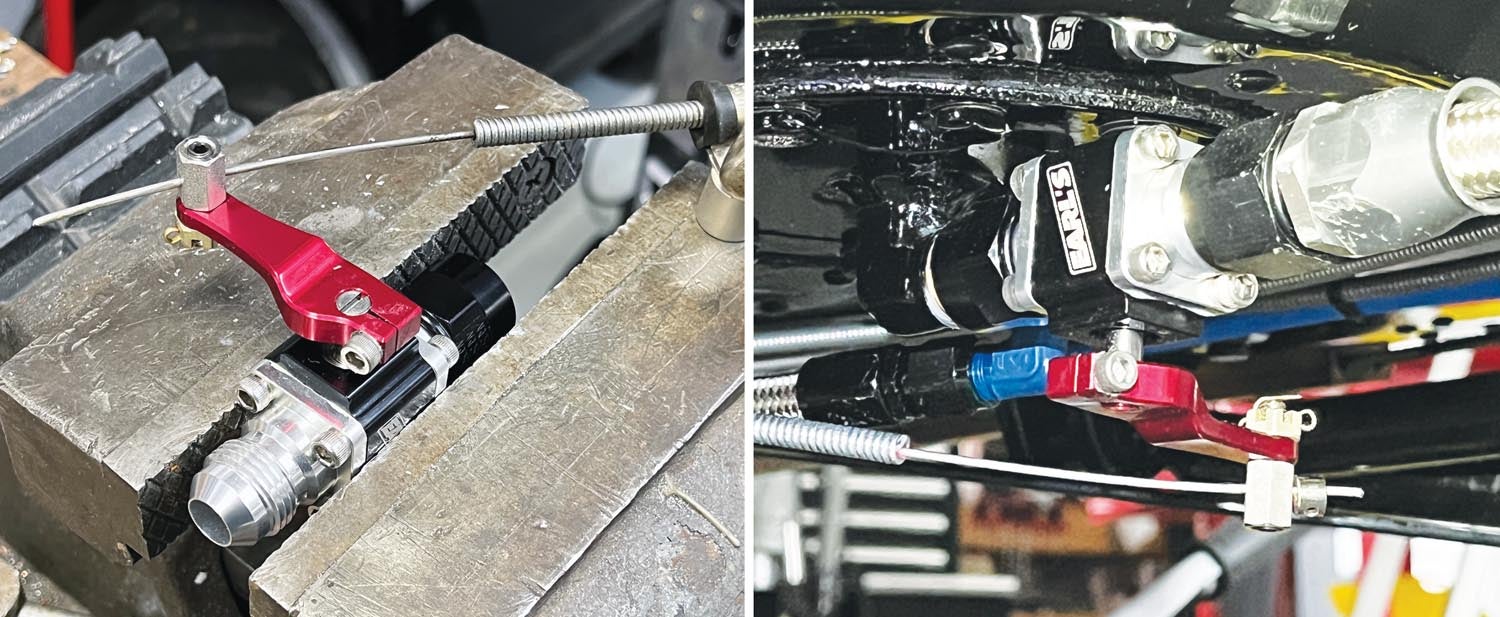
One of the main contributions to accidents in the amateur-built aircraft world is modification of the fuel system. As a DAR I always ask if any modifications have been made. In this case, I admit that I have made one modification, as I added the ability to remotely turn the fuel supply off. Since the fuel tank is at the aft end of the cabin, and there is only one tank, there are no fuel lines to route to a fuel-selector valve. There’s no sense routing fuel lines unnecessarily, but I wanted the ability to turn the fuel off in case of an accident and for maintenance. In this installation the fuel was routed from the bottom of the tank at the rear of the aircraft directly to the gascolator on the aft side of the firewall. It was simple enough to place a high-quality cutoff valve right where the connection is made to the sump. I worked out the geometry on the bench such that the slipstream and cable are always working to keep it in the open position.
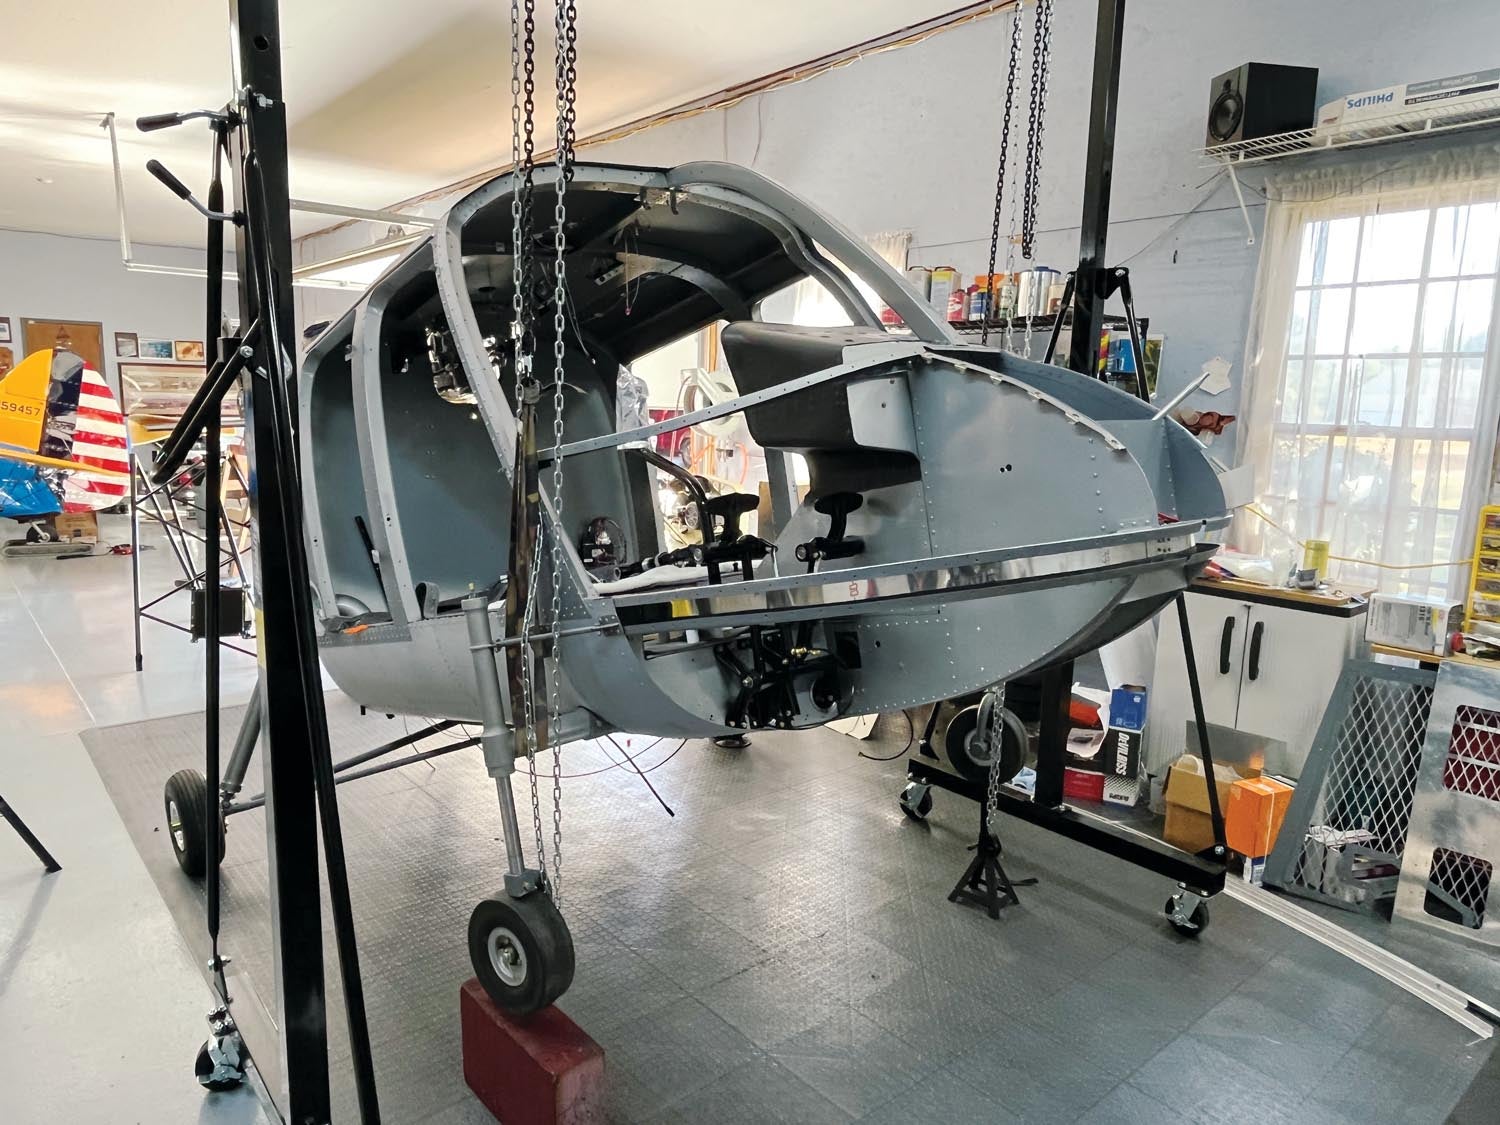
There are a lot of cables routed on the exterior bottom of the cabin, such as brake lines, control cables, throttle/mixture, etc. Again, the gantry crane I’ve mentioned in earlier columns came in very handy. The cabin sits pretty low to the ground, so lying underneath it was not very comfortable. Raising it using the gantry crane made the work very easy, including installing the chin windows, parking brake and landing lights. Yes, I added a parking brake, which I intend to use for rotor start-up and shutdown. Since this helicopter is on wheels, not skids, the initial torque at rotor engagement will cause the nose to turn without using the brakes. As a funny side note, I don’t think I ever broke the habit of stepping on the pedals in the Hughes 269 helicopter whenever I started the engine, even though it was on skids and had no brakes. Some habits die hard from flying fixed-wing aircraft. Now, it will seem natural to check the brakes.
Once everything was installed we took the time to make templates for the interior panels and carpet, allowing Carol to get started on fabricating them. The cabin is huge, so it required a number of complex panels in order to have an organized installation process.

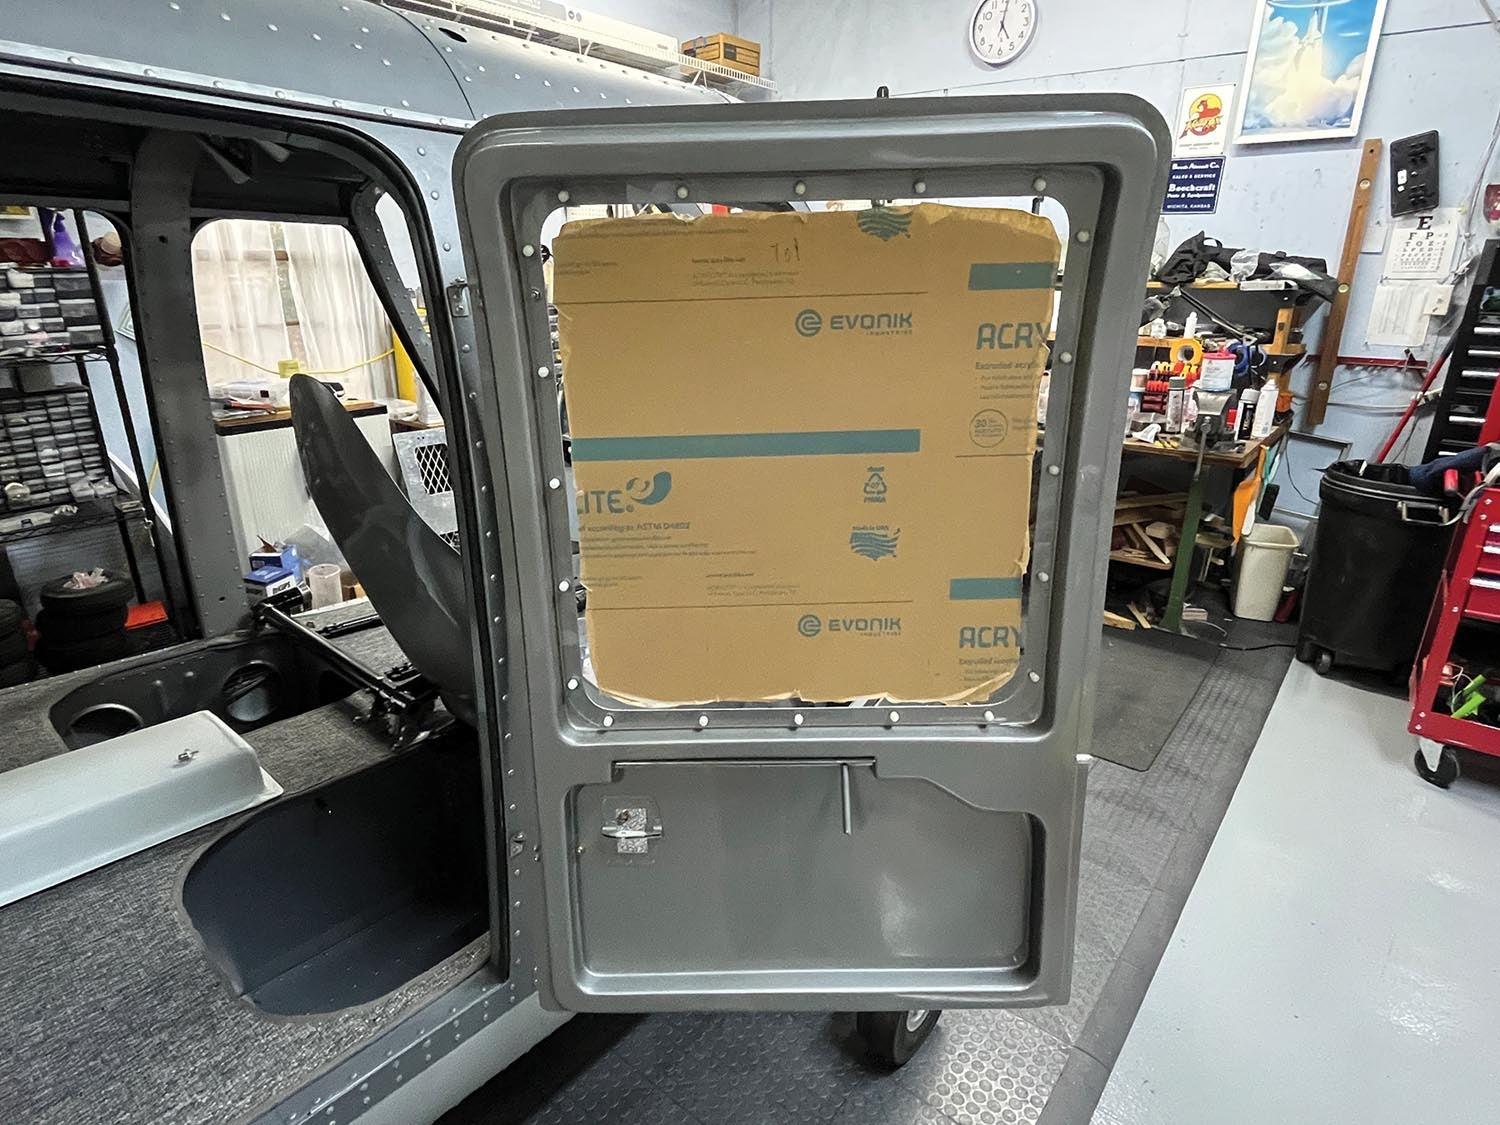
Another area that I needed to address was cockpit ventilation. Yes, we can fly it with the doors off, which is a lot of fun in a helicopter, but there’s a good portion of the time that the doors remain installed, and that huge bubble canopy makes for a really hot cabin on sunny days. Luckily, I had two Snapvents left over from an earlier project, as that company doesn’t seem to be in business any longer; they don’t answer the phone and every distributor shows them as indefinite backorder. I will install the two I have in the front door windows, and I added sidewall vents from Van’s Aircraft on each of the doors. I also designed the cabin heat system so that I can route cool air through it in the summer months.
I painted the interior of the doors first, so that I could get the plexiglass installed. When installing plexiglass, don’t forget to use a plexiglass drill bit, and drill the hole larger than the diameter of the fastener so that there is room for expansion. Otherwise, there’s a high probability that it will crack.
Painting the Tail Cone. Again.
In Part 4, I mentioned that I had painted the tail cone, but I wasn’t happy with the way it turned out. It’s my own fault, as this was the first time I was using Superflite paint. I’ve painted all my own aircraft over the years, but painting is one of those skills that deteriorates if you don’t use it regularly. Once every five to six years is probably not enough and coupled with a different brand of paint than I had previously used, it showed. As I progressed through painting the rest of the aircraft, my results improved. Unfortunately, that tail cone was staring us in the face as we walked by it every time on our way to the hangar. Carol was kind enough to not say anything, but I knew she wanted to.
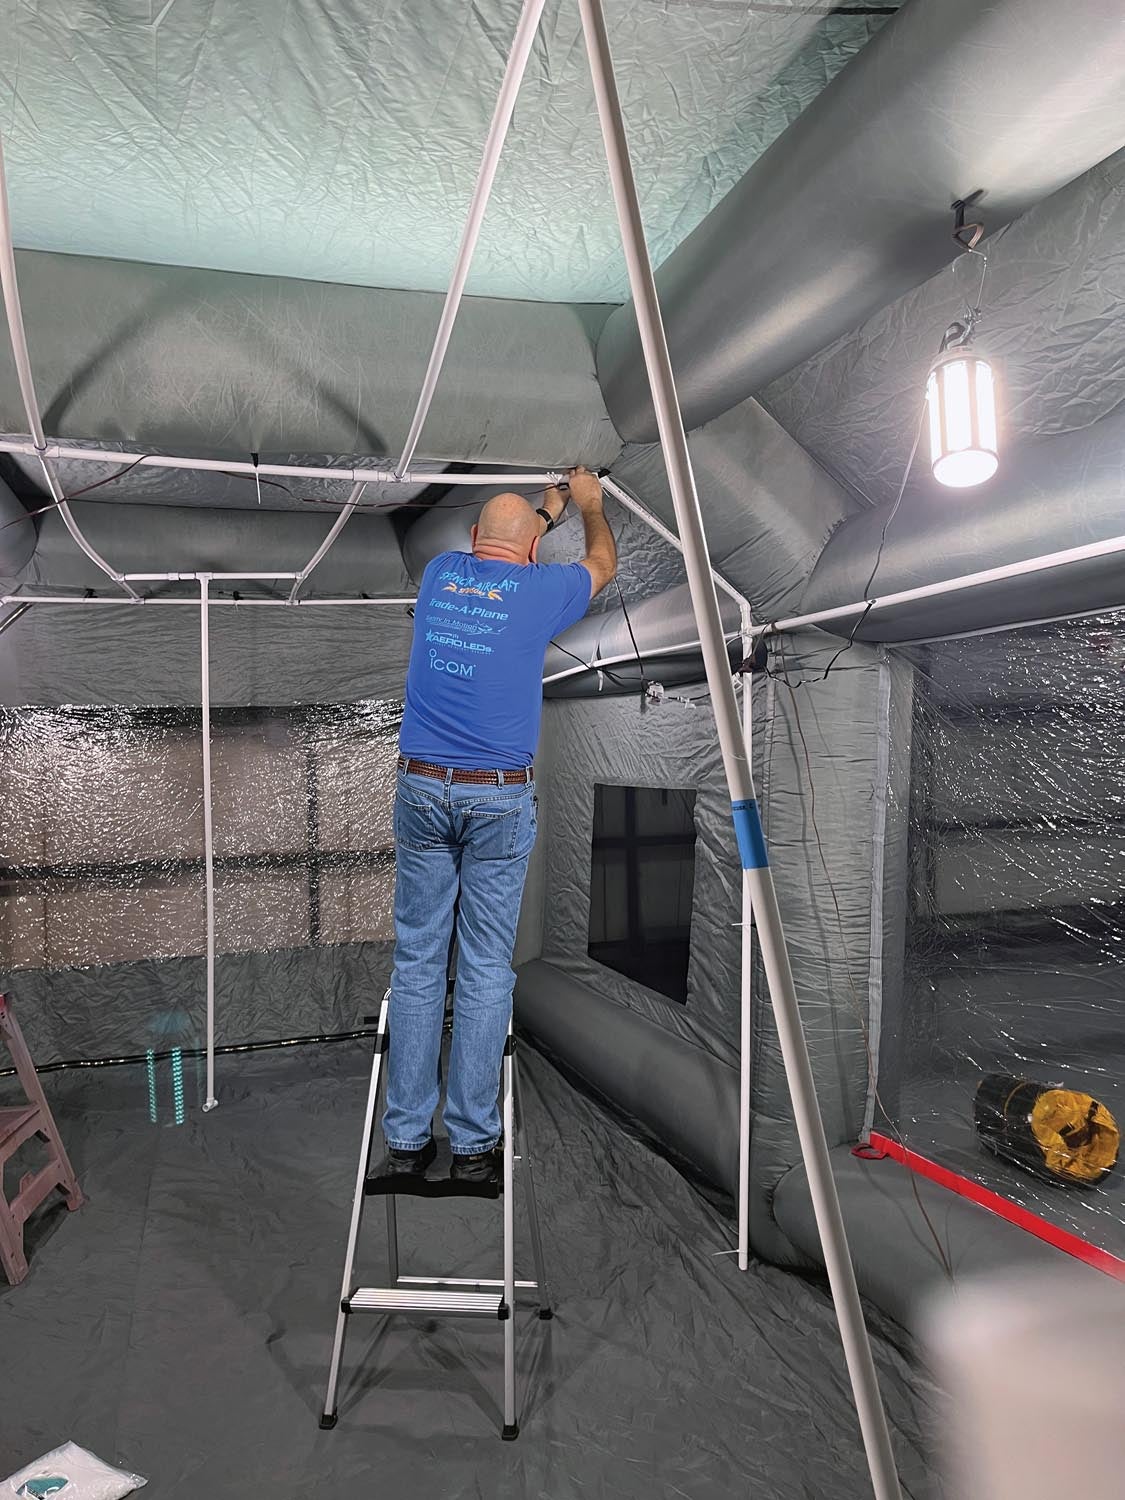
Then a lightbulb went off, or on, as I should say. I thought we had lit up the paint booth well and had even added some extra lights outside the booth shining into the windows. But the paint was black, and it was hard to see. Perhaps it’s my old eyes, and I’ll use that as an excuse, but I decided to try something different. The bottom of the cabin was going to be quite hard to paint, and I was wrestling with how to do it. The gantry crane process I had been using to work underneath it was not going to work in the paint booth, so I decided I needed to raise it another way. Brad Clark mentioned that pumping the struts up all the way would help, and I decided that jacking it just a little higher would even be better. I figured out a way to do that, but it still left me with the hard-to-see black paint.
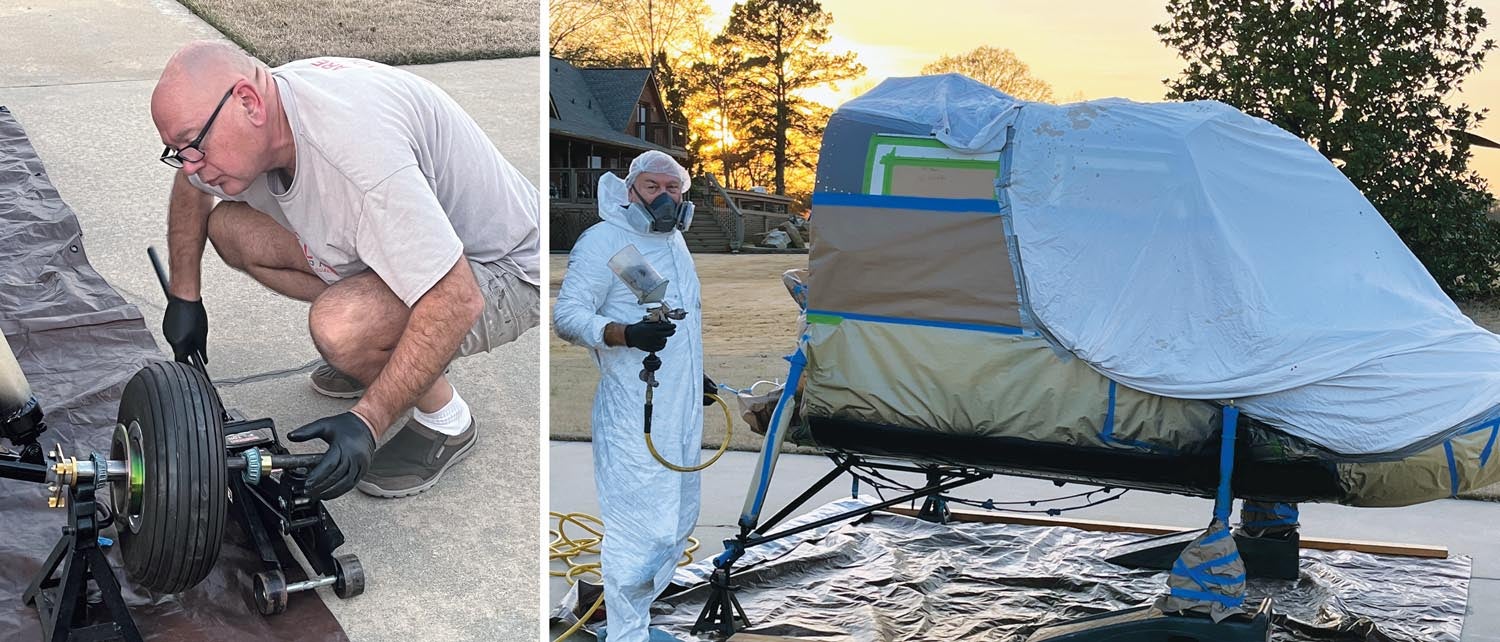
I needed more light and it had to be underneath the helicopter. I don’t know when it hit me, but the brightest light I know is the sun. So, one evening when the weather conditions were perfect—no wind, low humidity, no bugs, etc.—we placed a big tarp on the taxiway, and as the sun got lower on the horizon it lit up the bottom of the cabin beautifully. I managed to get a gorgeous paint job on the bottom that exceed my expectations. The trick was the light, so we found the brightest LED cone lights we could find for the booth, and it made a huge difference.

I know you are wondering, and yes, I sanded down the tail cone and repainted it in the booth with all the extra lighting. It’s gorgeous now, too.
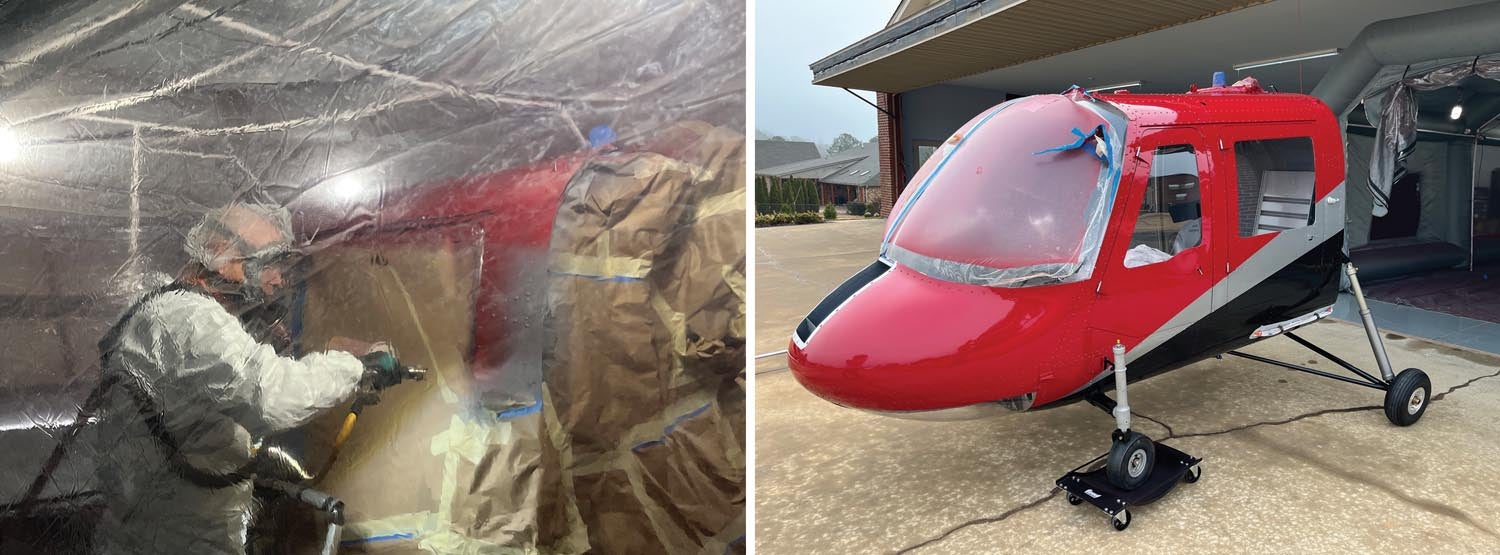
From there we proceeded to paint the red and silver on the rest of the aircraft. Painting is very time-consuming and tedious work, especially with multiple colors. You end up going through a lot of consumables, such as tape, masking paper and filters, coupled with a lot of extra time cleaning the booth between colors. Carol is ruthless about cleaning the booth, and it really makes a difference. I do wear paint suits, along with a fresh-air breathing system, gloves and head covers, so no skin is exposed. It’s kind of cumbersome in the booth dragging the hoses around and trying not to bump into the pieces as you paint them. Carol stays outside the booth and constantly drains the compressor of any moisture every few minutes, even though I have moisture traps and in-line desiccant filters.
While it’s not perfect, we are pleased with the results. It looks so different now that it is painted, but it’s also added to the stress of being more careful to not scratch anything.
Next update I will highlight the engine installation for you, and by then the engine should be making good noises. I’ve even started the paperwork for an airworthiness inspection, just to keep the fun factor alive. Did I tell you we received the registration? The FAA completed it in less than 10 days. I had heard they give new amateur-built applications a sense of urgency, and I was shocked at the turnaround. The Hummingbird is a model 300L, so we have N300VC, a 300 for Vic and Carol.


My name is Glenn, I was the quality assurance inspector for Vertical Aviation for 10 years. You’ve got yourself a good quality sturdy aircraft for the money. I’ve seen a clip of this helo doing a vertical loop when first built by Sikorsky. I enjoyed reading this ship and seeing it again.
Comments are closed.