Having a machine shop means never having to say, “I can’t make that.”
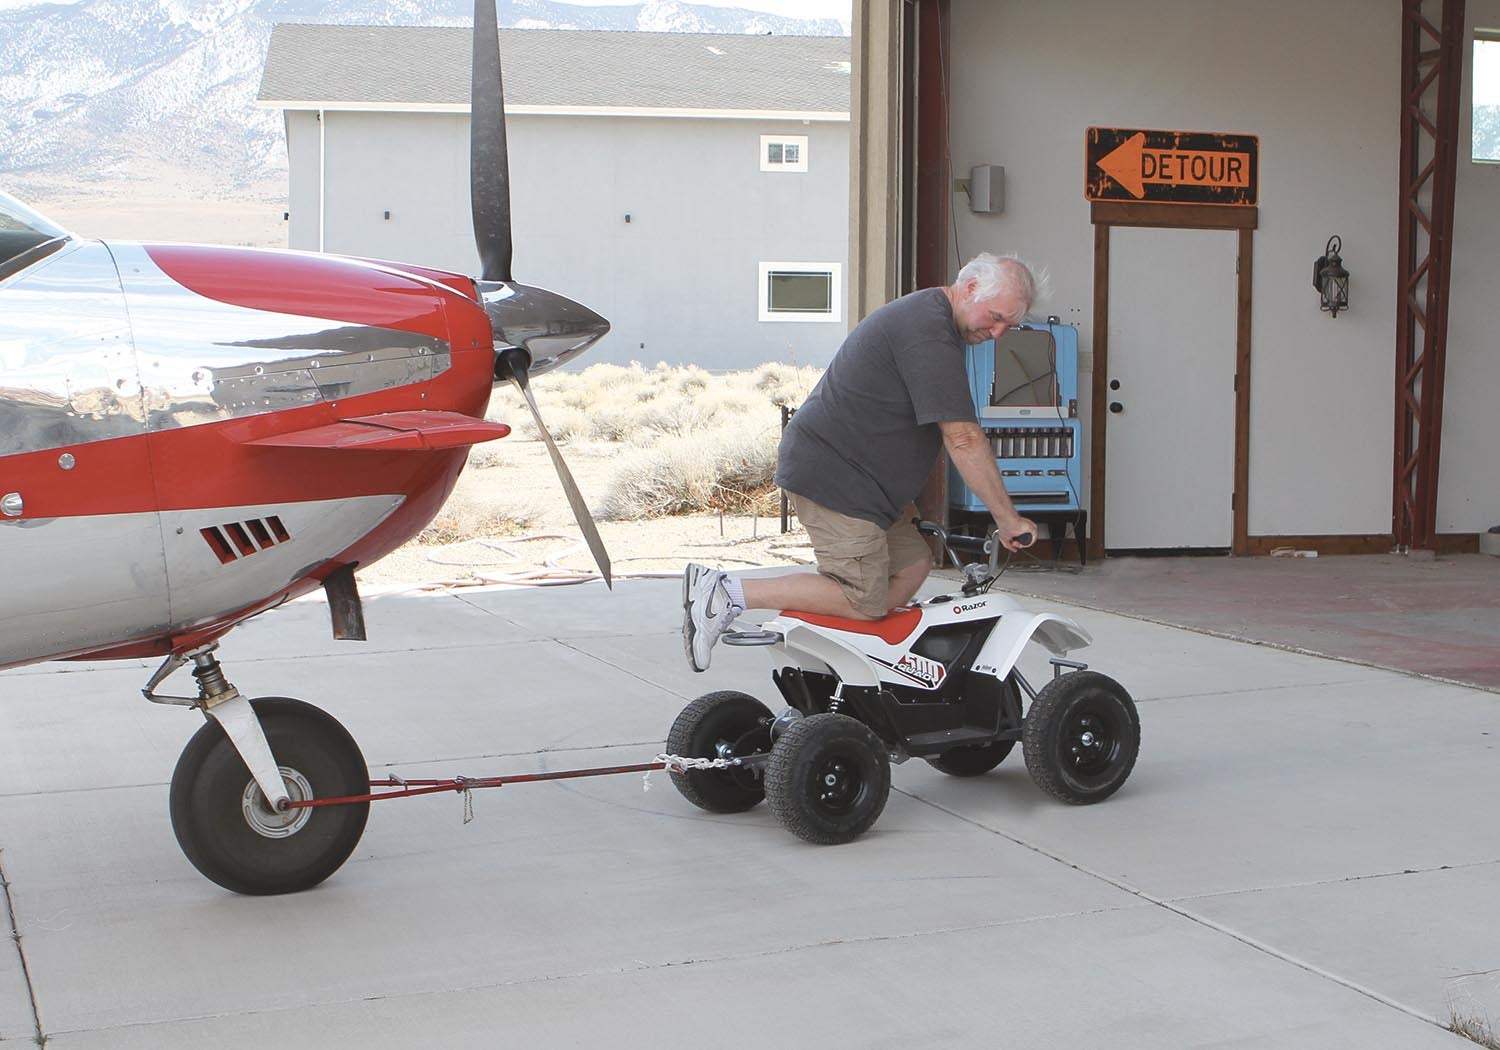
That occurred to me one afternoon when I was making a sprocket. The backstory for this was my neighbor, Todd, recently had a hernia operation and they told him no lifting, pulling or pushing during recovery. So, while he’s OK to be flying his Cessna 182—hernias are not on the FAA’s list of disqualifying conditions—it’s not OK for him to be pushing it out and pulling it back into his hangar. Actually, getting the airplane out is not the problem. There’s a slight slope between his hangar and the taxiway, so Todd gets a gravity assist going out. But it takes a bit of muscle to pull the 1700+ pound Wichita wonder back into the hangar.
Since the lifting, pulling and pushing situation was expected to be short-term, I offered to convert my 36-volt, 500-watt electric dirt quad into a temporary tug. After all, there are a number of tow bars on the market that use a handheld drill for power assist. (Linn Kastan at Redline Aviation came up with this idea more than 15 years ago.) Given that a good 18-volt power drill can put out 300 watts (a bit less than 1/2 hp) or more, I figured that, with a little tweaking, the 500-watt quad could be up to the task.
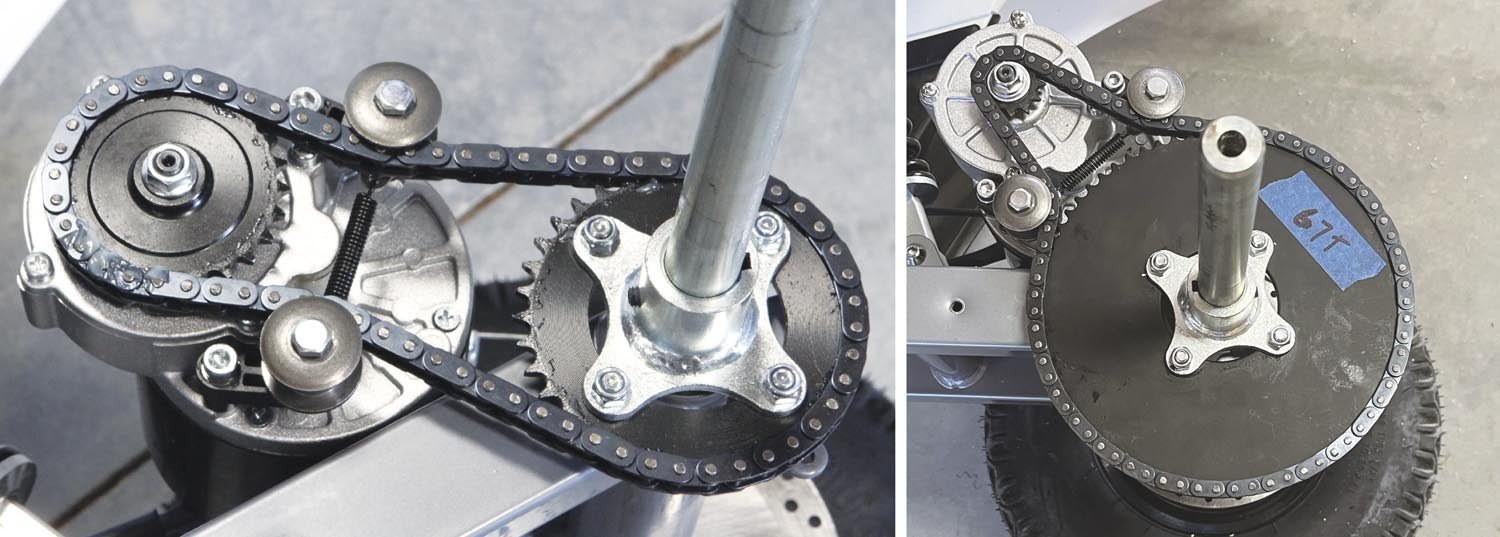
The tweaking consisted of changing the sprockets to lower the speed and increase torque. The stock drivetrain had a 25-tooth sprocket on the motor (the motor has a built-in 10:1 gear reduction) and a 36-tooth sprocket on the rear axle. Changing the rear axle sprocket from 36 to 67 (the closest I could find to 72, which would double the torque) reduced the top speed from 9 mph to just under 5. This change proved to be only good enough to tow the Cessna on flat ground; it couldn’t pull it up the incline to the hangar. It needed more torque.
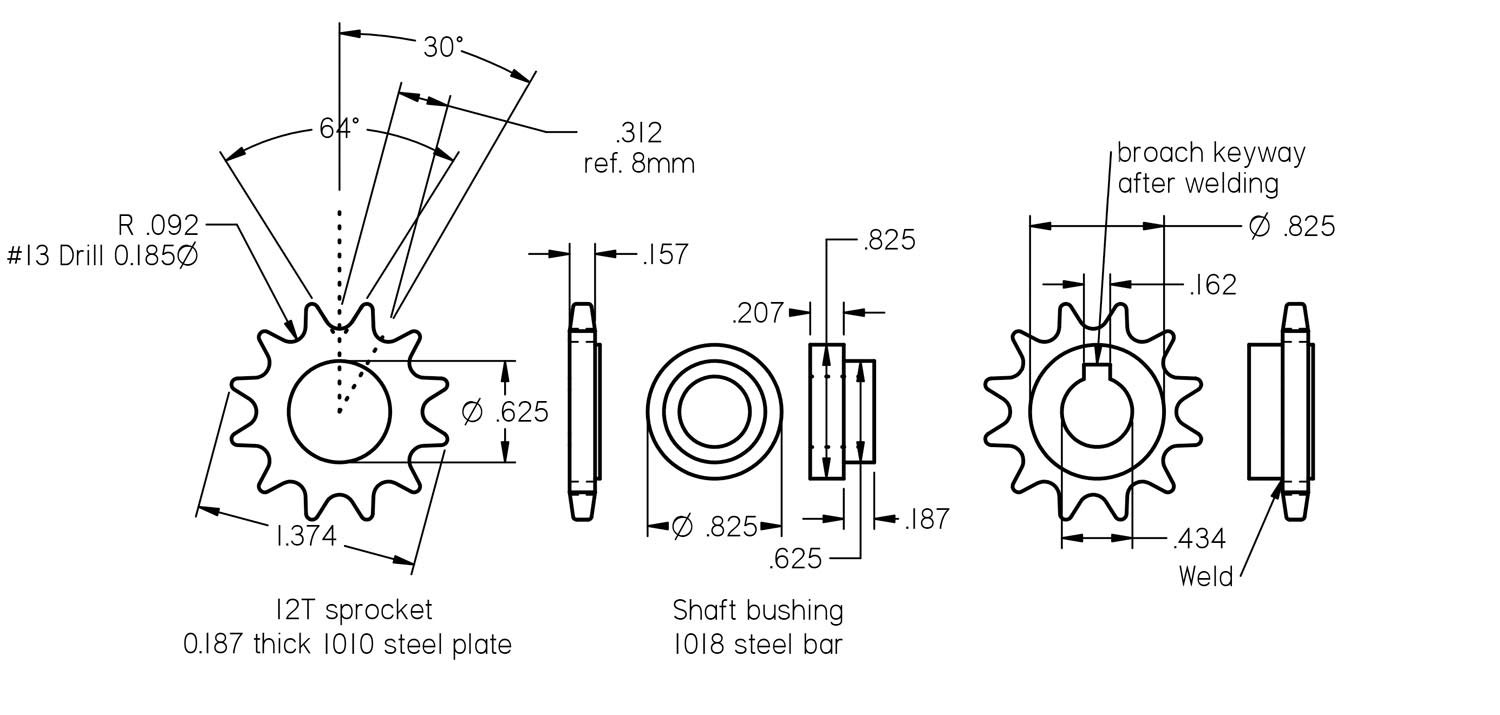
The next move was to change the 25-tooth sprocket on the motor to a smaller one. This time, instead of buying a sprocket, I decided it would be more fun to make one. Based on the size of the hub on the factory 25-tooth sprocket, with a 0.433-inch (11mm) bore and a 0.160-inch (4mm) keyway, I worked up a drawing for a 12-tooth sprocket. This would double the torque and lower the speed to less than 3 mph, which is on par, speed wise, with the drill-powered tow bars. This change would pretty much guarantee it would pull the Cessna up the ramp.
Since my shop was down for remodeling during the writing of this column, I am skipping the fabrication steps (look for that in the future) and jumping forward to the pièce de résistance of this project: case hardening the sprocket to ensure a lifetime of service. According to Wikipedia, “Case hardening is the process of hardening the surface of a metal object while allowing the metal deeper underneath to remain soft, thus forming a thin layer of harder metal at the surface.” The wiki page goes on to explain that iron or steel alloys with low carbon content, which otherwise have poor to no ability to be heat treated by the traditional methods (heating, quenching and annealing), can be case-hardened by infusing carbon to the surface.
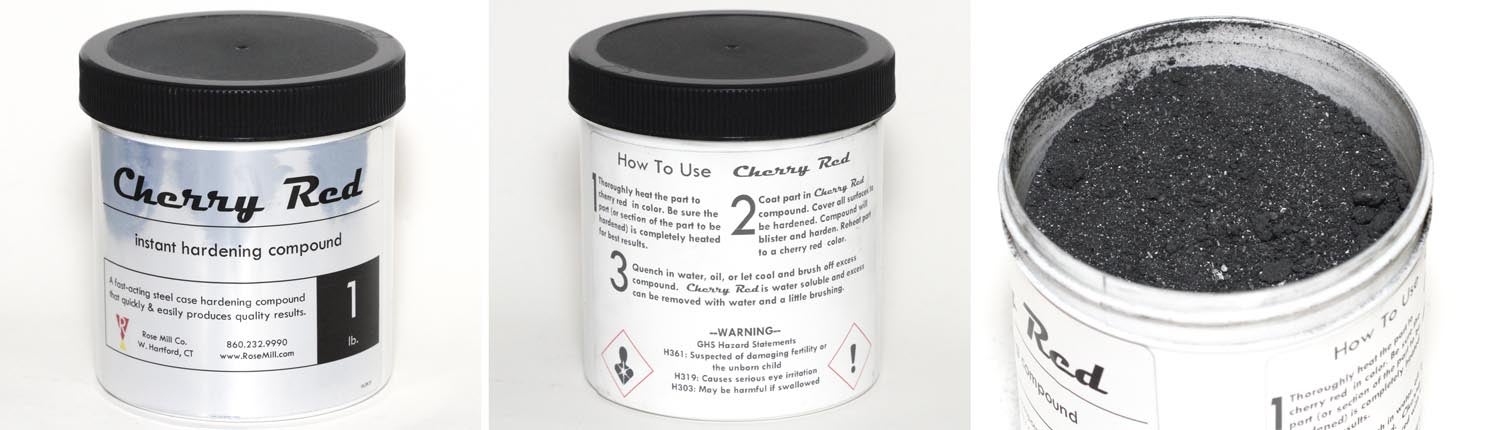
The 1010 steel that I used for the sprocket is exactly that: a low-carbon (mild) steel alloy that is great for normal fabrication but not heat treatable, except for case hardening. And, being a small part, case hardening is something we can do in the home shop using a product called Cherry Red. The following is from the Cherry Red instructions:
“Cherry Red is a fast-acting hardening powder, which when applied to steels will develop a case hardening surface. Cherry Red is used on parts such as knives, punches, drills, chisels, cutting edges and small tools.
“Thoroughly heat the part until it is cherry red in color. Be sure the part (or section of the part to be hardened) is completely heated for best results.
“Coat the part in Cherry Red compound. Cover all surfaces to be hardened. The compound will blister and harden.
“Reheat part to cherry red color. Quench in water, oil or let cool and brush off excess compound. Cherry Red is water soluble and excess can be removed with water and a little brushing. Repeat steps one through three as needed to raise the Rockwell value.
“Test results claimed by the manufacturer on low carbon (mild) steel: before applying Cherry Red 17HRC and after applying Cherry Red 39HRC.”
Since I wanted the entire sprocket hardened, including the bore and keyway, I decided to use the “dunk” method to make sure that every surface would come in contact with the Cherry Red powder. To do that, I filled a stainless steel measuring cup about two-thirds full of Cherry Red powder. I used a propane torch to heat the sprocket per the instructions, and then with a pair of pliers, I quickly transferred it to the powder, making sure it was completely covered. The reaction was instantaneous: Everywhere the compound came in contact with the red-hot metal, it blistered into a scaly residue. After allowing it to cool down, I pulled the sprocket out, reheated it and let it air cool, per the instructions. Prior to scrubbing off the excess, it looked a bit like a crusty artifact salvaged from the bottom of the ocean.
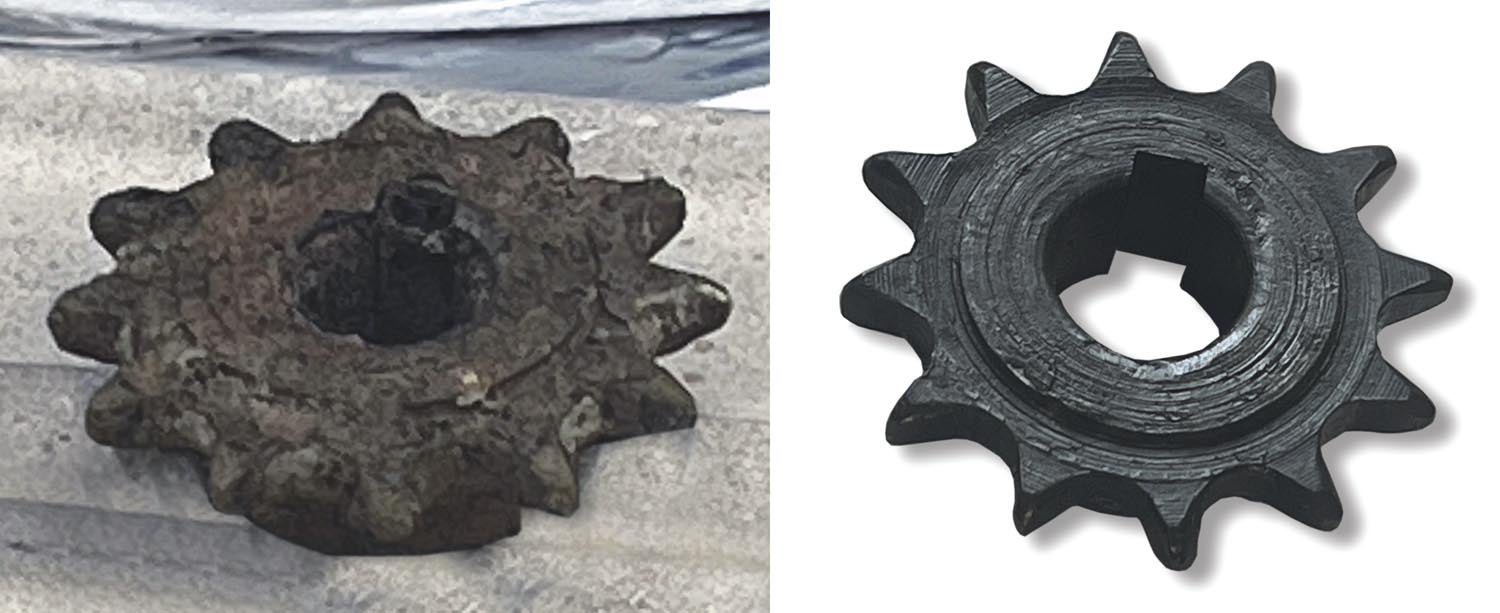
A quick check with a file confirmed the treatment produced a hard finish. For information on the file test and more, see “Home Shop Heat Treating” in the April 2018 issue of Kitplanes.
That’s it for now. As soon as the remodeling is done, I’ll be back in the shop making chips!


