Last month I ended the column with a foray into the challenges faced by first-time builders/owners who are now first-time mechanics. This month I am going to start a series on some of the things to which new mechanics or new owners of Amateur-Built aircraft should pay attention.
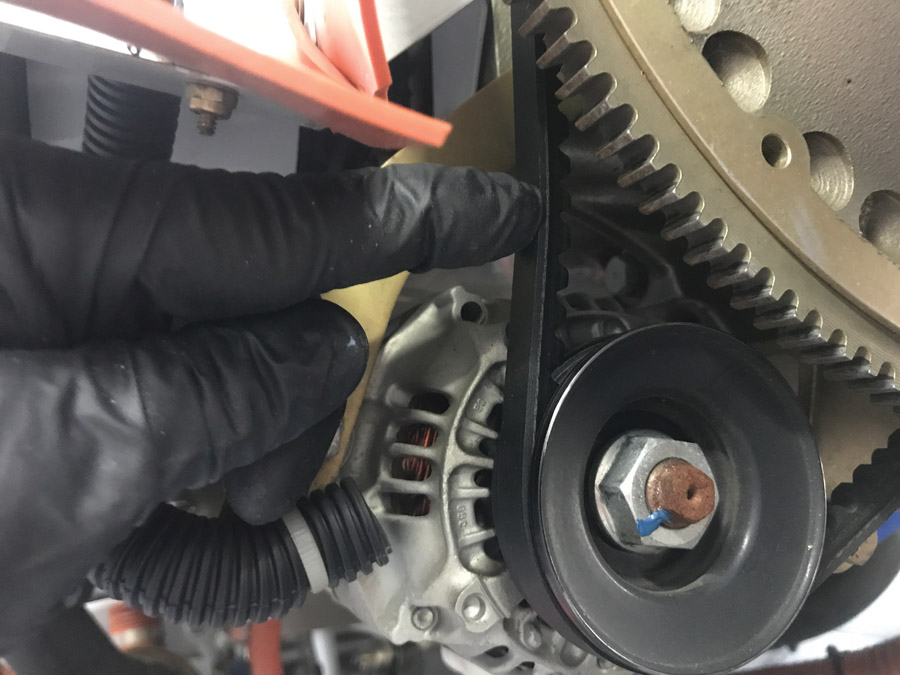
During the first few hours of flying, the alternator belt should again be checked for proper tension. You’ve probably heard a loose alternator belt squeal in a car, but it’s hard to hear in an airplane. Sometimes a loose belt will be reflected by voltage fluctuations. Usually after one adjustment, a properly sized belt will be fine for a long time.
As with being a pilot, attitude has a lot to do with being a good mechanic or owner. I have found that there are separate factors that come into play here between the first-time builder and the first-time owner. For the first-time builder, it’s usually been a long arduous journey to get to the flying stage. Even for those who have lots of family support, the building of an airplane is work. It requires good project management skills along the way, and lots of decisions that require large sums of money, especially when it comes to engines and avionics. It can be very stressful at times, but it can be one of the most rewarding things you will ever experience, especially when your airplane takes to the air for the first time. Then the flying begins, and you realize that 40 flight hours can be a long time calendar-wise, given weather delays, time to and from the airport, and any potential new-airplane problems. Then friends and family start asking when they can get a ride. No pressure here. So you can see that the stage is already being set for maintenance to take a back seat.
First-time owners of Amateur-Built aircraft are used to the majority, if not all, of the maintenance being done by the local A&P. They rarely ever look past the oil filler dipstick or dare take the wheelpants off to look at tires and brakes during the course of the year. By the way, I am not being judgmental here. For most of the certified fleet it’s an OK practice. The aircraft have been flying a long time, with the majority of them having been built the exact same way (unless modified with STCs), the wear items are known, and (except in the case of rentals) the owner usually understands his/her aircraft enough to recognize a change that may require attention.
I tell everyone that you should not trust the airplane until you have at least 100 hours on it. After that, you can certainly begin to have some confidence in the airplane. That same adage applies to new Amateur-Built aircraft during the first 100 hours of operation, and for new owners of Amateur-Built aircraft, no matter how many hours are on the airframe/engine. Why so on one that has been flying, you ask? Well, after inspecting an RV-7 that had been flying for over seven years and still had five loose jam nuts throughout the control system that had never been tightened and subsequently missed on all of the condition inspections and preflights by the owner/builder, you realize how easy it is for someone to constantly look at something that is wrong and completely miss it. It’s not malicious—it’s human. That’s one of the reasons why I don’t mind anyone looking over my airplanes anytime the cowling is off. I’d like to think I’m human, too.
Let’s also not forget that even in the certified aircraft world, with a fleet that has accumulated millions of hours, we still see airworthiness directives (ADs).
Is it Leaking, Rubbing, or Loose?
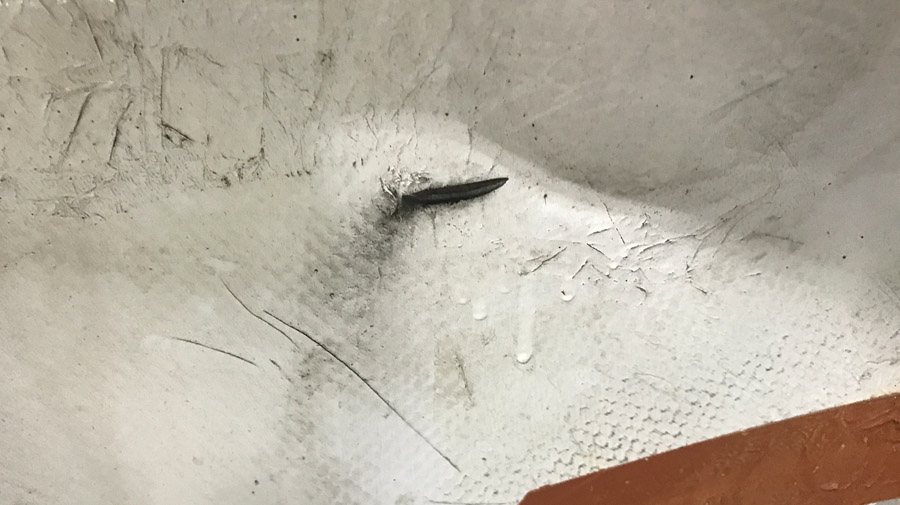
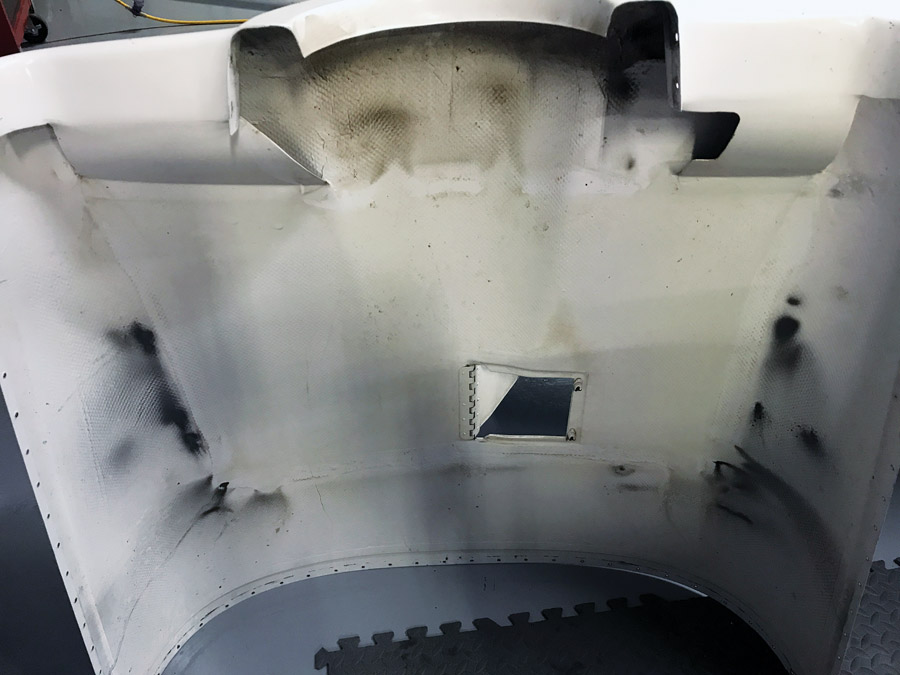
Now that I have set the stage on why maintenance needs to take a front seat after first flights or new sales, let me share with you some best practices that should help lower the risk. I’ve always made it a practice to completely remove the cowling after the first flight to make sure everything is tight and there are no leaks. Certainly you had no leaks on the initial ground runs, but temps and pressures are much higher on the initial flight, and for a longer length of time. It is also a good time to check and see if any parts of the engine are rubbing against the cowling, such as exhaust stacks, alternator pulleys, or airboxes. It’s best to catch these now, before they completely rub a hole in the cowling. You may have thought you had enough clearance with it on the ground, but flight and torque loads do cause a lot more movement of the engine then you might realize.
Here’s a common problem with the tightly cowled engines on Amateur-Built aircraft: The alternator pulley clearance looks fine on the ground, but when subjected to flight loads it can rub the cowling. The engine sagging from the rubber mounts can cause the same problem. Be sure to check it often during the first 100 hours or be prepared for some repair work.
By the way, the engine compartment is one area you will be glad that you used Torque Seal or some other marking medium on all of the nuts and fittings, as it will only take a quick visual check to verify nothing has moved. If you didn’t, you really need to check the tightness of all of the fittings and nuts, and even check for cotter keys and safety wire in the proper locations. At our local airpark we had one RV crash on takeoff with two aboard due to complete loss of power. The culprit? A missing cotter key on the carburetor throttle bolt!
As for new owners, it’s probably not necessary to take the cowling off after the flight home. However, I do recommend an oil change within 10 hours so you can at least see the engine compartment and gain a little understanding of the aircraft’s powerplant if so inclined. Not everyone is, and quite a few new owners tend to treat an Experimental as they treated their certified aircraft—turning all maintenance over to an A&P. I think this is OK as long as you have someone perform the maintenance that is intimately familiar with the particular type of homebuilt.
Past the first flight, I think it is a good idea to take the cowling off again and change the engine oil and filter. Most engine manufacturers recommend changing the oil at 10 hours and checking the filter for any signs of metal. It is also a good time to thoroughly go over the engine compartment. Sometimes a minor oil leak can become a major problem by this time, or at least have the potential to become a major problem if not corrected.
All too often the top cowling is removed and set aside without taking the time to inspect it for chafing. If left unchecked, the baffling can quickly put a hole in the cowling, ruining a nice paint job. A cowling touching the engine will also be felt as vibrations in the airframe.
I once had a minor oil leak on my new engine in the RV-7. It was just enough to throw light specks on the windshield and leave a tiny film on the front of the engine. Initially I thought it could have been the prop or the front seal. I kept wiping it down but couldn’t locate the problem. Finally, at the 10-hour mark, I got serious about finding the source. It required removing the front baffling so I could take a closer look at the front seal. The front seal looked fine, but right above it, on the front of the engine, was a 1/8-inch plug that had a telltale streak of oil emanating from it, and it turned with just finger pressure. I found out that during the engine manufacturing process this plug is removed to measure the oil-pressure drop across the crankshaft. It had never been tightened properly when it was reinstalled. It was pretty close to completely falling out, which would have been a pretty serious problem if it had occurred during flight. Crisis averted!
After the 10-hour inspection, there shouldn’t be much to do until the next oil change, which I usually do 25 hours later. Why? Well, it gives me a chance to thoroughly go over the airplane again and get the oil changed with only five hours until Phase I completion. That way, the aircraft and I are ready for trips with passengers after the Phase I signoff. Any needed maintenance or corrections performed at the 35-hour mark have had five hours to insure they are rectified.
Notice I said go over the whole airplane? Yes, I pretty much open up the panels and perform a condition inspection toward the end of Phase I. Remember the RV-7 I mentioned earlier? It had a loose jam nut on the main pushrod to the elevator. I could completely turn the pushrod in my hand! Whether it came loose or was never tightened we will never know. I do know that I haven’t seen one come loose that had been properly tightened. I also know I haven’t seen everything yet. So I check just in case.
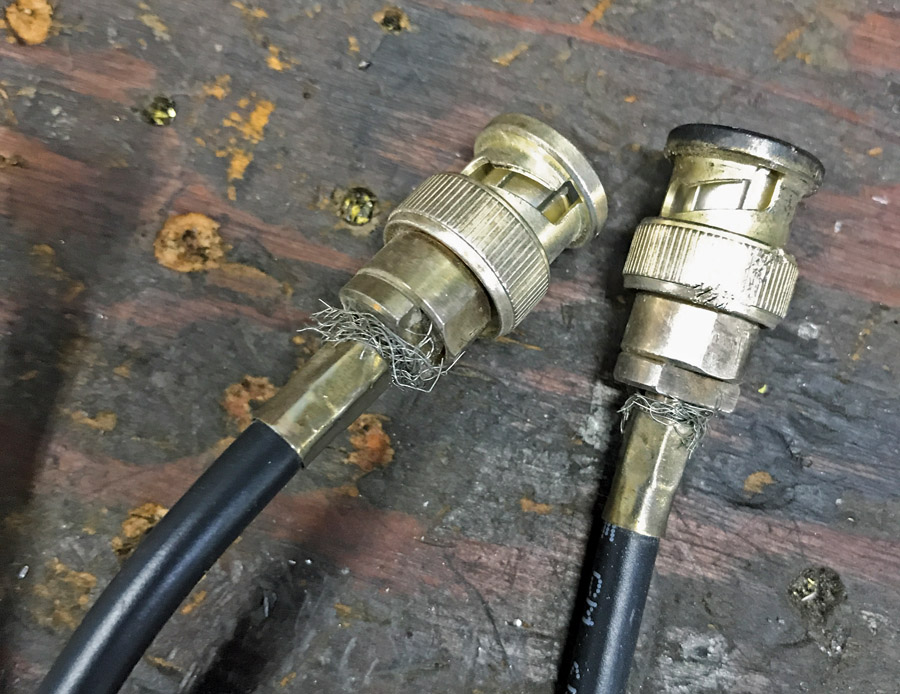
I hear many times about the engine instruments going crazy when the radio is keyed. Here is one culprit: a poorly crimped coax cable. There should be none of the braid showing, as it allows for spurious radiation.
Phase II
After Phase I is completed, the real fun begins and the reason we spent so much time building the airplane in the first place—the ability to go places and enjoy the freedom of owning your own airplane. No more need to watch the Hobbs meter or press your luck to get back on time for the next scheduled renter. However, the reliability of the new toy now rests squarely on your shoulders, and there is no worse feeling than coming out to the airplane for the return trip from vacation or a fly-in only to find a dead battery, leaking brake, or fouled plug during the runup. It can really put a damper on things! Especially if you happen to be a part of a group trip on a long fly-out and yours is the only airplane that won’t start. That’s where preventative maintenance can play a big role in assuring aircraft reliability. And the first year of ownership is a good time to put some best practices in place.
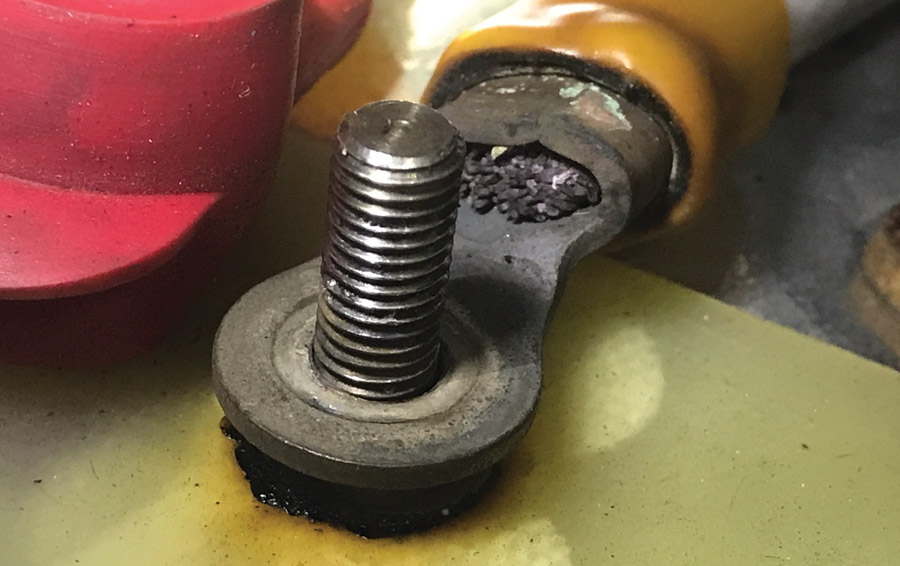
On non-metal aircraft it is really important to have a properly sized ground cable from the engine to the electrical bus, along with a good solid crimp on the connector. Things might work well on the ground, but in flight with all of the electrical equipment working, along with high-demand items such as gear retraction systems and air conditioners, a poor ground will start to burn and corrode, making things worse over time. A quick in-flight check is to turn your alternator off and see if the oil temp changes radically. If it does, start checking the engine ground.
For the recommendations I am passing along here, I am assuming one flies approximately 100 hours per year. That’s usually done quite easily with a kit that was properly assembled with the recommended engine. I don’t fault the alternative engine guys, but the majority of the ones I have been around seem to spend more time tinkering along with more unplanned downtime during the first few years as opposed to flying. Some of them knowingly went that direction and don’t mind the tinkering. They had different objectives in mind. But I sympathize for those who were lead to believe the alternative engine was the Holy Grail. I have seen lots of time and money lost, with an eventual refitting of a conventional aircraft engine as the answer.
Next time I will start with some ideas on first-year preventative maintenance that will both help you better understand your particular aircraft as well as ensure you have a reliable one. In the meantime, have fun, especially for those of you either in Phase I or just completing it. What an accomplishment!

