![]() Dimpling aluminum skins is an essential skill for anyone building any form of metal airplane. Even if you’re using all round-head rivets, you’ll find places where sheets overlap and a dimple is required to fit a flush screw or to seat a couple of flush rivets that just make the design work. I have yet to find a metal kit that didn’t have at least one place that needed dimpling, so you’ll have to have some tools to do the job.
Dimpling aluminum skins is an essential skill for anyone building any form of metal airplane. Even if you’re using all round-head rivets, you’ll find places where sheets overlap and a dimple is required to fit a flush screw or to seat a couple of flush rivets that just make the design work. I have yet to find a metal kit that didn’t have at least one place that needed dimpling, so you’ll have to have some tools to do the job.
Dimple dies come in various sizes to fit the typical sizes of rivets and screws. They consist of two parts, a male and a female half. You can install these in a hand or pneumatic squeezer, or in a C-frame dimpler that you whack with a hammer. There are also dimple dies where the male portion has a hole instead of a nose piece and the female has a hole all the way through. You can put one on either side of a sheet, thread a nail through the pair (and the work piece) and pull with a hand riveter to dimple the sheet. It works fine, but takes time.
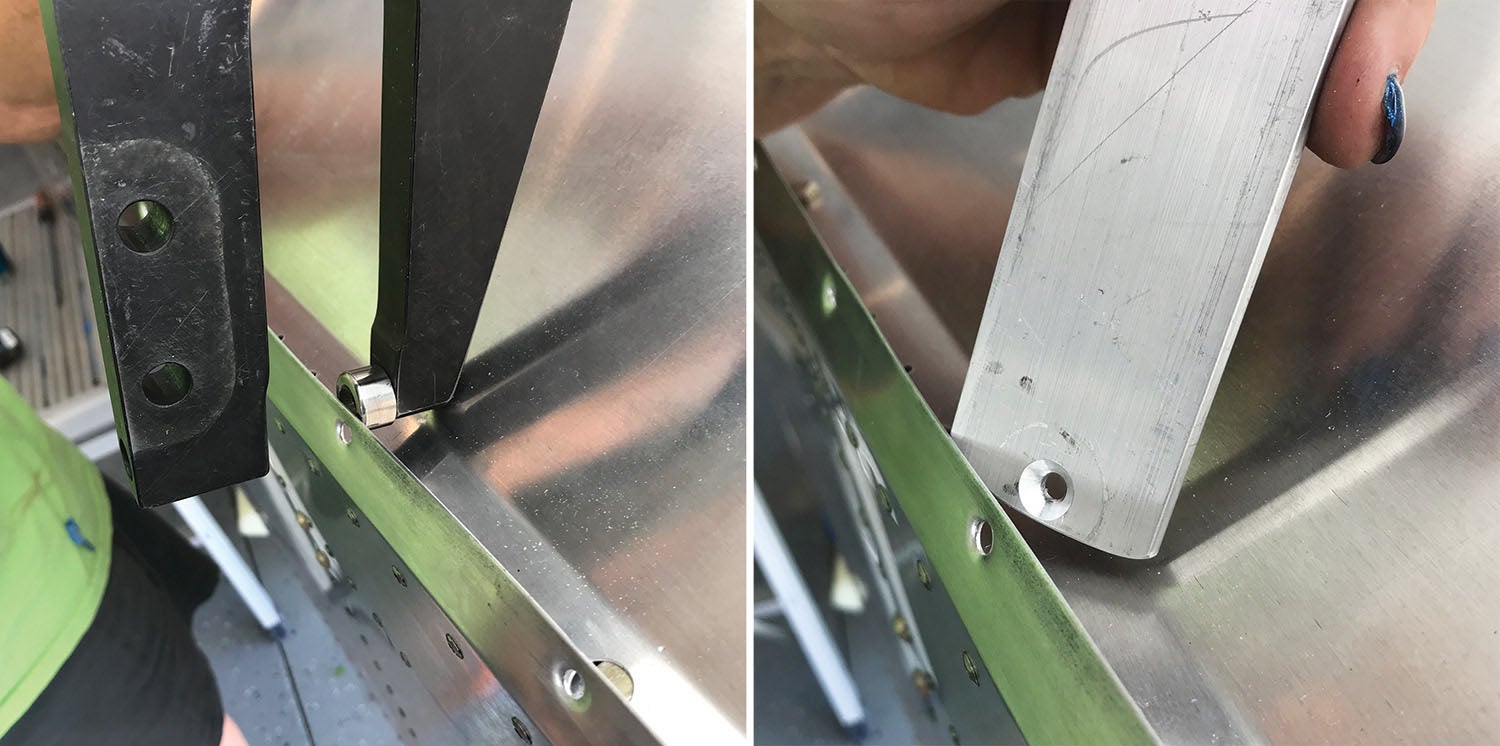
 Sometimes you run into a place where there just isn’t room for any of the normal tools. Such was the case we ran into on the Xenos motorglider project we have in our shop. The forward side skins stick up above the longerons about an inch, and the windshield nestles down inside of them so the skins form mounting flanges for the windshield. The windshield is mounted with flush screws, so the flanges need to be dimpled. But…they are also angled inward to match the curve of the windshield. Assuming that you have fit the windshield and bend the skins to match the curve of the Lexan, you have created a place where no squeezer yoke can fit.
No matter what combination of dies and squeezer yoke you try, and no matter if it is pneumatic or hand pulled, there is too much “stuff” on the inside. You can’t get a straight shot at the dimple—so the skin gets bent back out and now you have stretched the metal, making a good fit hard to attain. The perfect shaped yoke does exist—it is a no-hole yoke, and the part away from the squeezer is perfectly tapered and thin to fit in. However, this type of yoke has no hole to mount the female die. And anyway, if you did have a hole and mounted the die, it would once again be too thick to fit in the space allotted.
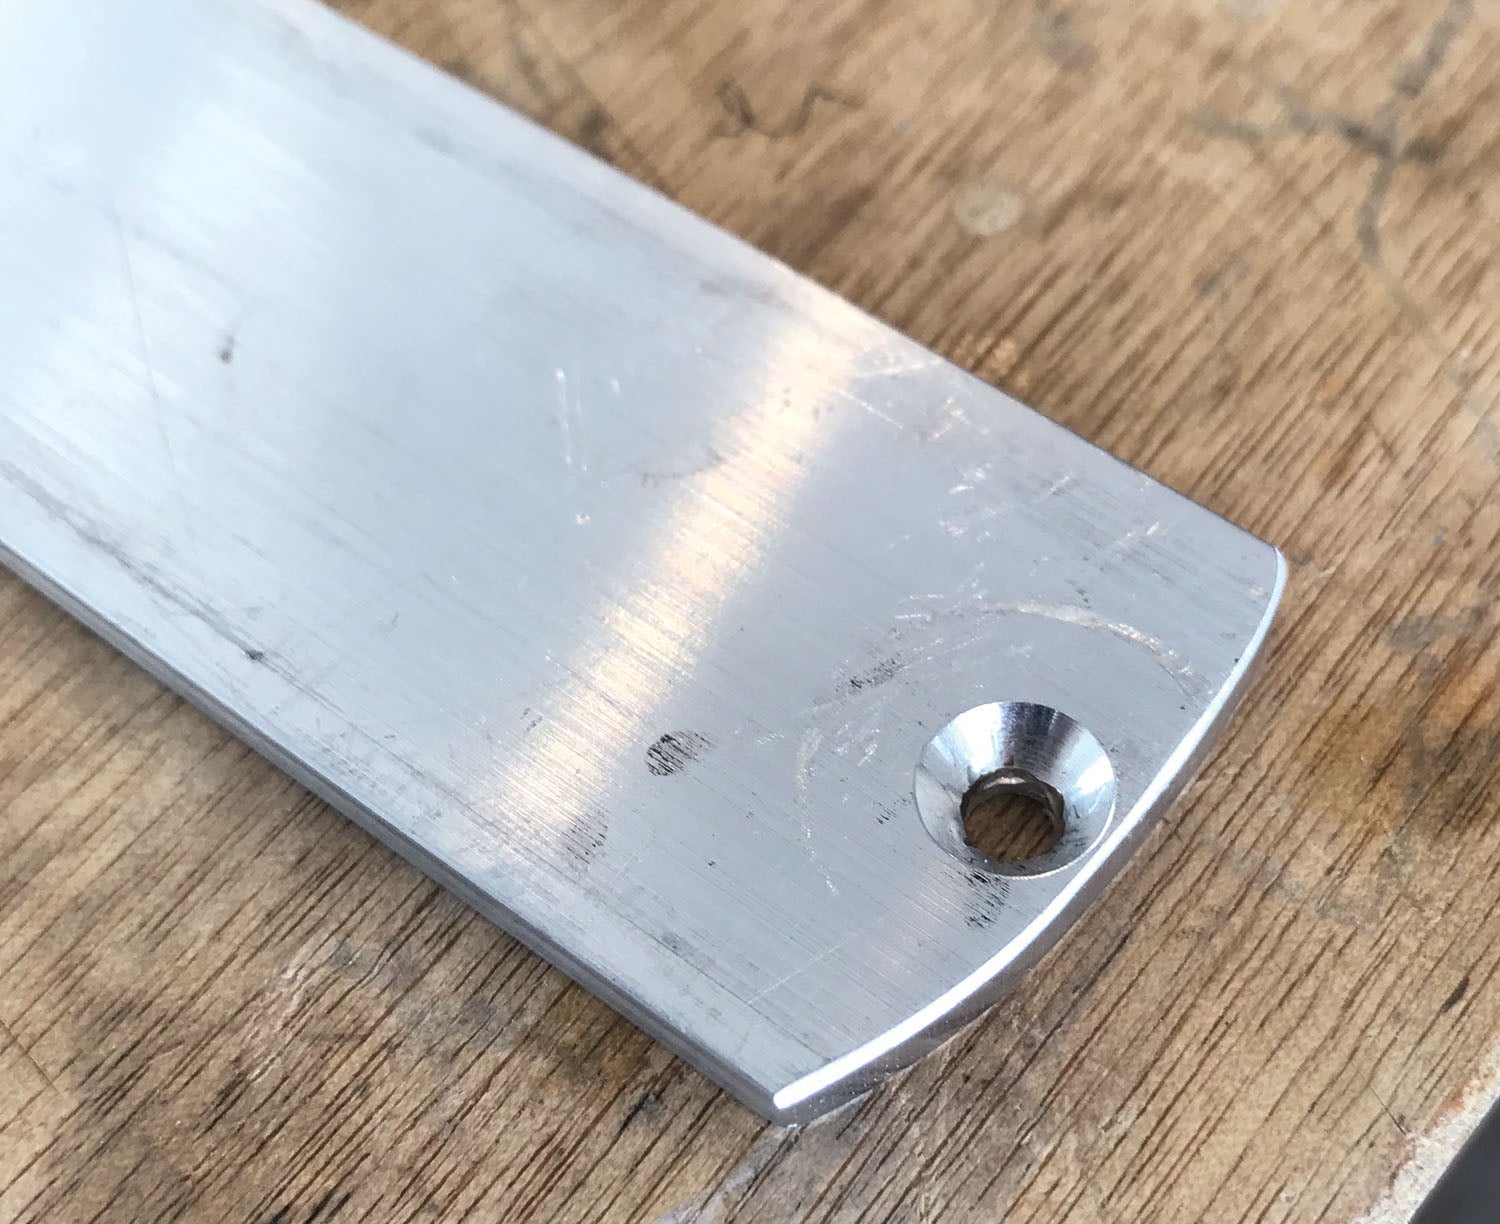
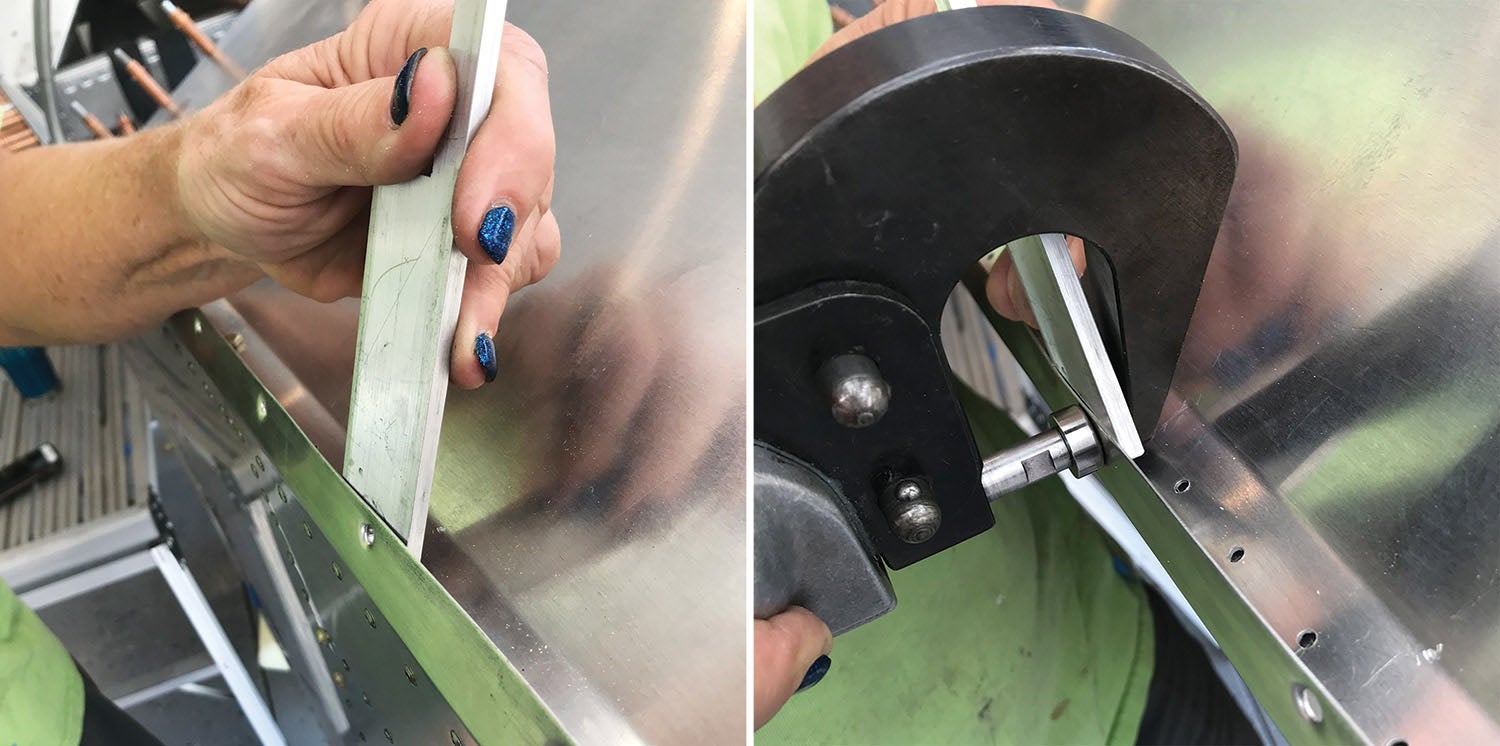
The answer we found was to make a “dimple stick.” It’s simply a piece of 3/16-inch aluminum long enough to give us a handle that we could manipulate. We drilled a hole near the end and countersunk it, making a female die in the stick. We then adjusted the squeezer with the no-hole yoke so that we’d get a perfect dimple with the dimple stick placed against the end of the yoke. The total thickness was less than 3/8 inch and fit everywhere we needed it. You do have to be able to tease the trigger on the squeezer to get the male die started into the hole and then line up the dimple stick before you close things up and go full force. The funnel nature of the female die helps, but you could ding things up if you aren’t careful.
The trick worked well for us, and I’m saving the stick for the next time I run into a place where there is just no room—or no good angle—to get an actual die around the back side of the work piece.


Good idea
As a structures worker i made steel dolly with the female of the dimple reproduced on the corner by drilling then countersinking it and a bit of hand polishing.
I rivet(monuel) was then put in the sheetmetal hole and driven with a mushroom snap in a river gun.
Comments are closed.