When that nice factory cowl interferes with the engine or an accessory, we go old-school and start shaping things with foam and clay, just like the scratch-builders do, but in a smaller and less laborious project.
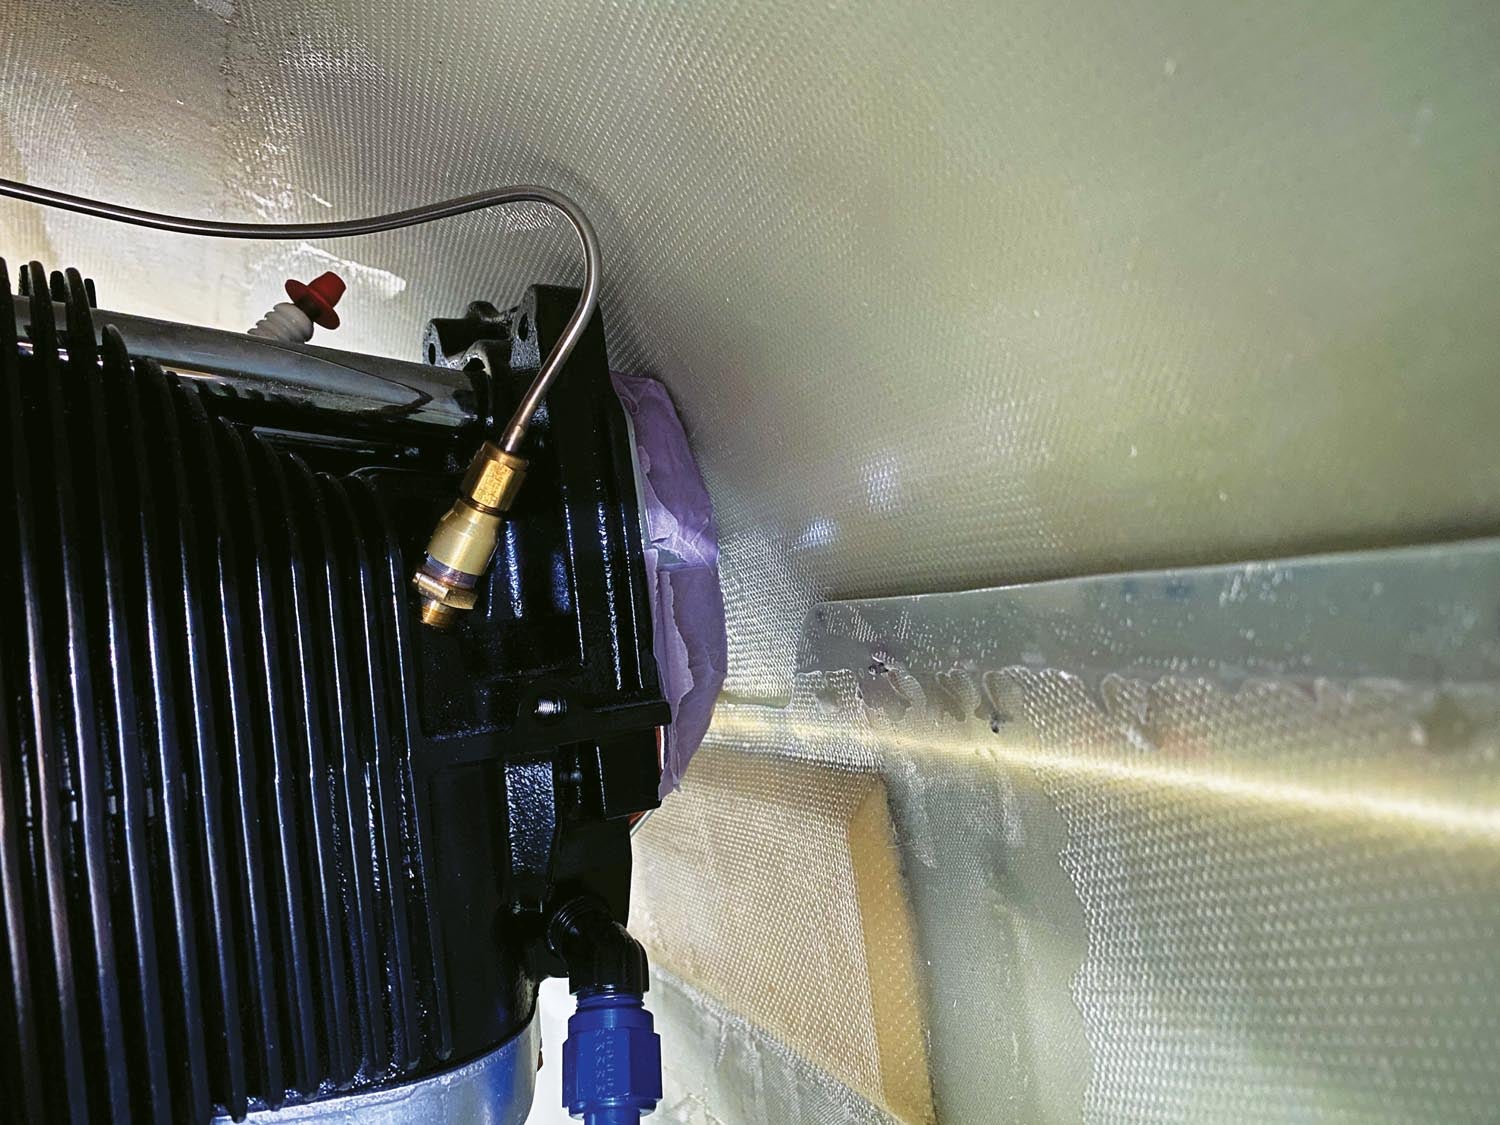
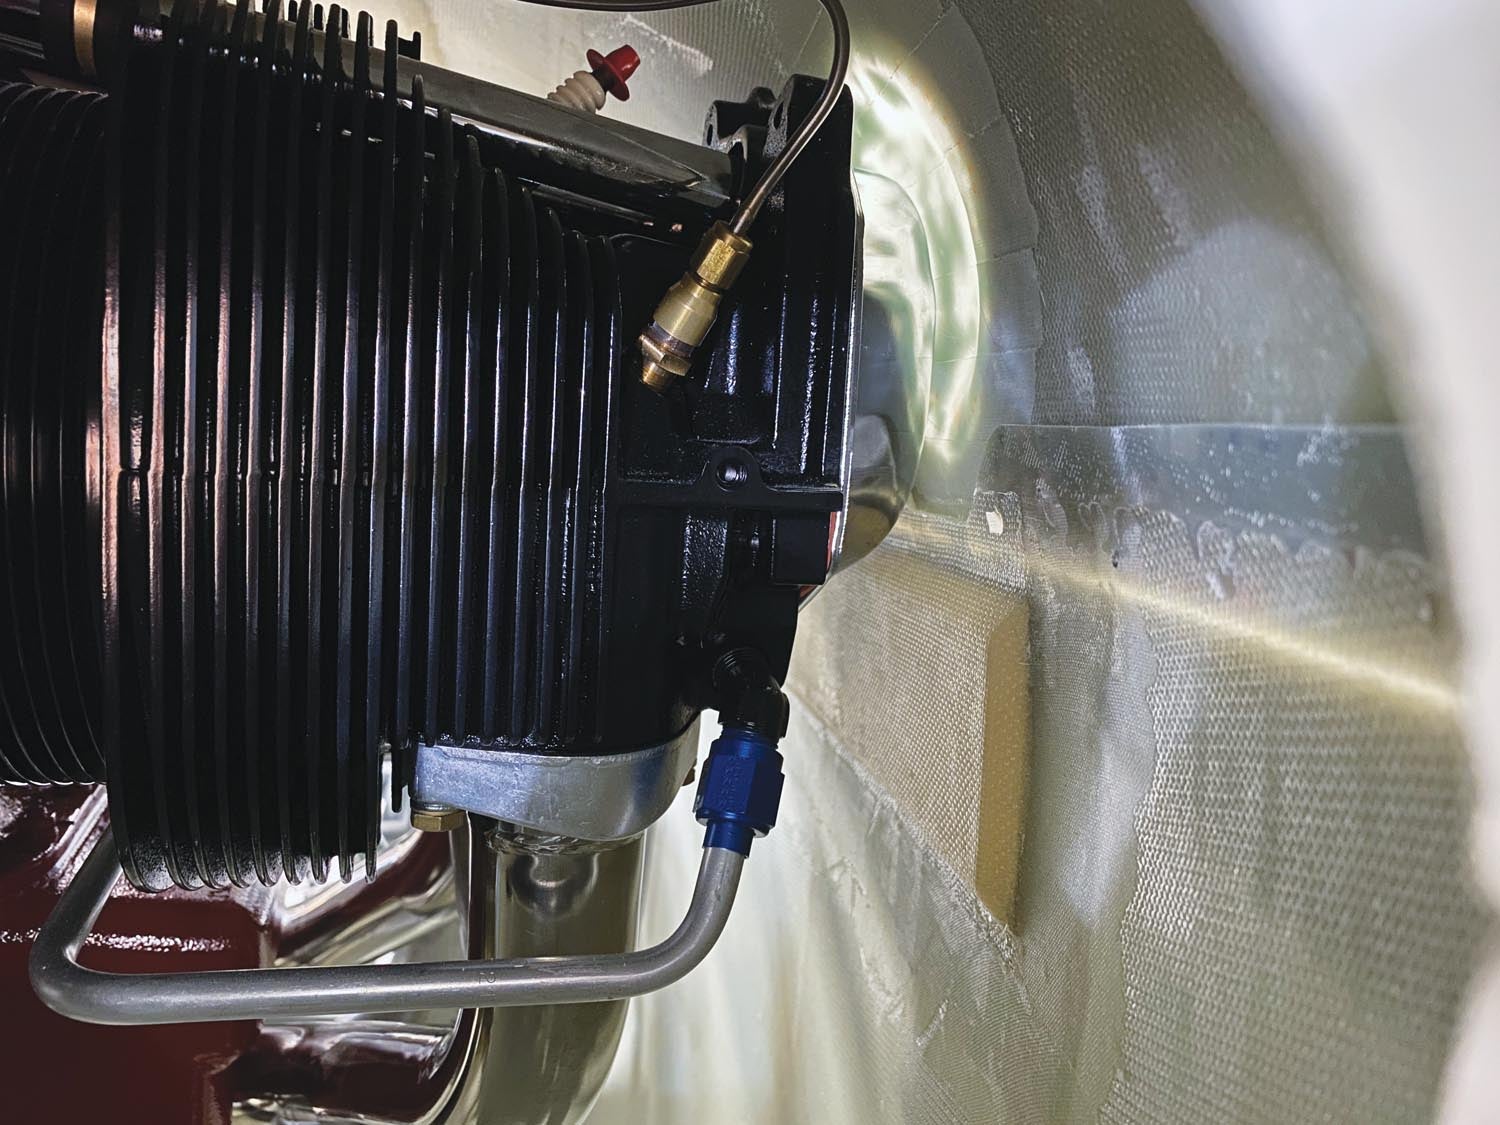
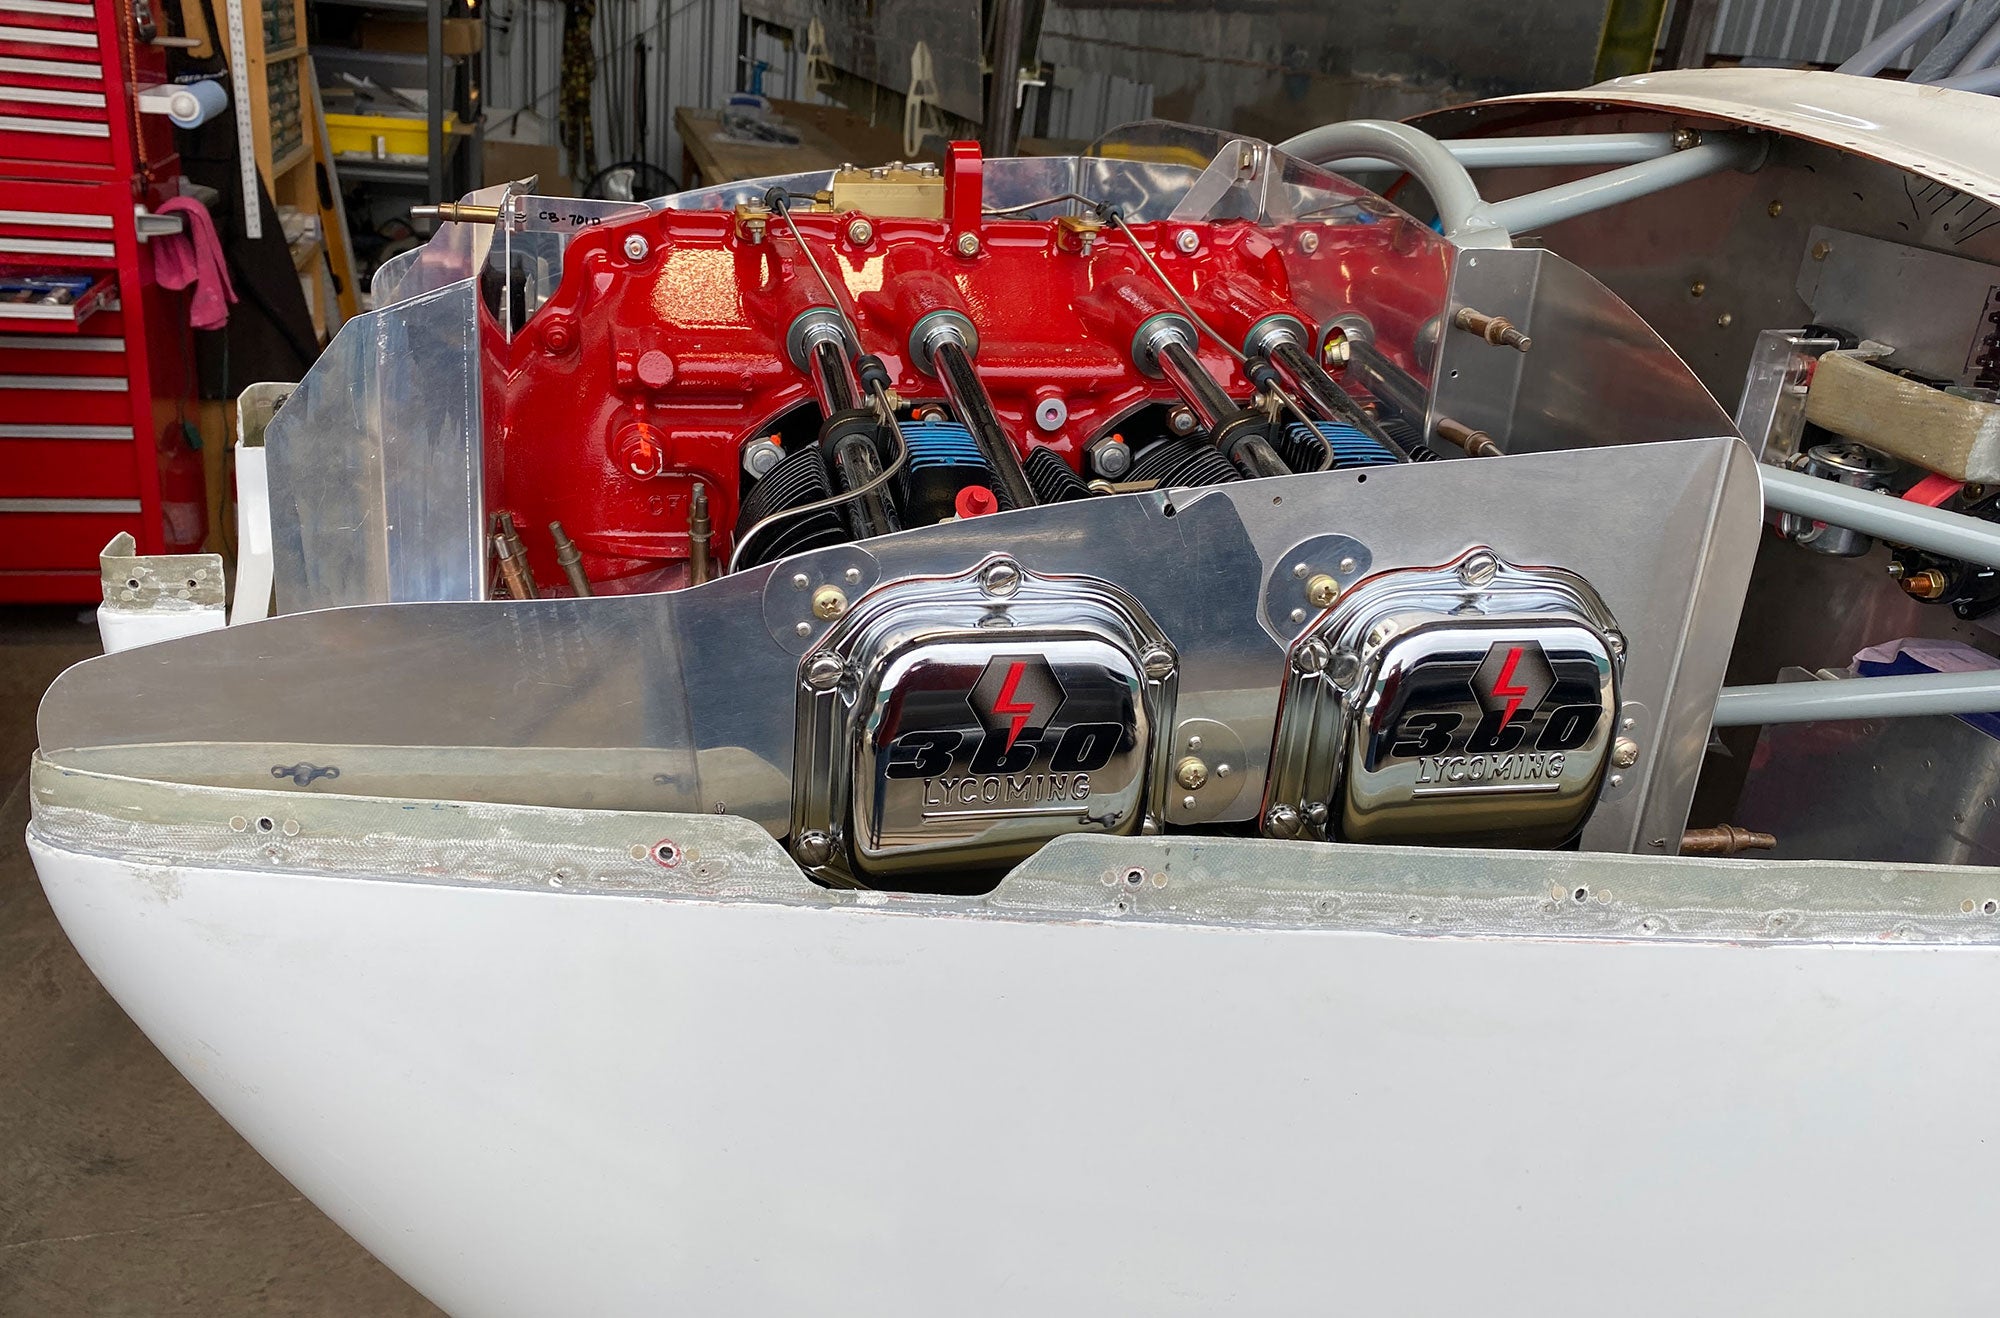
My GlaStar’s cowling is shaped to fit a Lycoming O-320 engine, so when I decided to install a Thunderbolt IO-360 (for, you know, more power), I knew I’d have to make a bump in the cowl where it interferes with the Number 2 cylinder rocker cover. The 360 is about an inch wider than the 320 and with the cowl installed there is contact at the top-forward corner of the rocker cover. Here’s how to make a blister that will eliminate the interference and in principle can be applied to any fiberglass cowling.
X Marks the Spot
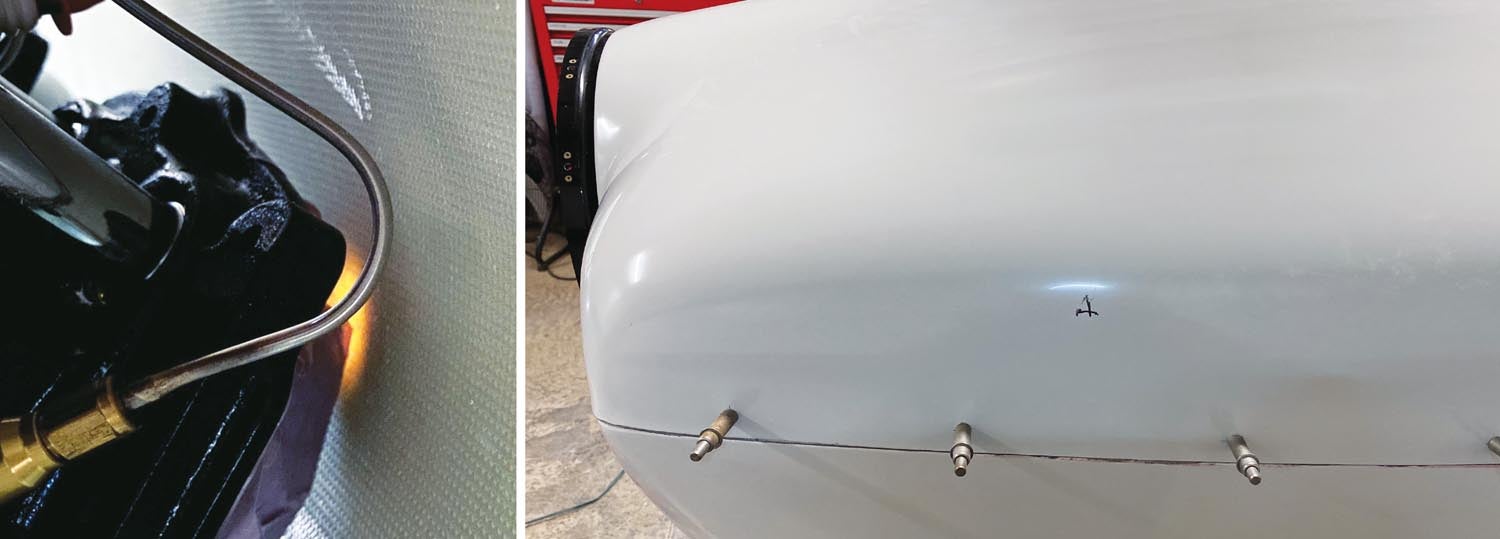
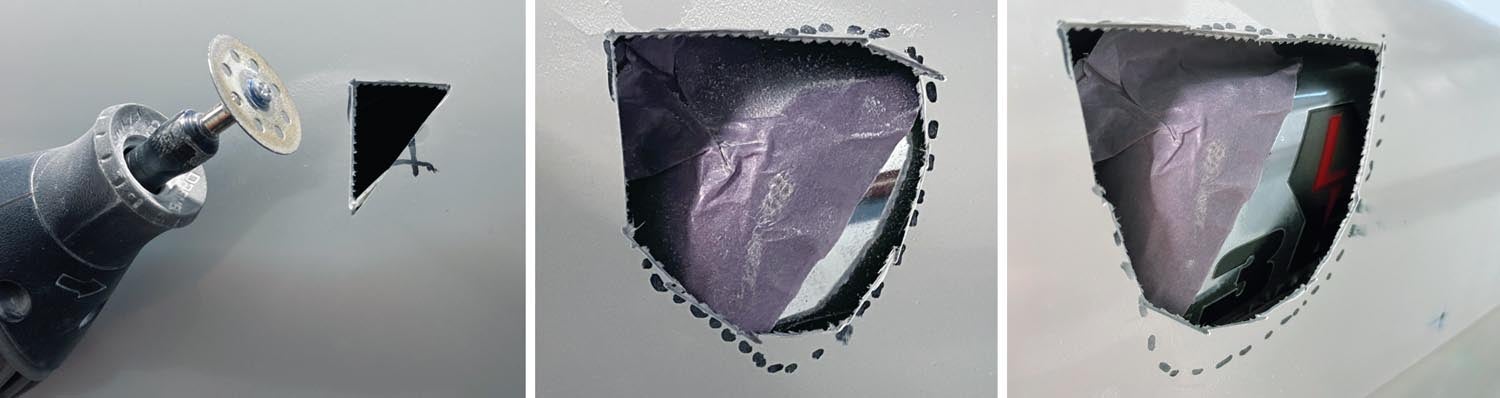
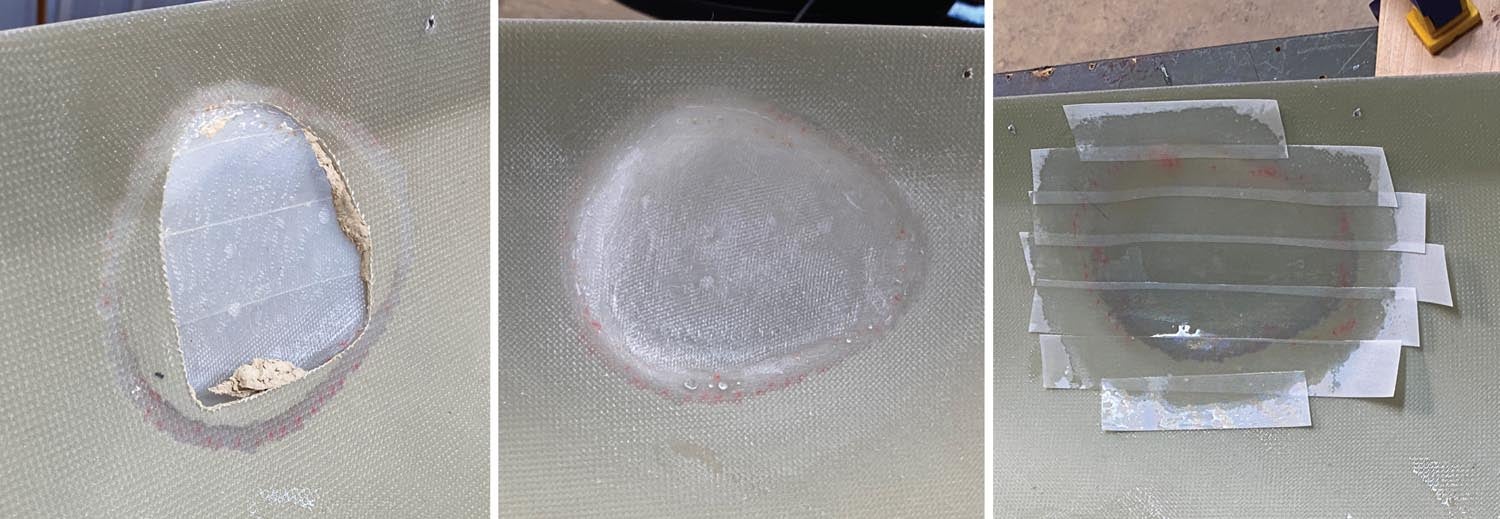
With the cowl installed, use a tightly focused flashlight to shine through the fiberglass and mark the location on the outside of the cowl. A laser pointer would be useful here, too. With the top cowl removed, I cut a small hole with a diamond disc in a rotary tool. These discs are excellent for cutting fiberglass—they go through it like butter, and they are cheap, too. My collection came from Amazon in a pack that contained 30 discs with mandrels for about $10. The trick to cutting fiberglass without coating your workshop in dust is to place the Shop-Vac hose within a few inches of the cut so that the dust the cutter throws out goes directly into it.
The first hole is exploratory—its purpose is to help you slowly expand the opening without any fancy measurements. When you put the top cowl back on, you will see how much more you need to remove. Go slowly and cut away enough material so that you have at least a quarter-inch gap between the cowl and engine. Don’t go any smaller because the engine moves a lot, especially during start-up and shutdown.
The Bump
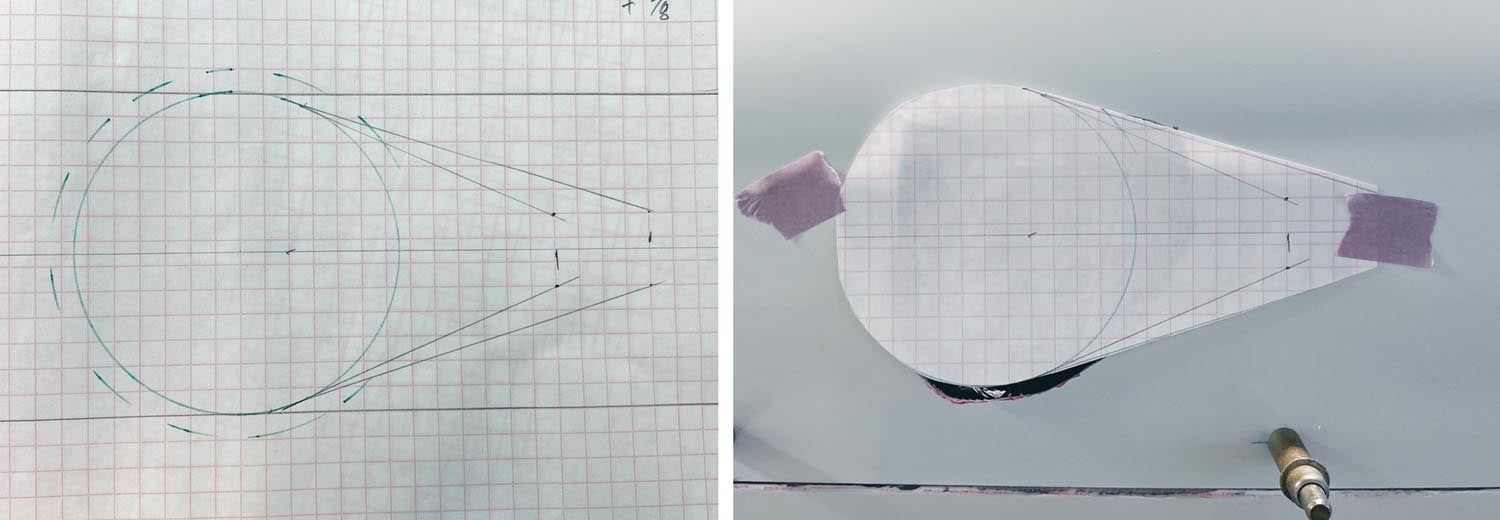
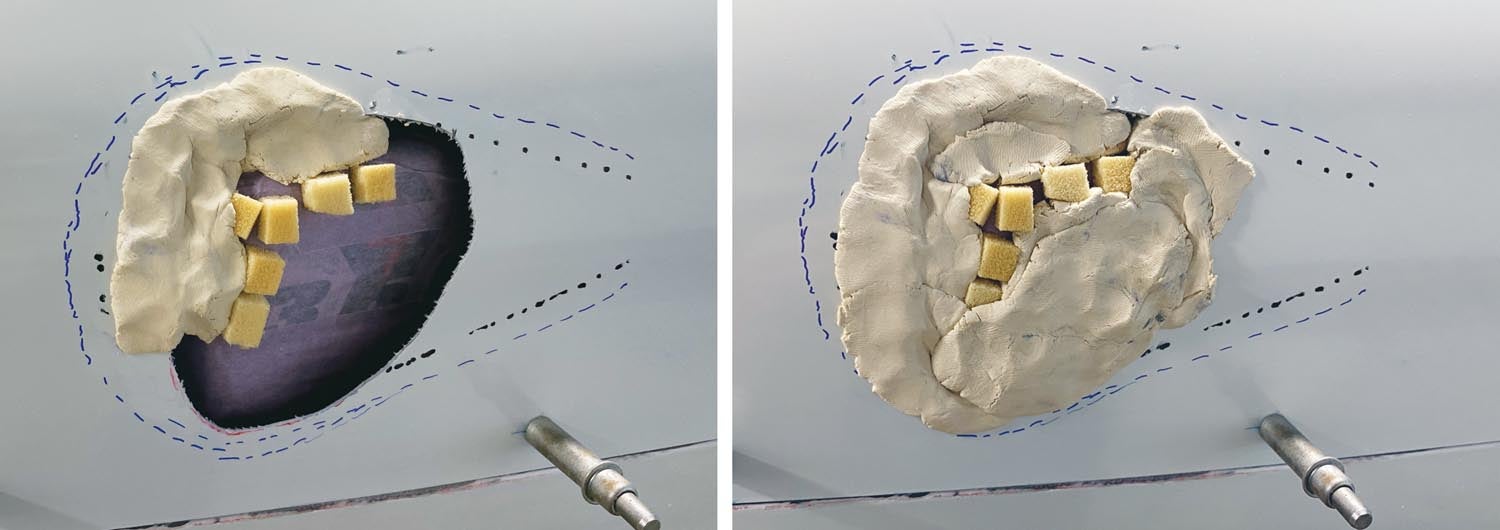
If you looked at planes with bumps in the cowl, you’d notice that a teardrop shape is commonly used—it’s aesthetically pleasing, symmetrical and easy to fair. But an approximation of that shape will do for most of our subsonic homebuilts. Make a paper cutout of the shape you want to use as a template for the bump, then draw a line parallel to the cowling split line through the center of the final opening and position the paper template so that the engine’s high spot will match the teardrop. Trace the shape onto the cowl.
Now you can begin building up the shape. Hot-glue a small cube of 1/4-inch foam to the high spot on the engine to act as your height guide and add small amounts of modeling clay to create the bump within the outline you drew earlier and shape it by hand. I made a tool out of a piece of scrap aluminum for smoothing the clay. With a slight bend in it you can create a pleasing transition from the bump to the cowl. Sand about ½ inch outside the line so that resin will have a good surface to adhere to.
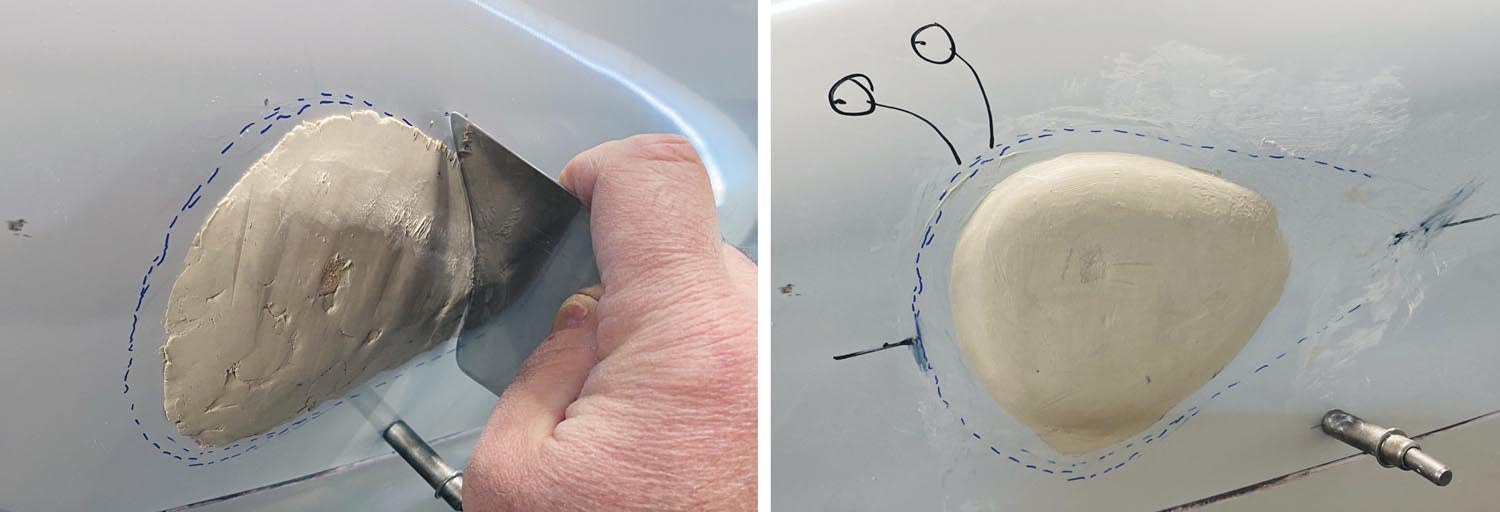
The surface doesn’t have to be perfect because fiberglass will bridge over minor imperfections. Use the same paper form from earlier to transfer the shape to two plies of fiberglass—one to cover 1/4 inch outside the clay and one to extend about 1/2 inch onto the cowling. Lay up the smaller piece first, followed by the larger one, and cover with peel ply.
Once the resin has cured, you can start digging out the clay from the inside. Remove as much as you can and then cut out the overhanging lip that remains from the cowling and make a smooth transition that fiberglass can follow. Residue cleanup will depend on the type of clay you used—mineral spirits work well on oil-based clays and water should be sufficient for the water-based kind. Sand well with 80-grit paper, vacuum and finally clean with acetone.
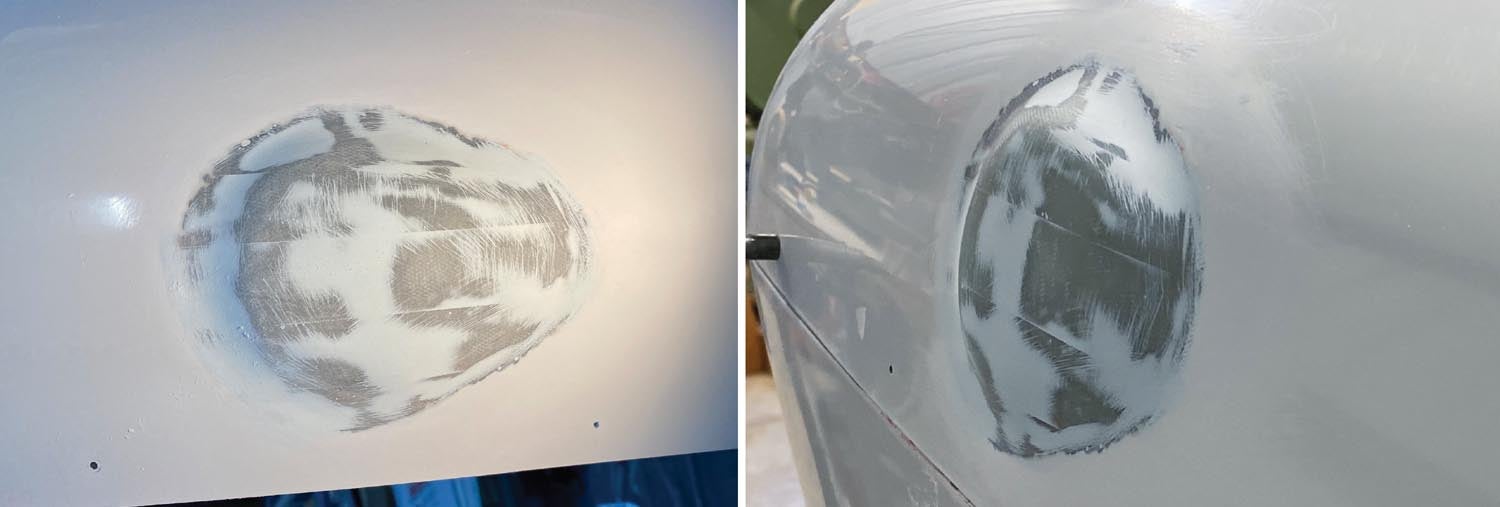
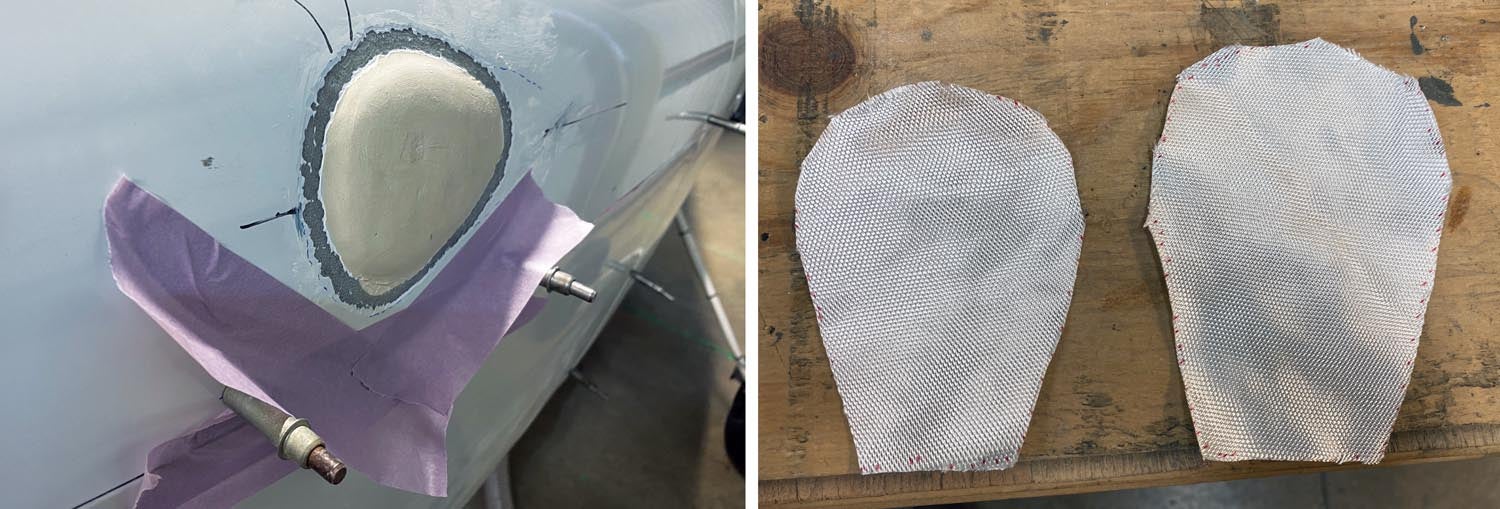
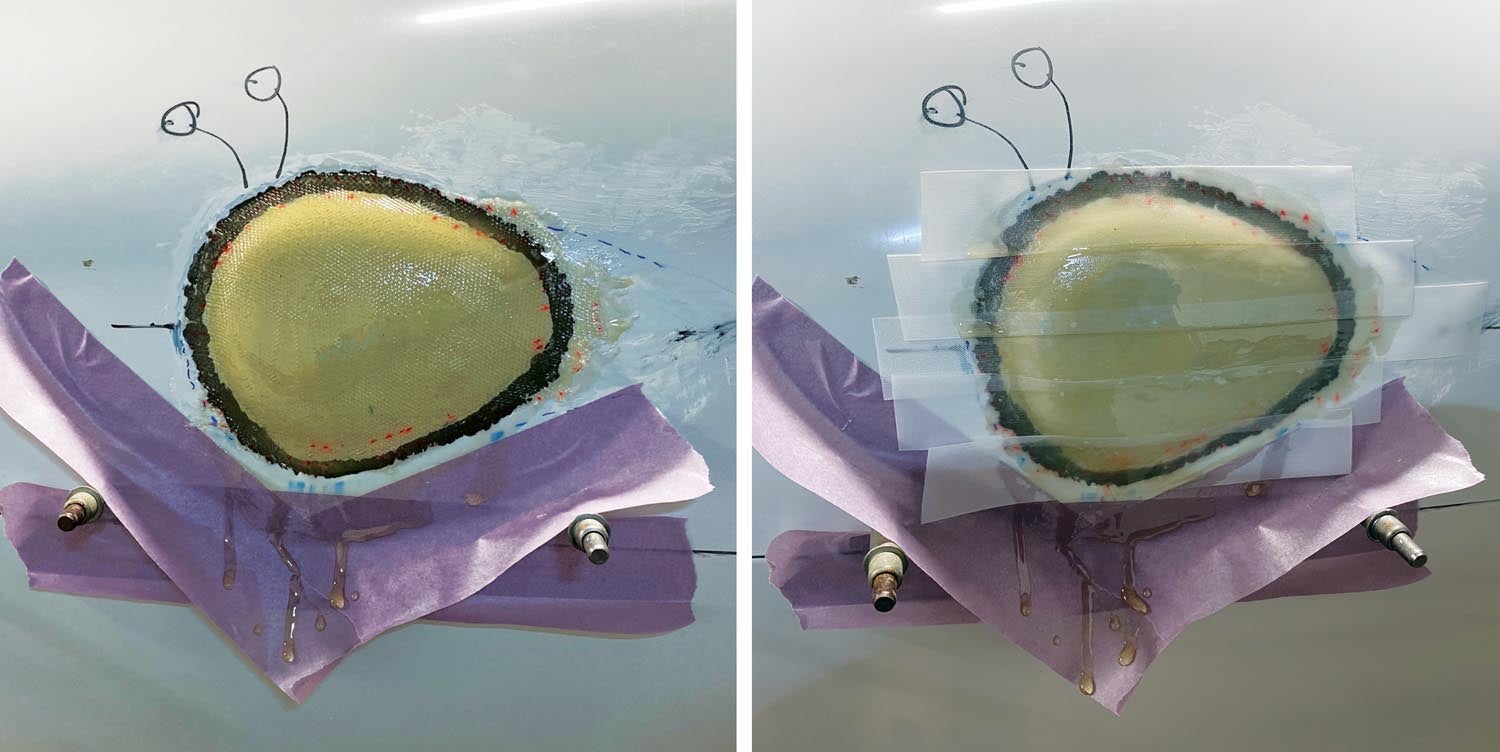
To finish the inside portion, cover the bumpout with two or three pieces of fiberglass, overlapping each ply by 1/4 inch, and cover with peel ply for a smooth finish. Once it cures, remove the peel ply and you’re done with the inside. The outside still needs some work. Sand down any ridges that were left after removing the peel ply, vacuum and clean with acetone. To get a paint-ready surface, apply a coat of filler and sand it smooth.
Thanks to Zach Chase, the resident composites guru at the Glasair Aircraft Owners Association for the inspiration for this project.


I used an angle valve IO-360 C1D6 (200HP Lyc.) instead of the 160 or 180 HP engines my Glasair 1RG factory Cowling was made to fit. Rather than the cheeks made in this story. I “slit” my Cowling (top & bottom) from the front about 1/2 to 2/3 back & spread it apart. Re glassed and reshaped it for smooth contours. Likely spent 100+ hours doing this instead. I didn’t want visible cheeks in a “fastglass” airplane as I had also seen others do.
Comments are closed.