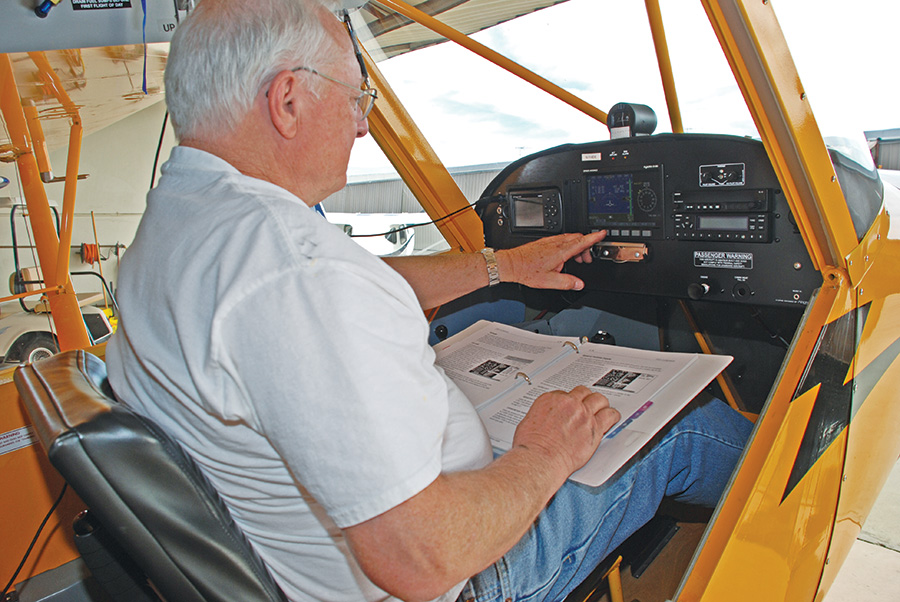
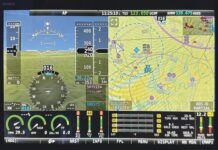
Be sure to program your engine management system with the upper and lower limits for each set of sensors and for the type of sensor. Erroneous readings can result from incorrect programming.
For certified aircraft, the FAA lists the minimum required engine instruments for an airplane in FAR 23.1305. Although these aren’t required for Experimental aircraft, this regulation provides a good guideline for builders. It calls for an oil pressure gauge, oil temperature gauge, tachometer, and cylinder head temperature (CHT) gauge. These additional gauges are required if the related equipment is installed in the airplane: manifold pressure gauge if a constant-speed propeller is used, fuel-pressure gauge for airplanes requiring the continuous use of a fuel pump, an ammeter for any airplane with an electrical system, and a voltmeter if the engine gauges depend on electrical power to operate.
Last, these instruments are not required but are nice to have: exhaust gas temperature (EGT) gauge, fuel totalizer, and Hobbs or hour meter. Fuel gauges that show fuel remaining in each tank are also required, but not really part of the firewall forward installation.
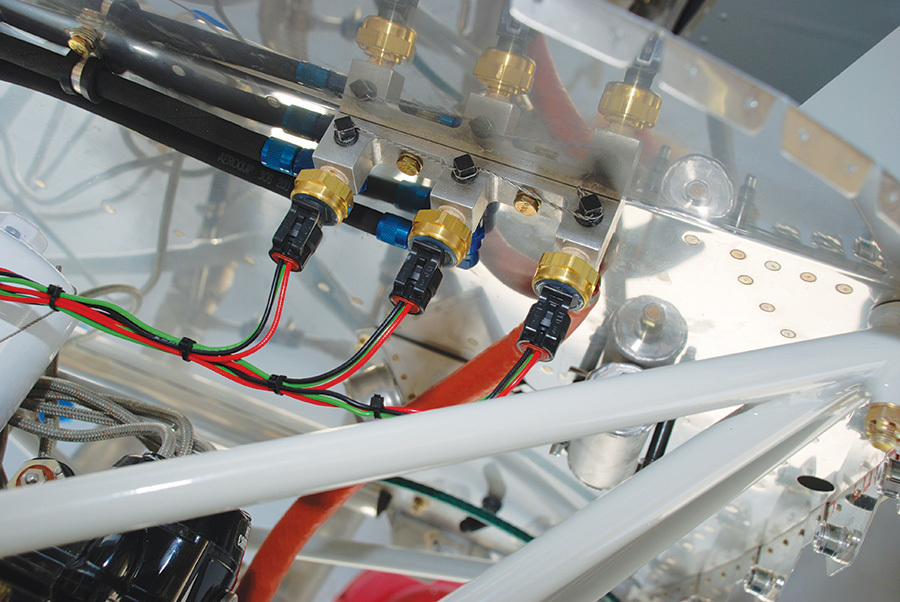
Sensors for (left to right) oil pressure, manifold pressure, and fuel pressure should be mounted remotely on the firewall. This handy manifold from Van’s makes it easy.
Companies such as Electronics International and JP Instruments make engine management system (EMS) packages that include most or even all of these functions in one unit. In addition, manufacturers such as Advanced Flight Systems, Dynon, Garmin, Grand Rapids and others make either standalone EMS units or they combine these features with electronic flight instrument systems (EFIS).
It is still possible to get single-function gauges for your Experimental airplane, but these new EMS units are quickly becoming popular with amateur builders everywhere. Individual round engine instruments are definitely going the way of the round steam-gauge flight instruments. This is because these EMS units provide more features in less space and with less weight than the older individual gauges. Often, even the cost is less, or at least competitive with individual gauges if you consider all the features included.
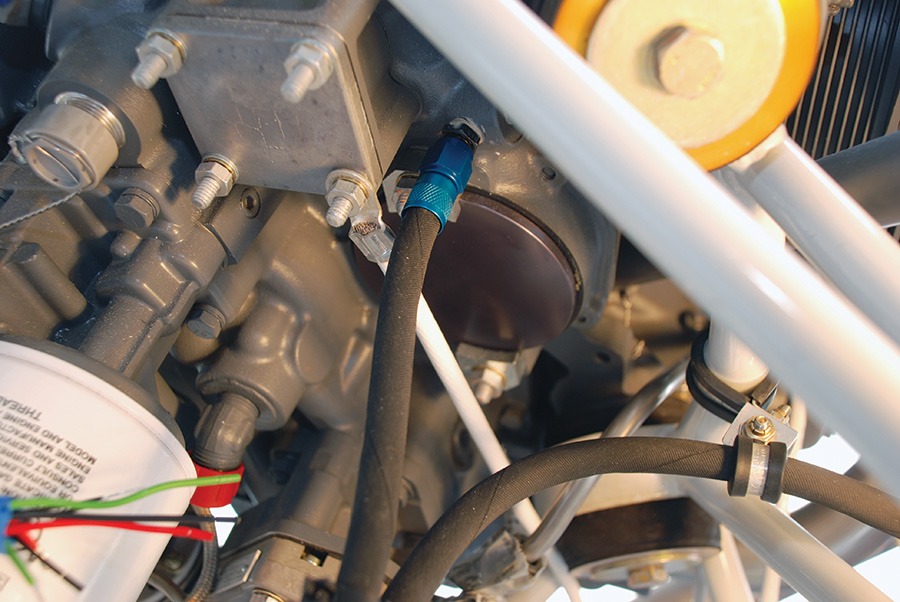
The oil pressure sensor line connects to an 1/8-inch NPT hole in the accessory housing in Lycoming engines. The right magneto has been removed from this engine to accommodate a Light Speed ignition system.
Oil Pressure
Oil pressure gauges once commonly used a mechanical indicator run by a small hose from the engine that carried pressurized oil directly to the gauge. This type of instrument is still used on airplanes with no electrical systems, but is otherwise not too common. Their primary redeeming qualities are their simplicity and reliability. The downside is that this and other individual gauges take up more room in the panel and cannot offer some of the features available with electronic gauges.
The preferred point to gain access to pressurized engine oil for the gauge is a small 1/8-inch NPT plug typically found in the upper right portion of the accessory case near the base of the number 3 cylinder on a four-cylinder Lycoming engine. An AN816-3 or -4 steel nipple is inserted into the hole, allowing a hose to connect the engine to a remotely-mounted oil pressure sensor.
With a mechanical gauge, an appropriate 1/8-inch NPT fitting is used to connect the engine to the gauge through a small oil line. In any case, this fitting should include an orifice to restrict the flow of oil. Commonly, the fitting and hose are provided with the mechanical gauge. If not, an orifice can be made by soldering up the hole in an AN816 fitting and then drilling it out to 0.040 to 0.060 inches.
Sensors for electronic gauges should not be mounted directly to the engine, but should be attached to the airframe in a convenient location where they are protected from the movement and vibration of the engine. The connector hose should have enough slack to allow for engine movement, but it should be secured as needed to prevent excessive movement in the same way you would secure a fuel or oil line.
The final step in installing an oil pressure sensor connected to an EMS is to program the unit with the appropriate warning limits and sensor information. See the EMS manufacturer’s instructions for details on this. And note that many EMS units will work with more than one brand of sensor, but if not correctly programmed, they can give erroneous readings.
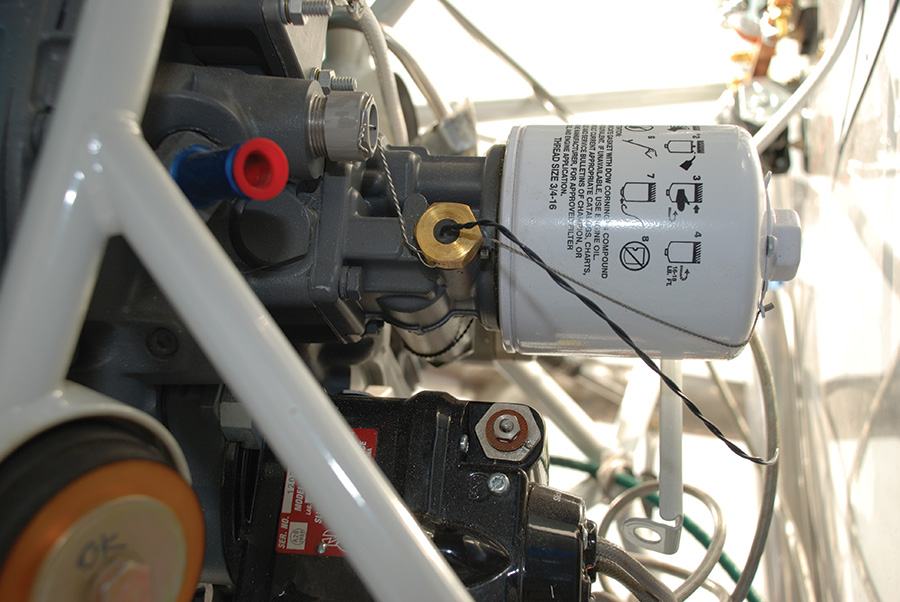
The oil temperature probe in a Lycoming engine threads into a specially machined hole in the oil filter mount casting. No other location will give an accurate oil temperature reading.
Oil Temperature
Lycoming has a specific point on the top of the accessory case to measure oil temperature. All Lycoming-compatible oil temperature sensors are made to fit into the threaded hole provided. No other location should be used for measuring oil temperature on a Lycoming engine. This is the point where the oil from the sump enters the engine and is thus at its lowest temperature.
If you use an alternate location for measuring oil temperature, then the factory temperature limits will not be of any use. If you have another brand of engine, be sure to consult the manufacturer’s literature to find the best point to place your oil temperature sensor for accurate readings. Unlike the oil pressure sensor, the oil temperature sensor cannot be mounted remotely.
Again, note that when using an engine management system, high, low, caution, and normal operating ranges need to be programmed into the unit, as does information about the type of sensor being used. If the sensor type is not properly matched to the correct selection in the EMS, erroneous readings could result.
Tachometer
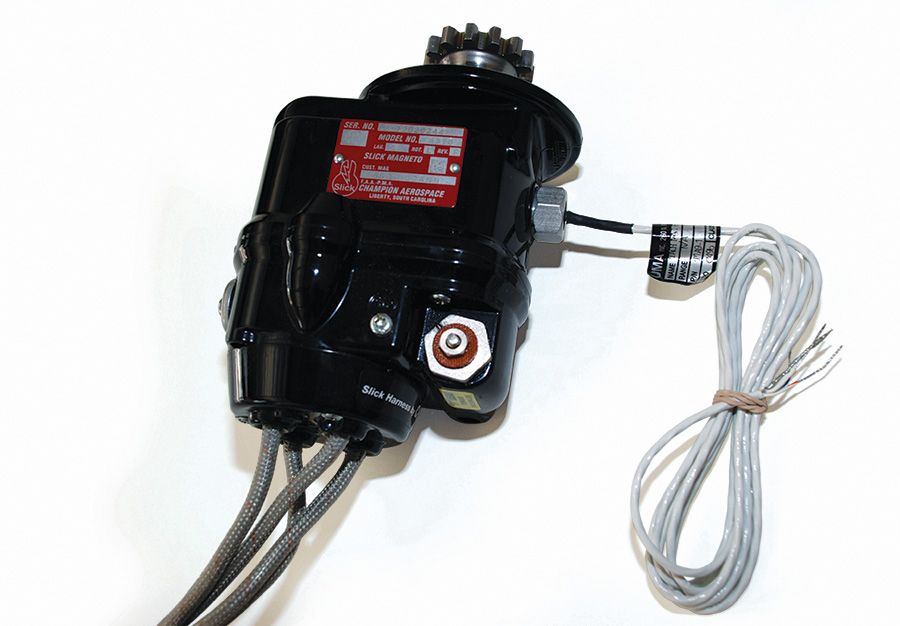
Traditionally, tachometers have been mechanical devices driven off a dedicated output at the back of the accessory case, but now electronic tachometers are more common, either as standalone units or as part of an engine management system. If the mechanical tachometer drive is not used, a small cap available from aviation supply sources should be installed and safety wired in place. The sensors commonly used for electronic tachometers or EMS units screw into the side of one of the magnetos and connect with standard aviation wire. Electronic ignition systems often have an output for engine rpm built in.
A magnetic tachometer pickup screws into the vent hole in a Slick magneto. When using electronic ignitions, the manufacturer typically provides a lead that can be used for rpm sensing.
The manufacturer’s installation instructions should be consulted when installing any electronic engine instrument, such as a tachometer. Furthermore, if an electronic ignition system is used, it will have provisions for sending information to the EMS or electronic tachometer. Check both manufacturers for any compatibility issues.
You should be able to select a device type that will work with your electronic ignition system when programming the EMS. As always, be sure to program the appropriate operating limits into the EMS and double check that the sensor settings selected match up with the sensor used or the electronic ignition system used to avoid erroneous readings.
To double check the accuracy of your tachometer, it is good to verify the indicated rpm with a strobe-type tachometer checker. Many mechanics will have one of these tools, so hopefully you can borrow one rather than buy it, since you are not likely to need one very often. Mechanical tachometers especially can be inaccurate by 100 rpm or more, so it is nice to assure your unit’s accuracy.
When using a mechanical tachometer, be sure to avoid kinks, twists, or sharp bends in the cable housing as you route it from the engine to the tachometer. A fairly straight path from the engine to the tachometer is preferred, but remember to have enough slack in the cable to allow for engine movement. For best results, penetrate the firewall with an eyeball fitting.
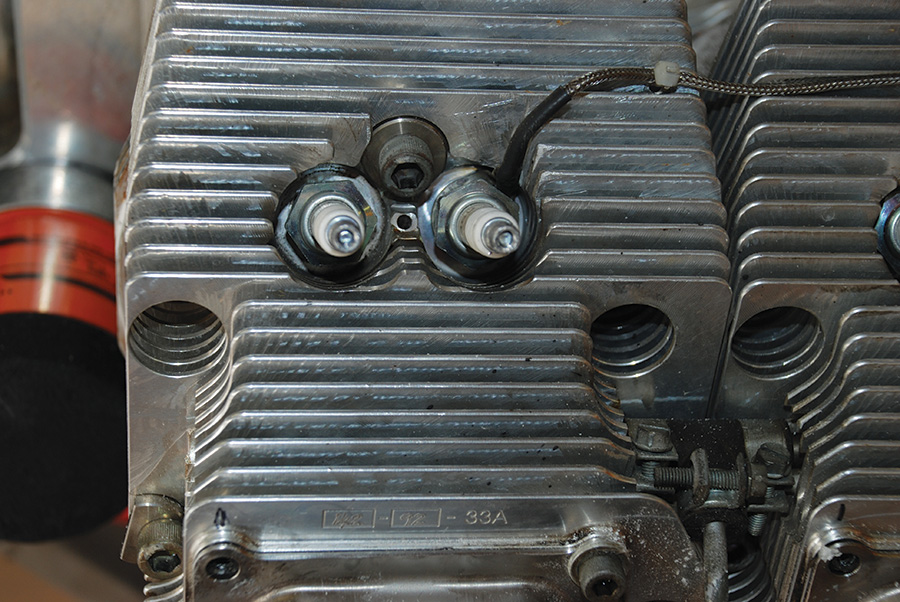
This Jabiru engine installation employs CHT probes that fit under the spark plugs. Over time, the probes take a bit of a beating as you change spark plugs.
Cylinder Head Temperature
There is no requirement to monitor the temperature of every cylinder head, but it is clearly the best way to go if your budget allows. The problem with monitoring only one CHT is that you are never 100% certain which cylinder head is the hottest at any one time. Common practice with four-cylinder Lycoming engines is to monitor the CHT of number 3 cylinder if only one is instrumented.
However, this gives you no idea of what is happening with the other three cylinders. In a certified airplane that has been subjected to extensive testing, the manufacturer may feel fairly confident that they know which CHT will be highest in their particular model of airplane. However, with an experimental airplane, you really don’t have any way of knowing. It is also possible that the hottest cylinder during climb is not the hottest cylinder during cruise. For all these reasons and more, it is highly recommended that you monitor all CHTs on your engine.
The CHT gauge for a single cylinder can be a simple, non-powered device that connects a thermocouple to a simple gauge. These units use a thermocouple that produces a small amount of voltage when heated to move a voltmeter that is calibrated to read temperature. This simple single-cylinder gauge will meet the minimum FAA requirements, but it is important to install it correctly. If you are using such a gauge, be sure to check the instructions before you attempt to alter the wires from the cylinder head to the gauge.
The sensors for CHT gauges come in two basic types. The preferred type has a probe that threads into a dedicated hole on the underside of each Lycoming cylinder head. The second type uses a loop that goes underneath a spark plug of each cylinder to be monitored. Consult the manufacturer’s installation instructions to see if the loop should be installed between the spark plug gasket and the base of the spark plug or between the gasket and the cylinder head. The disadvantage to the loop-type probe is that it gets handled and possibly damaged every time the spark plug is removed.
Manifold Pressure
An engine with a constant-speed propeller needs to have a manifold pressure gauge, or have that function included in the EMS. This indicator tells the pilot vital information about the position of the throttle, and combined with information supplied by the tachometer, it tells us how much power the engine is making. The manifold pressure gauge is typically calibrated in inches of mercury to read absolute pressure, much like a barometer.
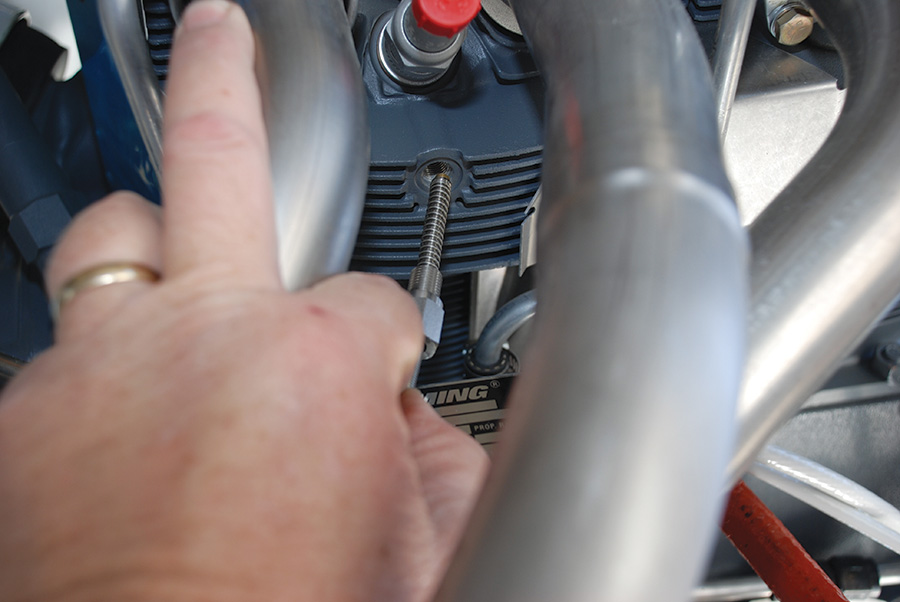
Manifold pressure can be measured by tapping into one of the plugs in the number 3 cylinder intake port (four-cylinder Lycoming engines), as it is with the black hose shown running from the center of this photo to the left. The actual sensor should not be mounted to the engine.
Manifold pressure is measured by a remote-mounted sensor that is connected by a -3 or -4 hose to an 1/8-inch NPT fitting at the number 3 cylinder intake port on four-cylinder engines or number 5 on six-cylinder engines. There is an 1/8-inch NPT plug in the top of the head that can accept an AN816 fitting. The same plug in the other heads is for the primer system, which is deleted from the number 3 cylinder.
Fuel Pressure and Fuel Flow
An airplane that needs a fuel pump to work also needs a way to monitor whether or not the pump is working— besides having the engine quit, that is. This would include all airplanes with fuel-injected engines, and it would include all airplanes where the fuel tanks are below the level of the engine, such that they cannot gravity-feed fuel to the engine. These engines all need a fuel pump to work, which means they also need a backup or auxiliary fuel pump to ensure that fuel will flow to the engine, even if the primary pump fails.
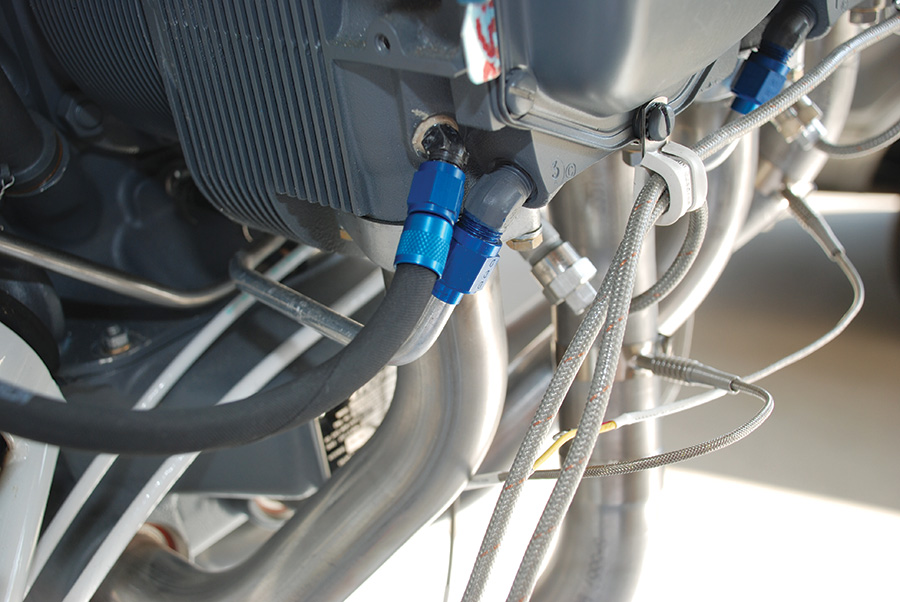
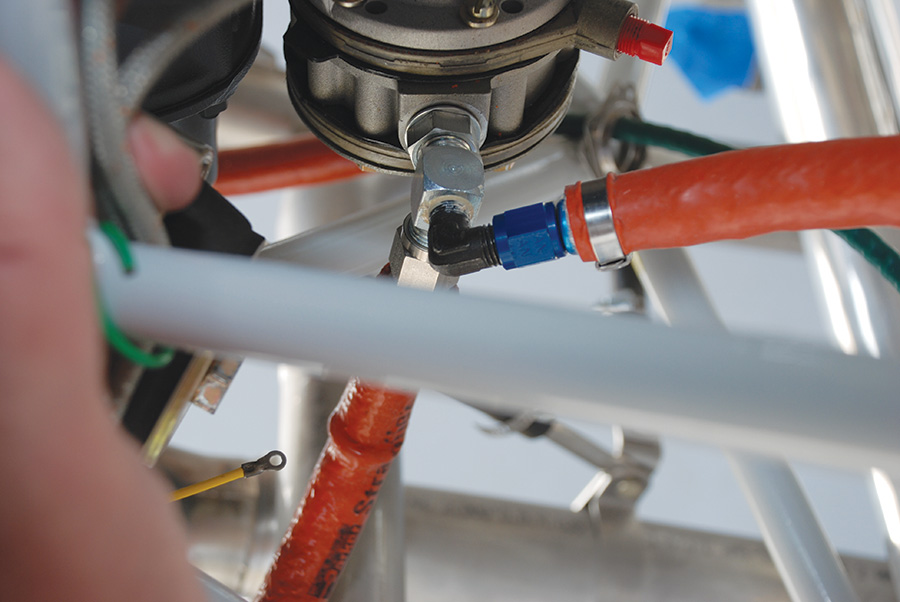
A special fuel fitting made for Lycoming fuel pumps has a threaded hole for an AN822 fitting that allows a fuel pressure sensor line to be connected to it. This fuel pump fitting is available from major aviation parts vendors. Note that the fuel sensor line is protected with Fire Sleeve.
Along with that backup fuel pump, they need a way of monitoring the performance of the primary fuel pump. This can be in the form of a fuel pressure gauge or a fuel-flow indicator. Mechanical fuel-flow gauges have been standard in fuel-injected airplanes for a long time, but the new EMS units that are now so popular with amateur airplane builders provide even more information with inputs for both fuel pressure and fuel flow, including a fuel totalizer function, which we will look at later. Another advantage of the EMS units is that they can be programmed to meet the needs of a wide variety of engines.
The mechanical fuel pump found on most Lycoming engines can be equipped with a fitting that can connect it to a fuel pressure sensor. Like the oil pressure and manifold pressure sensors, the fuel pressure sensor should not be mounted to the engine directly, but rather mounted to the airframe to protect it from engine vibration. A flexible -3 or -4 hose works well for this.
The fuel flow sensor also needs to be mounted to the airframe. It usually needs to be level to work properly and should have a piece of straight tubing leading into it so that any turbulence from a bend in the line will have dissipated before the fuel enters the flow sensor. Be sure to refer to the manufacturer’s installation instructions for the fuel flow sensor. The accuracy of this device can be easily compromised by an improper installation.
Exhaust Gas Temperature
Measuring exhaust gas temperatures or EGTs is not required, but it is helpful to keep your engine running well and making its best power at all altitudes. With a fuel-injected engine and well-calibrated fuel injectors, optimum leaning can be readily achieved, saving significant amounts of fuel.
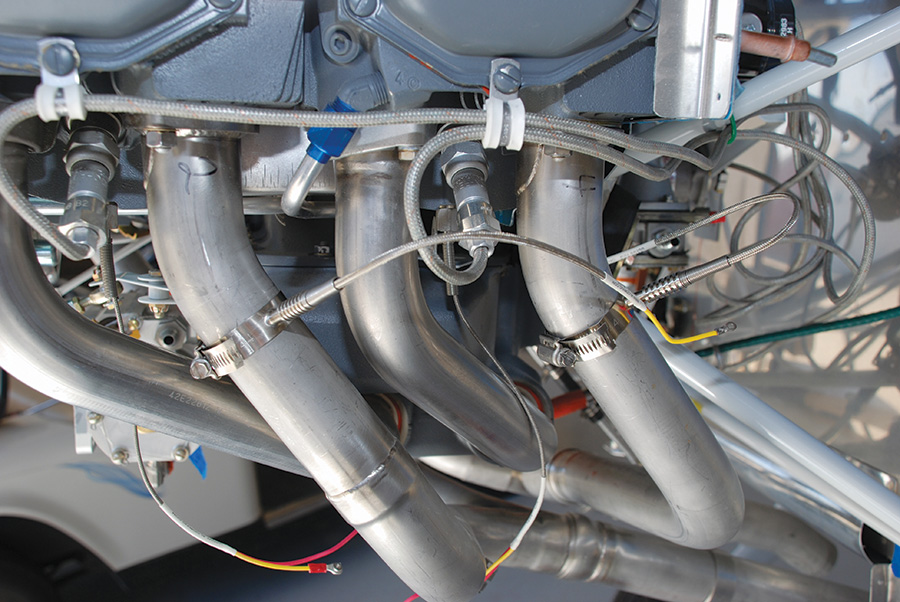
EGT probes installed in the exhaust pipes of a Lycoming IO-360 engine. Make sure that the probes do not interfere with the cowl or other engine components.
Even carbureted engines can benefit from an EGT gauge on one—or better yet—all cylinders. Leaning to best takeoff power at high density altitudes is easier with an EGT gauge, and leaning for best power or best economy during cruise can be more precise if the exhaust gas temperature of each cylinder is known. Luckily, virtually all new EMS units have provisions for EGT probes for every cylinder. Such a setup is highly recommended.
Be sure that each EGT probe is installed the same distance from the exhaust flange. Mark out all the cylinders first and then drill the holes. The exact dimension is less important than a consistent one.
Fuel Totalizer
If you are already measuring fuel flow, then you probably have a fuel totalizer as well. The totalizer keeps track of how much fuel has flowed through the sensor, so by combining that with the capacity of your tanks, you can determine how much fuel you have left. If the totalizer is properly calibrated and you are diligent about updating your fuel quantity after each fill-up, you will have a fuel-remaining reading that is usually much more accurate than the tank-mounted gauges.
Most of the new EMS units have provisions for installing a fuel flow sensor, including the totalizer function. This is high on the nice-to-have list, even if it is not required. Read and follow the sensor manufacturer’s instruction carefully, and be sure to program the EMS to match the sensor used. For the totalizer to be of value, the fuel flow sensor must be properly installed. There are few things worse in an airplane than believing you have plenty of fuel left when you really don’t.
Even though there are still many airplanes with traditional steam gauges, it is clear that the age of electronics has come to aviation. The ability to provide more information in a compact unit and present it in an easy-to-read format is a giant step from where we once were.
New EMS systems even store engine data and make it available for download and analysis in most cases, making engine tuning and troubleshooting much easier than it used to be. Even if you are a diehard traditionalist, it is worth taking a look at the new electronic EMS units now available. They just do more in less space and with less weight than traditional alternatives. Best of all, it is now possible to manage your engine more safely and efficiently than ever before.
The next article in our firewall forward series is also the last. We’ll deal with starting your engine for the first time and engine considerations for your first flight. There is more to it than you might think.

