You’ll recall that in last month’s column, I spun a custom backplate for a prop spinner for my Jabiru. After being trimmed to fit the backplate, the spinner cone needed substantial changes to make it fit my wood prop. This created an interesting challenge. The cone shape and size makes it impossible to clamp in a vise. On top of that, the cone is annealed aluminum that dings pretty easily. What I needed was some offhand way to enlarge the openings to match the shape of the prop.
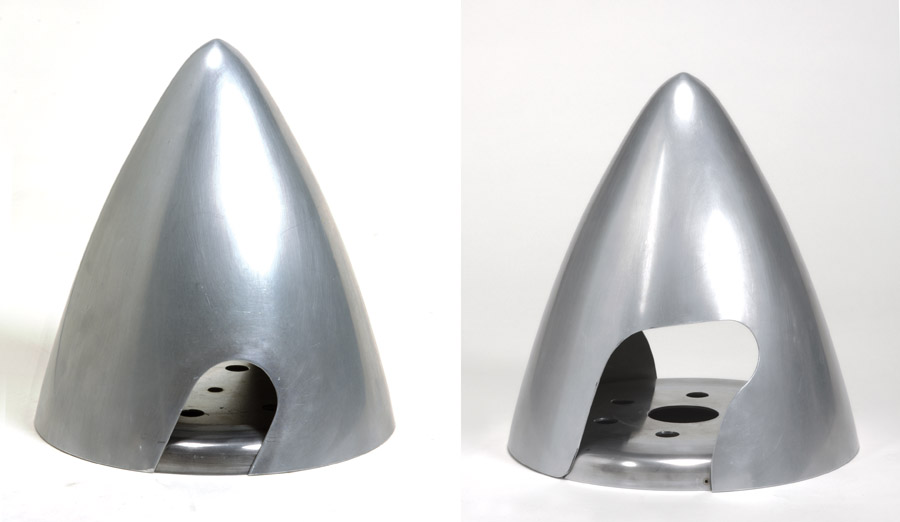
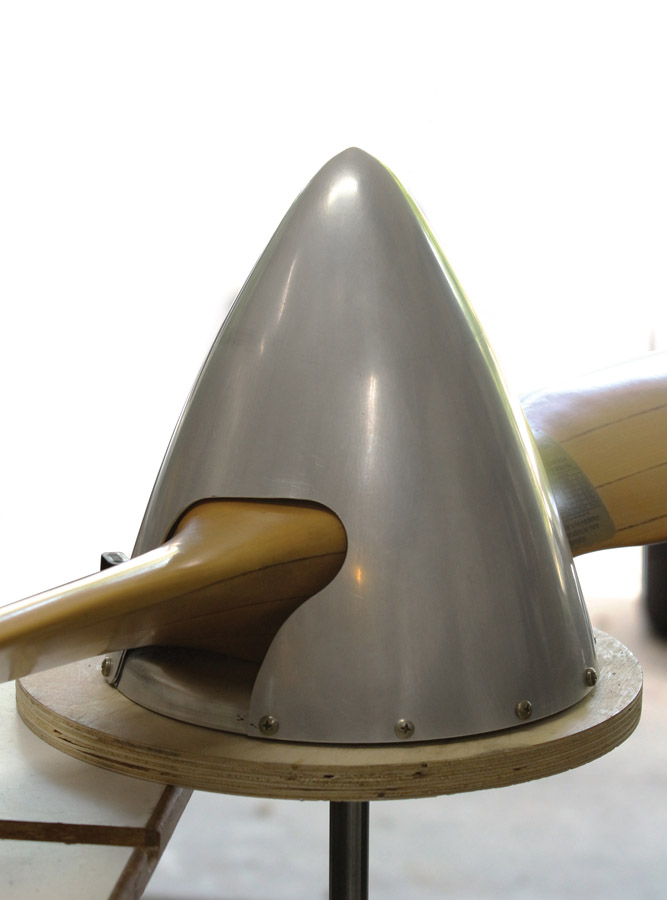
(Left) The spinner cone with the original openings for the blades. (Right) The blade openings after nibbling, drum sanding, and deburring.
Using a hand shear was out of the question because of the shape and thickness. I considered using a file (too slow), a jigsaw (too hard to hold and steer), and a die grinder (too risky to hold) before finally deciding that a hand nibbler was the best choice for the job.
A nibbler is a miniature punch press. As the name implies, it removes just a nibble at a time. One advantage of this is the precision with which you can control material removal. Where a saw can drift and a die grinder can bounce or kick back, nibblers just, well, nibble. There’s another advantage, too: Because they remove small amounts of material, and the shearing action is supported by the underlying die, you don’t get any residual stretching or distortion that you would with shears or a jigsaw.
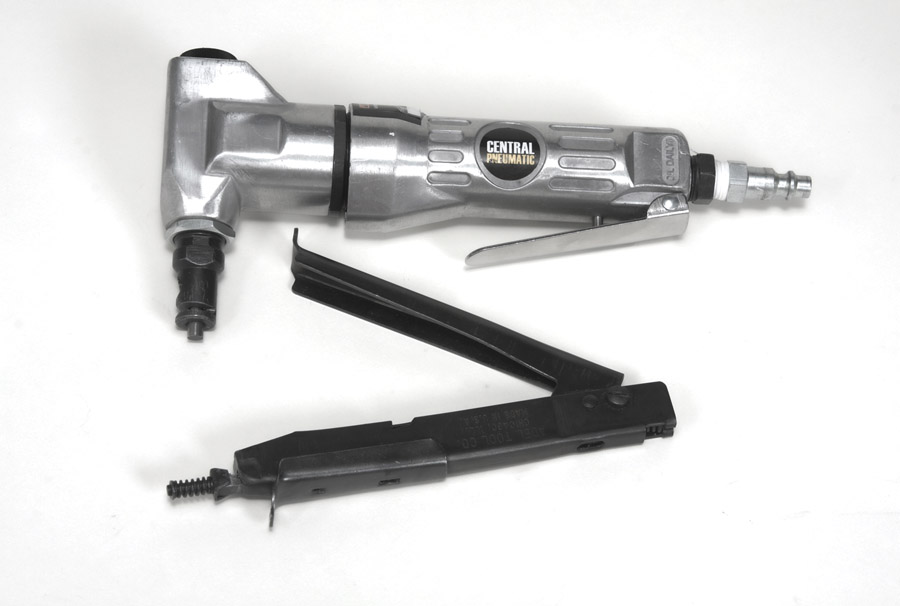
Nibblers come in hand- and air-powered versions. Air nibblers are popular with body shops because they can get into tight spots and plow through sheet remarkably fast. They’re great for rough cutting. But when it comes to following a crisp outline (or inline), a little patience and a hand nibbler is the way to go.
To fit the prop to my spinner, I started by making a template from 0.040-inch sheet aluminum that fit closely around the prop. I transferred the pattern to the cone using a Markal Pro-Line Micro paint marker, but you could also use a fine-point Sharpie. Never use a pencil to mark aluminum. Graphite contaminates aluminum. Even if you trim away the mark, the graphite can still get imbedded into the surrounding material by the cutter. From there it was just a matter of trial-and-error fitting. If it looks like it took forever to nibble away the material needed for the prop, you’re right. But when it comes to modifying aircraft parts, it’s usually better to trade expediency for caution.

Making a square opening with radius corners demonstrates the utility of the hand nibbler: Use an ink pen to mark the cut line and drill the corners out. Drill a -inch starter hole.

Start nibblin’ away. The width of the channel created by the cutter allows for 90-degree corners or shallow curves.
I’ll wrap up this column with a nibbler-related story about my single-seat, Victor Stanley-built, VW-powered Funkist. This is one basic airplane: no electrical system, no flaps, and minimal instrumentation. At some point, I decided the instrumentation was a little too minimal and started looking at options for adding a vertical speed indicator (VSI). Keep in mind that as much as I like working on airplanes, I like flying more. Instead of making a new panel from scratch or pulling out the old one and reworking it, I made modifications with the panel in place using a nibbler. I removed the original airspeed indicator (nothing wrong with it, but for a plane that cruises at 90 mph, I didn’t need an airspeed indicator that went to 210 mph) and hand-nibbled the opening to make space for an overlapping subpanel with both the VSI and altimeter (see photos). A new 2-1/4-inch airspeed indicator with the correct speed markings went in the original altimeter opening.
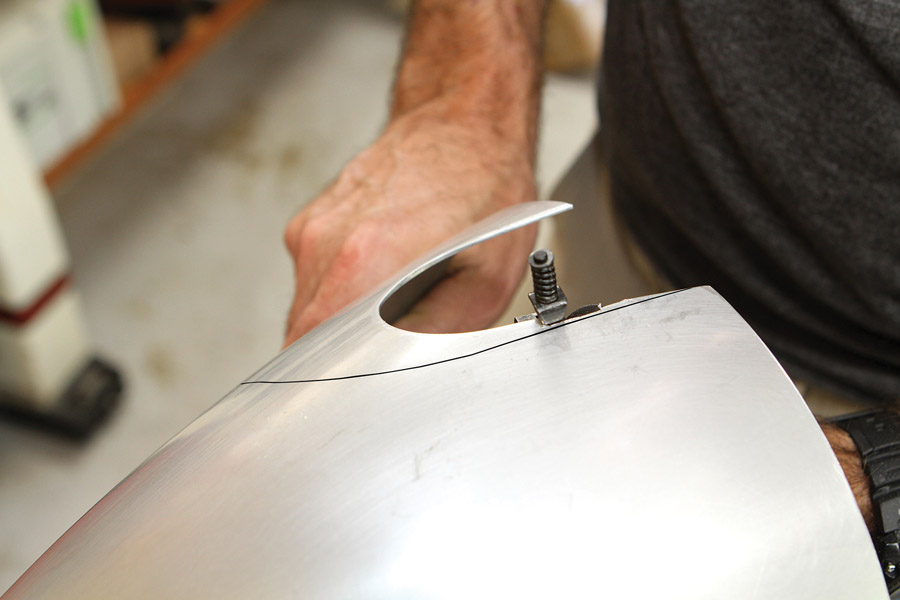
Nibbling inside the line. Once the initial pattern was trimmed, it took a series of trial-and-error fittings for everything to fit. To keep the cone balanced and the openings identical, I duplicated each cut sequence on both sides.
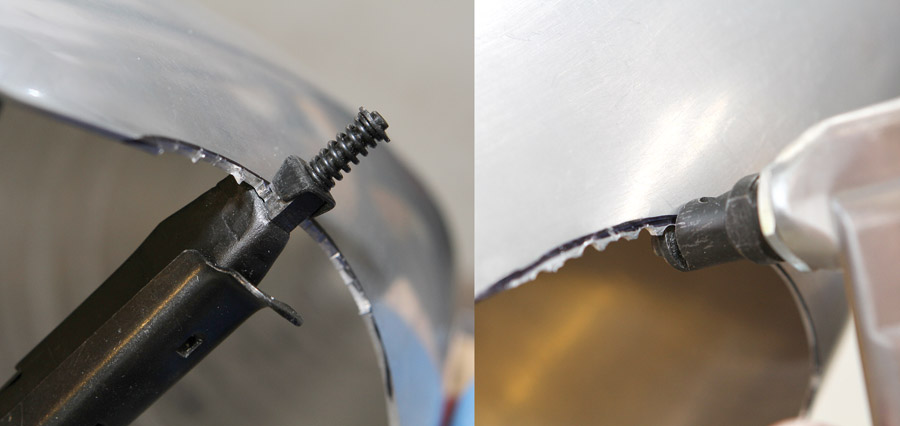
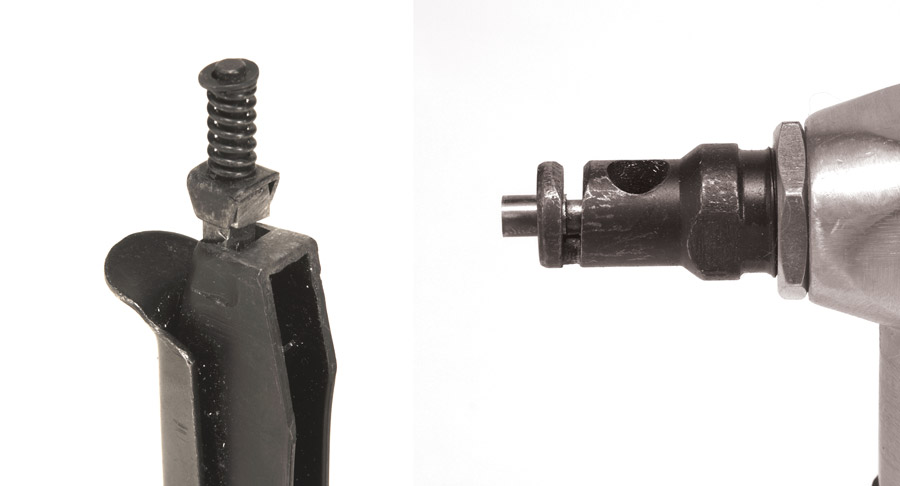
(Left) The square edge of the hand nibbler and the open view of the cutter made accurate cuts right on the cut line a breeze. (Right) The air-powered nibbler, though faster, is not so easy to use to trim to a precise line. It was quickly abandoned in favor of the hand nibbler for this job.
I chose the nibbler mainly to avoid creating dust or shavings, which occur with grinders, saws, or burrs. I put a towel under the work to catch every sliver cut from the panel. For deburring, I used a stick wrapped with sandpaper and held a shop vac to suck up any dust. The point is, when working on or inside an aircraft, you want to keep the work environment as sterile as possible. Account for every tool, screw, washer, and any work by-product, whether it’s a tie-wrap tailing or metalworking debris. Be especially aware of metal shavings, which can float around and potentially foul electrical connections, and small parts rolling loose, which can jam pivots and cables. Just because you don’t have to adhere to military standards, doesn’t mean you shouldn’t at least reflect on them. No, I didn’t count every time I squeezed the nibbler to account for every shaving—the Funkist isn’t so complex an aircraft to warrant that level of detail. But if it were, you can bet that I would have!
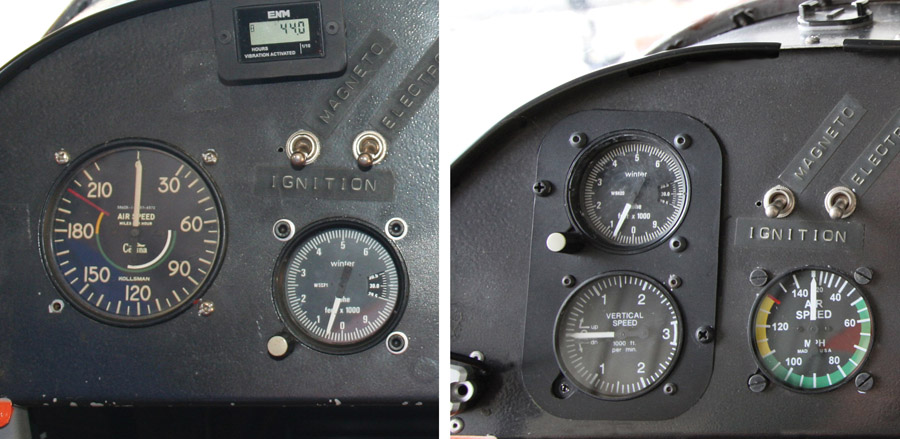
Before and after views of the Funkist panel. On the left, the original airspeed indicator, which was repurposed from a “slightly faster” Cessna. On the right, the panel with the VSI and altimeter stacked on the overlaid sub-panel and the new airspeed indicator with performance-appropriate markings.

![]()
Bob Hadley is the R&D manager for a California-based consumer products company. He holds a Sport Pilot certificate and a Light-Sport Repairman certificate with inspection authorization for his Jabiru J250-SP.

