 One of the best things about my little jet (with a top-mounted engine) is the complete lack of oil on the belly! I never have to worry about crawling underneath with a solvent-soaked rag to get the grit and grime off before it ruins the paint. But pilots and owners of homebuilt piston-powered aircraft everywhere (including me) go to great lengths to keep their machines’ bellies clean. Oil attracts dirt and dust from the runway to make that gooey black mess, and the more oil that comes out of the engine, the worse it gets. Of course, those with pusher configurations can laugh along with jet drivers—if there is no belly downstream of the engine, you have nothing to clean!
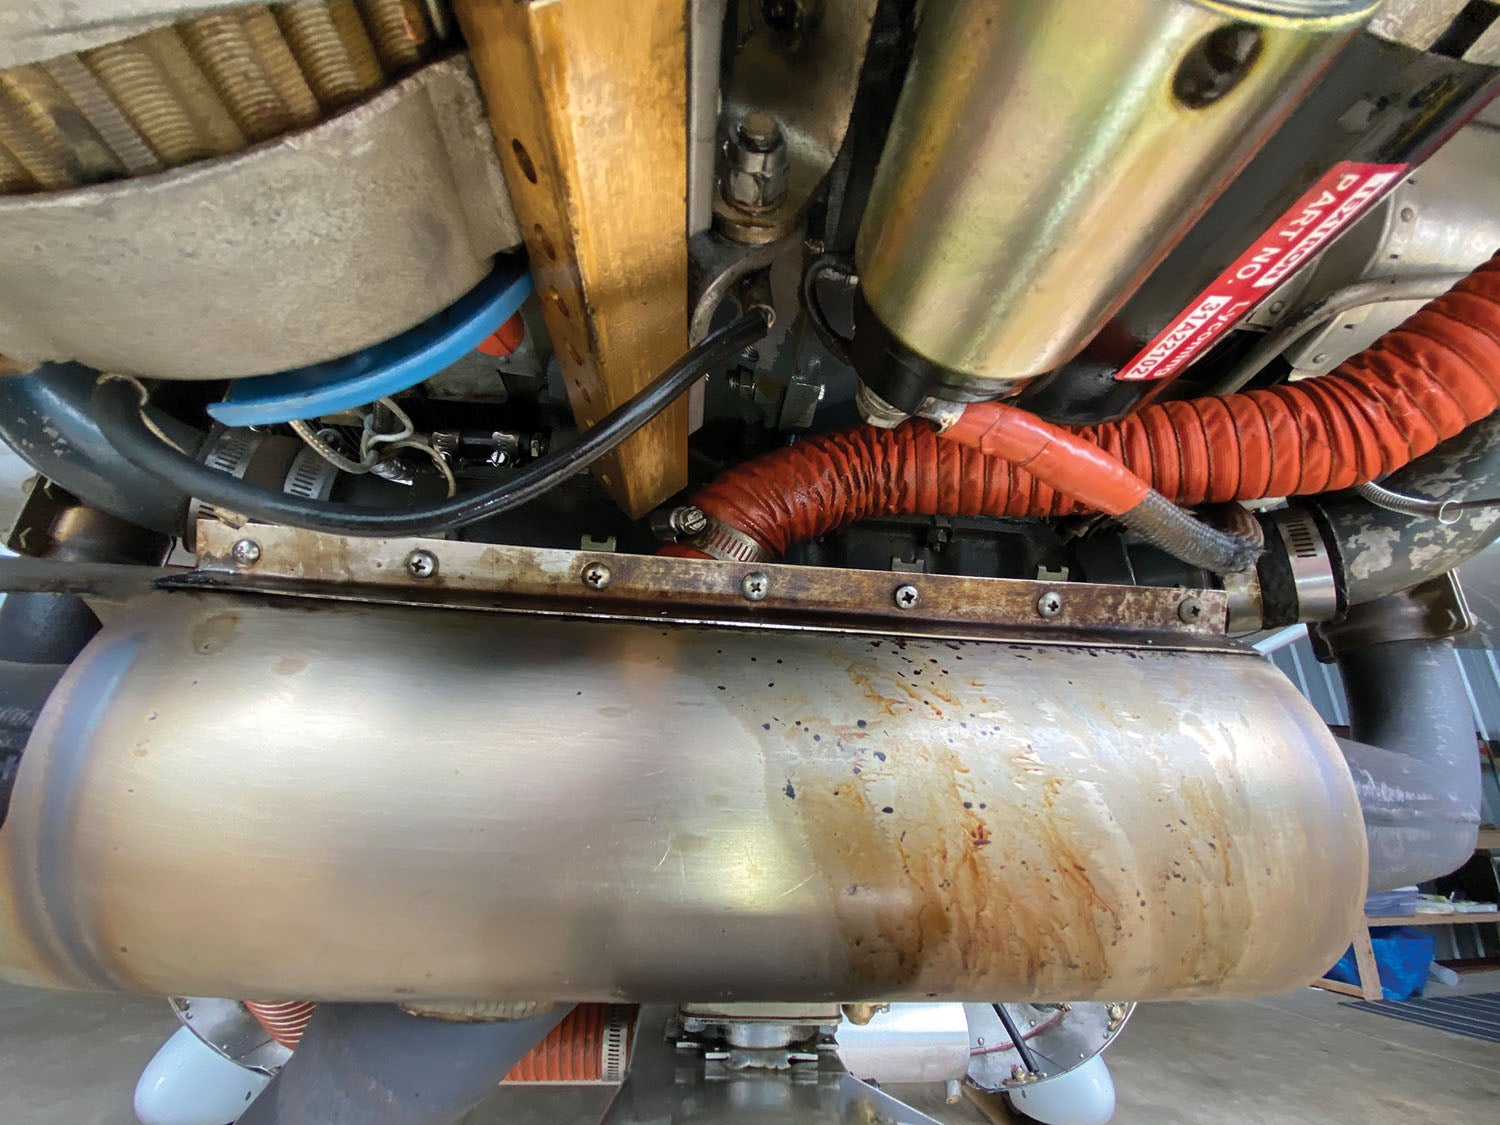
Oil separators are one way to reduce the mess, but many are disappointed that even after going through the effort of installing one, they still have oil on the belly. The problem, of course, is that while an ideal engine sends oil only out the breather line, in the real world, oil can leak from all sorts of different places—despite the best efforts of design engineers and mechanics.
Lay of the Land
The typical aircraft engine—whether that’s a true-blue Lycoming, a so-called clone or even a similar large-displacement, air-cooled powerplant—might start out dry and clean, but it is not uncommon for leaks and drips to develop after a hundred or more hours. Things shift, seals take a set, and eventually you find that before you can do a decent inspection, you have to buy a jug of Stoddard solvent and a cleaning gun.
That engine cleaning is the first step in tracking down any leak. Airflow underneath a cowling goes in odd directions, which means leaks are not necessarily where you think they are. I have seen leaks from rear-mounted accessories show up as drops of oil on the starter—it’s all about how the air carries the oil around.

So clean things up—and I mean thoroughly, like you’re planning surgery in there—then go run the engine for a little while. If you think you have a big leak, run it just a short time or the leak will spread enough so that it is hard to localize. If it is a minor leak, clean it up and go fly for half an hour, then come back and de-cowl to check it out. If you started with a clean engine, the leak location should begin to give itself away.
It’s important to be systematic. If you just bop around the engine compartment randomly, you’ll probably miss your real problem. The other thing to remember is Occam’s razor, which states that in most cases the simplest explanation (or solution) is usually the correct one. Leaks either come from fittings, seams or cracks—and since cracks are comparatively rare, they should probably be the last on your list. Start with the easy stuff that is most likely, and let the big worries move to the back of your mind. You’ll see why I say this in a moment.
Start Simple
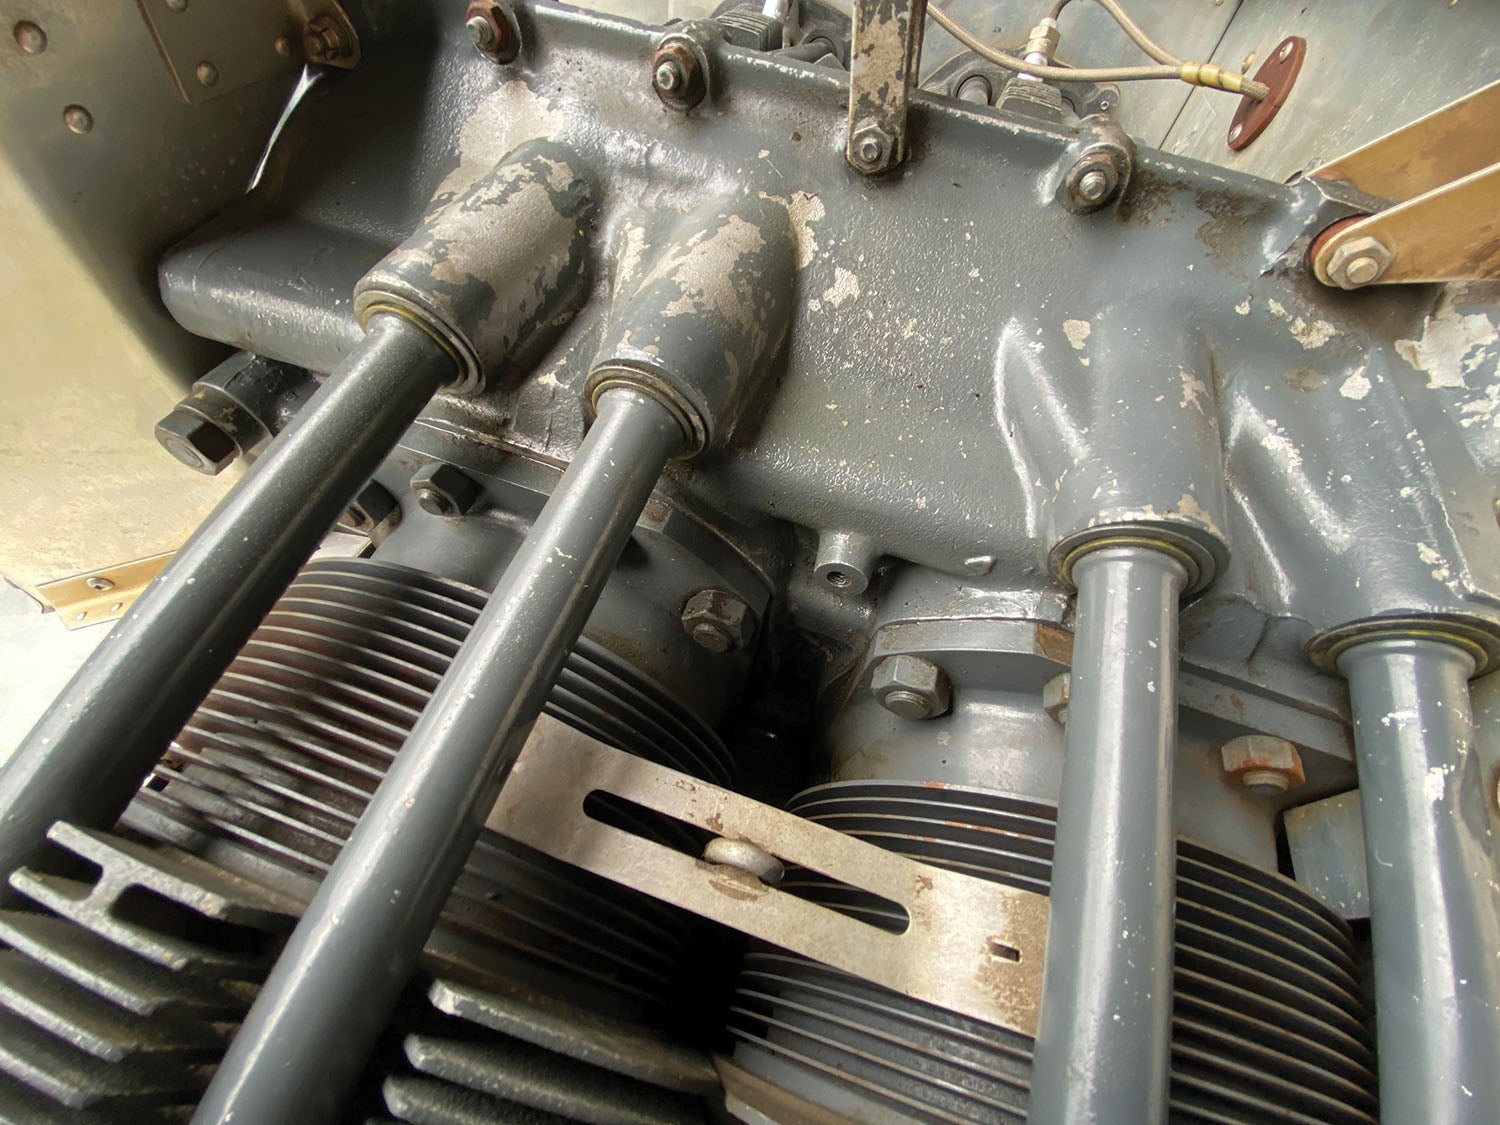
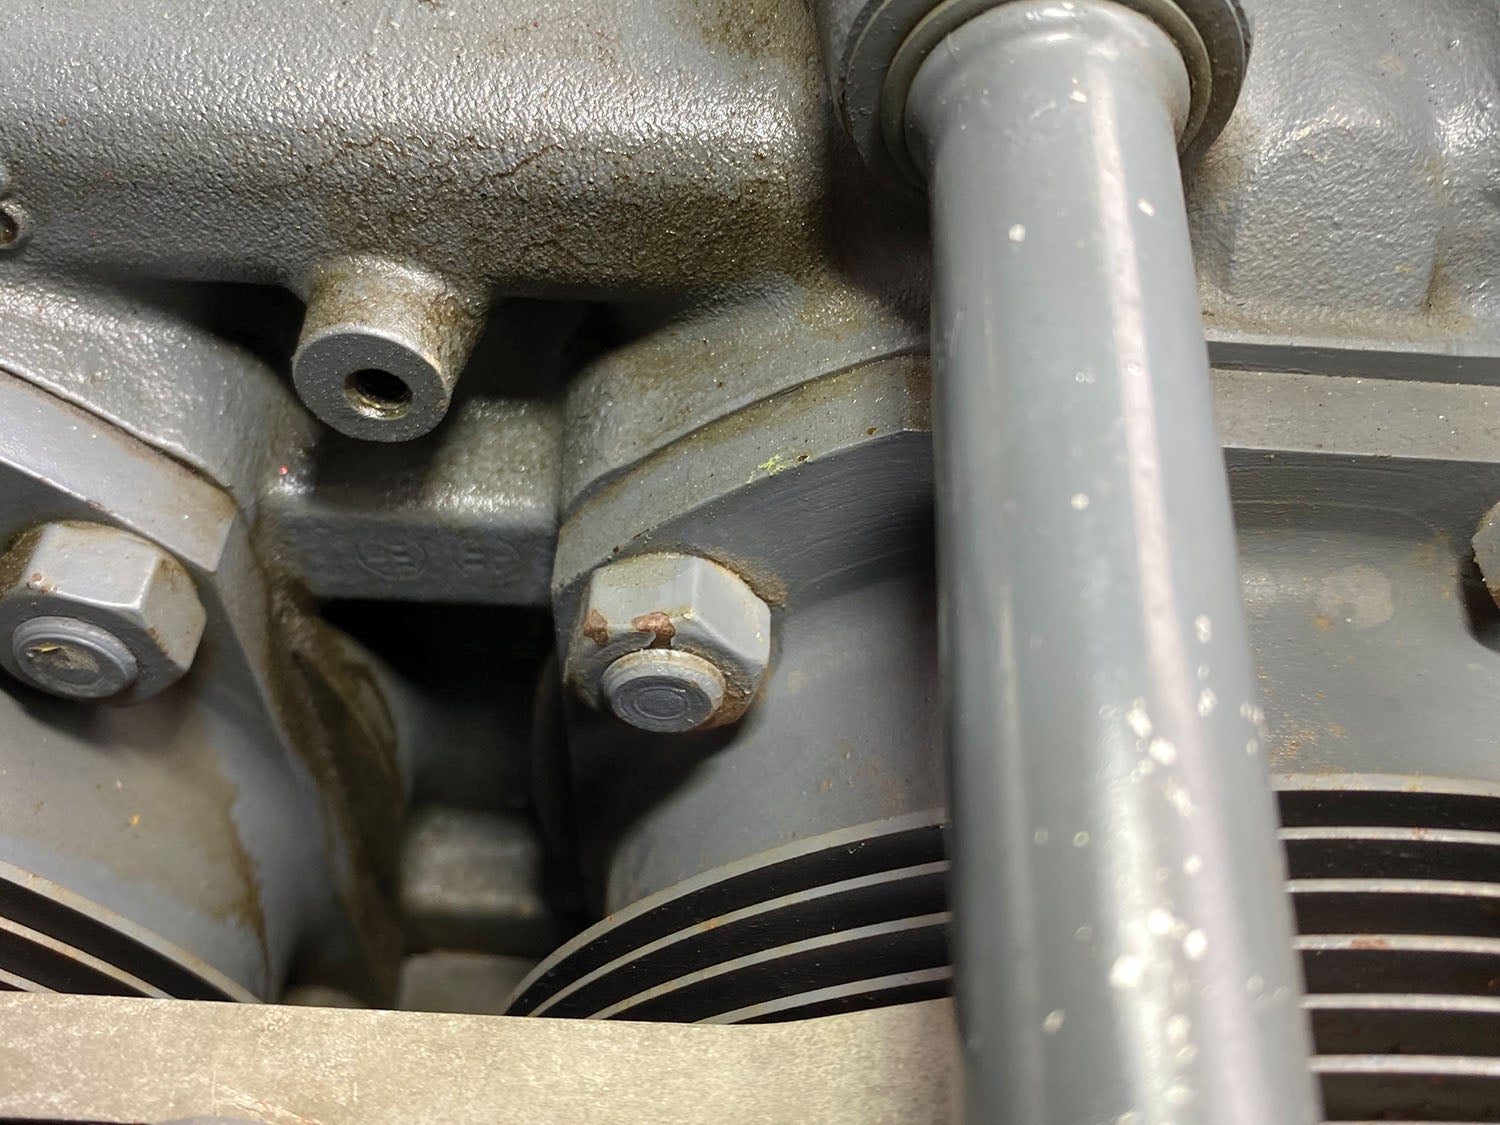
Begin your hunt for leaks at fittings—any place in the oil system that has a B-nut that you can put a wrench on. Check them all! Start at the top front of the engine and work your way down and aft—or if not in this direction at least systematically. If you have a constant-speed prop, check the governor line fitting on the nose piece, then move aft and check the oil drain-back line fittings on each cylinder head. On the back, check the prop line on the governor, then all of the hose fittings for an oil cooler (if you have one). Check the oil line that goes to the oil pressure sensor as well. In short, if it has oil in it, check for tightness!

A very common source of oil on these engines are the rocker-box covers. Look for drips on the bottoms of these, and check the screws for tightness while you’re there. If you still have the original cork seals, consider replacing them with the orange silicone seals. But be careful not to overtighten the screws if you do—the torque recommended for these is very low. Tighten a little, then run the engine and tighten a little more if you see drops from the bottom screw.
A huge number of leaks can be found this way—fittings can loosen over time. More likely, they weren’t tightened properly in the first place. Checking fittings for tightness should be done at every inspection—make it a habit to check them all with a wrench at every condition inspection. One other possibility to check, if you feel that a fitting is really leaking, is to remove it and look at the tubing flare to make sure it is properly done, has good contact all the way around and isn’t cracking, I have seen defects for each of these cases in flying airplanes.

Now while we’re just poking around, let’s do one more thing—let’s check for a crankshaft nose seal leak. Grab a flashlight, inspection mirror and a clean paper towel. Take a look up and inside the flywheel—this is most easily done with a mirror and by looking up above the alternator, most baffles and the starter block; there’s good access anywhere else. See if you see any sign of oil in there—if so, it can only really come from one place. If you’re not sure, take that clean paper towel and wipe the inside of the flywheel—that will tell you if you have any oil in there. If so, add this to your list of things you might have to go back to.
Moving Along
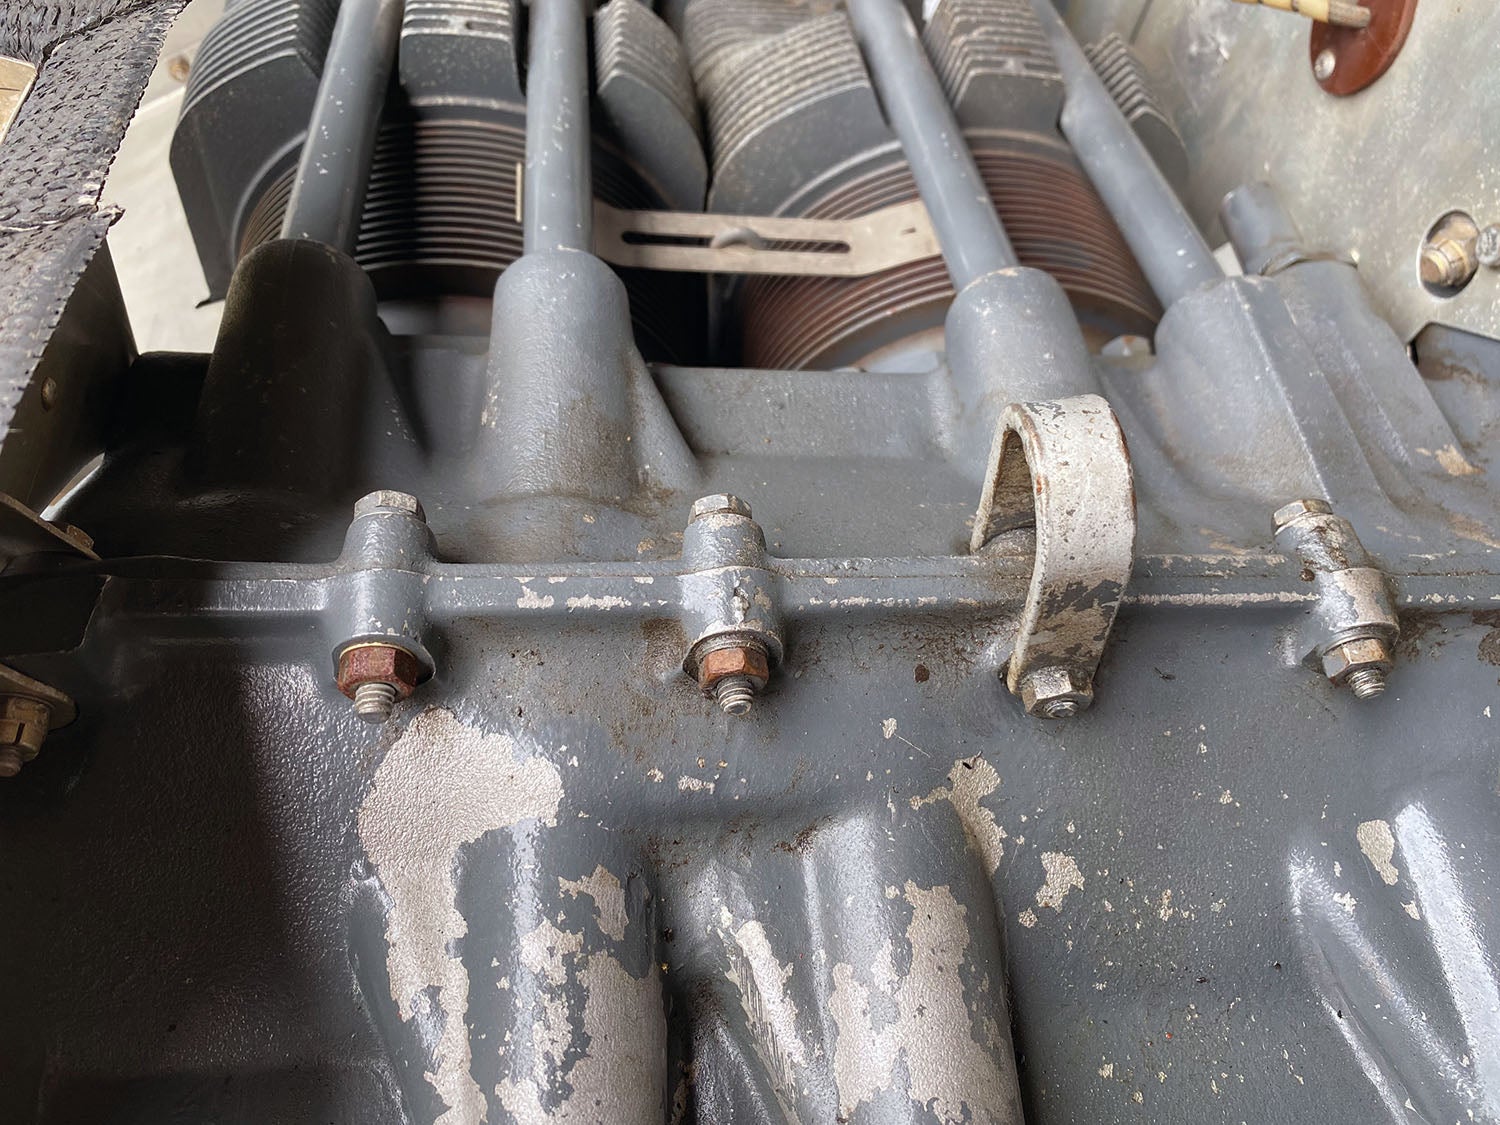
Next thing to check is anything secured with a hose clamp—the couplings for the oil drain-back lines underneath the cylinders, for instance. The factory- designed clamps for these rubber tubes are worm-drive hose clamps, two for each short piece of hose. Unfortunately, the nature of a worm clamp of that size is that it will not put even clamping pressure all the way around.

Owners of Lycomings have struggled with leaks here for a long time and many are now substituting automotive-style spring clamps that are installed with pliers; they tend to evenly clamp the hose for its full circumference. It’s not factory, but your engine is on an Experimental, so if you have trouble with leaks here, the new style clamps are worth a try. Also, if the hoses are chewed up by the clamps, replace them.
Continuing our search at this level, we are basically looking for any place that a “soft seal” might be leaking. It is important to remember that Lycoming’s recommended TBO (which we are not required to observe) is generally expressed as a number of hours or a number of calendar years—2000 hours and 12 months being applicable to most of the four-cylinder, direct-drive, horizontally opposed engines. Hours in service is a criteria that is easy to understand—it is a measure of potential wear.

But what’s the deal on those years? Seals are soft goods that age and become stiff or brittle with that age—so a growing number of leaks in seals is an indicator that you might be ready for a teardown and rebuild. If your engine is low on hours but high in years, you might be able to get away with a simple reseal without having to do a complete overhaul. But in having it apart, I bet you’ll find corrosion (the result of few hours in a lot of years) and need to go the full overhaul route anyway. I’m not saying that you have to tear your engine down after the age requirement, by the way—I am simply saying that if you’re getting leaks with age, it might not be unexpected.

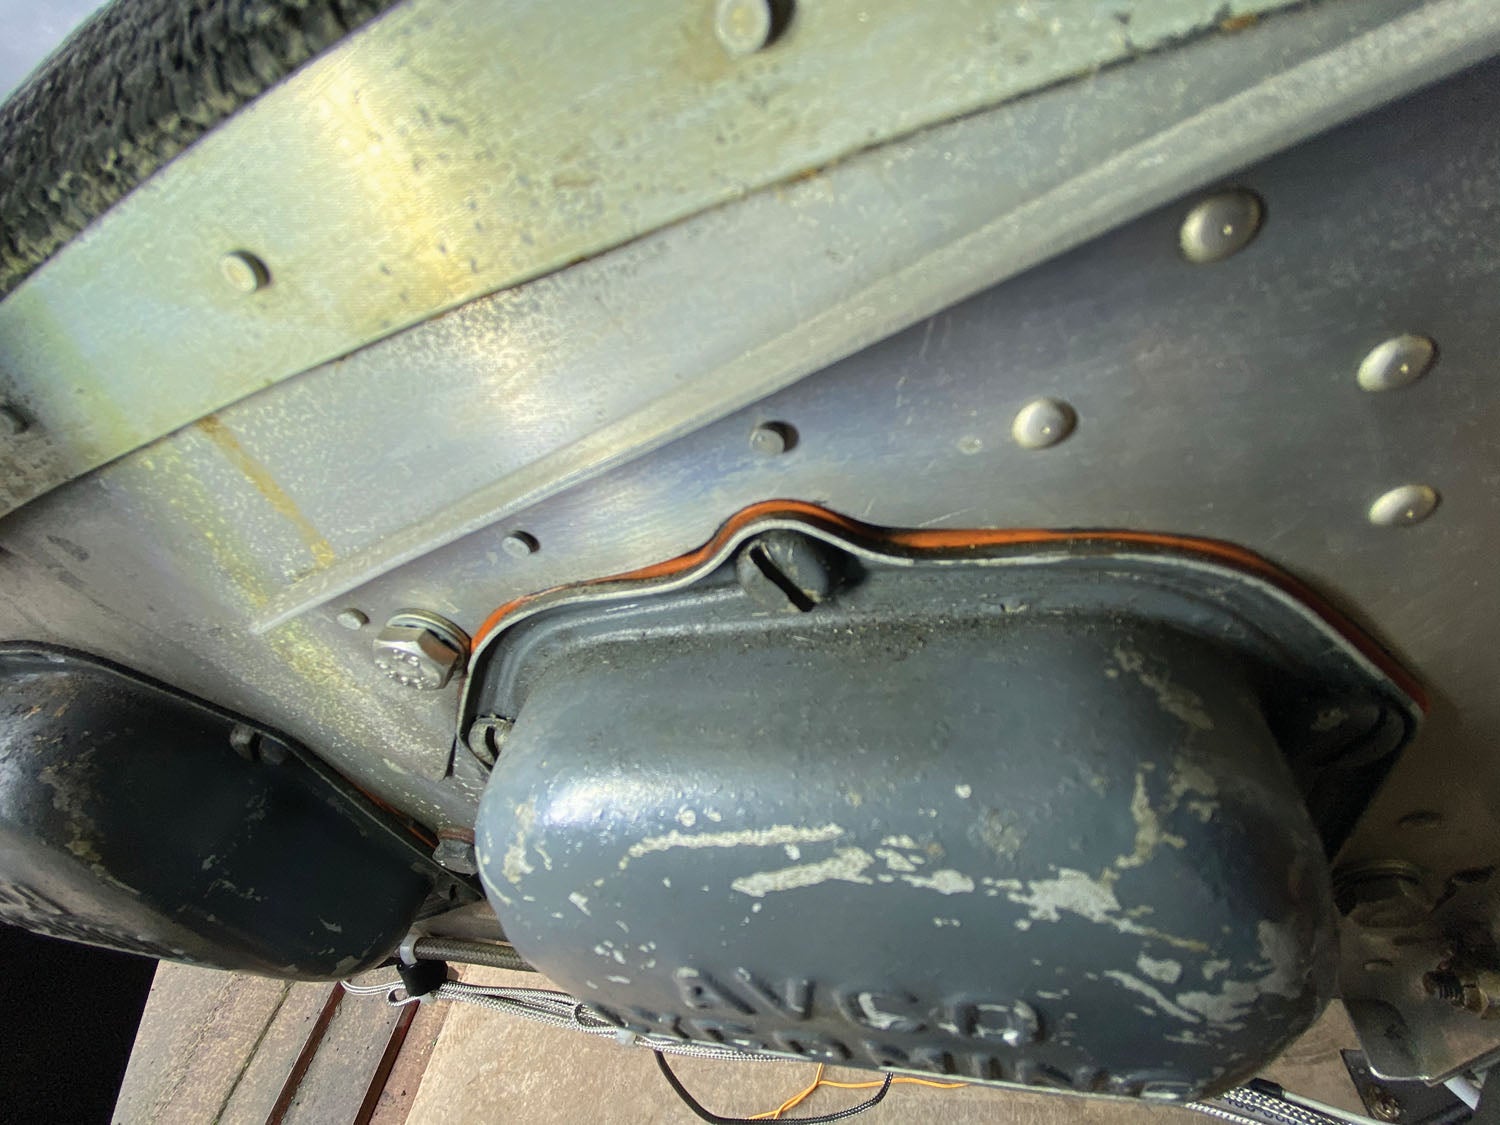
But before we entertain such a painful thought, let’s move to the back of the engine—where the accessories live. Most likely, you have a fuel pump, an oil filter (and adapter) or screen, magnetos (or ignition pickups), a prop governor and a vacuum-pump pad. Each of these has fasteners and gaskets that could leak. Use a bright flashlight to look for leaks, then put a wrench on every mounting bolt or nut and make sure everything is tight. The good news on accessories—if you find a leak from a gasket, it’s relatively easy to buy just the gasket you need, pull the device, replace the gasket and fix the problem. It is especially common to have mag gasket leaks, by the way; these often get disturbed in the process of timing the ignition and then they don’t seal.
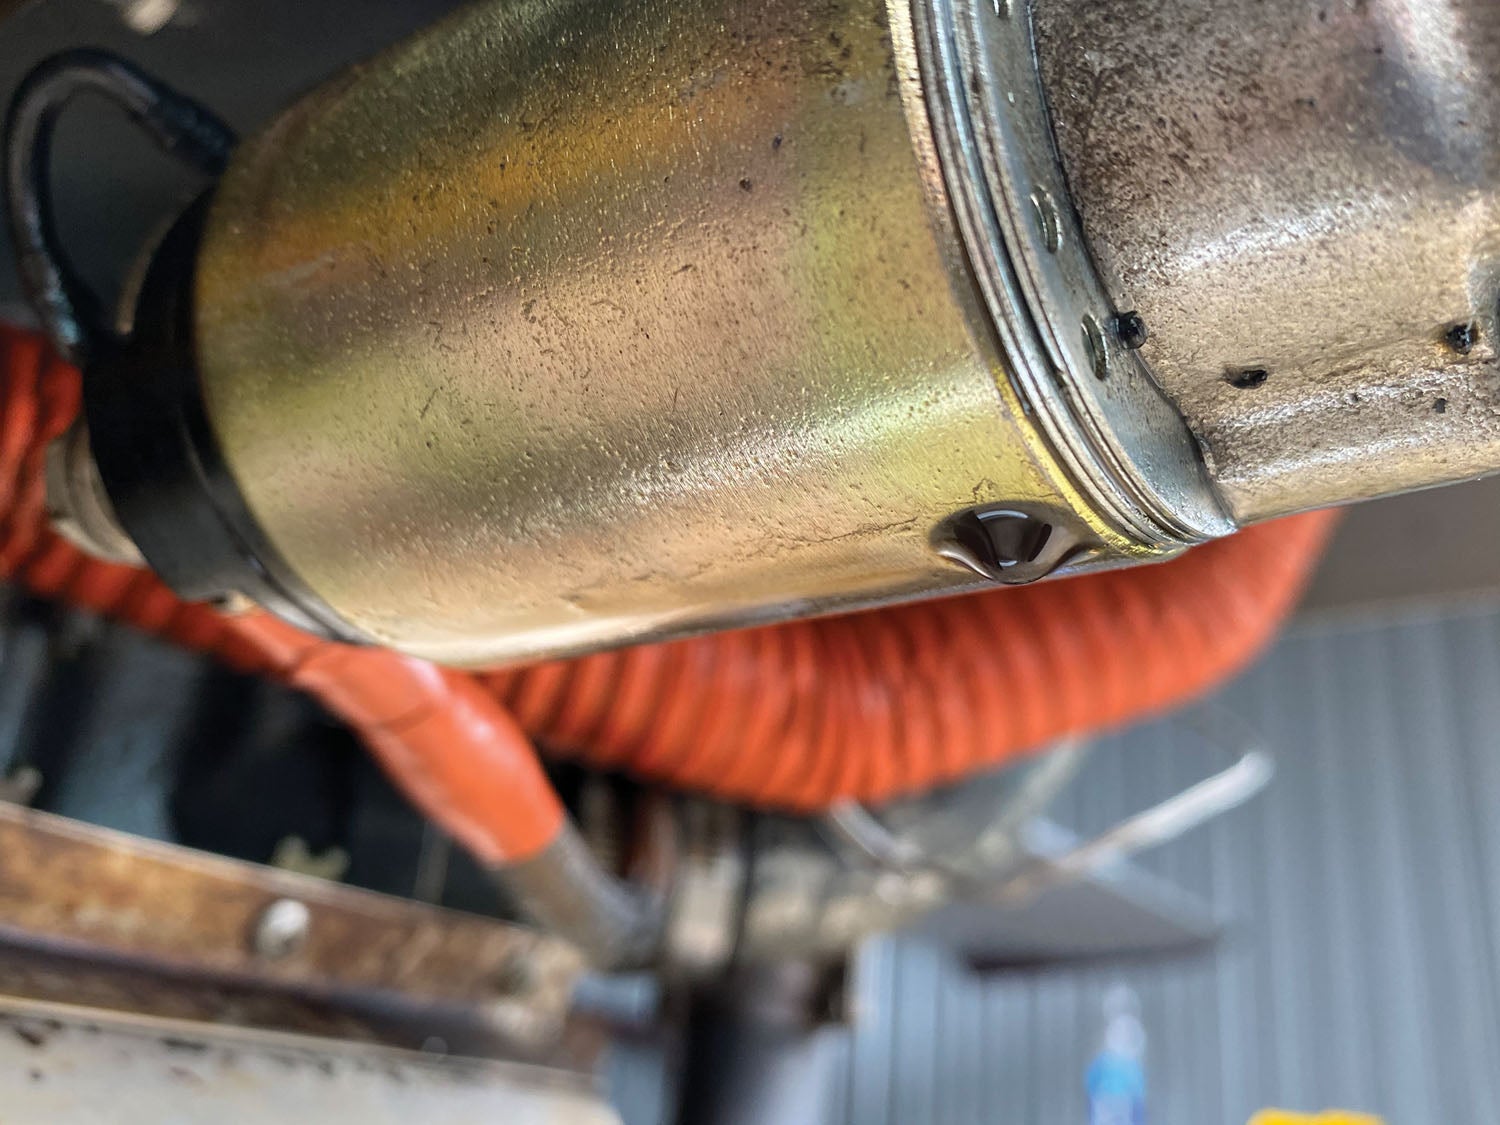
Don’t overlook the crankcase breather line, either—usually there is a short length of rubber hose at the top and the bottom is often terminated above an exhaust pipe, plumbed into an oil separator or just vented into space. The good news is that if these are leak sources, they are generally easy to find and fix. Just tighten the appropriate clamp.

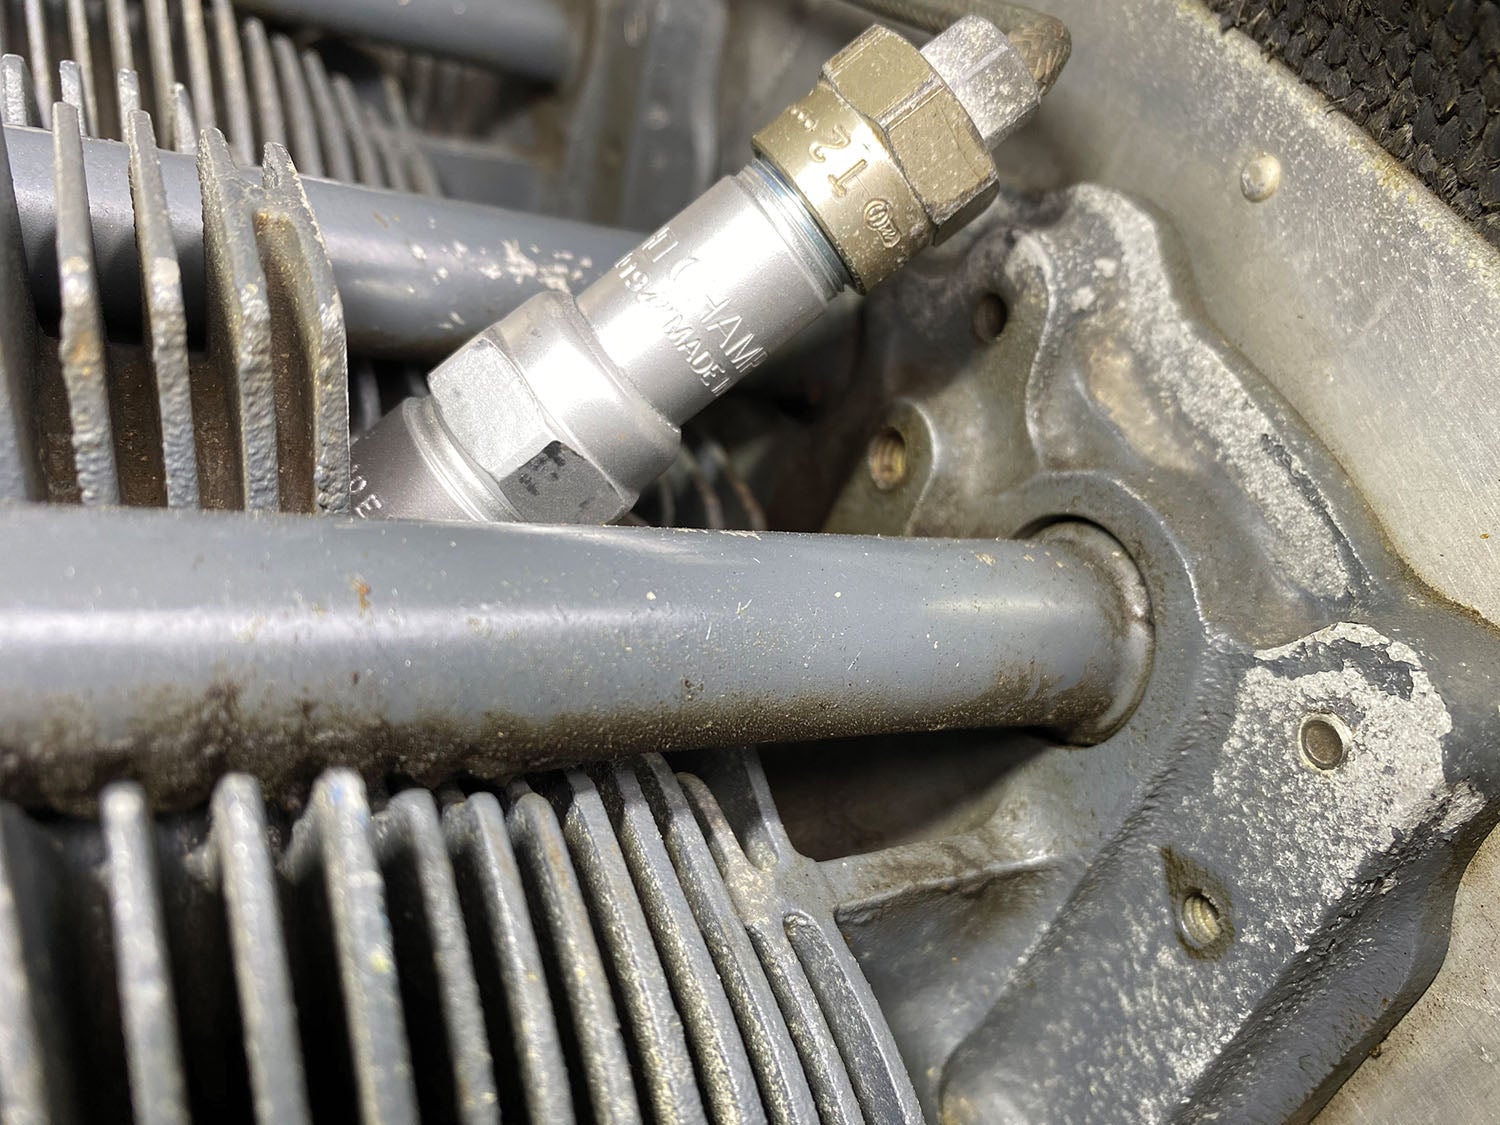
Before we leave the area of seals, let’s go back to the top of the engine and take a look at pushrod tubes—all of them—and both ends of each. It is fairly easy to see the end that tucks into the crankcase, and a leak there—from the green seals—should be obvious. The end at the cylinder head is a little harder to see, however, and is sealed with an O-ring that can deform and leak with age. If you find caramelized oil on the exhaust port or around the lower spark plug, think of where it is coming from—the outboard end of the tubes is the likely culprit. The seals on both ends can be changed fairly easily with just a little investment of time.
Bigger Problems
If you have tightened all of the fittings and hose clamps—and still have a leak—you might have a problem that is a little more difficult to fix. The major joints on the engine include the one between the two case halves, the sump attachment plane and the accessory-case joint on the back of the engine. Add to these the base of each cylinder, and you pretty much have all the places that are sealed by gaskets of one kind or another.

If you have a leak at the base of a cylinder, oil is somehow getting past the cylinder base O-ring. The only way to fix this is to remove the jug—not a terribly difficult thing to do once you have the baffling removed. (I can see the wind go out of your sails with the mention of baffling—but sometimes you just have to bite the bullet and remove the tin.) If you have to pull a cylinder to replace the O-ring, understand that it is invasive enough that you’ll want experience on your side—either your own or from someone who has disassembled and reassembled a Lycoming before. Again, it’s not a difficult job, but one that is more involved than we’ll discuss here. When you get the cylinder off, make sure to check the mating surface on the case for scratches or nicks that might be the actual source of the leak.
If your problem is not with the cylinders but with the case itself, you can start by checking the torque on the outer case bolts (they are 1/4-inch bolts) and the bolts that hold the sump and accessory case to the engine. You’ll find both bolts and nuts on studs as you work your way around. Truthfully, tightening these bolts beyond torque value isn’t going to fix a leak very often—only if they are really loose are you going to solve your problem this way. More commonly, you are going to find a gasket that is improperly sealed or one that has finally given way to a latent problem from the build or age. The three-way joint between the case halves and the front center of the sump is a place that oil can often seep, and the only way to fix this is to take everything apart and reseal the engine properly from the start. Pro tip here: Trying to put some sort of sealant over a leaking joint is rarely going to work, and is sort of a last act of desperation. Oil will continue to leak underneath any patch and separate said patch from the engine.

The case halves of a Lycoming are traditionally sealed with a little bit of adhesive to hold two lines of silk thread in place—and that is it! Lycoming does allow a more modern silicone sealant, but most of the big engine builders I have checked with still use silk thread because it works. The sump and accessory case use gaskets, and if you use proper torque, the engine should be tight. Oh, and back to that crankshaft oil seal up front—if you have a leak from there, you’ll have to pull the prop, but the fix is within the realm of a typical homebuilder.
The Worst News
If, after checking everything we’ve talked about already, you still have a leak you cannot find, you might have a really bad problem—a crack somewhere in your case. Finding such a leak is vitally important if one exists—the last thing you want is the crankcase to fail and send parts of the engine bouncing around inside the cowling. Cracks are best found by using a dye penetration kit, and you’ll be thoroughly cleaning the engine again, then running it to try and find the seep. You might well have to remove the baffling to really see all parts of the case, so this is a pretty involved process.

Fortunately, it is also a rare problem—more common on an old case that has seen several overhauls—so keep things in perspective. Yes, case cracks happen, but all of the things we have talked about so far are much more common and therefore more likely. In other words—don’t panic! Take your time, completely investigate all possible sources, and get another experienced opinion (or two) before you despair.
Leaks Be Gone
No one likes a messy engine—although a typical oil leak rarely gives a measurable drop on the dipstick, it doesn’t take more than a couple of tablespoons of oil to make a real mess! There is nothing as nice as a new motor that leaks nothing at all, and the first time you take your cowl off and find spilled oil can be a real downer. But when that happens, take a look at the points we’ve outlined and stay on top of it. Fixing a small leak early is far easier than finding one on a completely oil-soaked motor and, no, spilled oil doesn’t make anything run better.

The truth is, the basic Lycoming (or clone) design is pretty rugged and well proven—and will continue to run reliably even when it leaks. Nothing is as bad as those old radials. “Hey son, would you fill up the oil, and uh…check the fuel while you’re at it?” But it sure is nice when you can clean a few exhaust stains off the belly and not worry about where the oil is coming from. These engines are, in fact, not supposed to leak at all—so when they do, get out the flashlight and wrenches, and stop the seepage! Your plane and engine will be much happier in the long run.
Photos: Marc Cook


I took a page from the drag-racing world. Run engine until case is warm, solvent wash and the heat of the metal will dry it. Then spray the suspected areas with either Spot-Chek developer or spray foot powder, either will leave a flat-white film on the engine.
Then run for a few seconds after the oil pressure indicates , shutdown, and check for the spot.
Comments are closed.